Walking into a freezing garage on a winter morning is miserable. Your tools are cold, your workspace is uncomfortable, and any project that requires you to spend more than a few minutes out there feels like an endurance test. Radiant floor heating changes all that by turning your garage into a genuinely comfortable space you’ll actually want to use year-round.
Unlike forced-air systems that blow dust around and create hot and cold spots, radiant heating warms you from the ground up. It’s efficient, quiet, and keeps your entire garage at a consistent temperature. Here’s everything you need to know about installing it in your space.
Electric vs. Hydronic Radiant Floor Heating

Original uploader was Caroline karmann at en.wikipedia, CC BY-SA 3.0, via Wikimedia Commons
You’ve got two main options when it comes to radiant floor heating: electric and hydronic systems. Each has distinct advantages depending on your garage size and how you plan to use the space.
Electric radiant heating uses resistance cables or mats installed directly under your floor. Think of it like an electric blanket for your garage floor. These systems are simpler to install, require no boiler or water lines, and work great for smaller garages (under 500 square feet). The cables heat up when you flip a switch, and you can usually get the floor warm within 30 to 60 minutes.
The downside is operating cost. Electric systems can get expensive to run in larger spaces, especially in areas with high electricity rates. They’re best for garages you heat occasionally rather than maintaining 24/7.
Hydronic systems circulate heated water through PEX tubing installed in or under your floor. A boiler heats the water, which flows through loops of tubing and radiates warmth upward. These systems cost more upfront but are much cheaper to operate over time, particularly in larger garages or if you want constant heating throughout winter.
For garages over 500 square feet or spaces you use as workshops where you need consistent heat, hydronic makes more sense financially. You can also tie these systems into your home’s existing boiler if you have one.

Electric Radiant Floor Heating Mat
Perfect for smaller garage installations with straightforward DIY setup
Installation Methods: New Construction vs. Retrofit
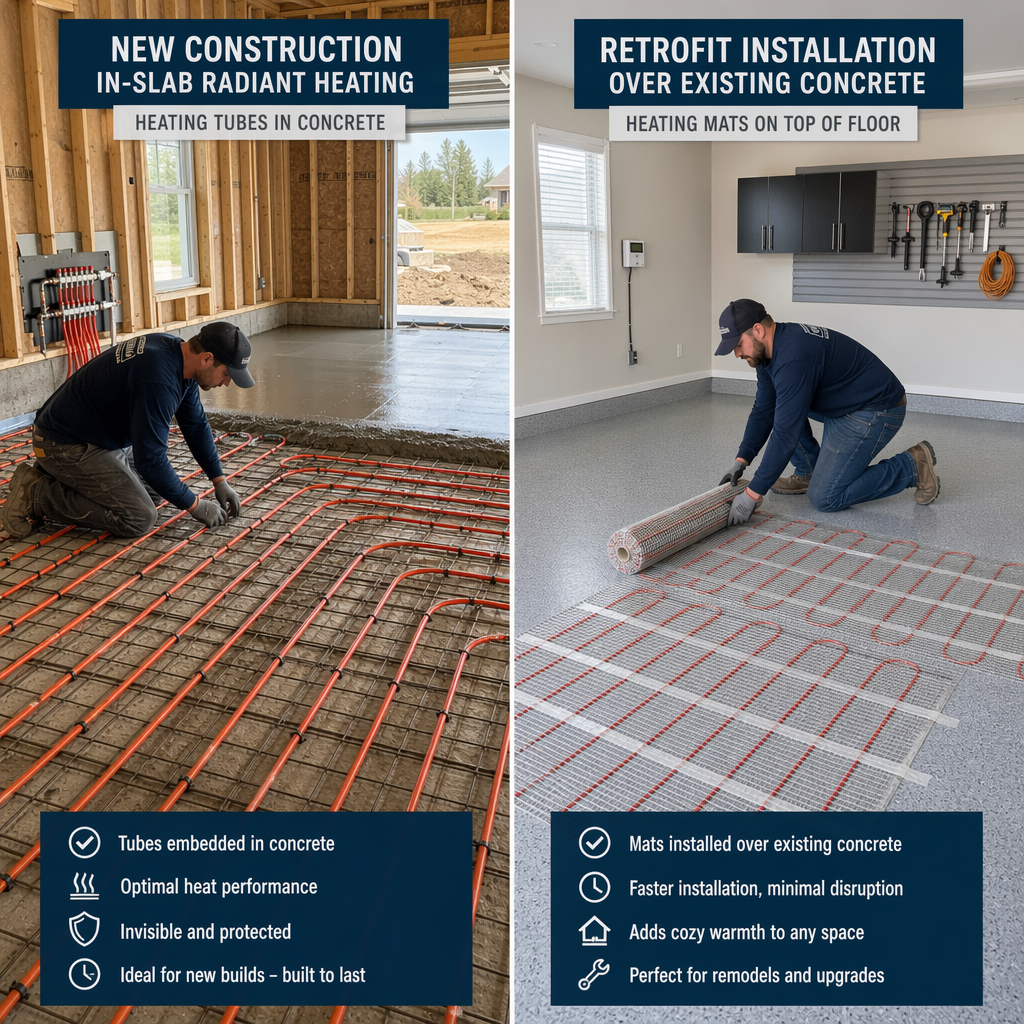
Installing radiant heating during new construction is infinitely easier than retrofitting, but both are doable with the right approach.
New Construction Installation
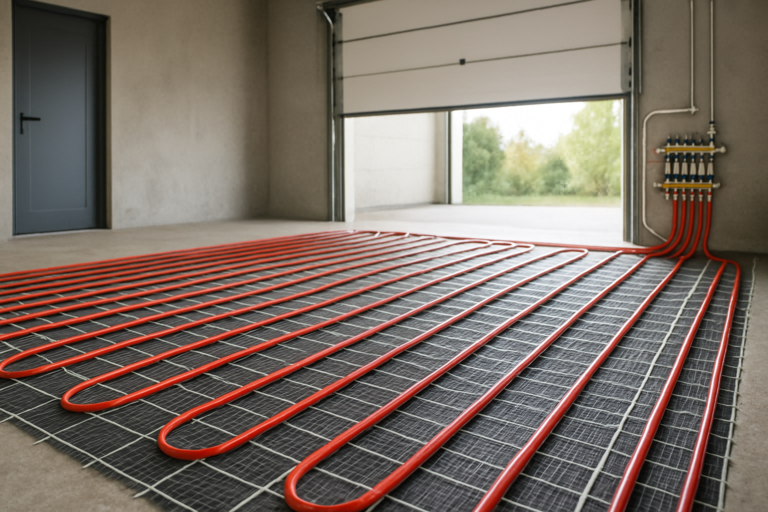
When you’re building from scratch or pouring a new slab, you have the perfect opportunity to embed your heating system directly in the concrete. For hydronic systems, you’ll lay down insulation (more on that below), then secure PEX tubing to the rebar or wire mesh before the concrete pour. Space the tubing 6 to 12 inches apart depending on your climate and heat loss calculations.
Electric systems follow a similar process. You can embed heating cables in the concrete or install them in a thin-set mortar layer on top of the slab. The latter gives you more flexibility if you need repairs down the road.
Always pressure test hydronic systems before pouring concrete. You don’t want to discover a leak after you’ve got 4 inches of concrete on top.
Retrofit Installation
Retrofitting is trickier but definitely possible. You have a few approaches depending on your existing floor situation.
The most common retrofit method involves building up your floor. You’ll install insulation board on your existing concrete slab, lay the heating system on top, then cover it with a new layer (either thin concrete, self-leveling compound, or a mortar bed for tile). This raises your floor height by 1.5 to 3 inches, which can create issues with garage door clearances and transitions to adjacent spaces.
Another option is installing the system under a raised floor. You can run PEX tubing or electric mats between floor joists if you’re working with a wood subfloor, then insulate below the tubing. This works if your garage has a basement or crawl space underneath.
Some electric systems are thin enough to install directly under certain floating floor materials without significant height changes. These ultra-thin heating mats work well under engineered wood or luxury vinyl, though concrete-embedded systems always perform better.
Insulation Requirements
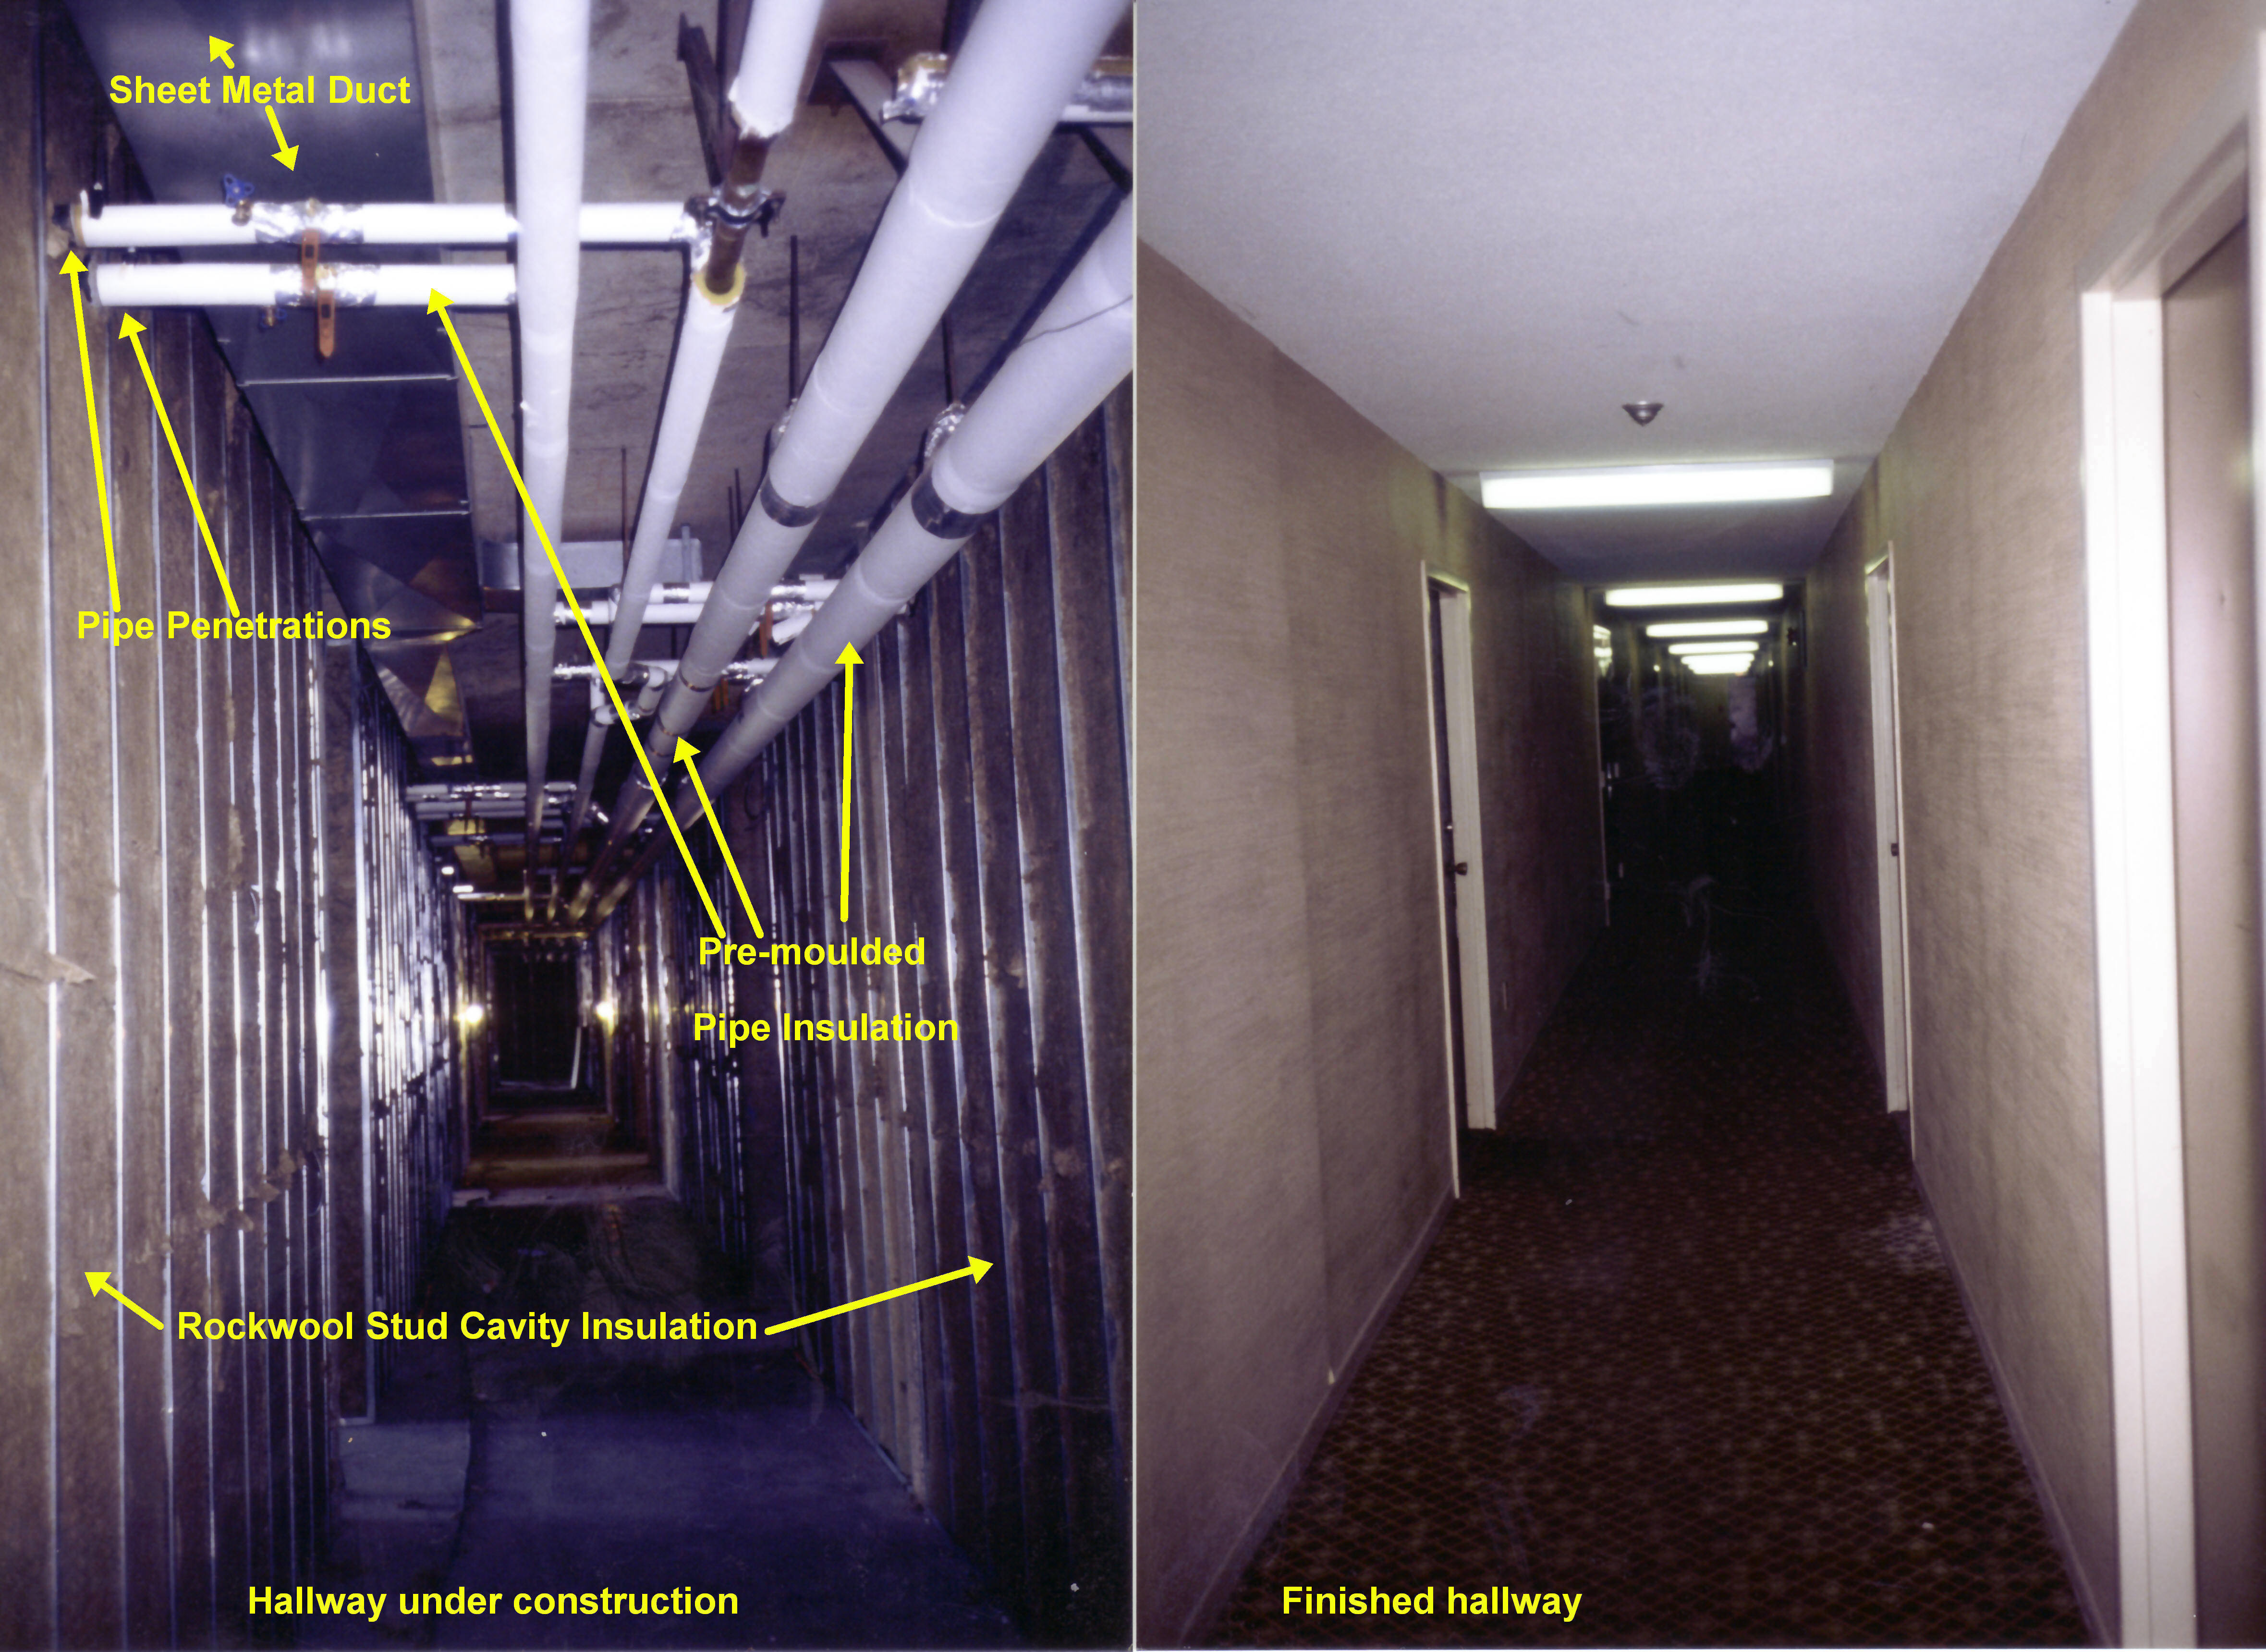
Insulation makes or breaks the efficiency of any radiant floor heating system. Without it, you’re heating the ground beneath your garage instead of the space above.
For slab installations, you need rigid foam insulation under the entire heating system. XPS or polyisocyanurate foam board in 1 to 2 inch thickness is standard. In colder climates (USDA zones 5 and up), go with 2 inches minimum. This creates a thermal break between your heating system and the cold ground.
You’ll also want perimeter insulation running vertically along the edges of your slab. This prevents heat loss through the slab edges, which is where most thermal bridging occurs. Run 2-foot wide insulation boards vertically along the foundation walls before pouring.
Don’t skip insulation to save money. An uninsulated radiant system can use 30-50% more energy to maintain the same temperature. The insulation pays for itself within a couple of heating seasons.
For under-floor installations, standard fiberglass batts or mineral wool between joists works fine, but you want at least R-19 in moderate climates and R-30 or higher in cold regions. Install a radiant barrier facing down to reflect heat back upward.
Cost Analysis and Operating Expenses
Radiant floor heating isn’t cheap to install, but understanding the costs helps you make an informed decision.
Electric systems typically run more affordable for the installation itself. Materials for a 400 square foot garage might be in the moderate range, and installation is simple enough for confident DIYers. Add a programmable thermostat and you’re looking at a manageable upfront investment.
Hydronic systems cost significantly more initially. You need the boiler (unless tying into existing), manifolds, PEX tubing, pump, and all the associated plumbing. Professional installation is almost always required unless you’re experienced with both plumbing and heating systems. Budget accordingly for professional work on hydronic systems.
Operating costs flip the equation. Electric systems can cost 2-3 times more to operate than hydronic, especially in larger spaces. A 500 square foot garage in a cold climate might see substantial monthly costs with electric heat running regularly, while hydronic could be considerably less with natural gas or propane.
Run the math based on your local utility rates and expected usage. Electric makes sense for occasional use in smaller garages. Hydronic wins for daily use in larger workshops where you maintain consistent temperatures.
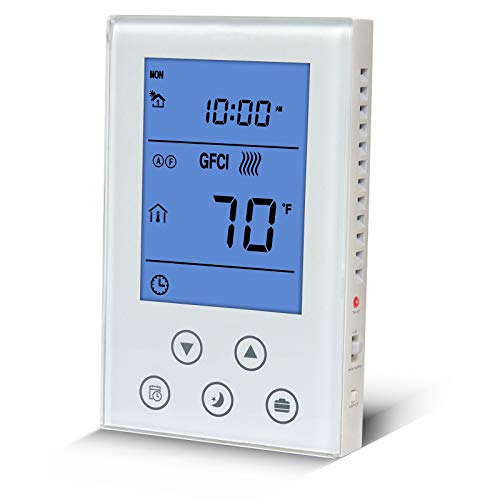
Programmable Radiant Floor Thermostat
Essential for controlling your system efficiently and reducing operating costs
Flooring Compatibility
Not all flooring materials work equally well with radiant heat. Some conduct heat beautifully, while others act as insulators that defeat the purpose of your system.
Tile and stone are the best options. They conduct heat efficiently, withstand temperature changes without damage, and give you a durable garage floor. Porcelain tile rated for garage use handles vehicle traffic, chemical spills, and temperature fluctuations without problems. The thermal mass of tile also helps the floor retain heat longer after the system cycles off.
Polished concrete or epoxy-coated concrete works great too. You’re basically heating the slab itself, which becomes a giant thermal mass. Concrete floors heat slowly but stay warm longer, creating very stable temperatures. Just avoid thick epoxy coatings over 1/8 inch, as they can reduce heat transfer.
Engineered wood and luxury vinyl can work with radiant heat, but you need to be careful. Check manufacturer specifications to ensure the product is rated for radiant heating applications. Most require you to keep floor surface temperatures below 80-85°F to prevent warping or damage. This limits how warm you can get the space.
Skip carpet entirely. It insulates too well and prevents heat from radiating into your garage. You’ll waste energy heating the carpet pad while the air stays cold.
Interlocking garage floor tiles (the thick PVC kind) also don’t work well. They trap air underneath and insulate the floor, blocking heat transfer. Save those for garages without radiant heating.
Installation Tips and Common Mistakes
A few key tips can save you major headaches during installation.
Always create a detailed layout plan before you start. Map your heating zones, calculate exact tubing or cable lengths, and identify any areas that don’t need heat (under workbenches, storage areas). This prevents waste and ensures even coverage where you need it.
Use a dedicated circuit for electric systems. Radiant floor heating draws significant amperage, and you don’t want it sharing a circuit with other garage equipment. Install a GFCI breaker for safety.
For hydronic systems, balance your loops carefully. Each loop should be roughly the same length (within 10%) to ensure even flow and temperature distribution. Longer loops can create cold spots.
Install floor sensors for your thermostat, not just air sensors. Floor temperature is what matters with radiant systems. An air sensor alone will short-cycle your system and create inconsistent heating.
Test everything before covering it up. Run electric systems at full power for several hours. Pressure test hydronic loops to at least 50 PSI and let them sit overnight. Finding a problem before you pour concrete or install flooring saves thousands in repairs.
Don’t rush the concrete curing process if you’ve embedded your system. Wait at least 30 days before firing up hydronic systems in fresh concrete. Heating too early can cause cracking and moisture issues.
Frequently Asked Questions
Can I install radiant floor heating myself?
Electric systems are DIY-friendly if you’re comfortable with basic electrical work and following manufacturer instructions. Many products come as mats you simply roll out and connect. Hydronic systems are much more complex and typically require professional installation unless you have plumbing and heating experience. The boiler setup, pressure testing, and system balancing need expertise to do correctly.
How long does radiant floor heating take to warm up a garage?
Electric systems typically heat up in 30-60 minutes once you turn them on. Hydronic systems embedded in concrete take longer initially (2-4 hours) because you’re heating the thermal mass of the slab, but they hold heat much longer after cycling off. This is why hydronic systems work best when run continuously at lower temperatures rather than being turned on and off frequently.
Will radiant floor heating melt snow on my garage floor?
Radiant heating will help dry wet floors faster and prevent ice from forming, but it won’t instantly melt large amounts of snow you drive in on your vehicle. The system keeps the floor at comfortable temperatures (typically 70-80°F), which is warm enough to evaporate moisture but not hot enough to rapidly melt inches of packed snow. You’ll still want to brush off excess snow from your vehicle outside when possible.
This article contains affiliate links. We may earn a small commission at no extra cost to you.