

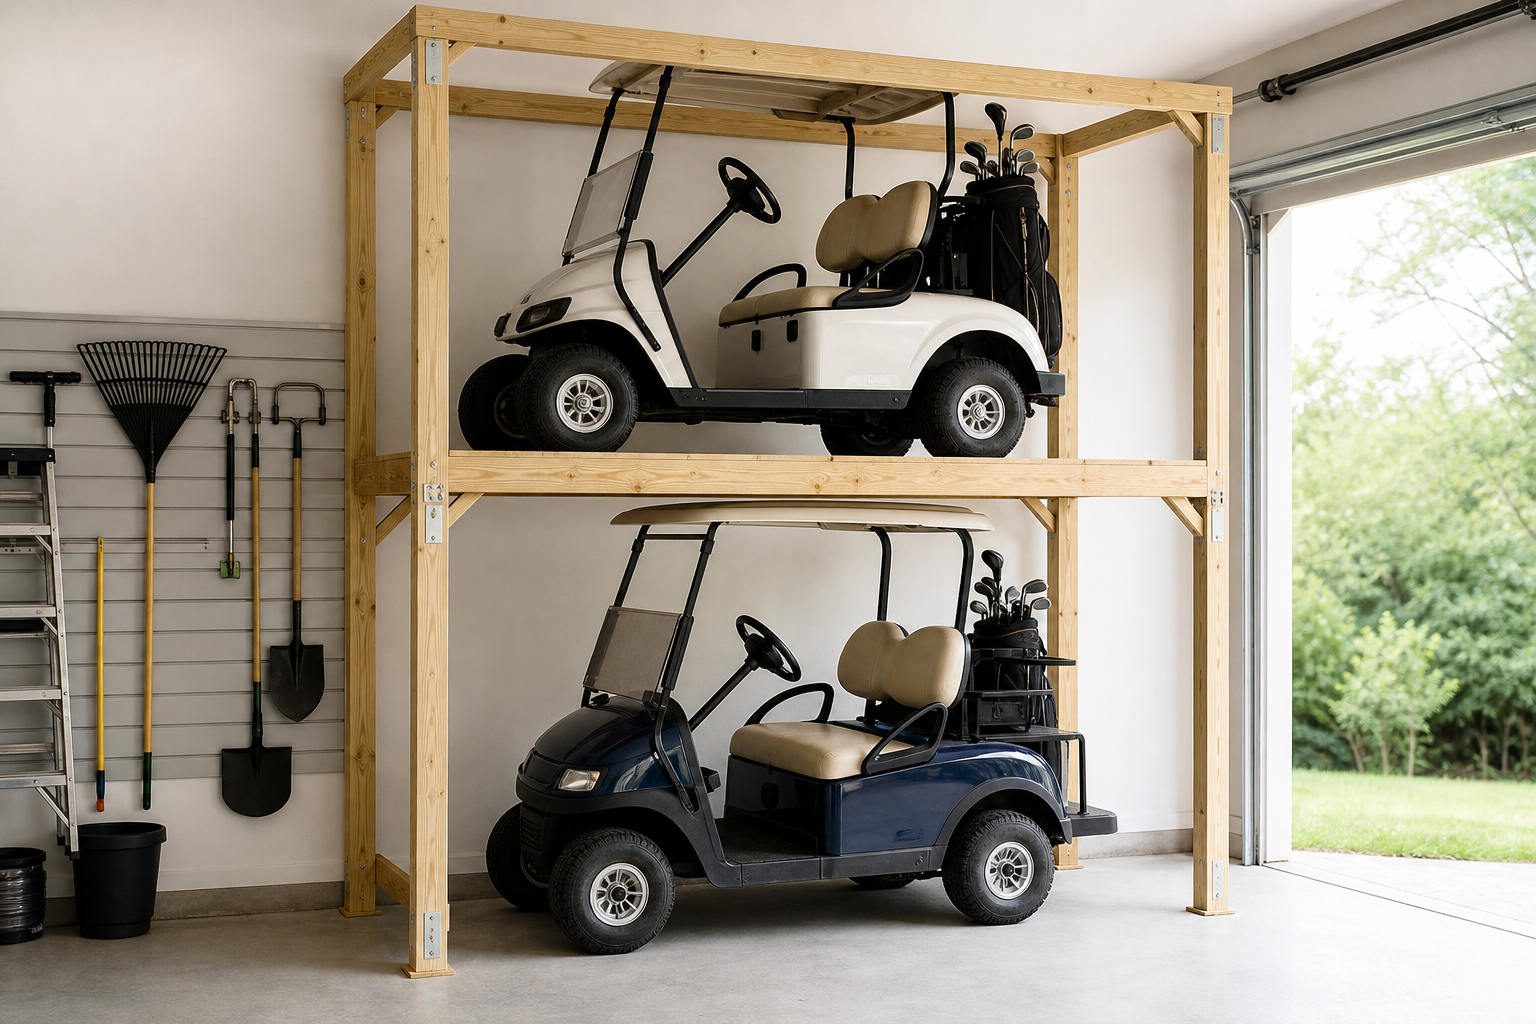
Whether you’ve been planning to build DIY garage golf cart storage for months or decided to tackle it this weekend, a clear roadmap makes all the difference. Preparation accounts for about 80% of the success in projects like this.
Golf carts sit at an awkward size: too big for standard shelving, too low to ignore the vertical space above them, and often used seasonally so they need organized storage that keeps them out of the way without making retrieval a major production. A dedicated storage rack solves the parking problem while creating usable space underneath for bins, tools, or lawn equipment.
Everything you need is below: tools, materials, step-by-step instructions, and the common pitfalls to avoid.
Understanding the Basics
Effective garage storage uses walls and ceiling as primary surfaces, keeping the floor clear for vehicles and work. Wall-mounted track systems, overhead ceiling racks, and sturdy cabinets provide organized access without eating into parking or workspace.
Zone your garage before buying products. Common zones: tools/workbench, automotive, seasonal items, sports gear, lawn/garden, and household overflow. Each zone stays self-contained so everything for a given task lives in one spot. For golf cart storage, you’re creating a dedicated zone that will likely integrate with your sports or outdoor equipment area.
Clear plastic bins beat cardboard for garage storage in every way: moisture resistance, pest resistance, visibility, and stackability. Label each bin on the front for easy identification. A label maker and 20 minutes of work saves hours of searching over the coming years.
Measuring Your Golf Cart and Space
Start with the golf cart’s dimensions. Most standard golf carts measure 4 feet wide, 8 feet long, and around 6 feet tall with the roof. Lifted carts or models with extended tops add another 6 to 12 inches in height. Measure yours with a tape measure rather than relying on generic specs.
Add clearance to those measurements. You need 6 inches of clearance on each side for maneuvering the cart onto the rack, and at least 12 inches above the roof for headroom when securing or accessing it. That means your storage footprint is roughly 5 feet wide by 9 feet long, with 7 to 8 feet of vertical clearance depending on your cart’s height.
Check your garage ceiling height. Most residential garages have 8-foot ceilings, which works for standard carts but gets tight for lifted models. A 9 or 10-foot ceiling gives you options for stacking storage above the cart or installing an elevated platform.
Locate your ceiling joists with a stud finder. Mark them with tape or chalk. Joist spacing is typically 16 or 24 inches on center. Your rack will anchor into these joists, so knowing their exact location determines where your platform can sit.
Material and Tool List
For a basic platform rack that holds a standard golf cart (around 900 to 1,100 pounds loaded), you’ll need:
- Four 4×4 pressure-treated posts, 8 feet long
- Two 2×6 pressure-treated boards, 10 feet long (side rails)
- Six 2×6 pressure-treated boards, 4 feet long (cross supports)
- 3/8-inch lag bolts, 4 to 6 inches long (for attaching to studs or joists)
- 3-inch deck screws (galvanized or coated)
- Post bases or concrete anchors if you’re floor-mounting
- Construction adhesive
- Sandpaper or sander (to smooth rough edges)
Tools:
- Circular saw or miter saw
- Drill with bits for pilot holes
- Socket wrench or impact driver for lag bolts
- Level (4-foot or laser level)
- Tape measure
- Stud finder
- Safety glasses, gloves, hearing protection
Pressure-treated lumber resists moisture and won’t rot in garage temperature swings. Don’t substitute untreated wood. The weight and seasonal humidity will cause it to fail.
Custom Rack and Charging Station Layout
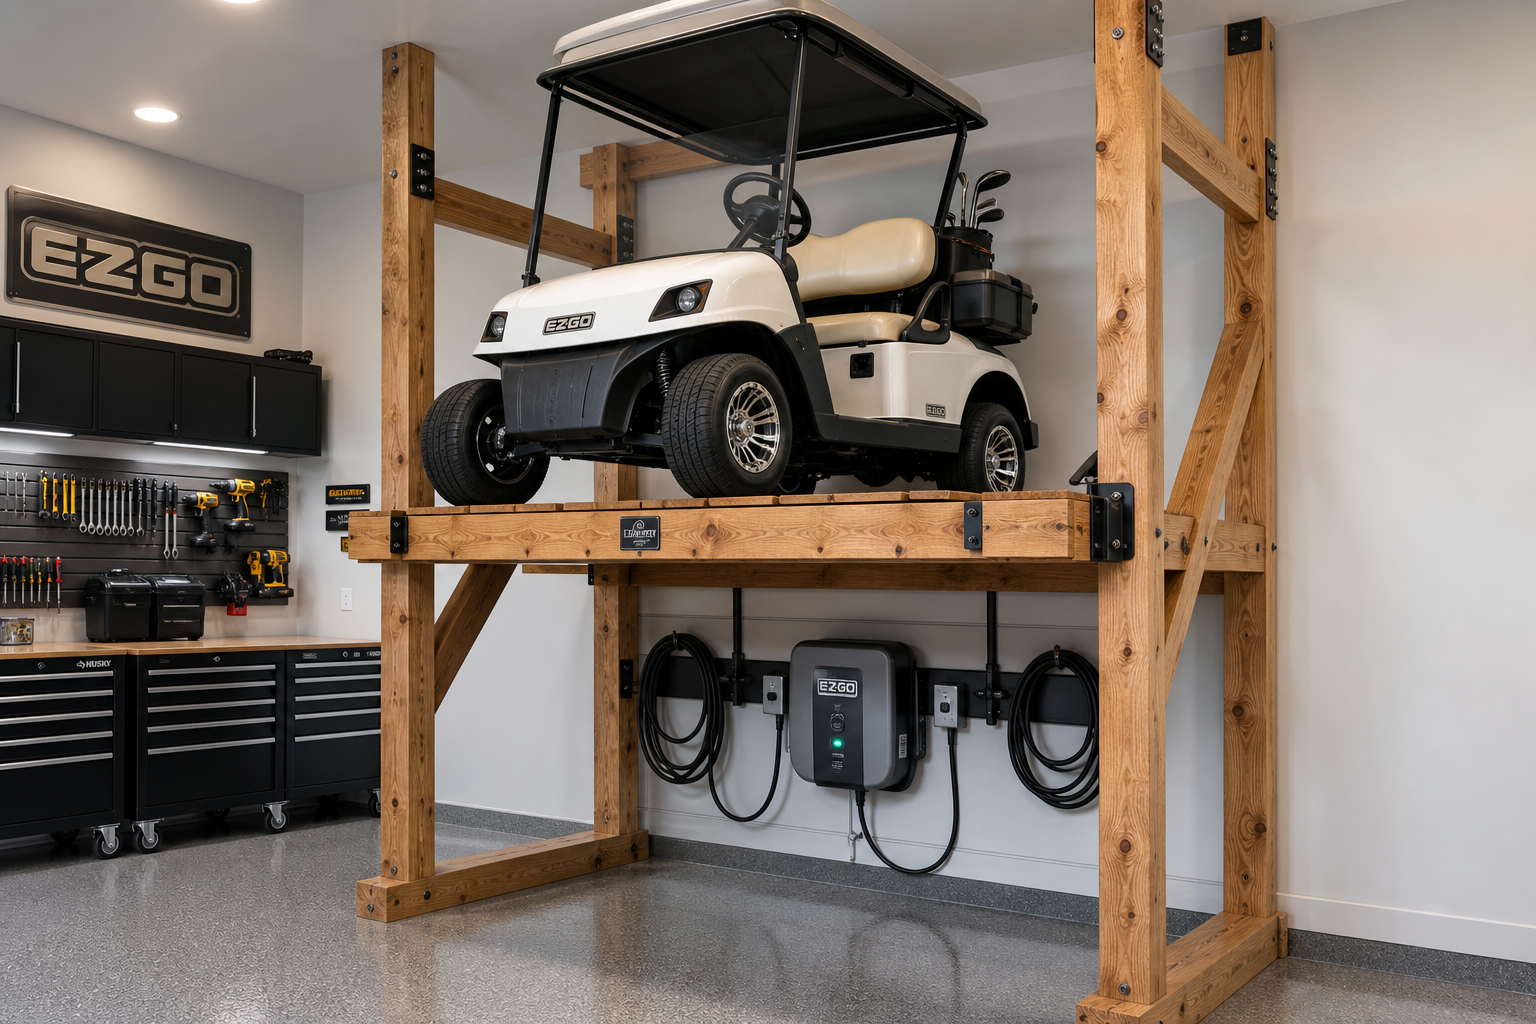
A two-post or four-post design works for most two-car garages. The two-post version cantilevers from the wall and takes up less floor space but requires solid wall framing behind it. The four-post version is freestanding, easier to build, and distributes weight more evenly across the floor.
Four-Post Freestanding Rack Design
Set the four 4×4 posts upright in a rectangle matching your cart’s footprint plus clearance. Space them 5 feet apart (width) and 9 feet apart (length). Secure the bottom of each post to the garage floor with post bases bolted into concrete anchors, or set them in shallow concrete footings if you’re working on a dirt or gravel floor.
Attach the two 10-foot 2×6 boards as side rails, running the length of the cart. Position them 18 to 24 inches off the ground. This height lets the cart roll up a ramp but still leaves space underneath for storage bins. Bolt the side rails to the inside faces of the 4×4 posts with lag bolts. Pre-drill pilot holes to prevent splitting.
Install the six 4-foot 2×6 cross supports perpendicular to the side rails, spaced evenly at 18-inch intervals. These create the deck surface the golf cart will sit on. Secure each cross support with 3-inch deck screws driven through the top into the side rails. Add construction adhesive between the boards for extra rigidity.
Check for level as you go. An uneven platform will cause the cart to roll or shift when parked.
Setting Up the Charging Station
For the charging station, mount a dedicated 110V outlet near the platform if your cart uses a plug-in charger. Run the wiring through conduit and secure it to the wall studs. If you’re not comfortable with electrical work, hire a licensed electrician for this part. A poorly installed outlet is a fire risk, especially with the sustained load of an overnight charge cycle.
Use a surge-protected power strip if you’re charging multiple batteries or accessories. Mount it to the wall or platform frame so cords stay organized and off the floor.
Building a Ramp for Loading
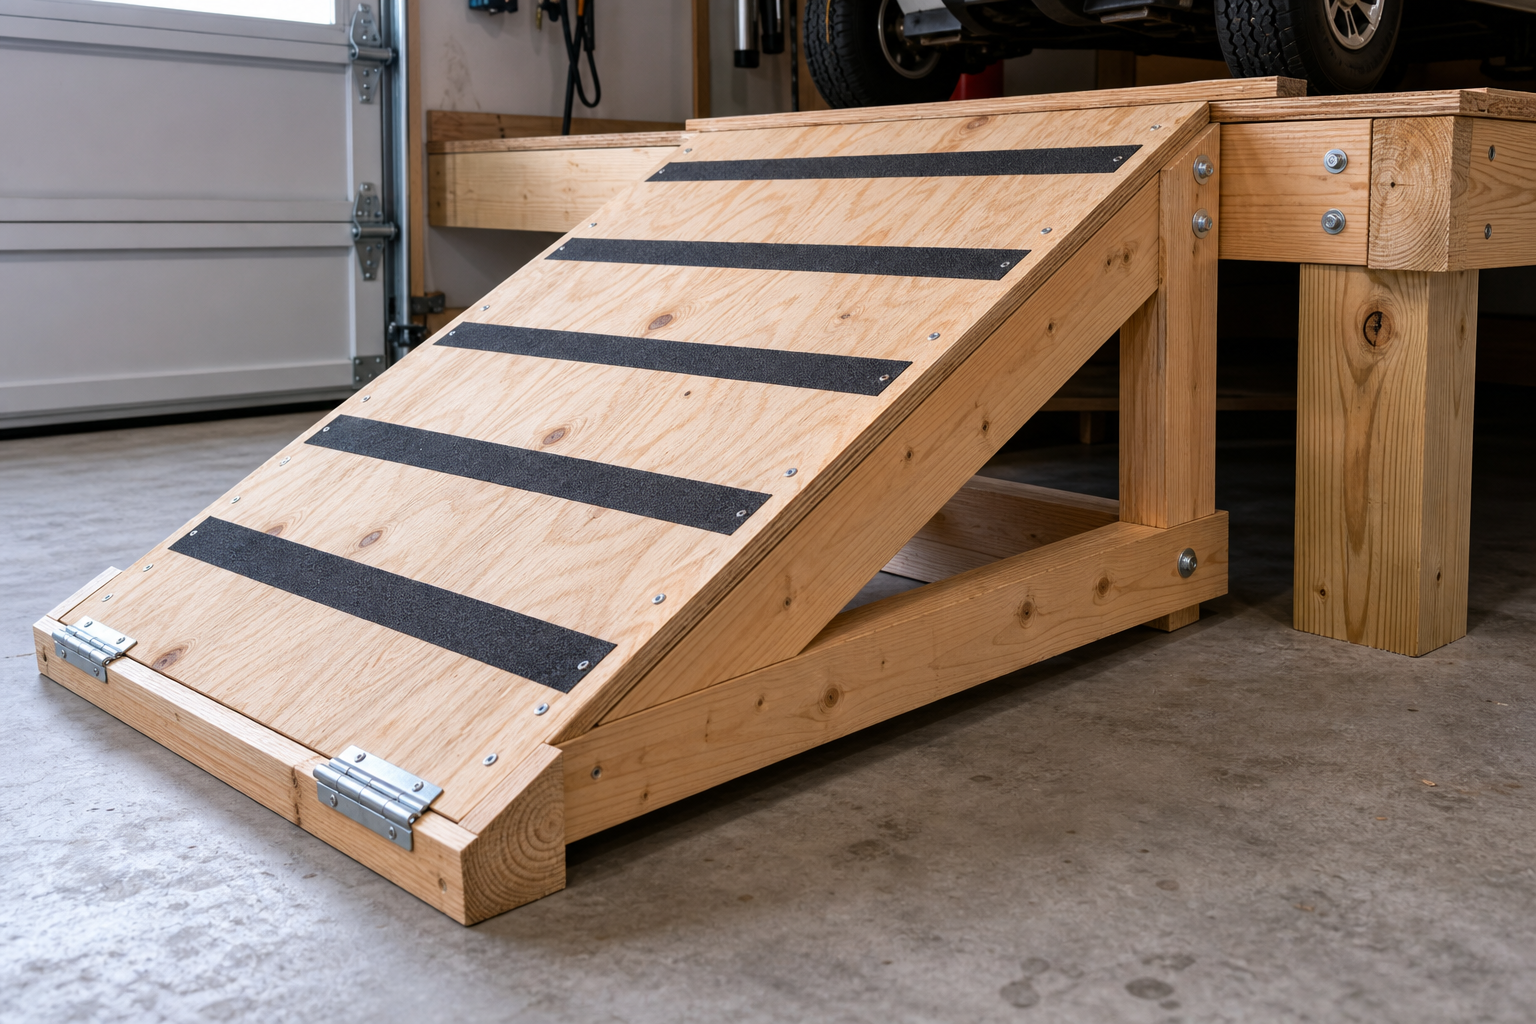
Unless you’re comfortable lifting a 900-pound cart, you need a ramp. A simple design uses two 2×10 boards, each 8 feet long, set parallel at the width of the cart’s wheelbase (roughly 3 feet apart).
Angle matters. A ramp slope of 15 to 20 degrees is manageable for driving the cart up under its own power. Steeper than that and you risk tipping or losing traction. For an 18-inch platform height, an 8-foot ramp gives you about an 18-degree slope.
Attach cleats (short pieces of 2×4) across the ramp boards every 12 inches to provide traction. Screw them perpendicular to the ramp surface. These keep the tires from slipping, especially if the ramp surface is wet or dusty.
Hinge the ramp to the platform edge or make it removable. A hinged ramp folds up when not in use, saving floor space. A removable ramp stores on wall hooks but requires lifting it into place each time.
Weight Capacity and Structural Checks
This is an area where cutting corners comes back to haunt you. Invest the effort upfront and you’ll save significant time and money over the next several years of use.
Weight capacity is critical and often misunderstood. Wall systems anchored in studs hold 50 to 75 pounds per linear foot. On drywall alone, that drops to 15 to 25 pounds before failure. Ceiling racks rated for 600 pounds assume even distribution; concentrating weight in one area can cause failure well under the total limit.
A standard golf cart weighs 600 to 900 pounds empty. Add two passengers (300 to 400 pounds), a cooler, golf bags, and accessories, and you’re at 1,100 to 1,300 pounds total. Your platform needs to handle that weight plus a safety margin.
Understanding Load Distribution
Four-post freestanding racks distribute weight across four floor contact points and the cross supports. Each post bears roughly 250 to 300 pounds if the load is centered. Standard 4×4 posts handle that easily, but the connections matter more than the lumber. Use lag bolts at every joint, not just screws. Screws shear under sustained vertical loads.
If you’re wall-mounting a two-post rack, find the studs and use 3/8-inch or 1/2-inch lag bolts, at least 4 inches long. Each bolt should penetrate the stud by at least 2.5 inches. Space bolts every 16 inches vertically. This gives you multiple load-bearing points and redundancy if one bolt loosens over time.
Test the empty rack before driving the cart onto it. Stand on the platform and bounce gently. It should feel solid with minimal flex. If it sways or creaks, add diagonal bracing (2×4 boards running corner to corner between posts) or additional cross supports.
Installation Steps
Prep the floor. Sweep and clean the area where the posts will sit. If the floor has an epoxy or polyaspartic coating, roughen the surface under each post base with 80-grit sandpaper so the adhesive or anchor grabs properly.
Step 1: Anchor the Posts
For concrete floors, drill holes with a hammer drill and masonry bit, then insert concrete anchors. Bolt the post bases down, making sure each post is plumb (perfectly vertical). Use a level on two adjacent sides of each post.
Step 2: Install Side Rails
Attach the side rails. Clamp them in place temporarily, check for level along the length, then drill pilot holes and drive the lag bolts. Don’t overtighten; you’ll crack the wood.
Step 3: Add Cross Supports
Install cross supports. Measure and cut each one to exact length so it sits flush between the side rails. Apply construction adhesive to the contact surfaces, then screw them down. Work from one end to the other, checking that each support is perpendicular to the side rails.
Step 4: Finishing Touches
Sand all exposed edges and corners to remove splinters. Pressure-treated lumber is rough out of the package and will snag clothing or skin if you don’t smooth it.
Seal or paint the wood (optional). A coat of exterior sealant or deck stain protects the wood and makes it easier to clean. Skip oil-based products if the garage gets hot in summer; they’ll stay tacky.
Practical Planning Tips
Invest in quality tools for tasks you’ll repeat. A reliable stud finder, a good level, a quality tape measure, and proper safety gear (eye protection, hearing protection, respirator) make every project easier and safer. These tools pay for themselves across multiple workshop projects over the years.
Consider the seasonal timing of your project. Floor coatings apply best in mild weather (50 to 85 degrees). Insulation projects are most motivating (and noticeable) before extreme weather hits. Electrical and plumbing work can happen year-round but should be completed before insulating or finishing walls over the wiring.
Before starting any garage project, take stock of what you have and what you need. Walk the space with a tape measure and a notepad. Record dimensions, note existing electrical outlets and their amperage, check for moisture issues, and photograph anything you want to change. This baseline assessment prevents surprises mid-project and helps you budget materials accurately.
Set a realistic timeline and budget before buying anything. Most garage projects take 50% longer and cost 20% more than initial estimates, especially for first-timers. Build that buffer into your plan so unexpected discoveries don’t derail the entire project or blow the budget.
Budget for this project runs competitively priced to competitively priced in materials if you’re building from scratch with basic lumber and hardware. Pre-fabricated metal racks designed for golf carts save the build time. DIY makes sense if you have the tools already and value customization. Buy the pre-fab option if your time is tight or you’re not confident with a saw and drill.

Golf Cart Storage Rack
For those who prefer a ready-made solution over building from scratch
Organizing Storage Under and Around the Cart
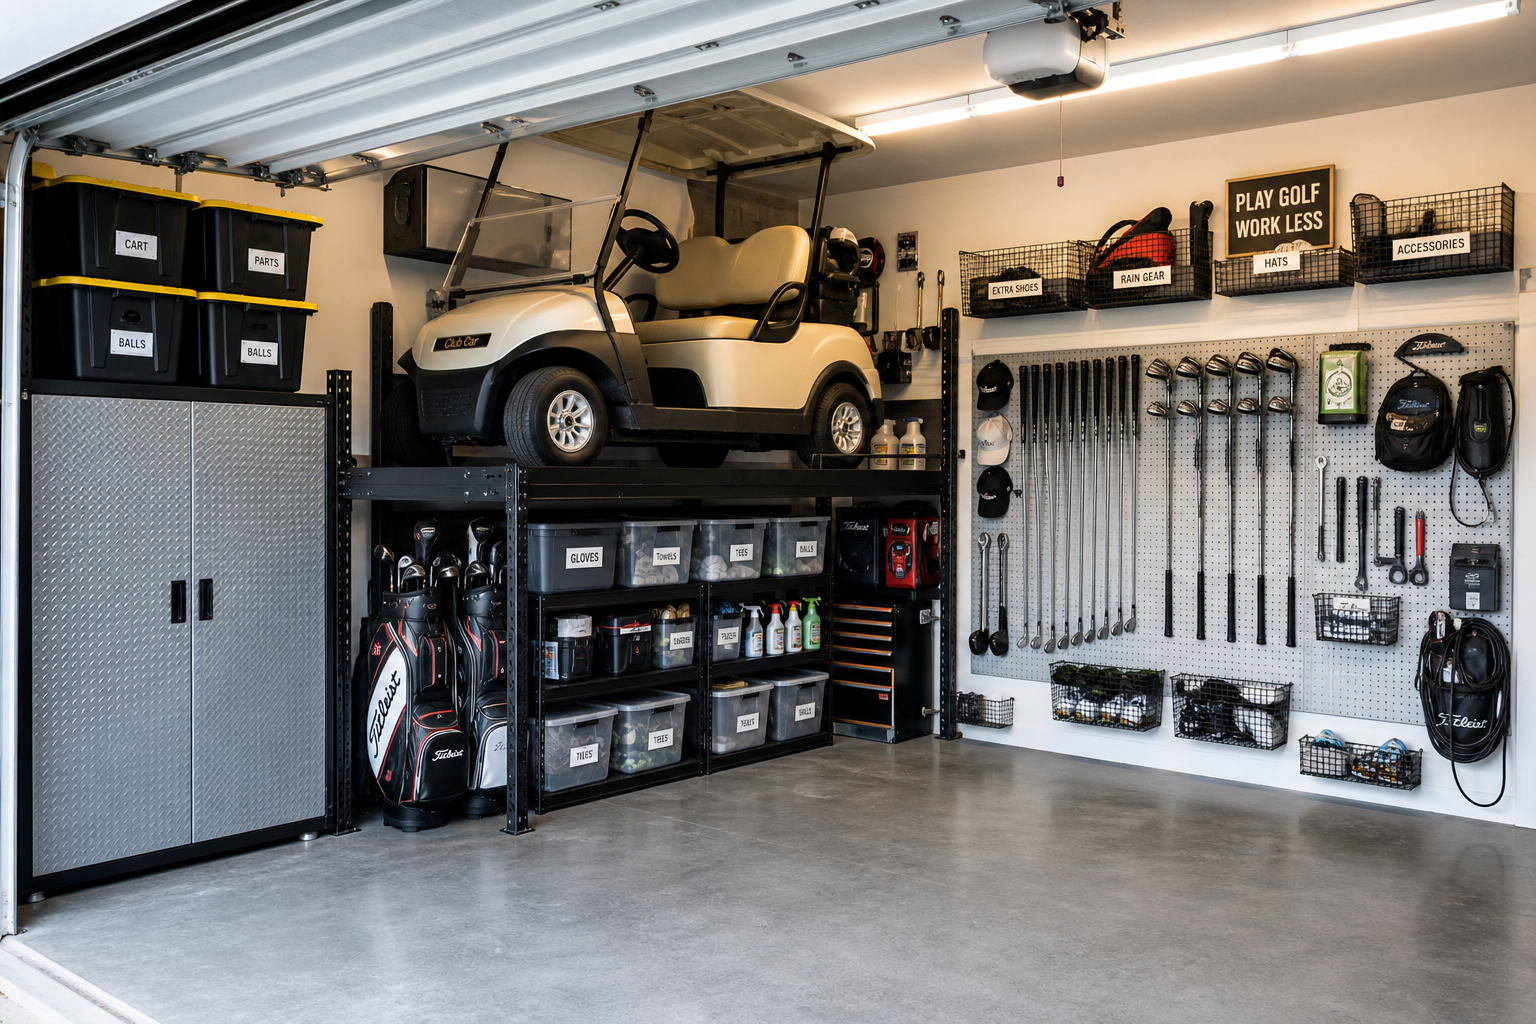
The platform creates usable space underneath. Most golf carts sit 18 to 24 inches off the ground when stored on a platform, giving you room for bins, shelving, or equipment.
Stack clear garage storage bins two or three high under the cart. Label them by category: golf gear, cart accessories, seasonal items. The clear sides let you see what’s inside without pulling everything down.
Mount a slatwall hook set on the wall beside the cart for hanging chargers, extension cords, or cleaning supplies. These systems work particularly well for organizing tools and accessories. For more detailed installation instructions, check out our garage slat wall accessories guide.

Store the cart with the battery charged to about 50% if you’re parking it for the off-season. A fully discharged battery degrades faster. Disconnect the battery cables to prevent parasitic drain.
Cover the cart with a fitted cover or tarp to keep dust off. Garages accumulate dirt even when closed, and a layer of grime on the seats or dash is harder to clean after months of sitting.
Common Mistakes to Avoid
Skipping the structural check. Don’t assume your garage walls or ceiling can handle the load. Check joist size and spacing. Standard 2×6 joists on 24-inch centers support less weight than 2×10 joists on 16-inch centers. If you’re uncertain, consult a structural engineer or experienced contractor before hanging heavy loads.
Using the wrong fasteners. Drywall anchors and finish screws won’t hold a golf cart. Use lag bolts into solid wood or concrete anchors into concrete. Match the fastener to the material.
Building on an unlevel floor. Garage floors slope toward the door for drainage. If your platform sits on a sloped floor without shimming or leveling, the cart will roll. Use shims under the low-side posts to make the platform level, or build the platform with adjustable feet.
Ignoring clearance for the garage door. Measure the door’s travel path when it opens and closes. If the platform extends into that path, you’ll hit the cart every time you open the door. Leave at least 12 inches of clearance from the door’s arc.
Overloading one side. Distribute weight evenly across the platform. If you store heavy items on one side of the cart or hang tools off one corner of the rack, you create uneven stress that can
