We get it – choosing the right garage floor coating can be overwhelming. You might worry about durability, how hard they are to maintain, or even whether to do it yourself or hire a pro.
We’re here to clear up that confusion and help you find a lasting solution that looks great, too.
Welcome to our easy-to-follow ultimate guide to epoxy floor coatings.
If you want to upgrade your garage, dive into a DIY project, or expand your professional expertise, this article has you covered.
This article is for anyone wanting to transform a space with flooring that’s both beautiful and practical. We’ll give you the information you need in a way that’s easy to understand. We’ll address your concerns and desires, offering helpful tips and step-by-step advice.
By the end of this guide, you’ll know all about epoxy garage floor coatings and feel ready to make the best choices for your space.

Table of Contents
Epoxy Floor Coatings: The Basics
Epoxy is a two-part product consisting of polymer resins and hardeners.
The resin, the base component of epoxy, provides color, texture, and thickness to the floor coating. When mixed with the hardener, the epoxy undergoes an exothermic reaction, meaning it releases heat while curing (hardening).
When applying an epoxy floor coating, pay close attention to the pot life and cure time.
Pot Life
Pot life determines how quickly you need to apply the epoxy coating.
Epoxy pot life varies but generally ranges from 30 to 45 minutes. It depends on factors like the type and ratio of epoxy components, the amount mixed, and the temperature of both the epoxy and the environment.
Be sure to apply your epoxy coating quickly to avoid issues like poor bonding or an uneven surface.
Cure Time
Cure time is how long you have to wait before you can walk or drive on them.
This is distinct from dry time. It’s the period the epoxy requires to reach full strength and resistance. Homeowners should avoid heavy traffic or harsh chemicals on the new epoxy floor during this period.
Epoxy floors take between 24 and 72 hours to fully cure (harden) before you can walk or drive on them. The floor may be dry to touch in 12 to 18 hours, but it’s not fully cured and could be damaged if not treated carefully.
Who Should Consider Epoxy Garage Floor Coating?
How do you know if an epoxy garage floor coating is right for you? If any of these sound like you, then you should strongly consider epoxy floors.
- Durability is Critical: Epoxy is your go-to choice for long-lasting garage floor coatings. Their solid finish creates an impact-resistant surface that outlasts most floor coatings while handling heavy foot traffic and industrial machinery effortlessly.
- Require Low-Maintenance: Epoxy flooring’s non-porous nature makes cleaning a breeze. It resists dirt, bacteria, and debris, reducing health and safety hazards.
- You Have a Sealed Concrete Floor: Epoxy acts as a long-lasting sealant, far surpassing the performance of regular concrete sealers.
- Willing to Invest Upfront: While epoxy coatings come with a higher initial cost, their durability makes them a cost-effective choice over time. They’re perfect for homeowners who view their flooring as a long-term investment.
- Want a Great Looking Garage Floor: Epoxy floors offer more than durability. They’re available in a variety of colors and styles, which transform your garage into an attractive part of your home.
We’ll get into each of these in greater detail in later sections.
Who Should Avoid Epoxy Garage Floor Coatings?
That said, epoxy floor coatings have some drawbacks. Here are some situations where you should choose an alternative garage flooring instead.
- High-Heat: Avoid epoxy floors if you use your garage for anything involving intense heat or sparks, like welding. High heat can severely damage an epoxy coating’s surface.
- You Use Abrasive Materials: Regular exposure to abrasive materials (like sand and salt) can erode the epoxy surface. This makes it less ideal for areas with snowy climates.
- Areas with High Moisture Levels: Epoxy coatings can trap water in the concrete, leading to potential damage over time.
- You Have a Tight Budget: The average cost of an epoxy coating for a residential garage in the U.S. is $2,342. Avoid epoxy if you’re on a tight budget or don’t plan on staying in your home for more than a few years.
- DIYers Without Specialized Skills: Installing an epoxy coating is not a straightforward DIY project. Improper application can lead to suboptimal results.
Are Epoxy Garage Floors Slippery?
Epoxy garage floor coatings are non-porous, making them slippery when wet. This also applies to their derivatives, like polyuria and polyurethane, which we’ll discuss later.
Most manufacturers recommend adding a non-slip additive during application to provide more traction.
Some popular anti-slip epoxy additives include:
- Decorative Color Flakes: These polymer paint aggregates are mixed with epoxy to add color and texture. They’re available in various sizes, shapes, and textures and can dramatically alter the floor’s look.
- Aluminum Oxide: Perfect for high-demand industrial environments, aluminum oxide provides an aggressive anti-slip texture without changing the epoxy coating’s properties. Unfortunately, this makes it tough on the skin and difficult to clean.
- Silica Sand: Integrating sand into the final coating creates a skid-resistant surface. Unfortunately, silica sand may crack and wear down in high-traffic areas.
- Shark Grip Additive: Shark Grip is compatible with both latex and oil-based paints. It should not be used with glossy finishes.

Do You Need a Top Coat with Epoxy?
Adding an additional top coat for your epoxy garage floor is a good idea.
It enhances the floor’s gloss and appearance, protects against scratches, stains, and chemicals, and improves safety by increasing slip resistance. More importantly, a top coat prolongs the life of your epoxy floor.
The most common top coats are either polyurethane or an additional layer of clear epoxy. Epoxy top coats are less expensive but may yellow over time due to UV exposure. Polyurethane top coats resist UV better but cost more.
Pay attention to the top coat’s chemical composition as well.
A 100% solids top coat will give you a thicker, more durable layer but is more complicated to apply. Water-based top coats are thinner, making them easier to apply, but aren’t as durable.
Color and Finish Options for Epoxy Floor Coatings
Epoxy floor coatings provide a wide array of color and finish options, allowing customization to fit any design preference or functional requirement.
Solid Colors: Epoxy coatings can be applied in single or multiple solid colors, offering a range of choices like tan, gray, blue, green, yellow, black, white, etc. This variety allows them to seamlessly integrate into any design scheme.
Metallic Colors: Metallic pigments in epoxy coatings create stunning effects by reflecting light and adding depth, movement, and dimension. Options include shades like silver, gold, copper, and bronze, offering a unique and modern aesthetic.

Glossy or Matte Finishes: The level of gloss or shine varies based on the type of epoxy and the top coat used. This choice affects the surface’s brightness and smoothness, ranging from high-gloss to matte finishes.
These options underscore the versatility of epoxy coatings, offering solutions that meet both aesthetic desires and practical needs.
Flakes or Chips: Adding flakes or chips enhances texture and contrast. They come in various sizes, shapes, and colors. As previously mentioned, they can be broadcasted over the base coat for a granite-like or terrazzo-like appearance.
Quartz or Sand: Incorporating quartz or sand adds slip resistance and durability and provides a natural or rustic look. These materials can be blended with different colors for custom designs.
Epoxy Floor Coatings vs Polyurea, Polyaspartic, Polycuramine
You’ll likely come across several options when considering the best coating for your garage floor. The most common are Polyurea, Polyaspartic, and Polycuramine.
Polyurea (Read Our Full Guide): This type of polyurethane is known for its fast curing time and high strength. It’s highly flexible and boasts impressive chemical resistance. However, it’s more expensive than epoxy but less costly than Polyaspartic or Polycuramine.
Polyaspartic (Read Our Full Guide): A modified version of Polyurea, Polyaspartic has a longer pot life, better adhesion, and superior UV resistance. It’s pricier than epoxy and Polyurea but offers a faster installation and a longer lifespan.
Polycuramine (Read Our Full Guide): This proprietary blend combines elements of polyurea, polyurethane, and epoxy, claiming superior hardness, adhesion, durability, and gloss. It’s more expensive than epoxy or Polyurea but promises better performance and value.
In this section, we’ll briefly compare epoxy floor coatings to these popular alternatives.
Let’s break it down.
| Criteria | Epoxy | Polyurea | Polyaspartic | Polycuramine |
| Cost | $$ | $$$ | $$$$ | $ |
| Volume Solids | Varies | Higher | Higher | Higher |
| Bonding | Requires thorough preparation | Requires thorough preparation | Better due to longer pot life | Claims excellent bonding due to hybrid nature |
| Sealing | Excellent protection | Excellent protection | Excellent protection | Claims superior protection |
| Curing Time | Longest | Fast | Faster than Epoxy but slower than Polyurea | Fastest |
| UV Stability | May fade unless treated | May fade unless treated | Less prone to discoloration | Less prone to discoloration |
| Other Features | Good durability, resistance, and aesthetics | Fast curing, high strength, chemical resistance | Longer pot life, better adhesion, UV resistance | Superior hardness, adhesion, durability, and gloss |
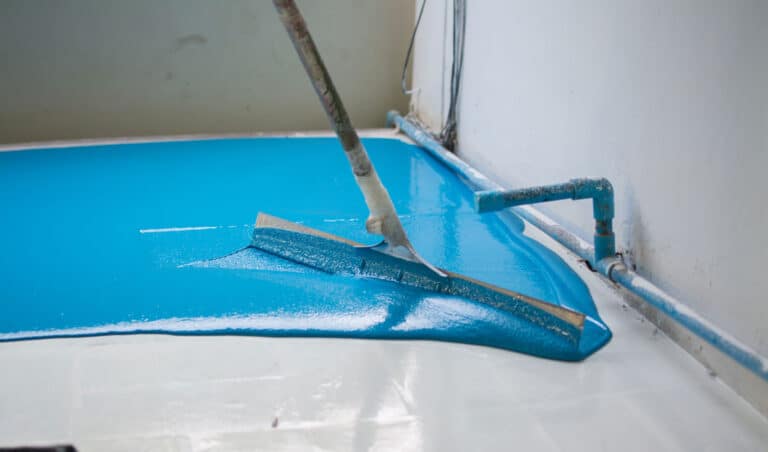
How to Apply Epoxy Floor Coatings
Applying epoxy floor coatings is a meticulous process. You’ll want to pay close attention to the preparation phase, which can often make or break the entire process.
Here’s a high-level overview of the process:
- Cleaning: First, clean the concrete floor. Use a degreaser and hose to remove oil and grease. Then, sweep, vacuum, or use a wet/dry vacuum to remove dirt and dust.
- Repairing: Fill any cracks or holes with concrete filler. Use a putty knife for this. After filling, wait for it to dry completely. Then, sand it smooth.
- Etching: Roughen the concrete surface for better epoxy sticking. Use an acid solution like muriatic acid or a commercial product. Be sure to follow the instructions and wear protective gear like rubber boots, gloves, and goggles. Rinse the floor well with water and let it dry.
- Priming: Apply an epoxy primer with a roller. This seals pores and moisture in the concrete, helping the epoxy coat bond better. Let the primer dry as instructed.
- Mixing Resin and Hardener: Properly mixing the resin and hardener is crucial. Follow the manufacturer’s ratio precisely. Use a measuring container and mixing stick for accuracy. Only mix what you can use within its pot life to avoid waste.
- Applying Primer: Though optional, primer can improve the epoxy’s adhesion and efficiency. It also reduces the amount of epoxy needed for the base coat. Spread the primer evenly with a roller or squeegee. It usually dries in 12 to 24 hours.
- Applying Base Coat: The base coat is your main epoxy layer. Apply it with a roller or squeegee, starting in one corner and working in small sections. Overlap each stroke slightly. Use a brush for edges and obstacles. Be sure to cover the area well without making it too thick.
- Applying Flakes or Chips: For extra texture and style, sprinkle flakes or chips over the wet base coat. This is optional but can improve slip resistance and look. Mix colors and sizes for a custom effect. Spread them evenly for the best look.
- Applying Top Coat: Finally, apply the top coat. This seals and protects the base coat and decorative elements, adding gloss and durability. Use a roller or squeegee, just like with the base coat. Let it dry for 24 to 48 hours.
Choosing Between DIY and Professional Epoxy Floor Coating
Most retailers will sell a DIY epoxy garage floor coating kit. But should you install epoxy floor coatings yourself or hire a professional?
DIY Installation: Doing it yourself involves buying a kit and applying the epoxy. This route can be more cost-effective, as you save on labor costs, which typically range from $1 to $7 per square foot. It also allows for personal control over the project, letting you choose colors, designs, and finishes.
However, DIY installation can be complex, particularly if you’ve never applied an epoxy floor coating before. It demands thorough preparation, including cleaning, repairing, etching, and priming the concrete. Additionally, using low-quality products or incorrect application can result in a poor or uneven finish.
Professional Installation: Hiring an experienced contractor means they handle everything from prep to cleanup. Professional work generally leads to a high-quality, consistent, and durable coating. Most professionals also offer warranties or guarantees, adding an extra layer of security.
This obviously comes at a cost. The labor will often cost as much as the floor coating itself. Depending on the contractor’s resources and expertise, you could also have limited customization options.
Finally, there’s always the risk of potential liabilities if the contractor is not licensed, insured, or reputable.
How to Maintain & Clean Epoxy Floor Coatings
Keeping your epoxy floor coatings in top shape is crucial in maintaining their look and longevity. Here’s a straightforward guide:
- Sweeping: Regularly sweep with a soft dust mop or broom. This simple step removes dust and debris, preventing scratches and damage.
- Vacuuming: Use a vacuum with a soft brush attachment now and then. It helps remove sand and grit that might stick to the coating and cause wear.
- Spot Cleaning: Quickly tackle any spills or stains. Use a cloth, paper towel, or shop vacuum to soak up liquids. For cleaning, mild detergent or warm water works well. Fast action keeps the floor stain-free and looking great.
- Mopping: Mop the floor periodically for deeper cleaning. A foam mop with a mix of ammonia and hot water is ideal. This combo cleans effectively without leaving residue or dulling the shine.
- Avoiding Damage: Steer clear of harsh chemicals, rough cleaning tools, and steam cleaners. These can harm the epoxy. Consider using aliphatic or UV-resistant epoxy to protect the floor from UV rays, abrasion, or heat. Alternatively, apply a top coat with protective properties like polyaspartic.
By following these simple steps, you can ensure your epoxy floor remains beautiful and durable for years.
Where to Buy Epoxy Floor Coatings
If you’re looking to buy epoxy floor coatings, there are several reliable places to consider. Each source offers a range of products to suit different needs and preferences.
Epoxy Superstore is a great online destination for both professionals and DIY enthusiasts. They offer a broad selection of epoxy floor paints, industrial coatings, and necessary application and floor prep tools. Their inventory includes various types of epoxies like 100% solids, water-based, and metallic. They also provide helpful tips and guides on their blog. You can find their products and resources on Epoxy Superstore’s website.
Lowe’s, the well-known home improvement retailer, stocks a variety of epoxy exterior stains and floor coatings. They carry brands like Seal-Krete, Rust-Oleum, Armorpoxy, and Craftsman. Their products, suitable for concrete and garage floors, come in different colors and finishes. You can explore these online or visit a Lowe’s store.
Sherwin-Williams focuses on industrial and commercial applications. They offer a range of epoxy flooring solutions, including coatings and mortars. Their products feature low-VOC, UV resistance, and decorative options. You’ll find extensive information on their epoxy systems at their technical resource center. Details are available on the Sherwin-Williams website.
ArmorPoxy caters to a wide clientele, including major companies and military branches. They manufacture and distribute commercial epoxy flooring, floor kits, and tiles. Their products fit various environments, from garages to pool decks. ArmorPoxy offers installation services, free consultations, and online purchasing on ArmorPoxy’s website.
Lastly, Epoxy Pro specializes in pure epoxy floor products. They serve both residential and commercial markets. Their selection includes diverse colors and sizes and concrete repair solutions. They offer free shipping on orders over $1000 and a 10-year warranty, available through Epoxy Pro’s website.
Each vendor provides a unique range of epoxy floor coatings, ensuring you find the perfect fit for your project.
Wrapping It Up
We’ve come a long way in our comprehensive guide to epoxy floor coatings. Starting with the basics, we explored epoxy’s two-part composition, including polymer resins and hardeners. We emphasized the importance of understanding the pot life and cure time, stressing timely application and patience.
Our discussion extended to who should and shouldn’t opt for epoxy coatings. We highlighted scenarios where its durability, ease of maintenance, and aesthetic value are beneficial. We also pointed out contexts where it might not be the best fit. Topics like the potential slipperiness of epoxy, the need for a top coat, and the variety of colors and finishes available showcased its versatility.
We compared epoxy with alternatives like Polyurea, Polyaspartic, and Polycuramine. Each offers unique benefits for your garage floor. The application process was a focus, underlining the need for careful preparation and application.
The debate between DIY and professional installation was also a key topic. We examined the cost-saving and personalization benefits of DIY against the expertise and reliability of professional services. Following this, we shared tips on maintaining and cleaning epoxy floors to keep them in top condition.
With the right approach and knowledge, your epoxy flooring project can significantly transform your garage, ensuring lasting beauty and functionality.