I used to think the only people who needed a hoist in their garage were people who worked on their cars or who needed to lift a ton of stuff (literally) into their pickup.
There are plenty of reasons for a garage hoist, like storing your boat or keeping your convertible’s hardtop out of the way. Once considered just mechanic’s tools, hoists are becoming more mainstream and consumer-friendly.
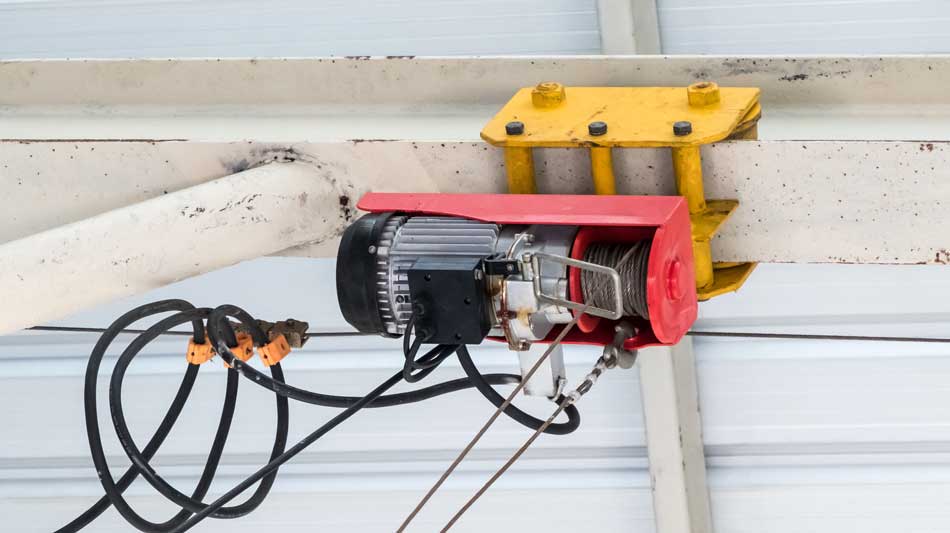
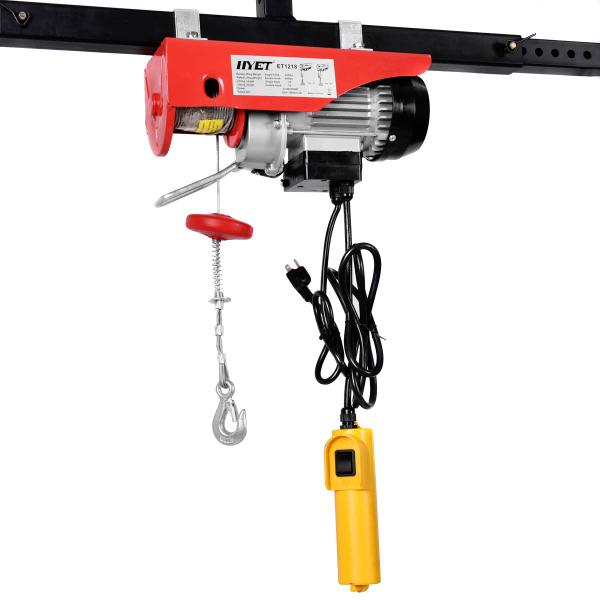
Ceiling hoists are relatively inexpensive, often costing under $400. However, your home’s construction might prohibit you from mounting one on your garage ceiling.
That leads many people to wonder what it takes to put a hoist in their residential garage.
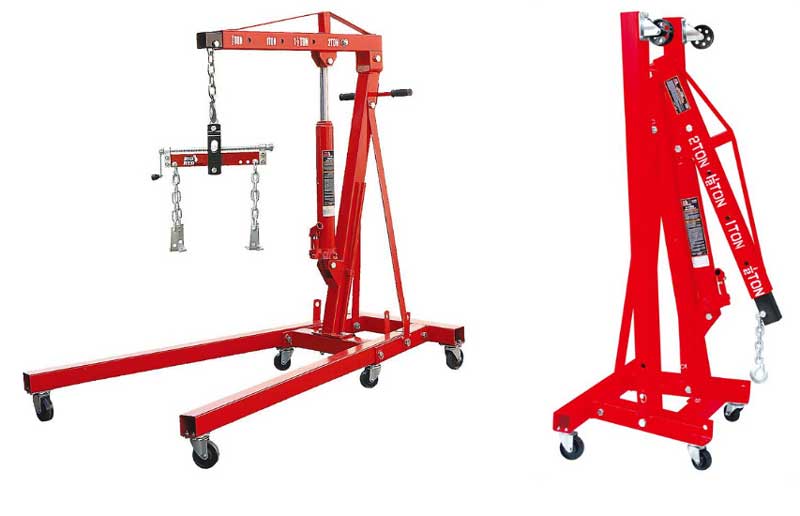
As long as your garage ceiling can support the weight, a ceiling hoist is the most economical option while saving valuable space. Otherwise, an adjustable gantry crane or an engine crane can do the same tasks without needing a permanent installation.
Some custom solutions can reinforce your garage ceiling even if you can’t permanently install a ceiling hoist. We’ll talk about each of those and briefly overview how to install a ceiling hoist.
But first, let’s clear up the difference between a hoist and a winch.

Hoist vs. Winch: What’s the Difference?
Some of you will laugh or shake your heads at this, but I didn’t know the difference between a hoist and a winch until recently.
So, to make sure that we’re all on the same page, let’s get the definition straight:
Winches pull items along a reasonably level plane (usually less than 45 degrees of slope). When you see a tow cable on a Jeep, that’s a winch.
Hoists are used to lift and lower things straight up and down with a minimal angle. Hoists have built-in brakes, so you can suspend a weight from them, whereas a winch isn’t designed for that.
Common uses for hoists are engine lifts or lifting and lowering heavy items in the back of a pickup.
Can You Put a Ceiling Hoist in Your Garage?
Whether or not you mount a hoist to your ceiling depends on how your garage ceiling is constructed.
If you have another floor above your garage, your ceiling is probably constructed with joists. Ceiling joists stretch across your ceiling and support the weight of the floor above it.
Residential ceiling joists typically use 2×4 beams. Unless they’ve been specifically over-engineered to support a hoist, they’re probably not strong enough to support the hoist and weight of what it’s holding.
If you don’t have another floor above your garage, you likely have trusses instead of joists. Trusses are designed to push the walls and roof out from the middle of your house.
Trusses typically can’t support as much dead weight as a joist.
The biggest potential problem is that if a joist or truss breaks, the walls or ceiling could start to bow or even collapse.
It can be challenging to figure out what kind of ceiling supports your garage has, so I wrote an article that makes it easier. It also lists the typical weight limits for each so you can be sure your garage hoist will be safe.
Garage Ceiling Hoist Alternatives
There are two possible solutions.
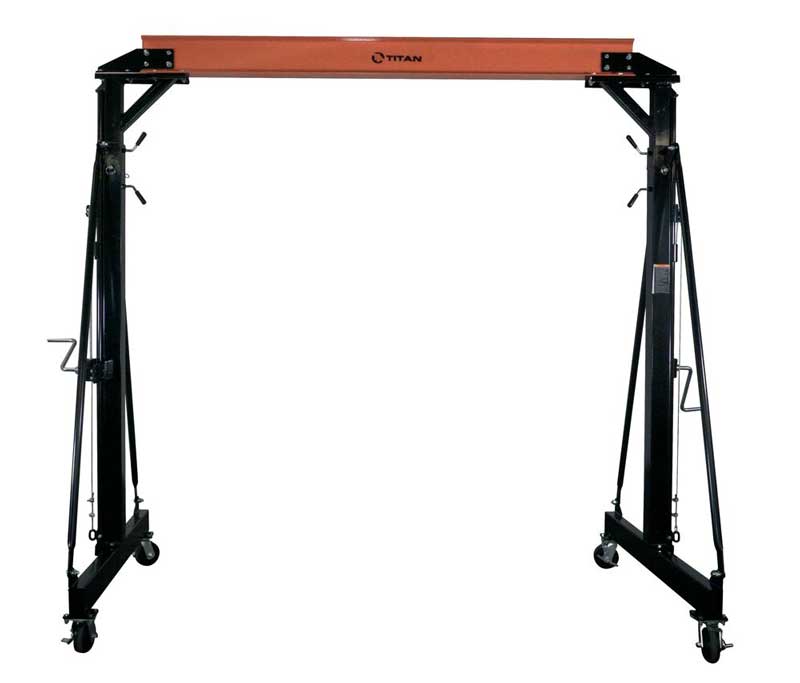
One potential solution is building a steel beam supported by separate columns – not part of the building’s structure. This can be an off-the-shelf gantry crane or a custom-built one, like you see here.
One solution is the Titan adjustable gantry crane. It has a 4000 lb. weight limit and is wide enough for most vehicles to fit in between.
That way, you won’t lose a parking space.
A gantry crane is my favorite option because you can take it with you if you ever decide to sell your house.
Another option is to skip the ceiling hoist and use a mobile hoist or hydraulic floor crane instead. They take up more space than a ceiling hoist, but a floor crane will work in any garage.

No matter what direction you go, if you plan on attaching a hoist to your garage ceiling, I strongly recommend having a civil engineer look at your house to ensure it’s safe.
Choosing the Right Garage Hoist
A ceiling hoist is the way to go if your ceiling can support it. Many inexpensive hoists are simple electric hoists that cost between $150 and $300.
Electric hoists use a controller and an electric motor to lower, lift, and decelerate or accelerate speed.
When choosing a garage hoist, consider the following:
- Load weight: This is the maximum weight you need to lift. Always estimate a little higher than you need to keep the motor from wearing out too quickly.
- Load movement: The distance the load can be raised and lowered – for example, 7 feet (84 inches).
- Lift speed: The speed with which the hoist lowers and lifts items. The industry standard for a load weighing 1/8th of a ton to 1 ton (907 kg) is 16 feet (192 inches) per minute. For a 2-ton load, the standard speed is 8 feet (96 inches) per minute.
- Number/frequency of lifts: The total number of lifts performed per job per hour.
- Chain length: The length of the chain from the floor to the mounting point. A 12-foot (144-inch) long chain is typical.

Hoists are classified according to their potential workload (source). For most residential garages, an H2 certification is sufficient.
| Service Classification | Maximum Start/Stops Per Hour | Typical Application Areas |
| H4 | 300 | High-volume handling (steel warehousing, fabricating plants, machine shops, etc.) |
| H3 | 150 | General handling (fabricating, storage and assembly, warehousing use, etc.) |
| H2 | 75 | Light handling (fabricating industries, machine shop, maintenance, and service work) |
How to Mount a Hoist to a Garage Ceiling
Once you choose the right ceiling hoist, it’s time to install it. This is designed to be a brief overview of the process.
The first thing is to gather the right tools and materials.
Materials and Tools
You will need the following materials to roll with your garage hoist project:
P.S. The materials and specifications below could vary based on the specific requirements of your project. The quantity might change, and/or the measurements could differ, but you would need them all, nonetheless.
- An electric hoist
- 1/2″ galvanized steel pipe
- Two 1-1/2” tee
- Four 1-1/2” floor flange
- Four 2”x4”96” studs
- Two plywood: 22”x45”x3/4” and 24”x48”x1/4”
- Four 3/8” eye bolts
- Four 48” long 3/8” chain
- Eight 3/8” quick links
- Two 7/16” quick links
- 12 3/8”x2-1/2” bolts with washers and nuts
- Various screws for the interior
When shopping for electric hoists, there are many different options, but only a little that sets them apart.
Measuring Things Up
You’ll need to know your garage’s measurements before gathering the required materials and tools. This includes measuring your garage’s floor joists and roof trusses.
A 36″ garter/beam (iron bar) would be fine for most roofs. If your roof is flatter, you might require a longer bar.
The metal beam helps bear the load, including the hoist’s weight and actual load.
It’s critical to ensure that your garage ceiling can support the weight of the hoist and whatever you will hang from it.
The “H” Frame
Once you have the measurements, you’re ready to cut. You may have to test how deep the threads would screw before becoming tight and adjust things as required.
Once done, you may compile the “H” frame and fit it in the truss.
If the floor flange is larger than the truss wood, rotate it so that the wood covers the mounting holes.
Make sure it’s leveled adequately before bolting it in place.
You’ll need at least one additional person to hold the frame in position while you make adjustments. Drill a hole and bolt in one of the four flanges. Drill and bolt in the remaining flanges in a similar manner.
Installing the Motor
You may install the hoist once the “H” frame is in position. Make sure the electric hoist is in the center of the frame.
After the installation, play the cable out until the hook touches the ceiling top.
Mark the point on the ceiling’s attic side since it’s the opening’s center and should be cut out.
Proper positioning of the electric hoist on the roof is imperative so the truss roof doesn’t come under excessive stress when lifting and lowering the load.
Most engineered trusses can manage loads of up to 180 kg (400 pounds), provided the weight is evenly distributed throughout the region where the hoist is attached.
The Platform
You can connect a small platform with the hoist cable using a series of simple chains.
This comprises a sequence of 2x4s covered with a 3/4″ piece of plywood. The bottom-positioned three cross members offer room for fastening the eye bolts and bringing the platform’s top on par with the floor joist’s bottom in the attic.
Also, the 1/4″ plywood skin is attached to them so the platform looks well-finished from underneath when stowed.
Turn the platform over and put in three 2x4s, each perpendicular to the initial six. Push the end ones inward by a few inches so that the eye bolt nut has room.
Next, drill a hole through the plywood in each corner. When installing the eye bolt, ensure it doesn’t hang over the platform’s edge or hit the opening upon raising the platform.
Finally, center the 1/4″ plywood on the platform’s bottom side and install it with screws.
The hoist is ready for a trial run once the platform is set up and the chains are attached to the eye bolts. Remember, the hoist is quite powerful.
If you want to know how the electric hoist chain works, watch this video for a basic overview.
Wrapping It Up
Putting a hoist in your garage is possible, but it may take some research.
If your garage ceiling can support the weight, an electric ceiling hoist is a great economical choice for most homeowners. If that’s not possible, the next best option is a gantry crane or an automotive engine crane. They take up more space, but they’re self-contained tools that won’t need any structural changes to your home.
Either way, adding a garage hoist is a great way to lift or store heavy items in your garage.


