

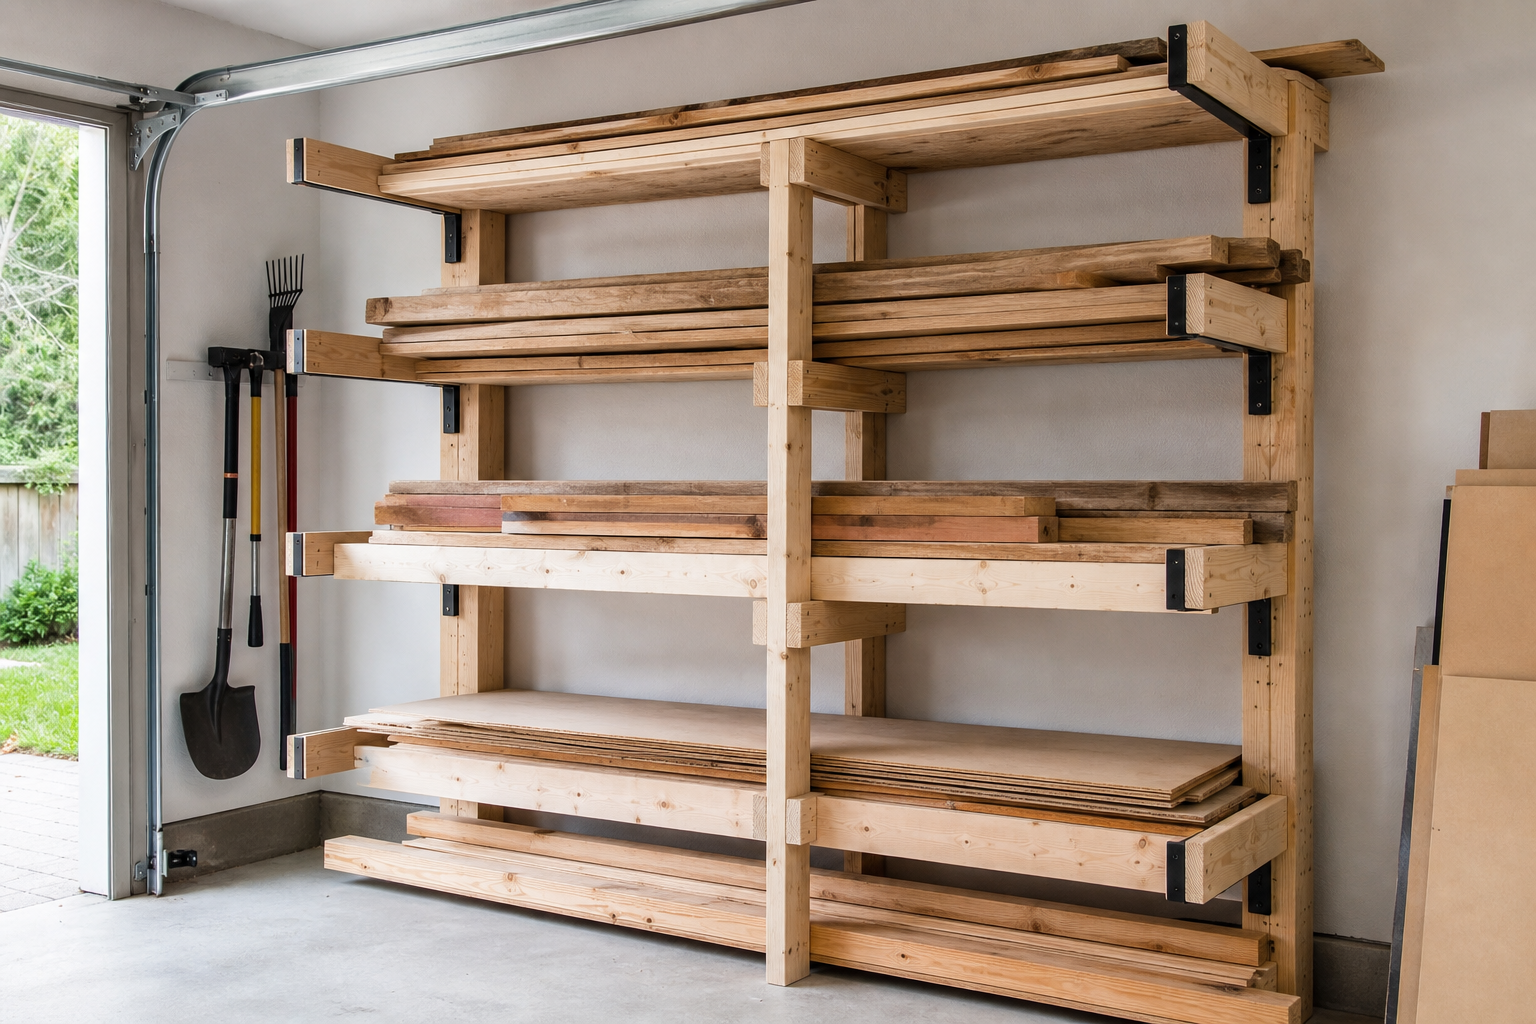
Taking on the project to build a lumber and material storage rack rewards careful planning and patience. Rushed work leads to results that need redoing within a year. A methodical approach delivers results that hold up for years.
This guide covers every stage from preparation to completion, with specific details on materials, tools, measurements, and techniques. Follow the sequence for the best outcome.
Understanding Storage Rack Fundamentals
Effective garage storage uses walls and ceiling as primary surfaces, keeping the floor clear for vehicles and work. Wall-mounted track systems, overhead ceiling racks, and sturdy cabinets provide organized access without eating into parking or workspace. For comprehensive overhead solutions, consider professional ceiling storage systems that maximize vertical space.
Lumber storage racks serve two main purposes: protecting your materials from warping and moisture damage, and keeping them accessible when you need them. A board left flat on a concrete floor can absorb moisture through direct contact, leading to cupping and twist.
Even in climate-controlled garages, concrete acts as a moisture wick during seasonal temperature swings common across the Midwest and northern climates. A proper workshop setup includes moisture control as a key element. If you’re dealing with floor issues, addressing concrete cracks before applying coatings prevents moisture from wicking up into stored materials.
Vertical storage maximizes wall space but requires sturdy mounting. Horizontal racks (the more common approach for lumber) need proper bracket spacing to prevent sagging over time.
The weight of dimensional lumber adds up fast. Ten 2x4x8s weigh around 130 pounds. Twenty 2x6x10s push 300 pounds. Your rack needs to handle not just current stock but whatever you’ll accumulate over the next project or two.
Wall-Mounted Horizontal Lumber Rack Design
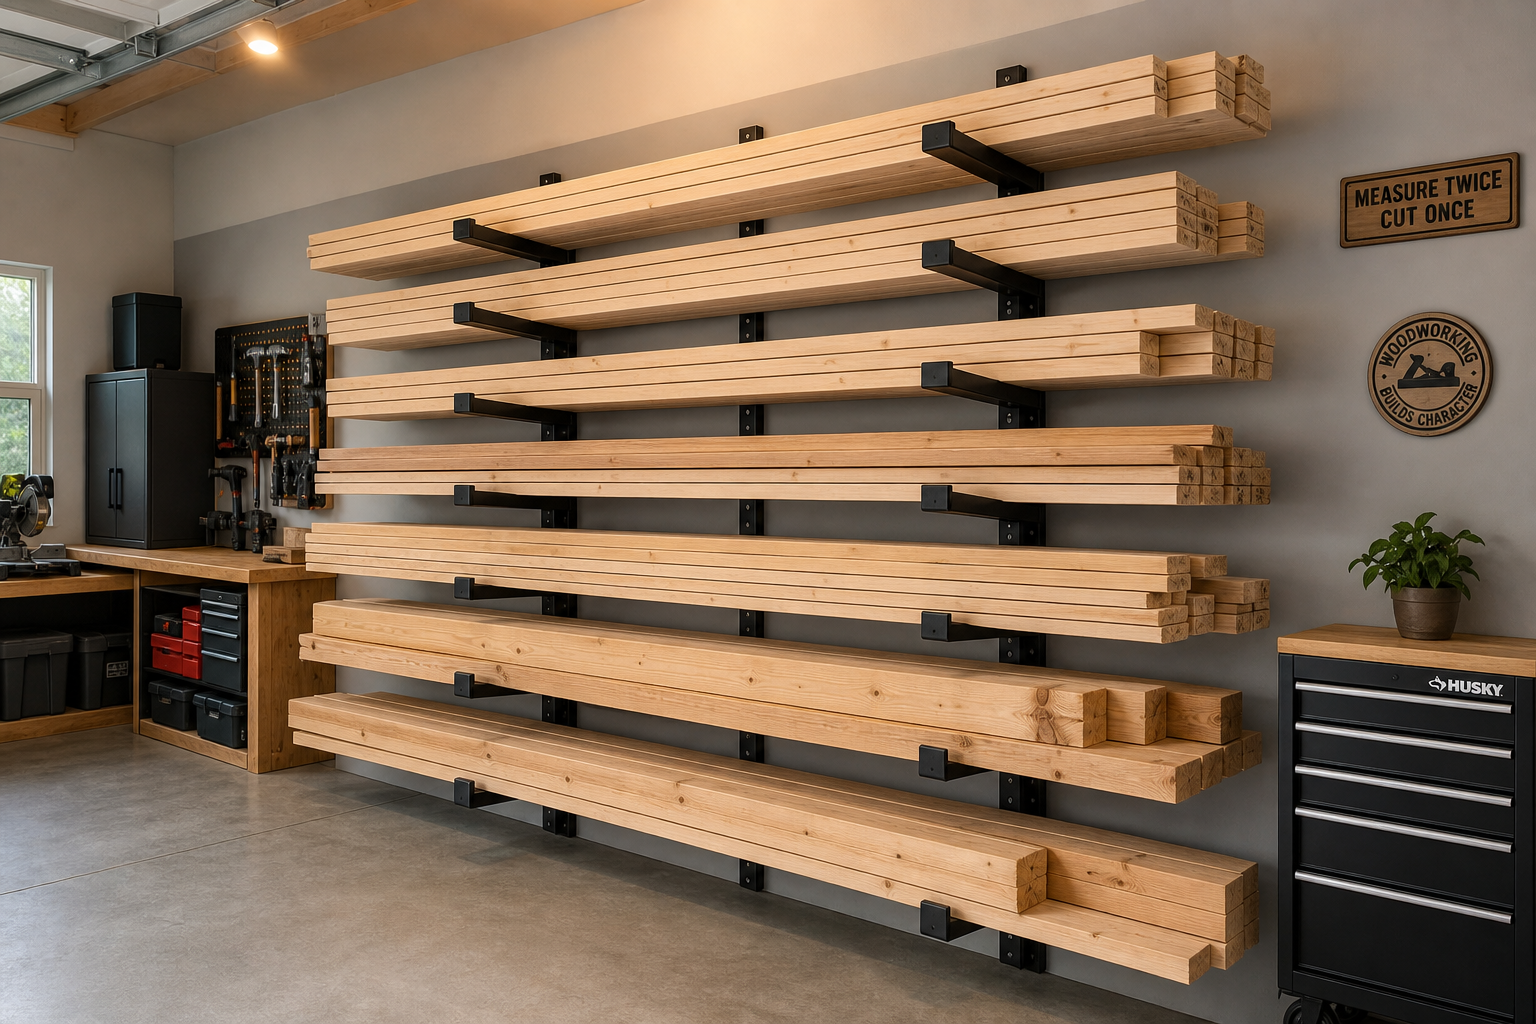
A horizontal rack holds boards flat and makes sorting through your stock easy. You pull what you need without moving everything else. This design mounts to wall studs and extends outward 16 to 24 inches, creating shelves for different stock lengths and thicknesses.
Materials for a Basic 8-Foot Rack
- Four 2x4x24-inch arms (the horizontal supports that hold lumber)
- Eight heavy-duty shelf brackets (rated for at least 150 pounds each)
- 3-inch lag screws or structural screws rated for the bracket weight
- Washers for lag screws
- Stud finder and level

Heavy Duty Shelf Brackets
Essential for supporting lumber weight safely on wall-mounted racks
Bracket spacing: Mount brackets every 2 feet along the wall for dimensional lumber (2x4s, 2x6s, 2x8s). For lighter trim and molding, you can stretch to 3-foot spacing. Closer spacing prevents sagging and distributes weight across more studs.
Height placement: Start the lowest rack at 24 to 30 inches off the floor so you’re not bending over to retrieve boards. Stack additional racks 18 to 24 inches apart vertically. Three or four racks fit comfortably on an 8-foot wall and separate your stock by length or type.
Attach each bracket to a stud with at least two fasteners. Wall studs typically sit 16 inches on center, though older garages sometimes use 24-inch spacing. Find the studs, mark them clearly, and plan your rack layout around actual stud locations rather than trying to force brackets where you want them.
Working with your garage’s existing structure beats fighting it. Cut the 2×4 arms to your desired depth. Eighteen inches works for most applications without protruding too far into the garage.
Mount the brackets level. Use a 4-foot level across multiple brackets to ensure they’re aligned horizontally. Boards will roll or slide off if the rack tilts. Once brackets are secure, rest the 2×4 arms on top and fasten them down with screws through pre-drilled holes.
Weight capacity reality check: Wall systems anchored into studs hold 50 to 75 pounds per linear foot. A single 2-foot section can manage around 100 to 150 pounds comfortably. Spread your heaviest stock across multiple sections rather than piling everything in one spot.
Vertical Plywood and Sheet Goods Rack
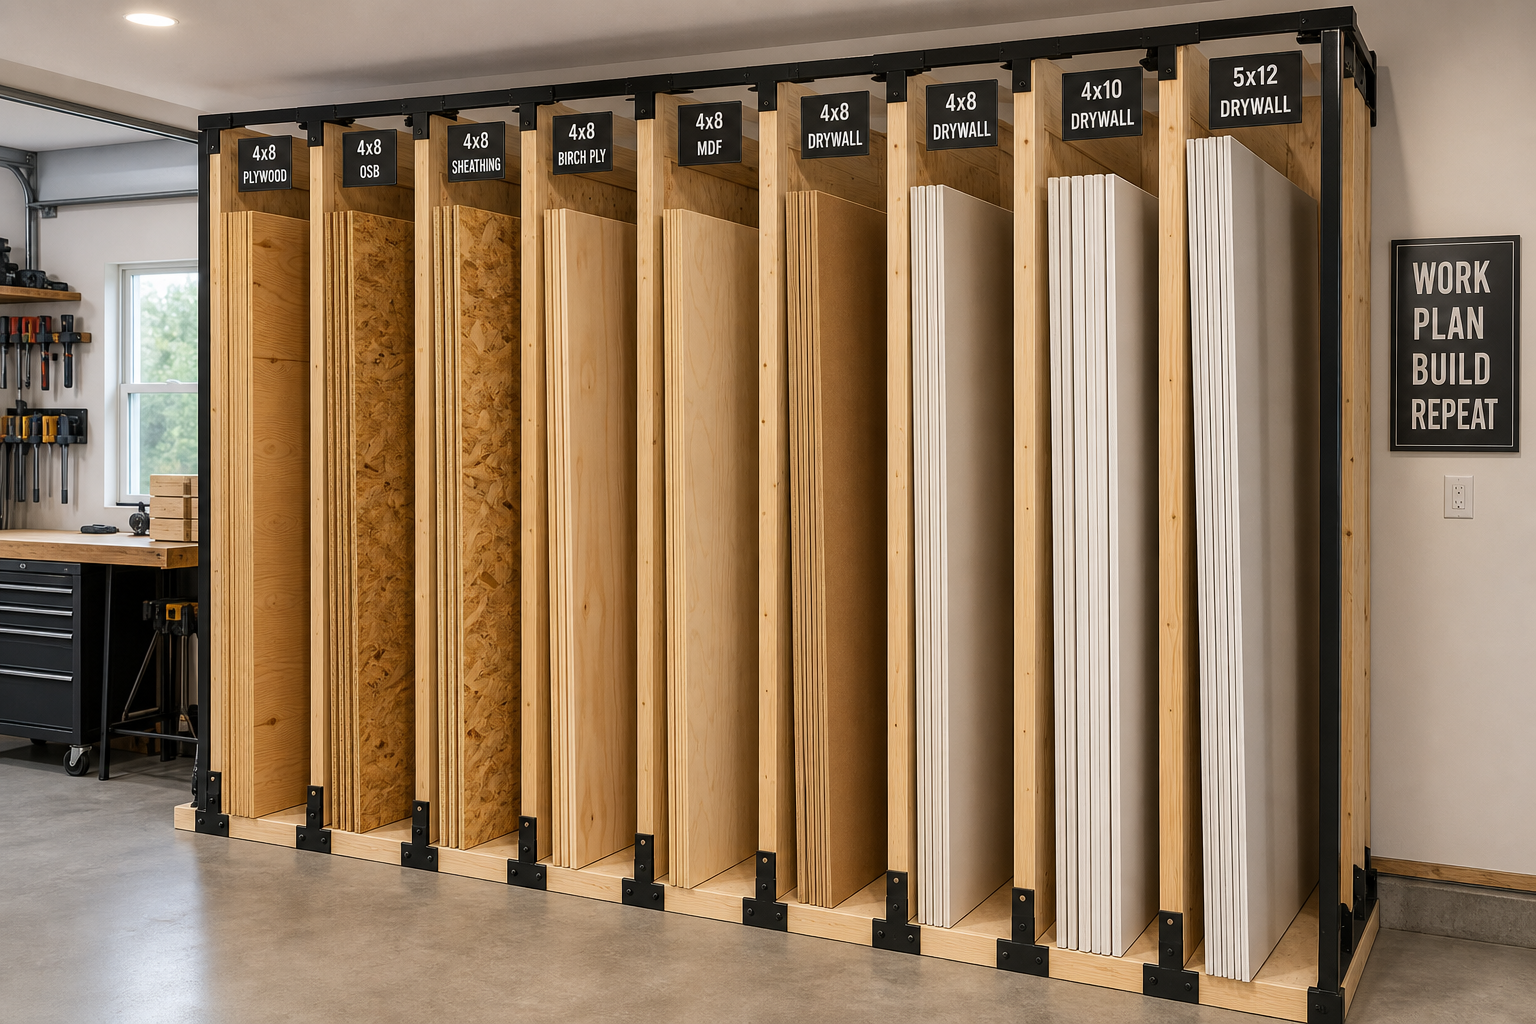
Sheet goods (plywood, MDF, drywall, paneling) need different storage than dimensional lumber. Standing sheets vertically prevents bowing and keeps them accessible without moving a whole stack. A vertical rack uses less floor space and makes it easier to pull a single sheet without wrestling the entire pile.
Basic Vertical Rack Design
Mount two or three vertical 2x4s to the wall studs, spaced 24 to 32 inches apart. These act as the frame. Add horizontal 2×4 stops at the bottom (to keep sheets from sliding forward) and angled braces or additional stops partway up to hold sheets at a slight backward lean.
Dimensions: A rack 4 feet wide accommodates full sheets. Height should reach at least 6 feet to support an 8-foot sheet without the top flopping over. For garages with 8-foot ceilings, run the rack to 7 feet and let the sheet tops lean safely against the wall.
Spacing from the wall: Build the rack 4 to 6 inches out from the wall. This gap gives you finger room to grab a sheet and prevents the bottom edge from scraping drywall or snagged on uneven concrete.
Vertical storage works best for partial sheets and materials you access regularly. Full 4×8 sheets of three-quarter-inch plywood weigh around 60 pounds each. Stacking ten sheets in a vertical rack creates 600 pounds of lateral force trying to tip the whole assembly forward.
Separate different materials with scrap 2×4 dividers placed vertically between sheets. This keeps plywood from leaning against drywall, MDF from rubbing on hardboard, and makes it faster to identify what you have in stock.
Overhead Ceiling Storage for Long Stock
Ceiling-mounted racks handle long, lightweight materials: PVC pipe, conduit, trim molding, and lighter lumber like furring strips. Overhead storage clears wall space for tools and workbenches while keeping materials out of the way until needed.
Ceiling joist mounting: Locate ceiling joists with a stud finder. Joists typically run perpendicular to the garage door, spaced 16 or 24 inches on center. Your overhead rack mounts across multiple joists for stability.
Bracket options: Heavy-duty shelf brackets mounted upside-down work for simple overhead racks. Brackets rated for 100 to 150 pounds each, spaced every 2 feet, create a stable platform. Alternatively, use metal ladder-style racks designed specifically for overhead garage storage.

Garage Ceiling Storage Racks
Specialized systems with safety features for overhead lumber storage
Safe weight limits: Ceiling racks rated for 600 pounds assume even distribution across the entire rack surface. Piling 400 pounds of material on one end creates uneven stress that can pull fasteners loose or crack drywall.
Keep overhead racks at least 6 inches below any garage door track hardware. When the door opens, it shouldn’t contact stored materials. Also consider working headroom. Racks mounted too low become a constant bump hazard when you’re moving around the garage.
Preventing Moisture Damage
Concrete floors wick moisture year-round, but the effect intensifies during temperature swings. Summer humidity condenses on cool concrete. Winter freeze-thaw cycles push groundwater up through the slab. Wood sitting directly on concrete absorbs that moisture and swells, warps, or develops mold.
Store all lumber at least 4 inches off the floor. Racks, sawhorses, or even scrap 2x4s laid perpendicular under your stack work. Airflow underneath dries the bottom surface and prevents trapped moisture.
In humid climates or uninsulated garages, leave space between stored boards for air circulation. Don’t pack lumber tightly. A half-inch gap between boards lets air move and prevents moisture from collecting between surfaces.
Avoid storing lumber against exterior walls during winter. The temperature differential between indoor and outdoor surfaces creates condensation on the wall, and your lumber absorbs it. Keep racks 6 to 12 inches away from exterior walls for better air circulation and temperature stability. While organizing your lumber storage, remember that hazardous materials like paint and chemicals require their own dedicated storage solutions away from wood materials.
Check stored lumber every few months. Look for dark stains (mold), cupping (edges curling up), or a sour smell (rot starting). Catching moisture problems early lets you move materials to a dryer spot before they’re ruined.
Material Selection and Cut List Planning
Plan your rack dimensions around the lumber you actually store. Build racks that handle 10-foot boards comfortably if you typically buy 8-foot and 10-foot stock. A rack that’s too short forces long boards to stick out awkwardly or get cut down just to fit.
Common Dimensional Lumber Weights
- 2x4x8: 13 pounds
- 2x6x10: 20 pounds
- 2x8x12: 37 pounds
- 2x10x12: 48 pounds
Use these figures to estimate total load and plan bracket spacing accordingly. Fifty 2x4s weigh over 600 pounds. Your studs and brackets need to handle it.
Purchase lumber for the rack itself from the same place you’ll store materials. Straight, dry boards make construction easier. Warped or twisted 2x4s create frustration when you’re trying to mount level brackets or join pieces square.
Step-by-Step Installation Process
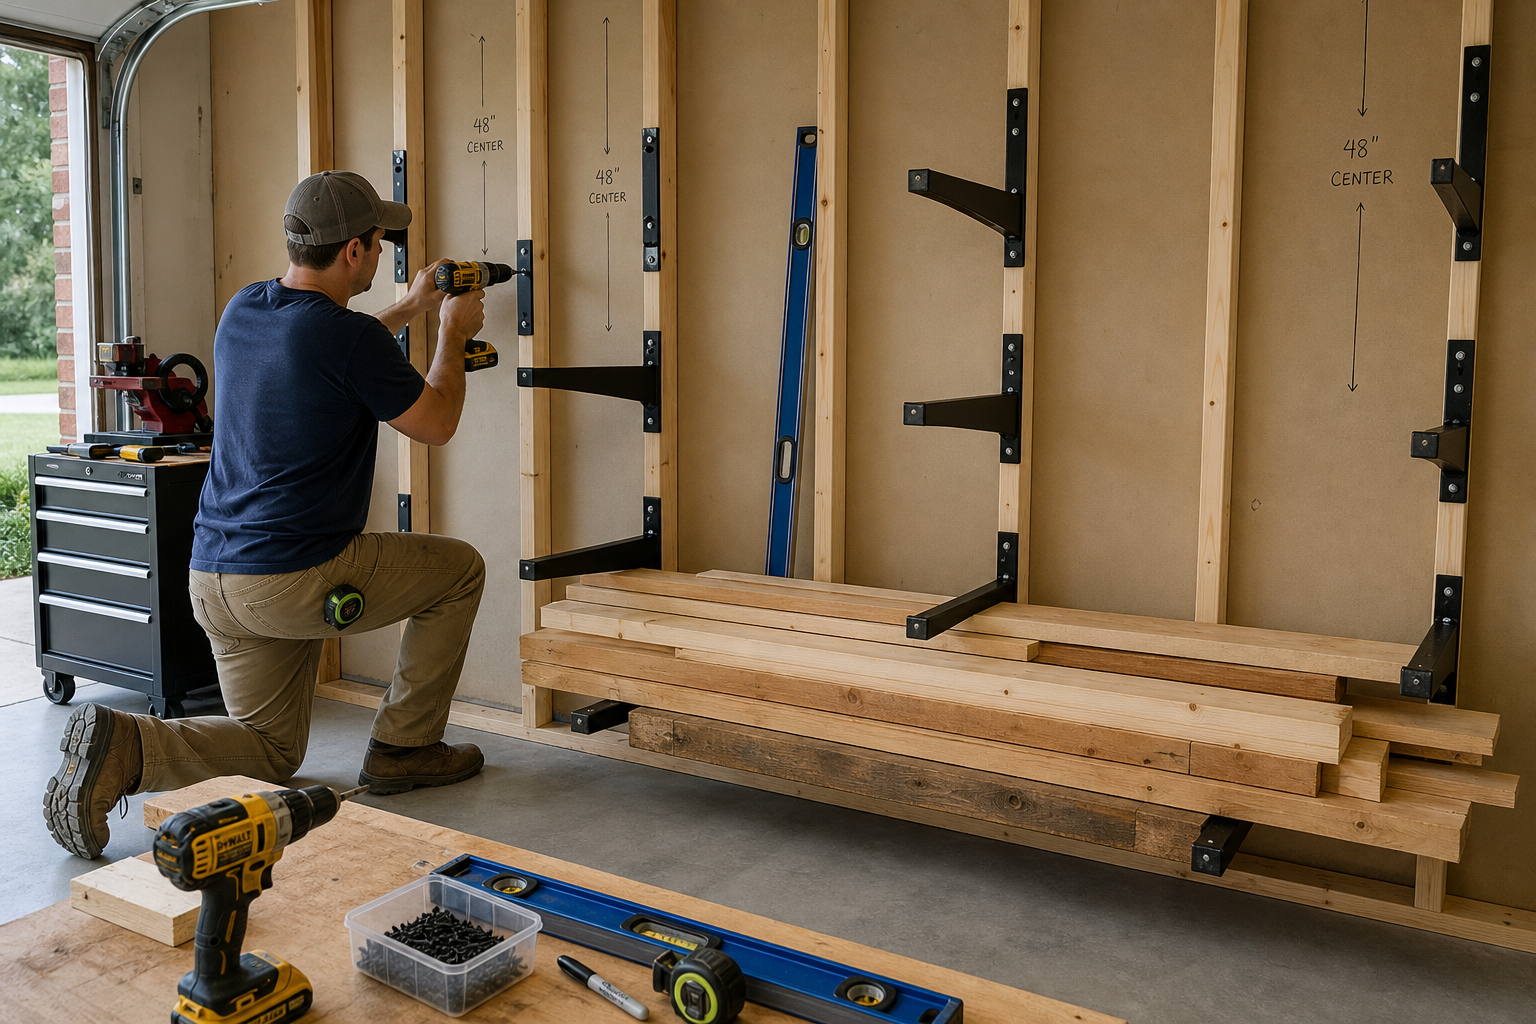
1. Locate and Mark Studs
Use a stud finder to locate every stud along your planned rack area. Mark each stud clearly with painter’s tape or pencil. Confirm stud location by drilling a small test hole or driving a finish nail through the drywall.
2. Mark Bracket Height
Measure up from the floor and mark your desired bracket height on the wall. Use a 4-foot level to extend this line horizontally across multiple studs. Every bracket on the same rack tier mounts to this line for a level result.
3. Install Brackets
Position the first bracket on a stud at your marked height. Drill pilot holes slightly smaller than your lag screws to prevent splitting. Drive screws through the bracket into the stud, checking level before fully tightening. Move to the next bracket position, align it with your horizontal line, and repeat.
4. Mount Horizontal Arms
Once all brackets are secure, position your 2×4 arms across the brackets. Pre-drill holes through the arms where they’ll contact brackets, then screw the arms down firmly. The arms should sit flat and stable without rocking.
5. Load Test
Before stacking your entire lumber supply, load the rack with a representative amount of weight and observe how it handles the stress. Look for any sagging, bracket movement, or screws backing out. Adjust fasteners or add additional brackets if needed.
6. Organize by Type and Length
Place your longest
