

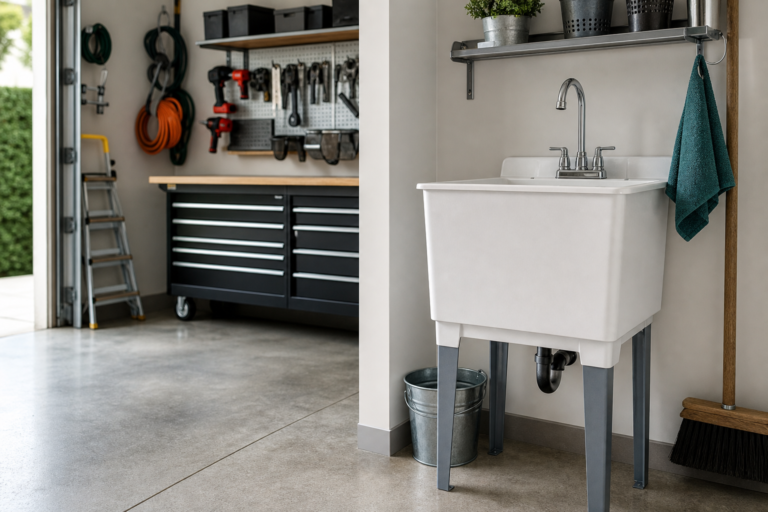
Deciding to add a utility sink to your garage is a smart upgrade that most homeowners can handle over a weekend. A properly installed sink transforms your garage into a true multi-purpose space, whether you’re cleaning paint brushes, washing muddy boots, rinsing shop rags, or prepping vegetables from the garden before bringing them inside. The details that seem minor during the process determine long-term quality.
Here’s the complete process organized into manageable steps. Read through it entirely first, then work section by section.
Understanding the Basics
Before you start cutting into walls or running new plumbing, you need to understand what you’re working with. Most garages weren’t built with plumbing in mind, which means you’re adding infrastructure that requires some planning.
The first decision is location. Your sink needs to connect to existing water supply lines and drain into a functional drainage system. The closer you position the sink to existing plumbing (typically where the house connects to municipal water), the simpler and cheaper the installation becomes. Every additional foot of pipe run adds cost and potential failure points.
Check your garage’s construction type. Slab-on-grade foundations require different approaches than garages with crawl spaces or basements underneath. With a slab, you’re likely cutting into concrete or routing pipes along walls and ceilings. With accessible space below, you can drop drain lines through the floor and tap into existing supply lines from underneath.
Local building codes dictate specific requirements for drain slope, vent placement, pipe sizing, and backflow prevention. Most jurisdictions require permits for new plumbing installations, and inspections ensure your work meets minimum standards. Working without required permits creates liability issues, complicates insurance claims if something goes wrong, and causes problems when selling the home.
Temperature matters more than you’d expect. If your garage isn’t heated, water lines can freeze in winter. You’ll need frost-proof fixtures, insulated pipes in exterior walls, or heat tape on vulnerable runs. A burst pipe in February costs far more than doing it right the first time.
Planning Drainage and Water Connections
The drainage side of the equation determines much of your layout. Drain lines require consistent downward slope, typically one-quarter inch per foot of horizontal run, to move wastewater without backup. If your garage floor slopes toward the driveway (as most do for drainage), you might be fighting gravity depending on where you want the sink versus where the main drain line sits.
You have three main drainage options. Connecting to the house’s existing drain system is cleanest but requires routing pipe through walls or under the slab. Installing a gray water system with a dedicated drain to the yard works in some jurisdictions but check local codes first, many areas prohibit this. Using a condensate pump creates a miniature sewage ejector system that pumps wastewater upward to reach a higher drain line, useful when gravity won’t cooperate.
Water supply is usually simpler than drainage. You’re tapping into existing hot and cold lines, running new copper or PEX to your sink location, and installing shutoff valves. PEX is easier for DIYers, it’s flexible, requires fewer fittings, and doesn’t need soldering. Use SharkBite or similar push-to-connect fittings if you’re not confident with crimping tools or expansion connections.
Plan for shutoffs at the sink location, not just at the main connection point. When a faucet develops a leak three years from now, you want to isolate just the sink rather than shutting off water to the entire garage or house.
Consider your water pressure. If you’re at the end of a long pipe run from the main supply, pressure drops. Low pressure makes filling buckets tedious and reduces cleaning effectiveness. Calculate the total pipe length and elevation change. If you’re running 60 feet of half-inch line with multiple elbows, you might need three-quarter-inch supply pipes to maintain adequate flow.
Choosing Between Wall-Mount and Freestanding Sinks
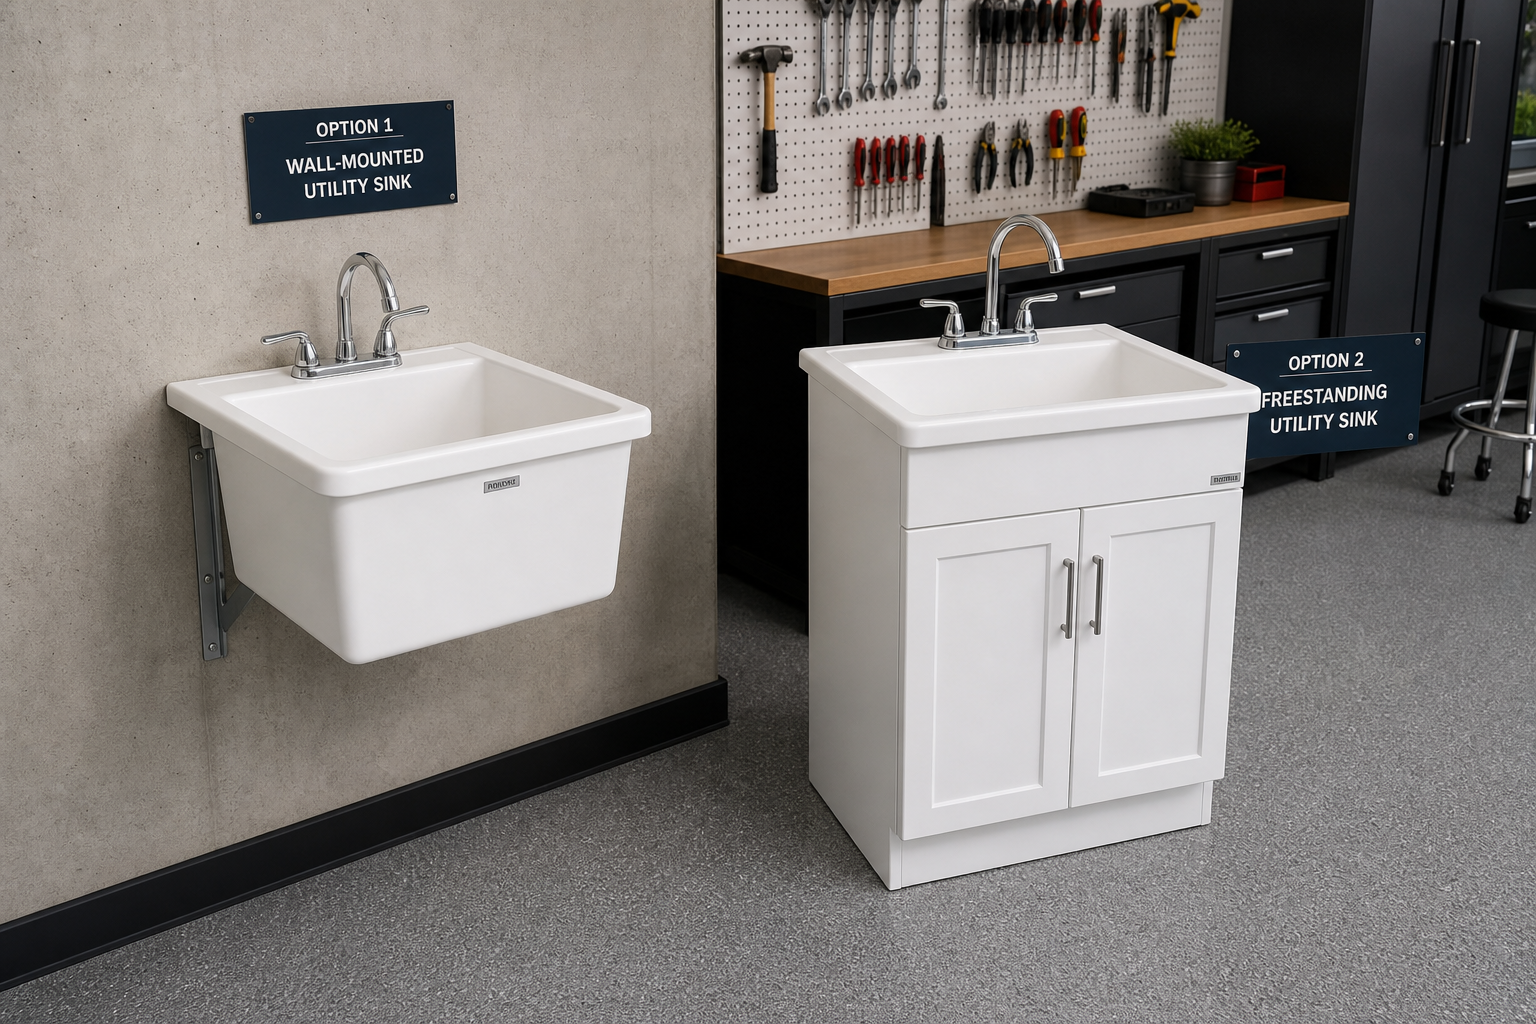
Wall-mount utility sinks bolt directly to wall studs with the drain and supply lines concealed in the wall cavity. They save floor space, make sweeping underneath easier, and create a clean look. The tradeoff is more intensive installation, you’re opening walls, running pipes inside cavities, and patching drywall afterward. Wall-mount models also require solid backing. Standard studs alone won’t support the combined weight of a cast-iron or composite sink filled with water and whatever you’re washing. Add horizontal blocking between studs or mount a plywood backer board to distribute load.
Freestanding utility sinks sit on legs or a cabinet base with exposed plumbing. Installation is simpler since you’re not opening walls. Surface-mounted supply lines and P-traps are easier to modify later. The floor space underneath is usable for storage if you choose a cabinet-base model. They look more utilitarian, which fits most garage aesthetics fine.
Laundry-style sinks with built-in cabinets are popular for garages. The cabinet base provides storage for cleaning supplies, and the deep basin handles large items. Most come as complete units, just connect water and drainage.

Utility Sink with Cabinet
Complete units that include storage and deep basins perfect for garage use
Stainless steel sinks are durable, lightweight, and resist chemicals. They dent if you drop heavy tools in them but don’t crack like cast iron or composite materials. Budget models develop thin spots where the stamping stretches the metal too thin. Look for 18-gauge or thicker steel.
Composite or polypropylene sinks handle abuse well. They’re chemical-resistant, won’t rust, and repair easily if scratched. The thick walls insulate against noise better than metal.
Cast-iron sinks with porcelain coating are nearly indestructible and easy to clean, but heavy, 60 to 100 pounds before you add water. You need very solid mounting or cabinet support. They chip if you drop wrenches on them, and the exposed iron rusts.
Splash-Resistant Finishes and Surrounding Surfaces
A utility sink generates splash and overspray. What’s behind and beside the sink matters for long-term maintenance and appearance.
Tile backsplashes are the gold standard, waterproof, cleanable, and damage-resistant. Use ceramic or porcelain rated for wet areas. Standard drywall mud and paint deteriorate quickly from repeated moisture exposure. If you’re going the tile route, cement board backing is the proper substrate. It won’t rot or disintegrate when wet.
Beadboard panels provide a classic utility-room look and cost less than tile. Use PVC or vinyl beadboard, not wood or MDF versions that swell and rot. Install over moisture-resistant drywall and caulk all seams.
FRP (fiberglass reinforced plastic) panels are commercial-grade wall covering used in restaurant kitchens and car washes. They’re nearly indestructible, completely waterproof, and clean with a rag. The textured surface hides minor scratches. You glue them directly to drywall with panel adhesive and cap edges with aluminum trim.
Semi-gloss or high-gloss paint over moisture-resistant drywall works if splash will be minimal. Use bathroom-rated paint with mildew inhibitors. Expect to repaint every few years as moisture and cleaning chemicals degrade the finish. If you’re planning broader garage improvements, consider painting the walls and ceiling for a cohesive look throughout the space.
The floor around the sink sees spills, drips, and standing water. If you haven’t upgraded your garage floor yet, at minimum use concrete sealer or epoxy in the sink area. A rubber mat provides cushioning and protects the floor but needs periodic cleaning to prevent mildew growth underneath.
Step-by-Step Installation Process
Start by mapping your route from water supply to sink location and from sink drain to the main drainage system. Measure twice. Sketch it out. Calculate total pipe needed plus 20% for mistakes and adjustments. Buy everything in one trip if possible, mixing pipe brands and fitting types mid-project creates compatibility headaches.
Shut off water at the main. Drain the system by opening a hose bib or lower faucet. Cut into supply lines at your planned connection point using a pipe cutter for clean edges. Deburr the cut ends. Install a tee fitting on both hot and cold lines with shutoff valves on each branch.
Run supply lines to the sink location. Support horizontal runs every 32 inches for copper, every 3 feet for PEX. Don’t pull PEX tight around corners, gentle bends reduce stress and flow restriction. Leave extra length at the sink end for final positioning adjustments.
For drainage, the P-trap must sit below the sink tailpiece with proper slope on the drain line leading away. Most codes require the drain line to vent within a specific distance of the trap, usually 3.5 to 6 feet depending on pipe diameter. Without proper venting, the trap siphons dry and sewer gases enter the garage. If you can’t connect to an existing vent stack, you might need an air admittance valve (AAV) that lets air into the system without running a vent pipe through the roof. Check local code, some jurisdictions don’t allow AAVs.
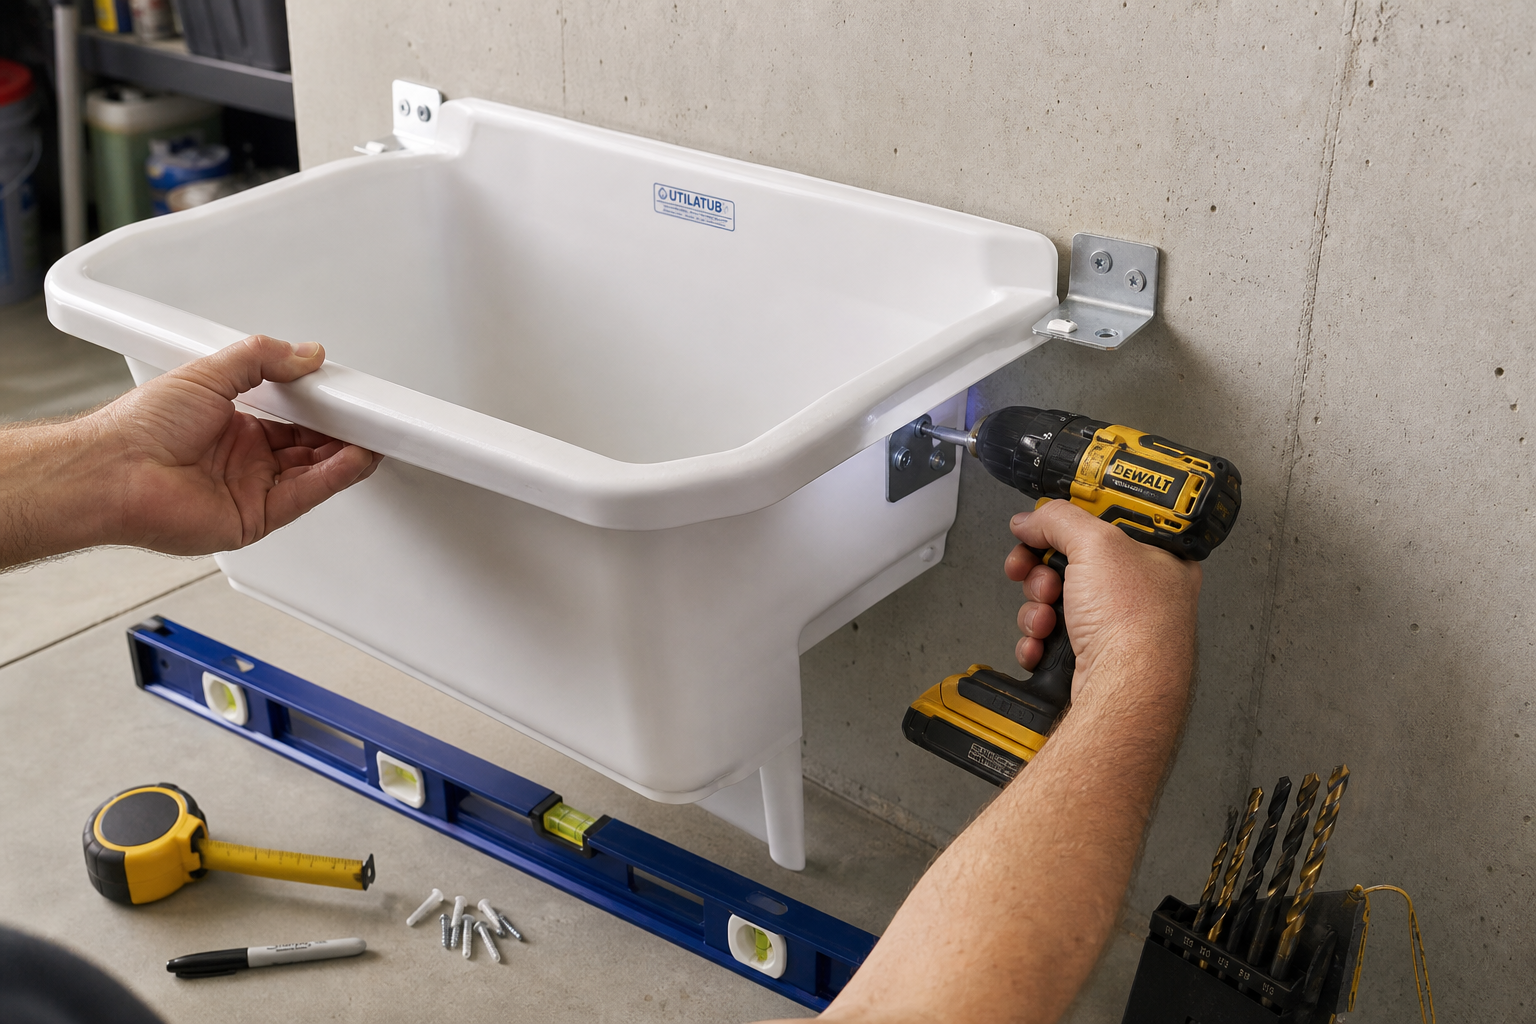
Mount the sink according to manufacturer instructions. Wall-mount units need lag bolts into studs or blocking. Cabinet-base models assemble per included directions. Level is critical, a sink that pitches wrong drains poorly and looks crooked.
Connect supply lines to the faucet. Most utility sinks use standard faucet connections, hot on the left, cold on the right. Thread carefully by hand first, then tighten with a wrench. Over-tightening cracks fittings.
Assemble the P-trap and connect the tailpiece to the trap, then the trap to the drain line. Hand-tighten slip nuts, then give them a quarter turn with slip-joint pliers. Over-tightening crushes the washers and causes leaks.
Turn water back on slowly. Check every connection for leaks. A few drips are common, tighten slightly and recheck. Run water full force for several minutes. Fill the sink and release it to test drainage flow and check for leaks under pressure.
Practical Planning Tips
Before starting any garage project, take stock of what you have and what you need. Walk the space with a tape measure and a notepad. Record dimensions, note existing electrical outlets and their amperage, check for moisture issues, and photograph anything you want to change. This baseline assessment prevents surprises mid-project and helps you budget materials accurately.
Prioritize your projects based on impact and urgency. Safety issues (faulty wiring, structural problems, gas leaks) come first. Functional improvements (plumbing, adequate lighting, climate control) come second. Cosmetic upgrades (floor coatings, paint, organization systems) come last. Following this order ensures you’re building each improvement on a solid foundation.
Consider the seasonal timing of your project. Plumbing work can happen year-round but wrapping up before hard freezes hit prevents complications from frozen pipes during installation. If you’re also upgrading flooring or wall finishes around the sink, complete the plumbing first so you’re not cutting into fresh finishes later.
Budget for unexpected complications. Opening walls reveals old wiring that’s not up to code, supply lines that are corroded and should be replaced, or drain lines that aren’t vented properly. Keep 25% of your project budget in reserve for these discoveries.
For workspace preparation, a proper garage workshop setup makes this type of project much easier. Check our detailed guide on garage workshop ideas for complete planning advice. If you’re working on a comprehensive garage transformation, having an effective organization system with slatwall and pegboards keeps tools and supplies accessible during installation.
Common Installation Mistakes to Avoid
Undersizing drain pipes creates slow drainage and frequent clogs. A utility sink needs a minimum 1.5-inch drain, but 2-inch is better if you’ll be dumping mop buckets or washing large items. The extra diameter costs little but prevents years of frustration.
Forgetting vent requirements causes gurgling drains and siphoned traps. Every plumbing fixture needs venting. If you can’t tie into existing vents, install an AAV where permitted or run a new vent through the roof.
Using the wrong pipe materials in unheated garages leads to freeze damage. CPVC becomes brittle in freezing temperatures. Standard PEX works to about 20 degrees below freezing but expansion PEX (PEX-A) handles colder temps better. Copper is fine but needs insulation or heat tape in exterior walls.
Skipping shutoff valves at the sink means shutting off water to the whole house when something needs repair. Install quarter-turn ball valves on both supply lines at the sink. They’re cheap insurance.
Poor slope on drain lines creates standing water that smells and clogs. Check slope with a level as you install. One-quarter inch per foot is minimum. More slope is fine.
Weak mounting causes sinks to pull away from walls or crack at mounting points. Use proper backing, not just drywall anchors. A utility sink with 20 gallons of water weighs over 200 pounds before you add whatever you’re washing. If your garage door has been making noise from heavy use during the project, addressing
