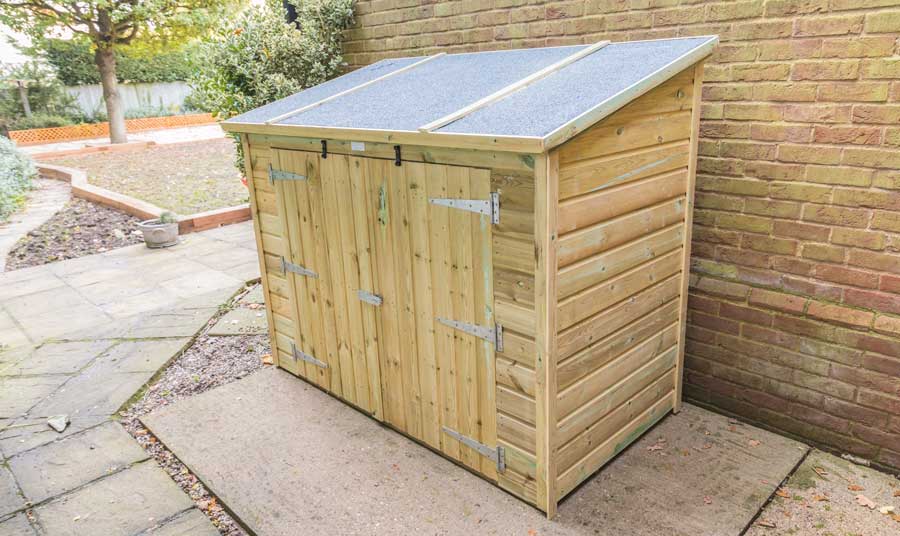
If you’ve ever looked at your garage and thought it could use a little extra space for your tools or gardening gear, a lean-to shed attached to a garage might be the perfect solution.
But, before you grab that hammer, let’s cover some basics. In this article, we’ll discuss the intricacies of design to what you need to know about local building codes. By the end of this guide, you’ll have everything you need to know to add a lead-to shed to your garage.
Let’s dive in!
Understanding the Lean-To Shed Design
A lean-to-shed has a simple design, making it a versatile choice for homeowners like you. It comprises a four-walled structure with a gentle slope instead of a flat top.
Depending on your garage’s design, this slope can go in multiple directions, either side to side, front to back, or back to front.
At its core, a lean-to-shed includes a low-pitched roof, which ensures easy drainage, adds durability, and simplifies installation.
If you live in an area with heavy rainfall, the roof’s slope can direct water and snow away from your home. Metal flashing can seal off potential water paths where the shed’s roof meets your garage.

Whether you’re looking to store a few gardening tools or need more space for larger equipment like a lawn tractor, a lean-to shed can be built in various sizes to accommodate anything you want.
That customization extends to the rest of the design as well. From materials and colors to finishes, doors, and windows, you can build a lean-to-shed that’s custom-designed to your taste.
Building a lean-to-shed is much more cost-effective than building a pole or framed garage. You can save even more by attaching the shed to your existing garage walls. Not only is this less expensive, but it gains added stability thanks to the support from your garage.
Design Upgrades for Your Lean-To Shed
While lean-to sheds are practical, some people find their simple design too plain or utilitarian. However, with the right touches, your shed can go from purely functional to a stylish extension of your home.
Here’s how you can improve its appearance.
Custom trim, especially around the doors and windows, can dramatically change the shed’s look, providing contrast and visual interest.
If you prefer that your shed blends seamlessly with your house, you could opt for matching siding instead. This helps create a unified look with the main structure.
Don’t forget about landscaping! A well-thought-out garden or a simple path can enhance the overall curb appeal and make a smooth transition from your home to the shed.
Once you’ve got the structure and exterior touches down, it’s time to look at colors and finishes.
Depending on your taste, a vibrant hue can add a pop of personality, or a subdued tone can offer understated elegance. But remember, the choice should resonate with the existing color scheme of your home and garage.
If paint’s not your thing, try the rustic charm of staining, the glossy allure of varnishing, or the vintage feel of whitewashing. No matter what you choose, you can select the texture and appearance of your shed’s wood surface.
Finally, you’ll want to add weatherproofing protection against rain, sun, and snow.
Products like sealants, primers, or protective paints offer dual benefits: they enhance your shed’s look while safeguarding it from UV rays, pesky insects, and unsightly stains.
Choosing the Right Location for Your Lean-to-Shed
The perfect lean-to-shed isn’t just about the shed itself. Its location is a crucial element that can significantly affect its utility, durability, and appearance.
Let’s walk through some key considerations when determining the ideal spot:
- Flatness: Before you start building, you need a solid foundation, literally and figuratively. Always choose a level and stable site. This minimizes potential structural issues and makes the building process smoother.
- Drainage: We’ve all seen that annoying puddle that never disappears. Standing water will eventually cause structural issues if it happens right beside your shed. Always select a well-drained location for your lean-to-shed. Avoid low-lying areas where water accumulates, or you might have to deal with more than just a puddle.
- Utility Accessibility: Plan ahead for things like electricity, water, or gas connections. Run those connections before laying your shed’s foundation to make things easier. That’ll save a lot of hassle later.
When choosing a roof orientation, try to keep your lean-to shed’s roof peak parallel to the peak of your home or garage.
This simple alignment will help a person’s eye flow seamlessly from one structure to another, enhancing that coveted curb appeal.
However, suppose your existing roof has a different pitch or orientation. You can still keep things cohesive by matching elements like siding, trim, or paint color. It’s all about finding ways to weave a visual narrative that ties the two structures together.
Choosing the Right Foundations for Lean-To Sheds
Deciding on a foundation for your lean-to-shed is a significant step in the building process. After all, a stable foundation determines not only the durability of your shed but also its longevity.
Concrete Slabs: Concrete slabs provide a durable and stable base that can easily shoulder heavy loads, and they’re the best line of defense against moisture and pests.
If your home or another structure has a concrete foundation, a slab for your shed will blend seamlessly.
That strength often comes with a cost. Concrete slabs need more labor, materials, and expertise to lay down. They also require a level, well-drained site.
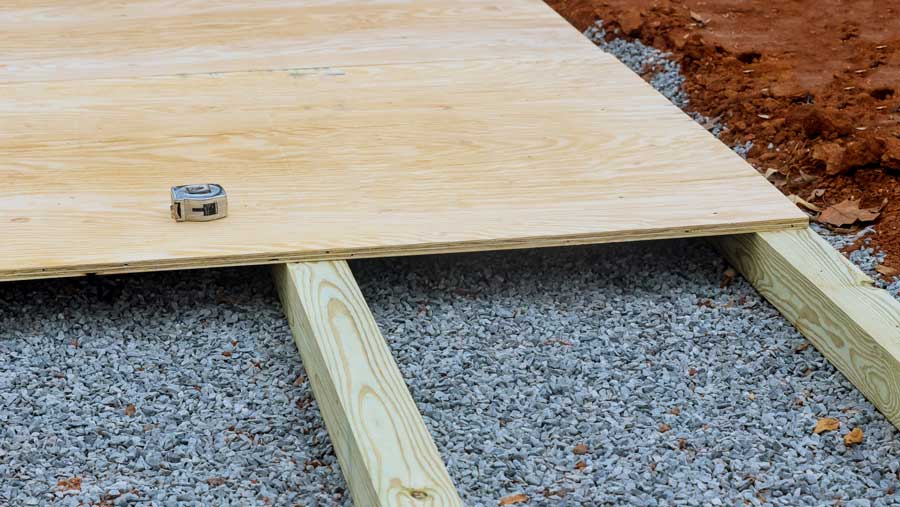
Wood Flooring Structures: Wood flooring structures can be constructed atop gravel, concrete blocks, or footings, making them extremely versatile. They’re a perfect match for lean-to sheds that will be attached to wooden foundation structures.
That said, while they might be cheaper to install than a concrete slab, wood typically requires more maintenance and protection against the elements and pests.
How to Lay Down a Lean-To Shed Foundation
For Concrete Slabs:
- Mark your shed’s outline using stakes and string.
- Excavate the marked area to about 6 inches deep.
- Firmly compact the soil, then layer it with gravel.
- Erect a wooden form around the shed’s boundary using 2×4 lumber.
- Strengthen the structure with rebar or wire mesh for added durability.
- Pour your mixed concrete in, ensuring it’s even with a trowel or screed board.
- After pouring, grant the concrete a minimum of 24 hours to fully cure. Only then should you take away the form.

For Wood Flooring Structures:
- Outline your shed’s footprint with stakes and string.
- Dig out your marked spot to a depth of roughly 4 inches.
- Following soil compaction, overlay with a gravel layer.
- Position concrete blocks or footings at every shed corner and at consistent intervals on the sides.
- Construct a wooden frame using 2×6 lumber atop these blocks or footings.
- Fasten floor joists across this frame employing galvanized screws or nails.
- Finish by affixing plywood sheets over the joists, securing them in place.
No matter which foundation you choose, a level foundation guarantees stability and helps prevent structural complications. Gravel bedding is your foundation of choice for ventilation and drainage, protecting against moisture-induced damage or mold.
Finally, anchoring bolsters the foundation, ensuring it remains upright during extreme winds or shifting soil.
Building Codes for a Shed Attached to a Garage
When you think about creating that perfect lean-to shed, there’s more to consider than just the design and materials. One crucial aspect, often overlooked by homeowners, is the need to align with local building codes.
Most residential projects will require pulling a permit with your local building office. That ensures the project will be completed safely and (hopefully) by a quality contractor.
Adhering to local building codes ensures your lean-to shed is:
- Safe for use: These codes are designed to mitigate risks, keeping you and your family secure.
- Legally sound: Complying saves you from the potential headache of fines or demolishing a shed built without necessary permissions.
- Respecting community standards: It ensures your shed isn’t an eyesore or hazard for your neighbors.
Some homeowners think they’re in the clear if they build their lean-to shed on temporary foundations like gravel or concrete pads.
However, it’s not always that simple.
Factors like the shed’s size, height, and location might fly under the building codes’ radar, especially if attaching it to a permanent structure. In those scenarios, permits are typically non-negotiable.
Setback requirements are another aspect of local regulations. They dictate how far your shed should be from property lines, existing structures, or easements.
So, what’s the best way forward?
- Consult Local Building Departments: Before you dive into your shed project, take a moment to consult your local building department. They can provide you with the specific codes and regulations relevant to your area.
- Permits are Crucial: If they say you need a permit, get it. Starting your project without the necessary permissions can lead to a lot of unwarranted stress down the line.
- Be a Good Neighbor: Always consider your neighbors. If your shed might affect their space or views, it’s not just about regulations but also about maintaining good relations. After all, they’re a part of your community.
While building your lean-to shed can be an exciting endeavor, always ensure you’re on the right side of the law and community standards. It will make the journey smoother and the results more satisfying.
Wrapping It Up
Building a lean-to-shed project can be exciting and enhance your property’s storage capabilities and aesthetics.
Remember, it’s not just about selecting the right design or materials. You must also choose the proper foundation and location while ensuring you comply with local building codes.
