Have you taken a close look at your garage floor lately?
If you’re fed up with stained, cracked concrete or considering a full garage makeover, upgrading to one of the best garage floor coatings can make a huge difference.
In this article, we’ve done the legwork for you.
We’ve thoroughly analyzed various garage floor coatings, considering factors like durability, application, cost, maintenance, and expected lifespan.
Spoiler alert: Not all garage floor coatings are equal. Most garage makeover companies will (obviously) try to push you towards a floor coating they sell.
After everything was said and done, we were surprised by the product we ranked as the best garage floor coating.
Keep reading and find out.
TLDR: We ranked Polyaspartic and Polycuramine as the best garage floor coatings, followed closely by High-Solids Epoxy.
Table of Contents
Explaining How We Ranked the Best Garage Floor Coatings
To provide an in-depth ranking of different garage floor coatings, we considered five crucial factors:
- Durability
- Application
- Price
- Maintenance
- Expected Lifespan
Below, you’ll find a brief explanation of each metric.
- Durability: A durable garage floor coating helps it withstand high traffic, heavy loads, and impacts. We assessed durability by considering resistance to wear and tear, chemical resistance (since garages often encounter spills of oil, gas, and other chemicals), abrasion resistance (important for garages with heavy tools or machinery frequently moving across the floor), and UV resistance (preventing the floor color from fading in well-lit garages).
- Application: This considers how easy the product is to apply. Key factors include drying and curing time, and adhesion. A high-quality garage floor coating should strongly adhere to the concrete to prevent peeling and lifting.
- Price: We evaluated the price by looking at both the material cost and installation expenses if you needed to hire a professional.
- Maintenance: A coating’s long-term maintenance needs can significantly impact its overall value. Some coatings may require re-application or special cleaning methods, so we’ve considered this in our rankings.
- Expected Lifespan: This is how long a coating typically lasts under real-world conditions. It takes into account regular wear and tear, occasional chemical spills, and routine cleaning. This data comes from product reviews and professional installers’ experiences.
The Overall Score is an average of all five metrics.
With these factors, we’ve aimed to provide a well-rounded perspective on each coating’s performance. This will help you to make an informed decision about the best floor coating for your garage.

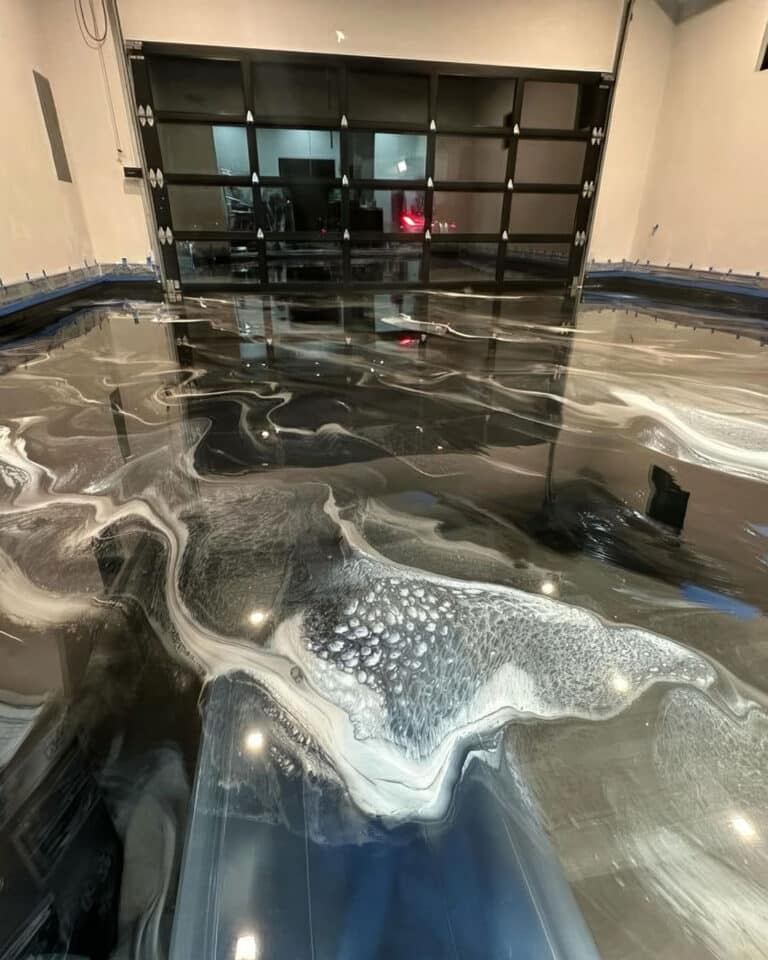
Polyaspartic Coatings
Looking for a garage floor coating that provides both durability and aesthetic appeal?
Look no further than polyaspartic coatings. These enhanced polyurea coatings offer high durability, UV stability, and chemical resistance.
This makes them a popular choice for decorative and high-performance applications.
Polyaspartic is the best garage floor coating for garages that need to withstand harsh conditions and heavy traffic while still looking good.
They resist hot tire marks, oil spills, salt, and abrasion while retaining their shine and color, even when exposed to sunlight or extreme temperatures.
You can customize polyaspartic coatings with various colors, flakes, or quartz to create a unique and eye-catching look for your garage floor.
However, there are some drawbacks that you should consider:
Polyaspartic coatings are pricier than alternatives like epoxy or acrylic. Also, they require more skill and experience to apply correctly due to their short pot life and fast cure time.
Improper application can lead to bubbles, fisheyes, or uneven thickness. Proper surface preparation is essential to ensure good adhesion and prevent peeling or cracking.
Polyaspartic coatings come in with a score of 7.5, which makes them the best garage floor coating on this list. You can’t go wrong here.
See our full guide to Polyaspartic floor coatings here.
Polyaspartic Coatings: Overall Score: 7.5
- Durability (9): Polyaspartic coatings provide excellent protection for your garage floor from various types of damage, including chemical resistance, impacts, abrasion, stains, and hot tire marks.
- Application (7): Polyaspartic coatings have a short pot life of around 45 minutes. You’ll need to work quickly to avoid wasting the product.
- Price (5.5): These coatings are more expensive than other garage floor coating options like epoxy or acrylic.
- Maintenance (7): Due to their excellent durability and UV resistance, polyaspartic coatings require minimal maintenance. Simple cleaning with a broom, vacuum, or damp mop with mild soap and water is enough.
- Expected Lifespan (9): With proper care and maintenance, polyaspartic coatings can last for 10 to 15 years or more.

Polycuramine
Polycuramine, a proprietary coating developed by Rust-Oleum, combines the best features of various coating systems to create a top choice for garage floor protection.
Offering the durability of epoxy, flexibility of polyurea, and chemical resistance of urethane, this innovative coating is known for its extreme durability and excellent resistance to chemicals, salt, oil, and other common garage spills.
Polycuramine is one of the best garage floor coatings if you need a strong, resilient coating that can handle harsh environments and heavy use. It can resist cracking, peeling, fading, and hot tire pick-up.
However, before you commit to polycuramine, consider its drawbacks.
Polycuramine coatings are more expensive than alternatives like epoxy or acrylic and typically require experience to apply correctly.
Improper application can lead to bubbles, fisheyes, or uneven thickness. Additionally, proper surface preparation is crucial to ensure good adhesion and avoid moisture issues.
Polycuramine: Overall Score: 7.5
- Durability (9.5): Polycuramine’s extreme durability protects your garage floor from various types of damage. With excellent chemical resistance, it can withstand impacts, abrasions, stains, and hot tire marks. Its flexibility also accommodates minor cracks or movements in the concrete substrate.
- Application (7): While relatively straightforward to apply, polycuramine has a relatively short pot life of 45 to 60 minutes. It demands quick, efficient work to avoid waste or curing issues. Be mindful of its fast cure time (8 to 10 hours) and the temperature during application.
- Price (5): Polycuramine has a deceptively low initial cost. However, once you factor in multiple coatings and a lower lifespan, it ends up being more expensive than garage floor coatings like epoxy.
- Maintenance (7.5): Polycuramine is low-maintenance due to its durability and UV resistance. It doesn’t need frequent re-coating or polishing to maintain its appearance and performance.
- Expected Lifespan (8.5): RockSolid switched their products over to a Polycuramine formula in 2014. Some of those initial applications are still going strong. When properly applied, Polycuramine coatings should last between 15 to 20 years.


High-Solids Epoxy
Let’s take a step back before we get into the details about high-solids epoxy garage floor coatings. There are several variations of epoxy coatings on this list, so it’s worth giving a brief overview.
- 100% solids epoxy coatings don’t contain any solvents or water that could evaporate while curing. They produce a thicker dry film with the same thickness as the wet film. They don’t release any volatile organic compounds (VOCs) and are one of the most environmentally-safe epoxies.
- High-solids epoxy coatings contain a higher percentage of solvents that won’t evaporate compared to solvent-based epoxies. They produce a thinner dry film than 100% solids epoxies but thicker than solvent-based epoxies. They release fewer VOCs than solvent-based epoxies and cure when the solvent evaporates.
- Solvent-based epoxy coatings contain a high percentage of solvents that evaporate while curing. They produce a thin, dry film that is half the thickness of the wet film. They release a lot of VOCs and cure through solvent evaporation and chemical catalization. They are less durable and resistant than high-solids or 100% solids epoxies.
Although they’re more expensive than finishes, high-solids epoxy coatings are one of the best garage floor coatings if you require the ultimate in protection from moderate to heavy traffic and exposure.
With a solids content of 60% to 100%, these coatings provide a thicker and more resilient surface that resists chemicals, abrasion, and impact.
The longer pot life (the time available to apply the product) of high-solids epoxy compared to 100% solids epoxy makes it a practical choice for larger projects.
However, the higher price tag and application challenges may make some homeowners think twice.
The versatility of high-solids epoxy coatings allows you to create a unique and attractive look for your garage floor. There are a variety of colors, flakes, and metallics available.
These coatings can resist stains, oil, grease, and water, while maintaining their gloss and color for an extended period.
Before opting for high-solids epoxy coatings, keep in mind that they are more expensive and challenging to apply than alternatives like water-based or solvent-based epoxy.
A thick consistency and fast cure time can lead to bubbles, fisheyes, or uneven thickness if not applied correctly.
Proper surface preparation is crucial to ensure good adhesion and prevent moisture issues.
See our full guide to Epoxy garage floor coatings here.
High-Solids Epoxy: Overall Score: 7.4
- Durability (8.5): The high solids content makes these coatings less prone to cracking or peeling and more resistant to chemicals, abrasion, and impact than their lower-solids counterparts.
- Application (7): The thick consistency of high-solids epoxy can be slightly difficult to work with. However, it offers better coverage and a pot life of about 30 to 45 minutes. Fast cure times (6 to 12 hours) mean you can get your garage back to normal faster.
- Price (6.5): Epoxy coatings can vary widely in initial cost. In general, you can expect to pay more up-front, but less over the life of your garage floor.
- Maintenance (7): Although durable, high-solids epoxy coatings may eventually require recoating. Clean easily with a broom, vacuum, or damp mop with mild soap and water.
- Expected Lifespan (8): With proper application and maintenance, high-solids epoxy coatings can last for 7 to 10 years without fading, yellowing, peeling, or cracking.

Polyurea
Polyurea is a high-performance elastomer that results from the reaction between an isocyanate component and a synthetic resin blend component.
Known for its exceptional flexibility, tensile strength, and durability, polyurea coatings offer superior resistance to chemicals, abrasion, and extreme temperature changes.
Plus, they cure quickly, allowing you to walk on your garage floor within just a few hours.
Ideal for garage floors that demand a resilient coating capable of handling harsh environments and heavy use, polyurea coatings resist cracking, peeling, fading, and hot tire pick-up.
They can also withstand moisture, salt, oil, and other common garage spills.
Polyurea: Overall Score: 7.2
- Durability (9): Protect your garage floor from various types of damage with polyurea coatings’ extreme durability. They have excellent chemical resistance, impact tolerance, abrasion resistance, stain resistance, and hot tire mark prevention.
- Application (6): Polyurea coatings are generally more complex to apply and often require professional installation. Most polyurea floor coatings have a very short pot life, so you must work quickly. However, they have a fast cure time of around 8 hours.
- Price (5): Polyurea coatings’ high durability and performance come at a higher initial cost. However, like high-solids epoxy, this cost will average out over the life of your home.
- Maintenance (7): With their strength and resistance, polyurea coatings require minimal maintenance. There’s no need for frequent re-coating or polishing to maintain their appearance and performance. Easily clean them with a broom, vacuum, or damp mop using mild soap and water.
- Expected Lifespan (9): When properly applied and maintained, polyurea coatings have a long lifespan, typically lasting 10 to 15 years or more with proper care.

Polyurethane
Polyurethane coatings are created through the reaction of a polyol with an isocyanate. They’re known for their durability, flexibility, and high resistance to chemicals, abrasion, and UV rays.
With the ability to provide a high-gloss or semi-gloss finish, polyurethane coatings are often used as a top coat over epoxy for enhanced UV resistance and protection against wear and tear.
Ideal for garage floors requiring a durable and glossy coating capable of handling moderate to heavy traffic and exposure.
Additionally, polyurethane coatings resist stains, oil, grease, and water. They can also withstand temperature changes, impacts, scratches, and fading.
Available in clear or pigmented options, polyurethane coatings can improve the appearance of the underlying coating or substrate.
Polyurethane coatings are more expensive than other options, such as epoxy or acrylic. They also require more skill and experience to apply correctly.
With a short pot life and a fast cure time, improper application could result in bubbles, fisheyes, or uneven thickness. Proper surface preparation is also crucial to ensure good adhesion and prevent moisture issues.
Polyurethane: Overall Score: 7.1
- Durability (8): Polyurethane coatings provide excellent protection for your garage floor from various types of damage, with strong resistance to chemicals, abrasion, and UV rays. Their flexibility allows them to accommodate minor cracks or movements in the concrete substrate.
- Application (7): While moderately easy to apply, polyurethane coatings may need a primer or base layer for optimal results. Their long pot life (2 to 4 hours) means you don’t have to work as quickly as other garage floor coatings. Longer cure times (48 to 72 hours) vary depending on the ambient temperature.
- Price (5.5): Due to their high performance, polyurethane coatings are typically more expensive than other options.
- Maintenance (7): Requiring minimal maintenance, polyurethane coatings are easily cleaned with a broom, vacuum, or damp mop with mild soap and water.
- Expected Lifespan (8): With proper care and maintenance, polyurethane coatings can last between 7 to 10 years or more when used as a top coat over an epoxy base.

Water-Based Epoxy Paints
Water-based epoxy paints are a popular choice for garage floors due to their eco-friendly nature and ease of application.
These coatings contain 30-50% solids and provide a thin, low-performance coat that works well for light-duty applications or as a primer for other coatings.
However, water-based epoxy paints can be less glossy and less resistant to chemicals and stains than solvent-based or high-solids epoxy.
Water-based epoxy paints are perfect for garage floors that need a simple, cost-effective coating for basic protection and enhancement.
They can resist dust, dirt, mildew, and water, while also improving the appearance of the concrete by adding color and shine. You can easily apply these paints with a roller or brush, and you don’t need special equipment.
These paints are less durable and less resistant than other epoxy coatings, such as solvent-based or high-solids epoxy.
They can easily be damaged by chemicals, oil, grease, or hot tire marks and may lose their gloss and color over time due to UV exposure or abrasion.
Water-Based Epoxy Paints: Overall Score: 7.1
- Durability (6): Water-based epoxy paints offer decent durability for light-duty applications, protecting your garage floor from dust, dirt, mildew, and water. However, they can be easily damaged by chemicals, oil, grease, or hot tire marks. They may lose their gloss and color due to UV exposure or abrasion.
- Application (9): These paints are easy to apply with a thin consistency and a long pot life of about 2 hours. This allows you plenty of time to work with the product. The cure time is around 72 hours, making it among the slowest curing garage floor coatings on this list.
- Price (7.5): Water-based epoxy paints are inexpensive to apply, but don’t last as long as some of the more durable garage floor coatings on this list.
- Maintenance (7): Moderate maintenance is required due to the less glossy finish and lower chemical resistance. You won’t need frequent re-coating or polishing to maintain their appearance. You can easily clean them with a broom, vacuum, or damp mop with mild soap and water.
- Expected Lifespan (6): With proper care and maintenance, water-based epoxy paints have a moderate lifespan suitable for light-duty applications, lasting 3 to 5 years.

Solvent-Based Epoxy
If you’re considering an epoxy coating for your garage floor, solvent-based epoxy might be a suitable option.
This type of epoxy contains 30% to 60% solids, with the remaining content consisting of solvents that evaporate during curing.
Solvent-based epoxy is generally easier to apply and adheres better to contaminated surfaces than its water-based counterpart. You can use a roller or brush for application without the need for special equipment or ventilation.
Solvent-based epoxy has a pot life of 1 to 2 hours. This gives you plenty of time to work with the product without wasting it. It also cures within 12 to 24 hours, meaning you won’t have to wait long before using your garage.
Solvent-based epoxy coatings are not as durable or resistant as other options, such as high-solids or 100% solids epoxy. They’re prone to damage from chemicals, oil, grease, and hot tire marks.
These coatings tend to lose their gloss and color over time due to UV exposure or abrasion. They also require proper surface preparation to ensure good adhesion and avoid moisture issues. Solvent-based epoxy has a high level of volatile organic compounds (VOCs), which can cause air pollution and health issues.
Solvent-Based Epoxy Overall Score: 7
- Durability (7): While solvent-based epoxy provides adequate protection for light-duty applications, it’s easily damaged by chemicals, oil, grease, or hot tire marks.
- Application (8.5): Offering easier application and better adhesion than water-based epoxy, solvent-based coatings have a moderate pot life (1 to 2 hours) and cure time (12 to 24 hours).
- Price (7): Reasonably priced, solvent-based epoxy coatings are more affordable than high-solids or 100% solids options.
- Maintenance (6): Moderate maintenance is required due to susceptibility to UV rays. Regular inspections for wear or damage are necessary.
- Expected Lifespan (6.5): Solvent-based epoxy has a moderate lifespan of 3 to 7 years with proper care and maintenance, but may peel or crack over time due to low flexibility and adhesion.
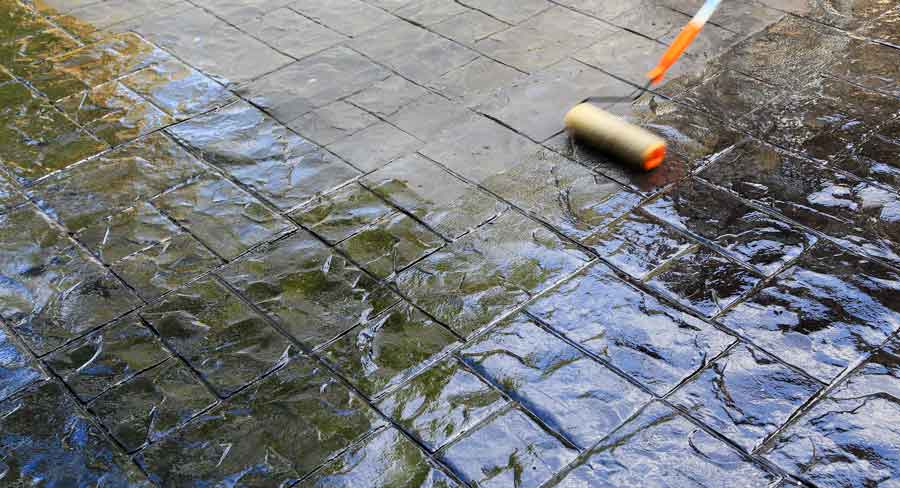
Concrete Sealer
There are various types of concrete sealers available for protecting and enhancing your garage floor. Some types include silicate densifiers, acrylic sealers, epoxy sealers, and urethane sealers.
These sealers can be either penetrating or film-forming, offering different levels of protection and aesthetic appeal.
From preventing dust and water damage to adding a touch of shine, concrete sealers can be an affordable and simple solution for your garage floor.
Concrete Sealer: Overall Score: 6.8
- Durability (6): While concrete sealers offer moderate durability for light-duty applications, they may not be the best choice for heavy-duty use. They can protect your garage floor from dust, staining, and water damage. However, they can also be easily damaged by chemicals, oil, grease, or hot tire marks. Additionally, their gloss and color may fade over time due to UV exposure or abrasion.
- Application (8): Applying concrete sealers is typically a straightforward process. With a pot life of about 45 to 90 minutes, which is comparable to other garage floor coatings on this list. The cure time is also reasonable, ranging from 24 to 48 hours. This means you won’t have to wait too long before using your garage again.
- Price (6.5): Concrete sealers are an affordable alternative compared to other options. However, you’ll need to repeat the installation process several times over the life of your home.
- Maintenance (7.5): Concrete sealers require some maintenance due to their susceptibility to UV rays and chemicals. They don’t need frequent re-coating or polishing to maintain their appearance and performance. Cleaning is easy, with just a broom, vacuum, or damp mop and mild soap and water.
- Expected Lifespan (6): Concrete sealers have a moderate lifespan, making them suitable for light-duty applications. With proper care and maintenance, they can last for 2 to 5 years.

Acrylic Sealer
As a cost-effective choice for dust-proofing raw concrete floors, acrylic sealer is often used in garages. Compared to other options like epoxy or polyurea, it’s not as durable and may require more frequent reapplication.
However, it’s a suitable choice for homeowners seeking an inexpensive, easy-to-apply coating that provides some protection and enhancement to their garage floors.
Acrylic sealer can resist dust, dirt, mildew, and water, while also improving the appearance of concrete by adding color and shine.
Application is straightforward, with a roller, sprayer, or brush – no need for special equipment or ventilation.
While acrylic sealers offer some advantages, they have their limitations.
They’re less durable and resistant than other coatings, making them susceptible to damage from chemicals, oil, grease, or hot tire marks. UV exposure or abrasion can cause the gloss and color to fade over time.
Acrylic Sealer: Overall Score: 6.6
- Durability (4): Acrylic sealers provide basic protection from dust, dirt, mildew, and water. However, they are vulnerable to damage from chemicals, oil, grease, or hot tire marks. Additionally, UV exposure or abrasion can lead to fading or loss of gloss.
- Application (9): With a long pot life of 4 to 6 hours, acrylic sealers give you a long time to work with the product. The moderate cure time of 24 to 48 hours means you won’t have to wait too long before using your garage. Application is simple with a roller, sprayer, or brush and doesn’t require special equipment or ventilation.
- Price (8.5): Acrylic sealers are cost-effective for their initial application. However, you’ll need to repeat the process frequently over the life of your home.
- Maintenance (7.5): Given their lower durability, acrylic sealers need more frequent reapplications. Basic cleaning with a broom, vacuum, or damp mop with mild soap and water is typically sufficient.
- Expected Lifespan (4): Proper care and maintenance can prolong the lifespan of acrylic sealers to 1 to 3 years.

Concrete Stain
While not technically a “coating,” concrete stain penetrates the surface of your garage floor. It provides a unique, colored finish that varies based on the concrete’s composition. Concrete stains are normally paired with a clear sealer for added durability.
Concrete stains are perfect for homeowners seeking an affordable, straightforward solution that adds a touch of personalization to their garage floor.
By creating a mottled or variegated effect, concrete stains can infuse color and character into an otherwise drab surface.
Application is a breeze. Simply use a sprayer, roller, or brush, and there’s no need for special equipment or ventilation.
However, concrete stains do have drawbacks worth considering.
They lack durability since they don’t form a protective layer over the concrete, making them susceptible to damage from chemicals, oil, grease, or hot tire marks. Additionally, UV exposure or abrasion can cause fading or discoloration over time.
Concrete Stain: Overall Score: 6.6
- Durability (4.5): While concrete stains do offer protection against dusting, staining, and water damage, their lack of a protective layer makes them less durable. They’re prone to damage from chemicals, oil, grease, and hot tire marks, and can fade or discolor due to UV exposure or abrasion.
- Application (8.5): Although the final appearance can be unpredictable due to varying concrete characteristics, concrete stains are relatively easy to apply.
- Price (7): Concrete stains are fairly inexpensive, but will have to be reapplied after a few years.
- Maintenance (8): Maintenance for concrete stains depends on the sealer used. They don’t require frequent re-coating or polishing. They can be easily cleaned with a broom, vacuum, or damp mop with mild soap and water.
- Expected Lifespan (5): With proper care and maintenance, concrete stains can last 5 to 10 years.

Latex Paint
While not as durable as other options, latex paint is an affordable and straightforward choice for garage floor coatings. It may not be suitable for high-traffic or heavy loads.
However, it can be a viable option for less frequently used garages.
Latex paints are perfect for garage floors requiring a simple, cost-effective coating that offers some protection and enhancement.
They resist dust, dirt, mildew, and water while improving the concrete’s appearance by adding color and shine.
Latex paints can be applied with a roller, brush, or sprayer and don’t require specialized equipment or ventilation.
However, latex paints have drawbacks to consider before selecting them for your garage floor.
They are not very durable and don’t hold up well against chemicals, oil, grease, or hot tire marks. Latex paints can be easily damaged by impacts, abrasion, stains, or peeling. Over time, they may lose their gloss and color due to UV exposure or abrasion.
Latex Paint: Overall Score: 6.5
- Durability (3): Latex paints offer limited durability and resistance to chemicals, oil, grease, and hot tire marks. They can protect your garage floor from dusting, staining, and water damage. However, they can be easily damaged by impacts, abrasion, stains, or peeling. Gloss and color may degrade over time due to UV exposure or abrasion.
- Application (9.5): Latex paints are easy to apply with simple painting tools.
- Price (9): Latex paints are among the most affordable options. Although they’re not as long-lasting as other garage floor coatings, it balances out over the life of your home.
- Maintenance (8): Latex paints require more maintenance due to their lower durability and resistance. They also need frequent re-coating to maintain their appearance.
- Expected Lifespan (3): Latex paints have a shorter lifespan due to their lack of wear and tear resistance. They can last for 2 to 3 years with proper care and maintenance. However, they can peel or crack over time due to their low flexibility and adhesion.
Wrapping It Up: The Best Garage Floor Coatings Ranked
When choosing the best garage floor coatings, the key is balancing durability, ease of application, price, maintenance, and expected lifespan.
Polyaspartic coatings stand out as our top performer in this analysis. They excel in durability and lifespan, despite a slightly higher price tag. It’s a strong choice for those seeking a robust and long-lasting solution.
However, your best garage floor coating depends on your specific needs and conditions.
Consider factors like traffic volume, exposure to chemicals, budget, and your ability to apply and maintain the coating.
Ultimately, the goal is to select the best garage floor coating that will compliment your floor and make your garage look great!