Ever found yourself staring at a mountain of garage door openers, overwhelmed by choices? You’re not alone.
Two names you’ve likely come across are LiftMaster and Chamberlain. They have so many similarities that many people wonder if they’re the same company.
Spoiler alert: They are – but there’s more to the story.
Yes, LiftMaster and Chamberlain are both brands under the same parent company, the Chamberlain Group. However, they have very different features, and they’re aimed at different consumers.
So, how do you choose between LiftMaster vs Chamberlain?
In this guide, we’ll break down the key differences, common features, and price points of LiftMaster and Chamberlain garage door openers. We’ll also delve into their installation process and distinct security features, helping you decide which brand best fits your needs and budget.
Keep reading to learn more.

Are Chamberlain and LiftMaster the Same Company?
Chamberlain and LiftMaster are sibling garage door opener brands under the same parent company, the Chamberlain Group.
Although they share the same parent company, Chamberlain and LiftMaster are more like siblings rather than identical twins.
Each has distinct features aimed at different homeowners.

Chamberlain is geared towards homeowners who want a relatively inexpensive garage door opener they can install themselves. Chamberlain garage door openers have a simple design with a hassle-free installation process. It’s the perfect match if you have a smaller garage door and want the easiest setup possible.
LiftMaster, on the other hand, is a heavier-duty garage door opener capable of handling larger, heavier doors. They typically have stronger motors to meet the additional weight requirements.
Both are reliable, innovative, and top-of-the-line brands. However, it’s all about determining what matters most to you in a garage door opener: simplicity, power, or a balance of both.
Common Features of Chamberlain and LiftMaster
Now that you understand who Chamberlain and LiftMaster are, let’s dive into what they offer.
While each brand has unique selling points, these sibling companies also share some impressive features that make them smart and convenient choices for your garage door opener needs.
WiFi Connectivity
Most garage door openers in their lineups feature built-in WiFi connectivity.
Both Chamberlain and LiftMaster garage door openers can connect to the internet, allowing them to communicate with your other smart devices. This enables a world of hands-free control, making operating your garage door as easy as a swipe or a voice command.
Google Home Support
Are you a Google Home fan? Great, because both Chamberlain and LiftMaster support this smart speaker. This means you can control your garage door opener with simple voice commands.
HomeLink Support
Chamberlain and LiftMaster support HomeLink compatibility for those who prefer control from their car.
HomeLink is a wireless system that integrates with your vehicle, allowing you to operate devices such as your garage door opener, gates, and even lights or security systems, all from the comfort of your driver’s seat.
Amazon Key Support
If you’re an Amazon Prime member, you’ll be happy to know that Chamberlain and LiftMaster both support Amazon Key. This service allows for in-garage delivery of your packages, ensuring that your packages are never left outside.
No Alexa Support
Unfortunately, neither Chamberlain nor LiftMaster supports Alexa, Amazon’s smart speaker and assistant. So, if Alexa is your go-to for controlling your smart devices, you won’t be able to extend that control to these garage door openers. (at least out of the box)
MyQ Smartphone App
Last but certainly not least, both Chamberlain and LiftMaster use the same MyQ smartphone app. This allows you to control and monitor your garage door openers from your smartphone.
With the MyQ app, you can open or close your garage door, check its status, receive alerts and notifications, set schedules or routines for the door, and even share access with family or guests.
It puts control of your garage right in the palm of your hand.

LiftMaster vs Chamberlain: Hardware & Installation Differences
Now let’s move on to some of the differences. Understanding their hardware and installation differences is essential if you’re trying to decide between LiftMaster and Chamberlain garage door openers.
First up, LiftMaster. This brand caters to the professional market, delivering a heavy-duty garage door opener solution. These units aren’t available at your local retailer – they’re sold exclusively through professional installers, so DIY installation isn’t on the table.
One of its main features is its T-rail assembly trolley system comprising a single, durable steel component. This steel piece offers superior strength, allowing LiftMaster openers to lift significantly heavier doors than their Chamberlain counterparts.
LiftMaster includes its exclusive Posilock system for added security.
If your garage door remains open longer than it should or attempts to close when it shouldn’t, this system kicks in to ensure your door stays locked and secure.
Finally, instead of the typical garage door sensors, LiftMaster uses an infrared safety beam to detect unusual activity near your garage door. If the beam detects anything, it reverses the door and activates your garage door lighting, illuminating potential hazards.
Chamberlain, conversely, is the go-to choice for budget-friendly and DIY-savvy homeowners. Their openers use a multi-piece plastic rail, resulting in a slightly less robust construction than LiftMaster’s steel design.
When it comes to security, Chamberlain relies on rolling code technology. Each time you operate your garage door via remote control or smartphone, the system generates a new code, enhancing your garage’s security and deterring potential intruders.
To sum up, LiftMaster offers a heavy-duty, installer-only solution ideal for heavier doors, while Chamberlain provides a more cost-effective, DIY-friendly alternative with a distinct approach to security.
Your choice will depend on your garage’s specific needs and your personal preferences.
LiftMaster vs Chamberlain: Price & Warranty Differences
When selecting a garage door opener, LiftMaster and Chamberlain are two popular options many homeowners consider. To make an informed decision, comparing their price and warranty offerings is essential.
Let’s dive into the details to help you find the perfect fit for your garage.
Chamberlain boasts a wider variety of models, offering approximately 20 options compared to LiftMaster’s nine. If budget is crucial for you, Chamberlain’s lower prices across all horsepower ranges might make it more attractive. On average, a Chamberlain garage door opener costs around $257.28.
On the other hand, LiftMaster is known for its superior durability and robust performance, which comes with a higher price tag. The average cost of a LiftMaster garage door opener is approximately $415.67. However, the additional investment is justified by added features and the convenience of professional installation.
When it comes to warranties, both brands offer protection, but specifics may vary based on the model and place of purchase. It’s essential to review the warranty details for any model you’re considering, as this can be a deciding factor in your choice.
Ultimately, your decision between LiftMaster and Chamberlain will depend on your personal preference, budget, and the specific needs of your garage.
Chamberlain vs LiftMaster: Which Should You Buy?
Deciding between Chamberlain and LiftMaster for your garage door opener is about aligning their features with your needs.
Remember, these two brands stem from the same parent company, the Chamberlain Group, and cater to different consumer groups with unique benefits.
If you have a heavier garage door or a professional setting that demands high performance, LiftMaster could be your go-to choice. LiftMaster openers are built to last with a sturdy, one-piece steel trolley system and incorporate an infrared beam security feature for added peace of mind. The robust nature of LiftMaster models means they can lift heavier doors effortlessly. However, their enhanced durability and performance come with a higher price, including the cost of professional installation.
On the flip side, if you have a lighter garage door and prioritize budget and ease of installation, Chamberlain might be the best fit. Chamberlain openers, favored for their DIY-friendly installation, use a multi-piece trolley system, often made from plastic. The security feature of choice here is rolling code technology that generates a new code each time the door is operated, providing a different kind of security. These openers are well-suited for lifting lighter doors and can be cost-effective for smaller garages.
In summary, opt for a LiftMaster if your garage door is heavier, you prioritize high-powered operation and superior security, and you don’t mind paying more.
Choose a Chamberlain garage door opener if your door is lighter, you don’t need the latest tech, or you want to save money on both the product and installation process.
In either case, both brands offer reliable, innovative garage door solutions.
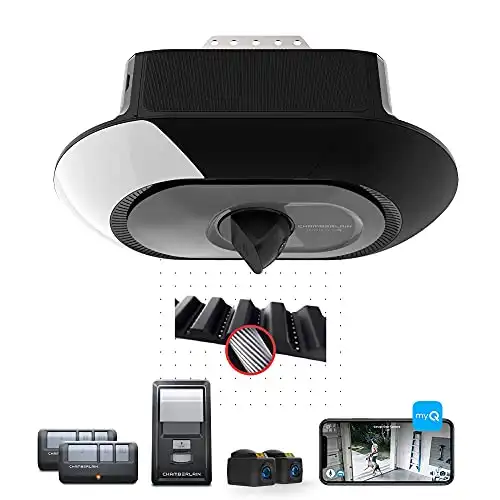
Chamberlain B4643T Garage Door Opener with Security Camera |
LiftMaster Elite Series 8500W |
|
Primary Rating:
4.2
|
Primary Rating:
4.4
|