

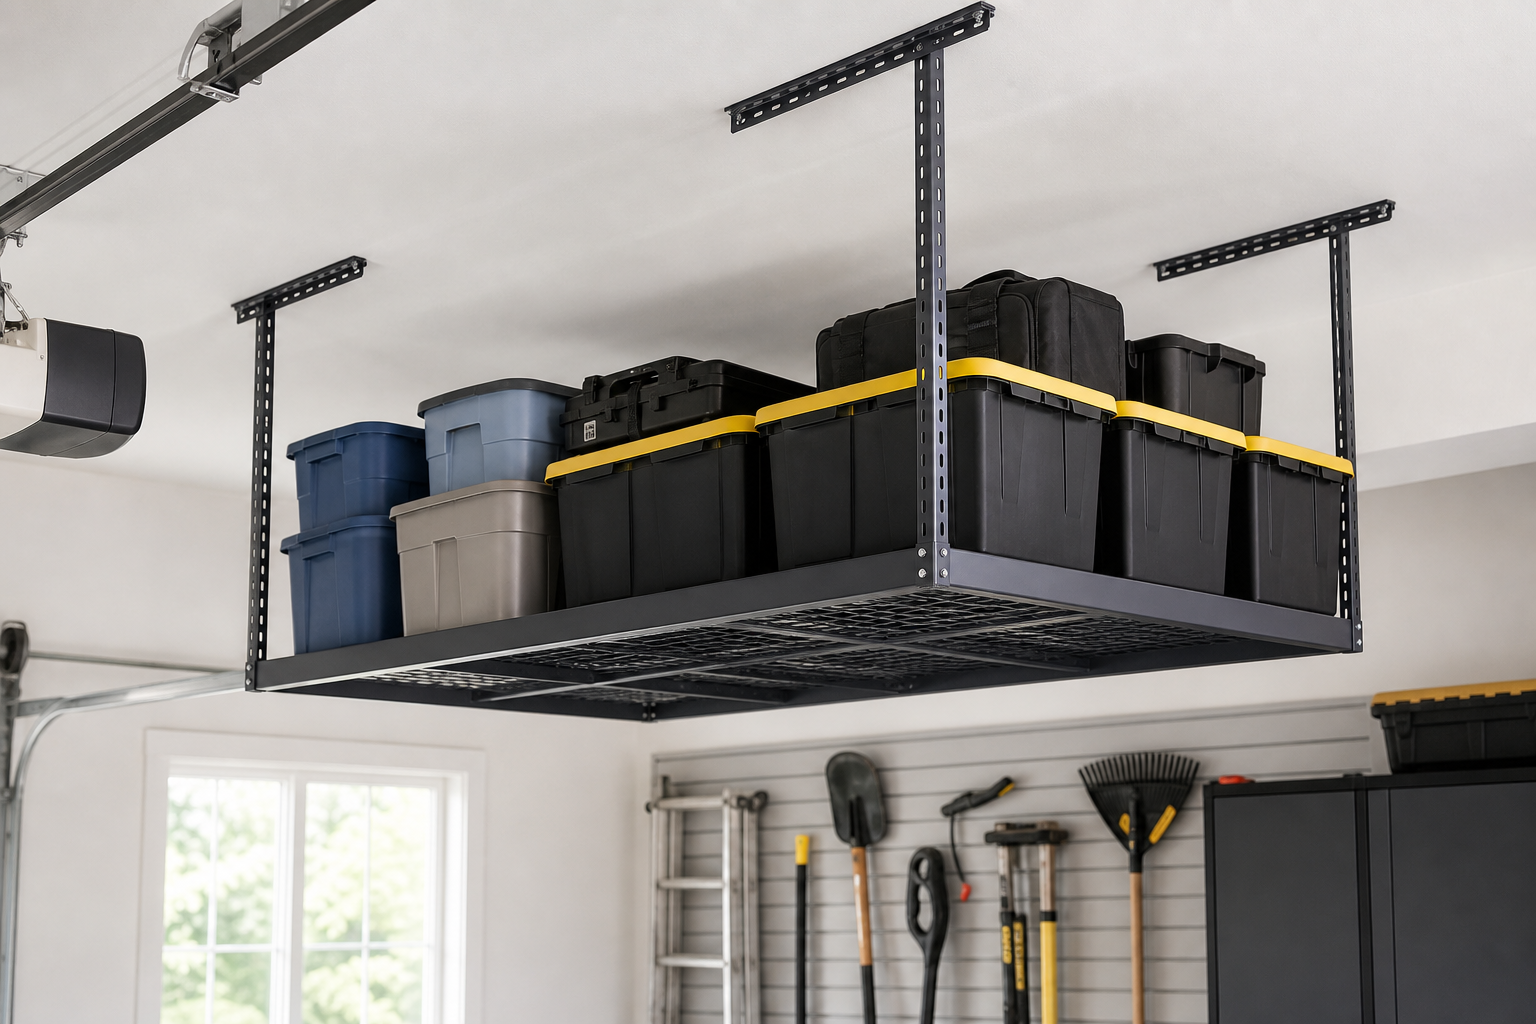
Whether you’ve been planning to build custom overhead garage storage for months or decided to tackle it this weekend, a clear roadmap makes all the difference. Preparation accounts for about 80% of the success in projects like this.
Everything you need is below: tools, materials, step-by-step instructions, and the common pitfalls to avoid.
Understanding the Basics
Effective garage storage uses walls and ceiling as primary surfaces, keeping the floor clear for vehicles and work. Wall-mounted track systems, overhead ceiling racks, and sturdy cabinets provide organized access without eating into parking or workspace.
Weight capacity is critical and often misunderstood. Wall systems in studs hold 50 to 75 pounds per linear foot. On drywall alone, that drops to 15 to 25 pounds before failure. Ceiling racks rated for 600 pounds assume even distribution. Concentrating weight in one area can cause failure well under the total limit.
The math gets more specific when you account for joist spacing. Standard 16-inch on-center joists distribute load differently than 24-inch spacing. A 4-foot-wide platform supported by three joists at 16 inches spreads weight across more contact points than the same platform on two joists at 24 inches. Check your joist spacing before selecting hardware.
Zone your garage before buying products. Common zones include tools/workbench, automotive, seasonal items, sports gear, lawn/garden, and household overflow. Each zone stays self-contained so everything for a given task lives in one spot. This approach eliminates the problem of hunting through three different areas for the socket set or camping gear.
Ceiling height determines what storage methods work. Eight-foot ceilings leave minimal clearance for overhead platforms without interfering with garage door tracks. Nine or ten feet gives breathing room for a 24-inch-deep platform with adequate headroom underneath. Measure from floor to the bottom of your garage door track at full open position. That’s your actual working height, not the peak of the ceiling.
Step-by-Step Platform Design Using Plywood
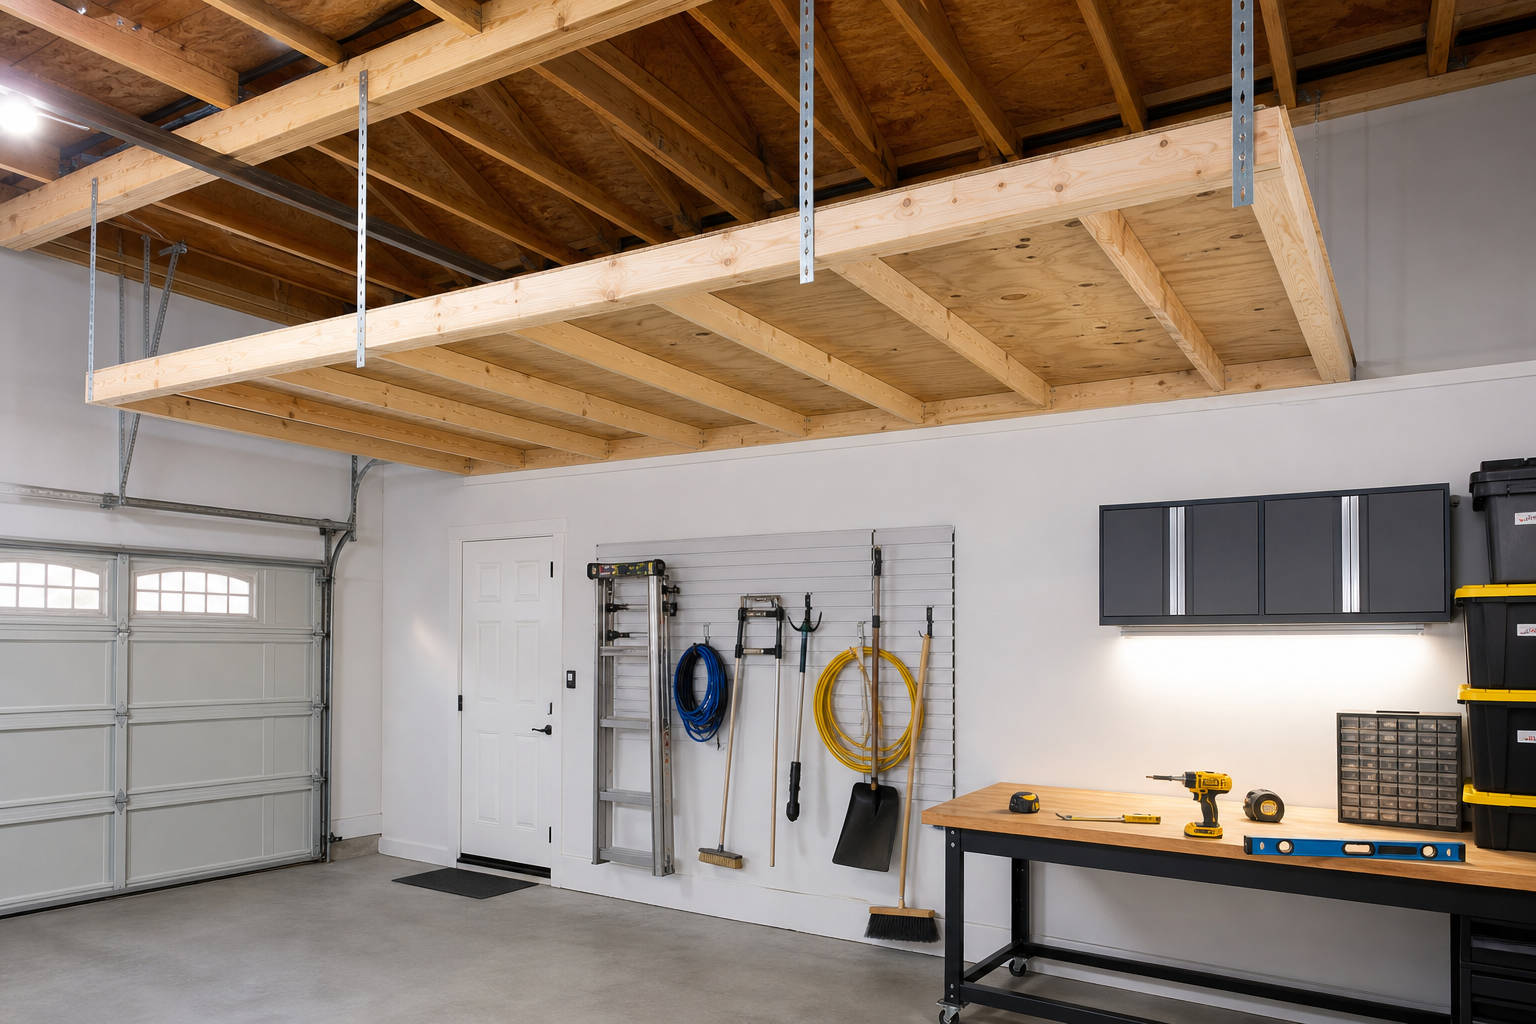
Building a custom overhead platform gives you storage tailored to your exact space and needs. The details here make the difference between a result that lasts and one that needs redoing within a year. Take the time to assess your conditions before committing to a method or product.
Finding and Marking Ceiling Joists
Start with ceiling joist location. Use a stud finder rated for joists, not just wall studs. Mark each joist with painter’s tape. Joists run perpendicular to the garage door in most garages, but not always. Verify direction before drilling anything.

Heavy Duty Overhead Storage Brackets
Essential for safely mounting platforms to ceiling joists
Selecting Brackets and Hardware
Choose brackets rated for your total anticipated load plus 25%. If you plan to store 400 pounds, use brackets rated for at least 500. Heavy-duty steel brackets designed for garage overhead storage typically mount with lag bolts directly into joists. Avoid expansion anchors or toggle bolts for overhead weight.
Bracket spacing depends on platform size and load. For a 4-foot by 8-foot platform storing seasonal bins, mount brackets every 24 inches along the length. Heavier loads or wider platforms require 16-inch spacing. Each bracket needs at least two lag bolts into solid joist wood, not just the edge.
Choosing Platform Materials
Platform material options vary based on your needs. 3/4-inch plywood provides a good strength-to-weight ratio for most applications. Marine-grade plywood resists moisture better than standard pine or fir plywood. For extreme moisture areas, consider plastic decking material cut to size, though it costs more and requires closer bracket spacing due to flex.
Cut plywood to fit between joists or span across them depending on your bracket system. Platforms that sit between joists need brackets mounted to joist sides. Platforms that span across joists mount brackets to joist bottoms and rest the platform on top.
Assembly and Installation Process
Assemble the platform on the ground first. Pre-drill all holes. Apply two coats of exterior primer and paint if using wood. This protects against moisture and extends platform life. Let paint cure fully before installation.
Installation sequence: mount brackets first, verify level across all brackets, then lift the platform into place. A second person makes this safer and faster. Secure the platform to brackets with bolts or heavy screws. Don’t rely on the platform just resting on brackets.
Measure twice and commit once. A tape measure and five minutes of verification prevent the mistakes that take hours to fix. This applies doubly to cuts, holes, and any irreversible step.
Budget 50% more time than guides suggest for your first project of this type. The learning curve is real, and careful work produces better results than rushing to meet an estimated timeline.
Weight Limits and Ceiling Joist Reinforcement
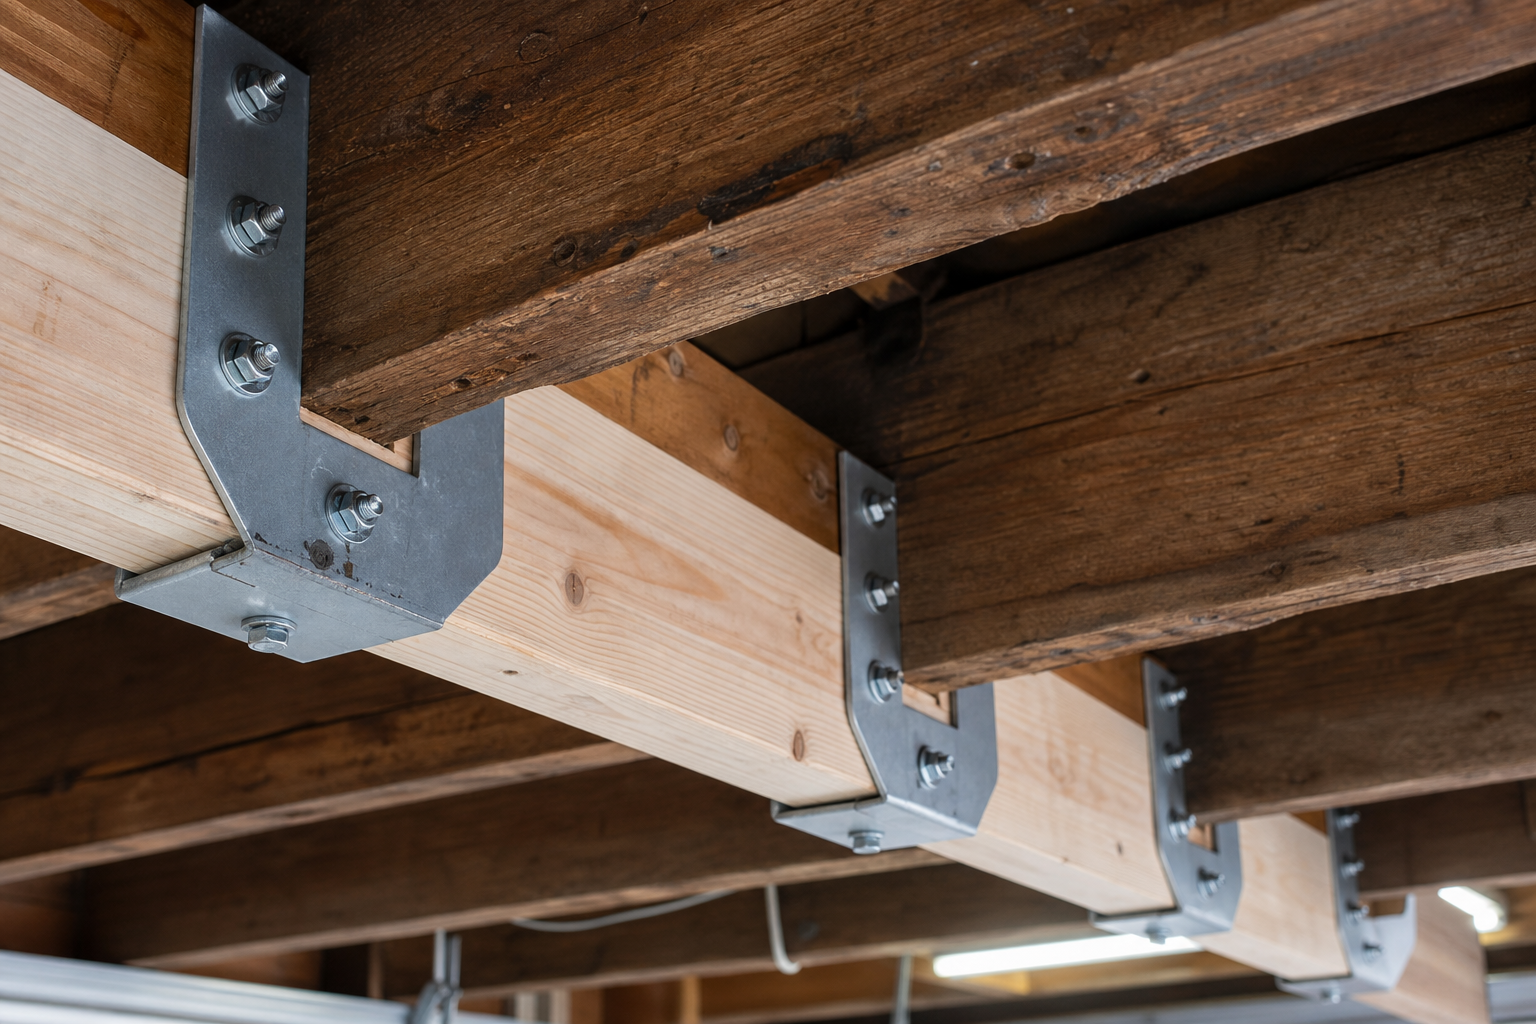
Getting weight limits right requires matching your approach to actual conditions rather than following a generic formula. Climate, surface condition, and usage patterns all influence the best path forward.
Understanding Joist Capacity
Standard 2×6 joists spaced 16 inches on-center support more weight than 2×4 joists at 24 inches. Most residential garages built after 1980 use 2×6 or larger. Older garages sometimes use 2×4 framing, which limits overhead storage capacity. Inspect your joists before loading them.
Signs your joists need reinforcement include visible sag in the ceiling, cracks in drywall running parallel to joists, or joists smaller than 2×6. Reinforcement involves sistering additional lumber alongside existing joists. A 2×6 sistered to a 2×4 essentially creates a stronger 2×10 joist.
Joist Reinforcement Process
Sistering requires removing drywall to access joists, cutting matching lumber to joist length, applying construction adhesive, and bolting or screwing the new lumber tight against the old every 16 inches. This doubles or triples joist strength depending on existing size. Hire a contractor if you’re uncertain about structural work.
Access Planning
Access considerations matter for overhead storage. Fixed ladders waste floor space. Folding attic ladders work if ceiling height allows and you don’t need daily access. Step stools suffice for platforms low enough to reach from below. Consider what you’re storing and how often you’ll retrieve it.
Platforms storing items accessed monthly or less can sit higher and require a ladder. Platforms for frequently used items should stay low enough to reach from a step stool. Don’t build storage you won’t use because accessing it is too much hassle.
Document every product you use: brand, color, batch number, application date. Future touch-ups need exact material matches. Tape the info inside a cabinet door or take a quick phone photo for your records.
Wear appropriate protection throughout: safety glasses, gloves, respirator when working with chemicals or dust. Ventilate when using adhesives, paints, or solvents. These aren’t optional precautions.
Tools and Materials List
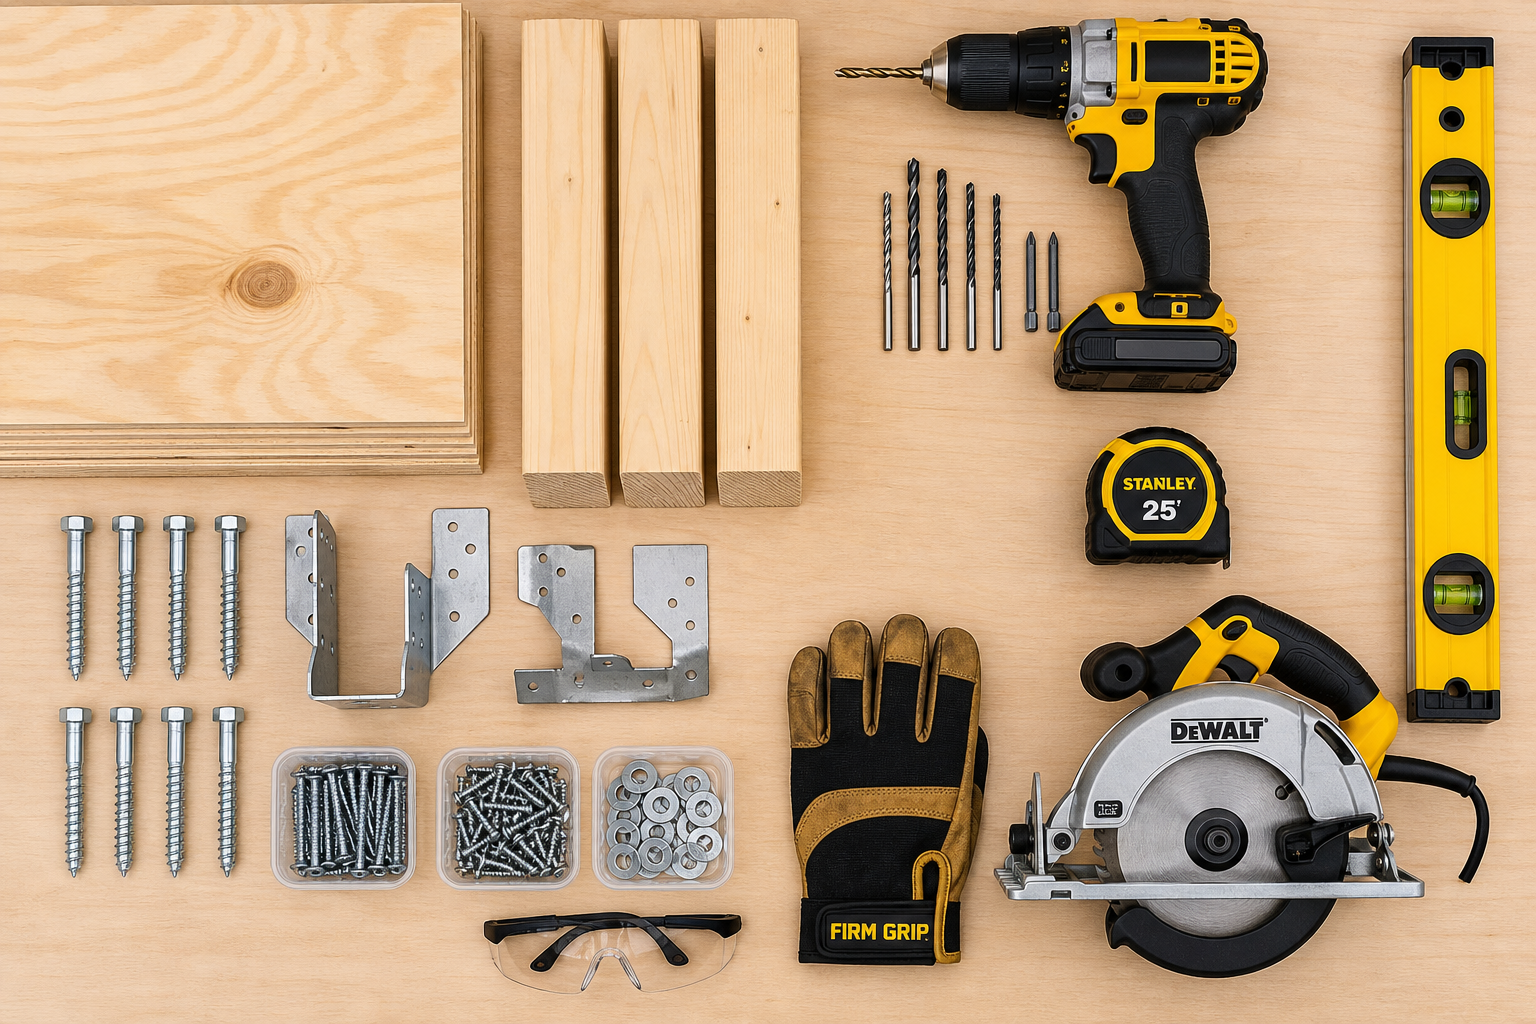
You’ll need specific tools for clean, safe execution. Don’t improvise with substitutes on critical items.
Required Tools
- Stud finder capable of detecting joists through drywall
- Drill with bits sized for your lag bolts
- Socket set or wrench matching lag bolt heads
- Level (4-foot minimum)
- Tape measure
- Circular saw or table saw for cutting plywood
- Safety glasses
- Work gloves
Optional but Helpful Tools
- Impact driver for faster bolt driving
- Sawhorses for cutting support
- Clamps for holding materials during cuts
- Second step ladder for two-person platform lifting
Materials Needed
- Heavy-duty overhead storage brackets (quantity depends on platform size)
- Lag bolts (typically 3/8-inch diameter, 3-inch length minimum for solid joist penetration)
- 3/4-inch plywood cut to platform dimensions
- Exterior primer and paint for wood platforms
- Washers for lag bolts
Calculate materials precisely. Measure your intended platform area, add 10% for cutting waste on plywood, count brackets based on 16 to 24-inch spacing, then multiply bolts by two per bracket plus extras.
Additional Storage Considerations
Storage Container Selection
Clear plastic bins beat cardboard for garage storage in every way: moisture resistance, pest resistance, visibility, and stackability. Label each bin on the front for easy identification. A label maker and 20 minutes of work saves hours of searching over the coming years.

Clear Storage Bins
Perfect for overhead platforms with easy visibility and moisture protection
Bin sizing matters for overhead platforms. Bins too large become too heavy to lift safely overhead when full. 18-gallon bins hit the sweet spot: large enough to hold seasonal items like holiday decorations or winter clothing, light enough to lift when packed.
Temperature-Sensitive Items
Avoid storing temperature-sensitive items overhead. Garage ceilings in uninsulated spaces reach extreme temps: below freezing in winter, above 120 degrees in summer. Paint, aerosols, electronics, photographs, and anything heat-sensitive belongs elsewhere.
Organization Strategies
Color-code bins by zone or season. Red bins for holiday items, blue for camping gear, green for lawn equipment. Visual coding lets you spot what you need from ground level without reading every label.
Stack bins two high maximum on overhead platforms. Three-high stacks become unstable and make bottom bins inaccessible without unloading everything above. Two high keeps items reachable and stable.
Alternative Overhead Storage Methods
Pre-fabricated ceiling rack kits offer faster installation than custom builds. These kits include brackets, hardware, and wire grid or solid deck surfaces. They mount to joists the same way custom platforms do but eliminate cutting and painting.
Pulley systems work for seasonal items you access once or twice yearly. Mount the platform on cables run through ceiling-mounted pulleys. Lower the platform to load or unload, then raise it back to ceiling height. This maximizes ceiling clearance but adds mechanical complexity.
Adjustable height racks let you customize clearance as needs change. These systems use vertical posts mounted to wall studs with horizontal bars that adjust up or down. More expensive than fixed platforms but offer flexibility.
Overhead garage door track storage mounts to the door track assembly itself, using wasted space above the door. Weight capacity stays low (typically 250 pounds) but installation is simpler since mounting points are pre-determined.
For those creating a dedicated workspace underneath, check out these garage workshop ideas that work well with overhead storage.
Common Mistakes to Avoid
Mounting brackets to drywall instead of joists causes catastrophic failure. Every bracket must hit solid wood. No exceptions. Use the stud finder, mark joists carefully, verify with a pilot hole before driving lag bolts.
Underestimating total weight leads to overloaded platforms. Weigh a sample bin fully packed, multiply by total bins, add 25% safety margin. A 50-pound bin doesn’t sound heavy until you have twelve of them on a platform rated for 500 pounds.
Ignoring garage door clearance creates dangerous interference. Measure door track position at full open before installing platforms. Leave at least 6 inches clearance between platform bottom and track top. Test the door fully open with a helper watching for contact.
Using short lag bolts that don’t penetrate joists adequately results in pullout under load. Bolts need at least 2 inches of thread in solid joist wood after penetrating the bracket. A 3-inch bolt through a 1/2-inch bracket gives 2.5 inches of joist penetration, which meets the minimum.
Skipping paint or sealer on wood platforms invites moisture damage and warping. Garages experience humidity swings that bare wood can’t handle long-term. Two coats of exterior primer and paint add years of life.
Building platforms without considering what you’re actually storing wastes effort. Design storage for the items you have, not theoretical future needs. Measure your bins, boxes, and gear before cutting plywood.
Tips for Better Results
- Allow extra curing time beyond manufacturer minimums. Those minimums assume ideal conditions that garages rarely provide.
- Stage tools and materials within reach before starting. Mid-project supply runs interrupt time-sensitive steps.
- Take photos at each stage. Visual documentation helps troubleshoot later and provides reference for future projects.
- Work in sections small enough to finish before material sets. Consistent technique across sections produces the most uniform results.
- Install lighting under platforms if they’ll block existing fixtures. LED strip lights add visibility without heat buildup.
- Leave front edges accessible. Platforms pushed tight against walls make retrieving items difficult. A 12-inch setback improves usability.
- Test load capacity gradually. Add weight in stages over several days, watching for bracket flex or bolt loosening.
Project Planning and Timing
Prioritize your projects based on impact and urgency. Safety issues (faulty wiring, CO risk, structural problems) come first. Comfort improvements (insulation, lighting, climate control) come second. Cosmetic upgrades (floor coatings, paint, organization systems) come last. Following this order ensures you’re building each improvement on a solid foundation.
Consider the seasonal timing of your project. Floor coatings apply best in mild weather (50 to 85 degrees). Insulation projects are most motivating (and noticeable) before extreme weather hits. Electrical and plumbing work can happen year-round but should be completed before installing trim or finishing walls over the wiring.
Overhead storage builds go fastest in moderate temps when you’re comfortable working for extended periods. Avoid midsummer heat or midwinter cold if you can schedule around them.
Before starting any garage project, take stock of what you have and what you need. Walk the space with a tape measure and a notepad. Record dimensions, note existing electrical outlets and their amperage, check for moisture issues, and photograph anything you want to change. This baseline assessment prevents surprises mid-project and helps you budget materials accurately.
Research local building codes and permit requirements for your specific project. Electrical work, structural modifications, and HVAC installations often require permits and inspections. Working without required permits can create liability issues, insurance complications, and problems when selling the home.
Overhead storage platforms typically don’t require permits unless they involve structural modifications beyond simple bracket mounting. Check with your local building department if you’re reinforcing joists or making cuts to framing members.
Frequently Asked Questions
How much weight can wall-mounted storage hold?
50 to 75 pounds per linear foot when anchored into studs. Drywall-only mounting fails above 15 to 25 pounds. Always use studs for heavy storage. For specific mounting solutions, check out our guide on
