If you want to install a drop ceiling, a fan, or do just about anything else to your garage ceiling, you must know how to find studs.
Ceiling studs hold up the drywall or sheetrock that makes up walls and ceiling. But once the ceiling joists are covered up, they can be hard to find. If you’re planning any ceiling-related construction or add-ons, you must know where your studs are.
This article will show you several ways to do that.
How to Find a Stud in the Ceiling Manually
Thankfully, several ways to locate studs in your ceiling don’t require a stud finder.
Trying to find studs manually is a great way to get to know the ins and outs of your house. That helps make future projects easier.
Here are a few simple ways to find studs in your ceiling. Best of all, they won’t require you to buy additional tools.
Find the Joists
The first thing you’ll have to do for any stud finding is to discover what direction the joists run in. Most attics and basements have exposed beams.
It’s worth checking there first.
If you can easily access your joists, make sure to measure their size. The measurements of the beam and the type of wood used can affect how much weight they can hold. If you plan to put in a heavier item like a ceiling fan, you may need to check to see if you’ll have to add reinforcements.
However, if your joists aren’t accessible, there are a few simple tricks to finding them.
Knocking
The most popular way to find hidden joists is also one of the simplest: knocking on the ceiling.
With this technique, you must start in one corner and use a tape measure to mark 16 inches. Then, knock at the 16-inch mark. If it sounds solid, then you found the joist!
However, if it sounds hollow, don’t fret. Measure another 16 inches in the same direction and knock the ceiling again. If it still sounds hollow, repeat these steps from the same corner but in the opposite direction. When you find a pattern, that means you’ve discovered which direction the joists run in.
Heavy insulation or certain stucco finishes may make it hard to tell where the joists are based on knocking alone. Additionally, older homes or DIY additions may mean builders didn’t follow the same spacing for all the beams. If you’re dealing with different ceiling materials, consider exploring alternative wall finishing options that might make future stud detection easier.
If so, you can use these other methods to manually find the ceiling joists and studs.
Follow the Outlets
This trick works best for finding wall studs but can also work when you have a ceiling outlet.
Those outlets will be attached directly to a joist.
You’ll want to double-check by knocking and listening for the hollow or solid sound, but outlets are a good indicator.
Another indicator is if you find any exposed nails. They’re almost always hammered into a joist and usually give you an idea of which way the beams are pointing.
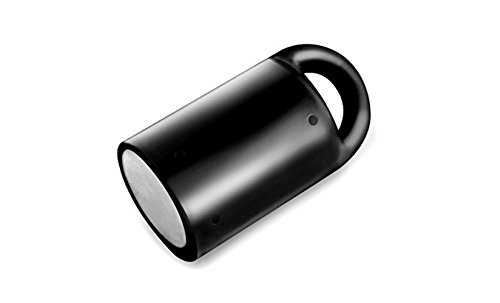
Use a Magnet
Much like using a magnetic stud finder, a decent magnet will allow you to discover metal fasteners. The larger (and stronger!) your magnet, it’s more likely you’ll get correct results.
A simple magnet, combined with the others in this section, makes it easy to double-check your results before you start hammering.
While you can go and get a high-powered rare earth magnet, some of the stronger refrigerator magnets could do the trick if you want to test it out first.
If the drywall and stud are attached, there must be either a screw or nail that keeps the two together.
Find the metal screw or nail, and you’ve found the stud.
Similarly, you can use a metal detector to pick up stud locations. If your metal detector or magnet is too sensitive, they might pick up other hidden metal items in the ceiling.
Use a Nail
This may be one of the messier ways to find a ceiling stud, but it is effective!
If you can see the joists in your attic (and they’re the ones you’re looking for), you can hammer a nail through the ceiling next to the joist to see it from below.
How to Find Ceiling Studs With a Stud Finder
If you are considering investing in a stud finder, getting one that works well for you is crucial.
While there are all sorts of opinions about which Stud Finders are best, first, you must understand the three basic categories of stud finders: electric, magnetic, and phone-based.
Magnetic Stud-Finders
Magnetic stud finders, as the name implies, leverage the power of magnetism. They include a small magnet drawn to the metal fasteners (like screws or nails) embedded in wall studs.
When this magnet detects a metal object beneath the surface, it resists or pulls, letting the user know they’ve found a likely stud location.
Magnetic stud finders are incredibly simple.
There’s no need for batteries, calibration, or complicated settings. They’re also compact, making them easy to store or tuck into a pocket while working. For those organizing their workshop space, proper tool storage solutions can help keep these handy devices within reach for future projects.
However, as with all tools, magnetic stud finders have their nuances.
Their primary limitation is that they detect metal, meaning they rely on locating the screws or nails in the studs, not the studs themselves. This can occasionally lead to false positives if there’s other metal behind your walls.
Additionally, for thicker or plastered walls, their effectiveness might be reduced.
- Easily locate the metal studs in the wall. Simple yet effective.
- Battery-free: Durable magnet means portable stud finding power without worrying about batteries or water damage.
- Coated with rust-proof plastic liner, the MagnetPal magnet will never rust
- Made of ultra-powerful Neodymium magnets that can hold up to 12 lbs of weight off the ground!
Electronic Stud-Finders
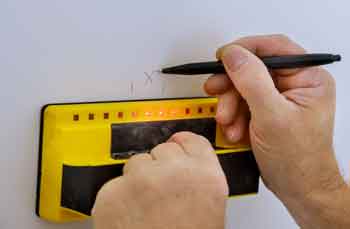
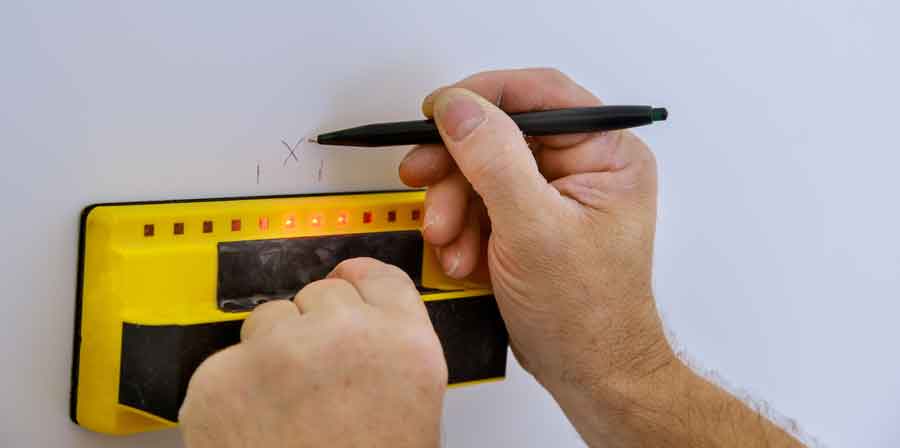
At their core, electronic stud finders work by measuring changes in wall density. They detect the relative density difference between the stud (denser) and the space between studs (less dense).
When they sense a significant shift in density, the device indicates the presence of a stud, often through visual cues like LED lights, digital displays, or auditory signals.
One benefit of using an electronic stud finder instead of magnetic stud finders is their ability to differentiate between different materials. Some models can discern between wooden and metal studs, while others identify live electrical wires, preventing potential mishaps during drilling.
There are three primary types of electronic stud finders:
- Edge Finders: The most basic variety, they locate the stud’s edges, requiring users to mark both sides to determine the stud’s center.
- Center Finders: A step up in sophistication, these directly identify the center of the stud, ensuring more accuracy in drilling or hammering.
- Instant Finders: The most advanced kind, they can simultaneously detect and display multiple stud locations instantly.
Despite their advantages, electronic stud finders do come with challenges.
They require batteries, sometimes give false readings on textured or uneven walls, and often need calibration for optimal accuracy. In dusty garage environments, keeping your workspace clean with proper dust control measures can help improve accuracy and extend the life of sensitive electronic equipment.