Your garage door starts to close, then suddenly reverses back up for no apparent reason. Or maybe it won’t close at all unless you hold the wall button down the entire time. These frustrating symptoms usually point to one culprit: misaligned safety sensors.
Those small boxes mounted near the bottom of your garage door tracks are literal lifesavers. They prevent the door from crushing anything (or anyone) in its path. But when they’re even slightly out of alignment, your garage door system essentially refuses to work properly. The good news is that fixing this problem takes about 10 minutes and doesn’t require calling a technician.
How to Tell Your Sensors Are Misaligned
Before you start adjusting anything, confirm that misalignment is actually your problem. The most obvious sign is a door that reverses immediately after you try to close it. You’ll also notice the sensor lights behaving strangely.
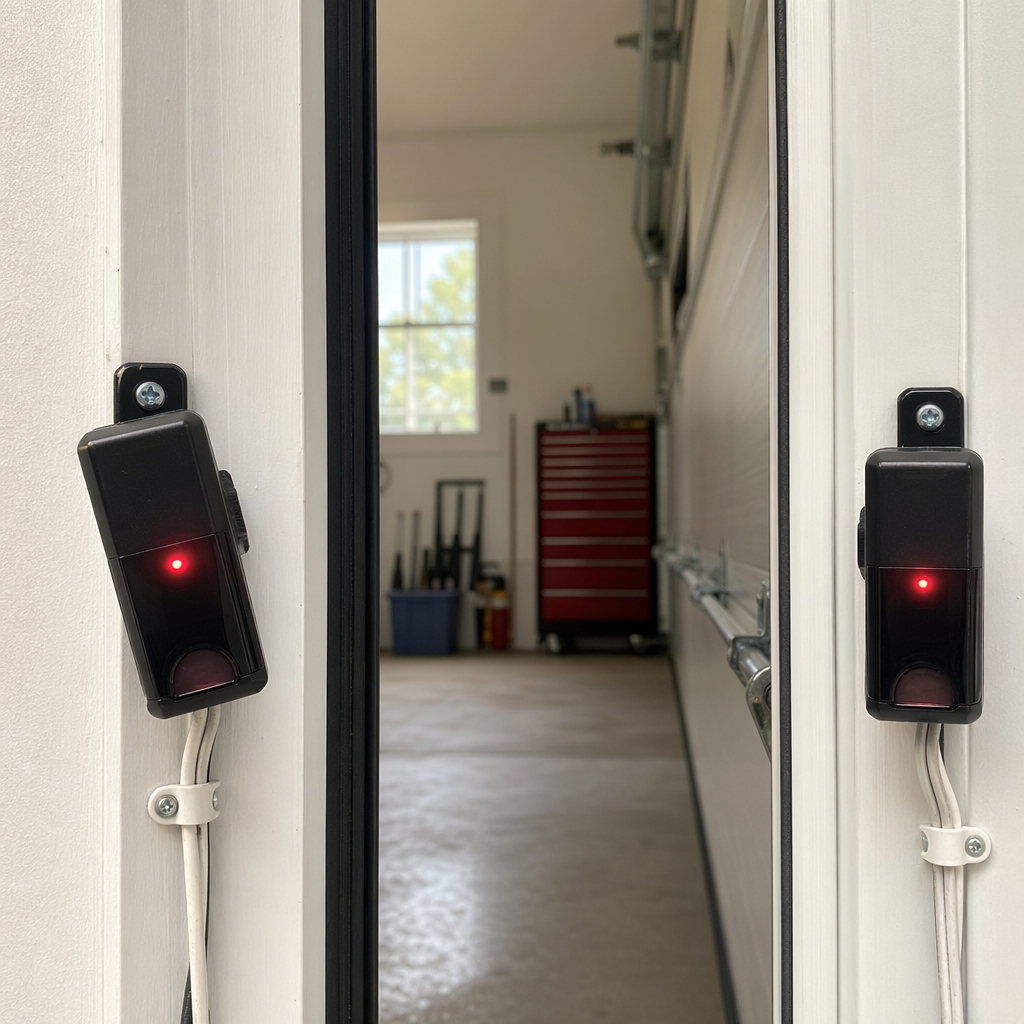
Most garage door sensors have LED indicator lights. One sensor sends an infrared beam, while the other receives it. The receiving sensor typically shows a green light when everything’s aligned correctly. When misaligned, you’ll see a red light, a blinking light, or no light at all depending on your brand.
LiftMaster sensors blink red when misaligned, while Chamberlain units (which are made by the same parent company) behave identically. Genie sensors show a red light on the receiving sensor when there’s a problem. Craftsman sensors also use the red/green indicator system.
Another telltale sign: your door closes only when you hold down the wall button continuously. This is actually a safety feature. Holding the button overrides the sensor system, telling the opener you’re aware something’s blocking the sensors and you want to close anyway. If you’re experiencing this issue, learning more about why your garage door opens but won’t close can provide additional troubleshooting insights.
Step-by-Step Sensor Alignment Process
Start by looking at both sensors from inside your garage. They should directly face each other, completely level and at the same height. Even a quarter-inch difference matters when you’re dealing with a narrow infrared beam.
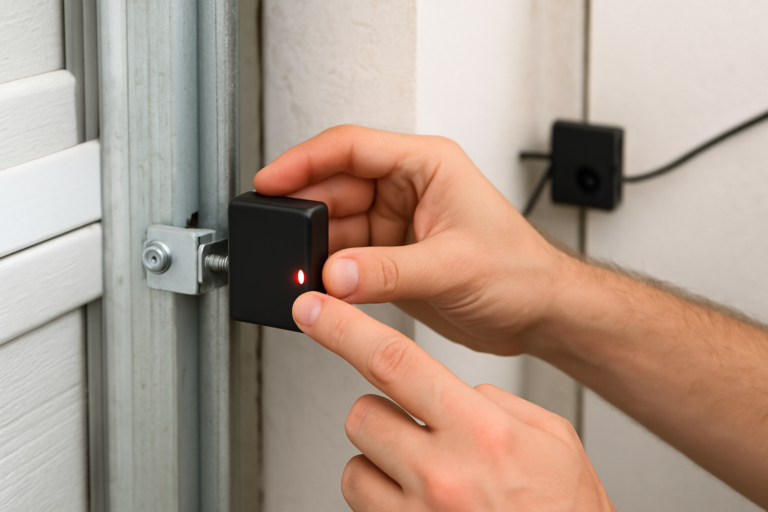
Loosen the wing nut or screw that holds the receiving sensor (the one showing the problem light) to its mounting bracket. Don’t remove it completely, just loosen it enough that you can move the sensor up and down or rotate it slightly.
Gently adjust the sensor while watching the indicator light. Move it up, down, left, or right in small increments. You’re looking for that solid green light (or whatever color indicates proper alignment for your brand). This can take a few tries, so don’t rush it.
Once you see a solid indicator light, hold the sensor steady and tighten the mounting hardware. Be careful not to move the sensor while tightening. I’ve made this mistake more times than I’d like to admit.
Test your door by closing it with the remote. It should close smoothly without reversing. Walk in front of the sensors while the door is closing to make sure they actually detect obstruction. The door should reverse immediately. If your door still doesn’t respond properly, you might be dealing with opener issues where the motor runs but the door won’t move.
Using String for Perfect Alignment
If you’re having trouble getting both sensors level with each other, try this trick. Stretch a piece of string between the two sensors at their current heights. Use a level against the string to make sure it’s perfectly horizontal, then adjust each sensor to align with the string.
This method works particularly well for newer installations or if someone knocked a sensor significantly out of place. It takes the guesswork out of eyeballing the alignment.
Clean Those Lenses
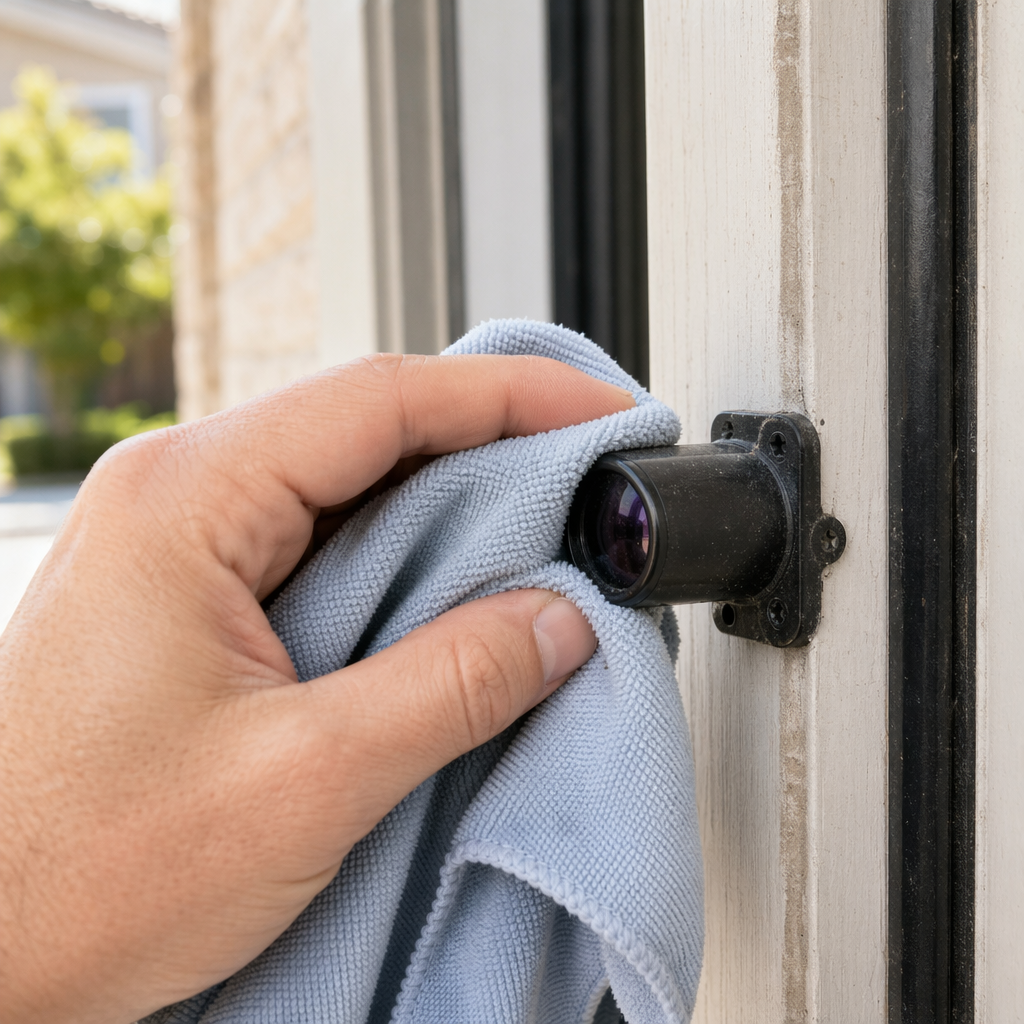
Sometimes the sensors are perfectly aligned, but they still don’t work because the lenses are dirty. Garage environments are dusty, and those little sensor lenses collect grime, spider webs, and general crud over time.
Wipe each sensor lens with a clean, dry microfiber cloth. Don’t use glass cleaner or wet wipes, as moisture can sometimes interfere with the sensor reading. A dry cloth removes most buildup effectively.
Check the lenses for scratches or cracks while you’re at it. A damaged lens might let some light through but not enough for reliable operation. Replacement sensors are relatively inexpensive, and you can find universal options that work with most major brands.
Inspect the Wiring
Alignment and cleanliness fix most sensor problems, but occasionally the issue is electrical. Look at the wires running from each sensor back to your garage door opener motor unit.
Check for any obvious damage like cut wires, exposed copper, or loose connections. The wires should be stapled or clipped along the wall and tracks, not hanging loose where they can get snagged. Rodents sometimes chew through these wires, especially in detached garages.
At the opener motor unit, make sure the sensor wires are firmly connected to their terminals. These are usually simple screw terminals or push-in connectors. Give them a gentle tug to confirm they’re secure.
For Chamberlain and LiftMaster units, the sensor wires typically connect to terminals marked with white and gray or white and black color coding. Genie openers use similar terminal setups. Verify you didn’t accidentally reverse the wires during a previous repair or installation. Regular maintenance with the right lubricants can also help prevent mechanical issues that might affect sensor performance.
Brand-Specific Quirks to Know
LiftMaster and Chamberlain sensors are essentially interchangeable since LiftMaster owns Chamberlain. They use the same 3-wire safety sensor system and have identical mounting brackets. The model 041A5034 sensors work with most units manufactured after 1997.
Genie sensors operate on a similar principle but use slightly different mounting hardware. Genie’s Safe-T-Beam system includes sensors that often have a larger profile than LiftMaster units. The model GICSB-R replacement sensors fit most Genie openers from the last 20 years.
Craftsman garage door openers, which were made by Chamberlain for many years, use LiftMaster-compatible sensors. However, some older Craftsman units from the 1980s and early 1990s had different safety systems altogether. Check your model number if you have an older Craftsman unit.
Overhead Door brand sensors use their own proprietary design for their Destiny and Legacy series openers. These sensors often have a different appearance, with a more rectangular shape instead of the typical cylindrical design.
When to Replace Your Sensors
Sometimes no amount of adjustment or cleaning will fix malfunctioning sensors. Physical damage is the most obvious reason to replace them. Cracked housings, broken lenses, or crushed sensor bodies won’t function reliably no matter how well you align them.
Water damage is another common killer. Sensors mounted in areas where rain blows in or where melting snow creates puddles often fail prematurely. The internal electronics corrode, and the sensor becomes unreliable or completely dead.
Age matters too. Sensors older than 15 years start having reliability issues even without visible damage. The infrared emitters weaken over time, and the receivers become less sensitive. Replacing both sensors as a pair makes sense if one fails and they’re more than a decade old.
Intermittent problems that come and go unpredictably often indicate failing sensors. Your door works fine for days, then suddenly acts up for no reason. This erratic behavior usually means the sensor electronics are degrading, and replacement is your best bet. Sometimes sensor issues can also contribute to door alignment problems, creating a cascading effect of operational issues.
Frequently Asked Questions
Can I use sensors from a different brand on my garage door opener?
Generally, no. While the basic technology is similar, each manufacturer uses different wiring configurations and communication protocols. LiftMaster sensors work with Chamberlain openers because they’re the same company, but mixing other brands usually doesn’t work. Universal replacement sensors exist for some brands, but always verify compatibility with your specific opener model before purchasing.
Why do my sensors work fine until sunlight hits them in the afternoon?
Direct sunlight can overwhelm the infrared receiver, making it unable to detect the beam from the sending sensor. This is particularly common with sensors facing east or west. Try adjusting the angle of the receiving sensor slightly downward to reduce sun exposure, or install a small shade above the sensor using a piece of cardboard or a purpose-built sun shield. Some people have success simply repositioning the sensors to the opposite side of the door opening.
How often should I check my garage door sensor alignment?
Test your sensors monthly by waving an object in front of them while closing the door. This confirms they’re still detecting obstructions properly. Physical alignment checks are only necessary when you notice problems or after any impact to the sensors. However, cleaning the lenses every few months helps prevent dirt buildup from causing false readings or reducing the effective range of the infrared beam.