Most garages aren’t heated, making them uncomfortable in winter, especially if you have a detached garage.
Electric heaters are a decent solution, but many require 240-volt wiring, and many garages don’t have it.
There’s another option, though: a small wood stove.
Heating a garage with a wood stove could provide simple, safe heating…
Or it could be a disaster waiting to happen.
Keep reading to find out which is more likely.
Guidelines for a Heating a Garage with a Wood Stove
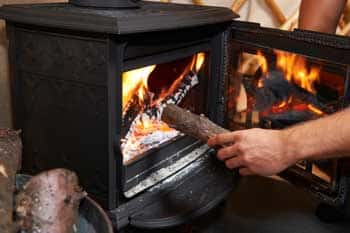
A wood-burning stove is as versatile as it gets.
It can be set up anywhere in your garage to add extra warmth, but there are a few things to remember.
When installing a wood-burning stove, always set it up on a fireproof, non-flammable surface.
Most garages have concrete slab floors, which is excellent for a stove. Just be aware that even the strongest garage floor coatings can be susceptible to heat damage.
Remember, you also need adequate ventilation in your garage so the smoke has somewhere to go besides your lungs.
Installing a Wood-burning Stove in the Garage
A wood-burning stove will make your garage nice and cozy, regardless of what you use the garage for.
Whether you have a detached or attached garage, big or small, or even how well your garage is insulated, it doesn’t matter.
With a little effort, you can find the right wood-burning stove to make your garage much more comfortable in the cold winter months.
Here’s a step-by-step DIY process for putting in your wood-burning stove.
Tools Needed:
- Cement backer board
- Cement board screws
- Chalk
- Fire-rated sheetrock
- Framing square
- Jab saw or Utility knife
- Matches
- Measuring tape
- Newspaper
- Plumb bob
- Screwdriver
- Scribing compass
- Silicone caulking
1. Find the Location
When selecting a location, take measurements of the ceiling, wall coverings, and garage ventilation system.
Always check the manufacturer’s instructions for how much clearance they require around the wood stove. You want to make sure your stove position exactly meets or exceeds requirements.
2. Lining Up
Using your plumb bob, mark the place in the ceiling for the chimney opening. Have the plumb bob centered over the stove’s chimney connection flange.
3. Set-up Clearance for Combustibles
Take your scribing compass and draw a circle to the chimney section diameters that will penetrate the roof and ceiling. Add another four inches to the diameter of the hole. The step allows a typical minimum clearance for combustible materials like the roof structure or ceiling joists.
4. Adjust the Chimney
Adjust the chimney configuration or stove position so that roof penetration is as close to centered between rafters and joists.
5. Prepare the Sheetrock & Roof
Take your utility knife or jab saw and cut the ceiling sheetrock. The size should comfortably accommodate the metal chimney collar. Cut the roof’s sheathing and roofing along the outline of the central circle on the wood-burning stove connection.
6. Get the Chimney Ready
Clear the roofing around the opening. Install the chimney collar flashing according to manufacturer instructions. Once you’ve verified the correct location of the hole, lower the plumb bob through the ceiling hole.
7. Confirm Stove Spacing
Measure your space for the stove on the concrete floor. Create a wall line that’s an 18-inch perpendicular point beyond the front edge of the stove door opening. To ensure the measurement, use a framing square.
9. Move Stove
Now, move the wood-burning stove away to access the rear wall.
10. Install Sheetrock
If you have an unfinished/no sheetrock wall, you need to cover that wall with a full sheet of drywall. It should be fire-rated and placed centered and horizontally. Maintain a minimum of 48-inches on both sides from the stove location’s centerline.
Attach the sheetrock with drywall screws and a screwdriver. If using a corner installation, extend the sheetrock 48-inches each way from the stove corner.
11. Install Backer Board
Install a sheet of cement backer board no less than 36 inches high. Place it horizontally with the stove’s centerline. Do not let the backer extend beyond the sheetrock. Attach the cement board to the wall framing using screwdriver cement board screws. Keep screws about eight inches apart on the studs.
12. Reset Stove
Put the wood stove back. Use the tape to ensure you’ve done all necessary clearances.
13. Put Chimney Up
Connect your chimney sections. Thread the joined chimney assembly through the collar flashing and roof opening before sliding the base over the chimney flange on the top of the stove. Attach the stove flange and chimney using manufacturer instructions.
Attach the storm collar, or counter-flashing, over the roof collar flashing. Take the silicone caulking and run a continuous bead around the gap perimeter between the chimney’s vertical surface and the storm collar’s inside edge.
Place the chimney cap. Ensure the cap snaps full lock on the top of the chimney assembly.
14. Test the Flue
Turn the metal handle (that should be on the chimney’s side) and open the flue. The handle is usually somewhere between five and five feet above the floor.
15. Test the Stove
Using matches, light a small newspaper inside the firebox. Adjust the flue, ensuring you can sustain even, clear smoke drafting into the chimney.

Professional Installation of a Garage Wood-burning Stove
While there are no hard-and-fast rules for installation for these solutions, there are regulations for appliances that produce heat that require the following.
The best way to ensure a safe, fast, and efficient installation is to go with a pro installer.
When you use a contractor to install a wood-burning stove, you take advantage of the following benefits.
You’ll Save Money
Many DIY-ers feel they save money doing it themselves. However, we’re usually only looking at the rate of using the contractor and materials. Most people don’t consider how essential time and experience are.
Bringing a pro to the game simplifies everything.
They have a line on getting the best materials and knowing regulations and safety measures.
They can get the job done without life distractions. The pros are streamlining the process and getting it done with less expense.
You’ll Definitely Save Time
A professional installation provides exceptional flexibility.
You don’t have to set aside your weekend to do the job. There’s no finding time to shop, and make sure you have everything you need.
The only time you schedule is to give the installer access to the garage.
You’ll Have Peace of Mind
When you hire a contractor, you don’t concern yourself with safety guidelines, materials, or the possibility you missed something.
Installers have specialized skills, expertise, training, and experience. You’ll enjoy your spaces more and sleep better knowing the environment is safe.
Choosing a Wood-burning Stove for a Garage
We’ve compiled some of the best features you should look for and other factors to consider before choosing the ideal wood-burning stove for your garage.
Type of Stove
Wood-burning stoves come in a range of designs. Common models include catalytic and non-catalytic combustion stoves.
The first is going to be higher-end and more expensive. It will burn more efficiently as it offers consistent temps and burns wood longer. The non-catalytic will cost less and won’t need maintenance and frequent replacement of combustion elements.
Energy Efficiency
While stoves are meant to burn some form of fuel, each method does it differently. For example, you can find models that produce similar amounts of heat, but one will burn more fuel doing it than another.
Before buying one of these stoves, perform your due diligence regarding fuel requirements and energy efficiency.
Size
You don’t need a large stove if you don’t have a spacious garage. A smaller or medium device will minimize fuel consumption, save money, conserve energy, and still manage to be comfortable.
The EPA keeps a database of certified wood heaters. Search for the size of your garage, and you will make finding a suitable wood-burning stove much easier.
The Best Wood-Burning Stoves for the Garage
To cap off our wood-burning stove in the garage roundup, let’s take a quick look at some of the best garage wood-burning stoves available now and why they stand out.
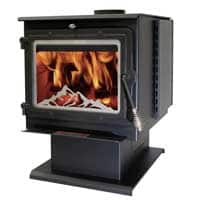
Pleasant Hearth Wood Stove
The Plesant Hearth stands for a sturdy build, a 65,000 BTU per hour rating, and its management of up to 1,800 square feet. It has a neat ceramic glass window for a relaxing view. It uses seasoned cord firewood and is easy to refuel.

- 2020 EPA certified
- Up to 65,000 BTU's/hr. heats up to 1,800 sq. ft.
- Large ceramic glass window to the fire for an amazing view
- Ash drawer allows for quick and easy cleanup
- Includes variable speed blower (PBAR-2427) for quiet, yet powerful heat distribution
Englander Wood Stove
Put the piggy bank away. You won’t have to break it for a solid wood-burning stove. The Englander is a great, affordable option. It has heat shields that help protect any combustibles in the vicinity. The stove comes with a complimentary blower. The add-on will circulate heat across 2,000 square feet.
- Steel and cast iron USA-made construction offers long-lasting durability
- Large 2.45 cu. ft. firebox holds logs 18 in. L
- Heats up to 2,000 sq. ft. for reliable heating when burning seasoned cordwood
- Designed with a high-tech firebox to create a clean, hot, long-lasting burn
- Integrated, wrap-around heat shields for safer operation and more placement options
Guide Gear Wood Stove
Don’t overlook the Guide Gear Wood Stove when it comes to bang for the buck. It’s designed as a portable wood stove for camping but can pull double-duty in your garage if necessary.

- 2mm galvanized steel fire box with high-temp finish
- Cast iron door with adjustable vent
- Five interlocking stove pipes connect to form 6.45'h. chimney
- Cool-touch coiled handle
- 11"w. x 17"d. x 8"h. firebox