

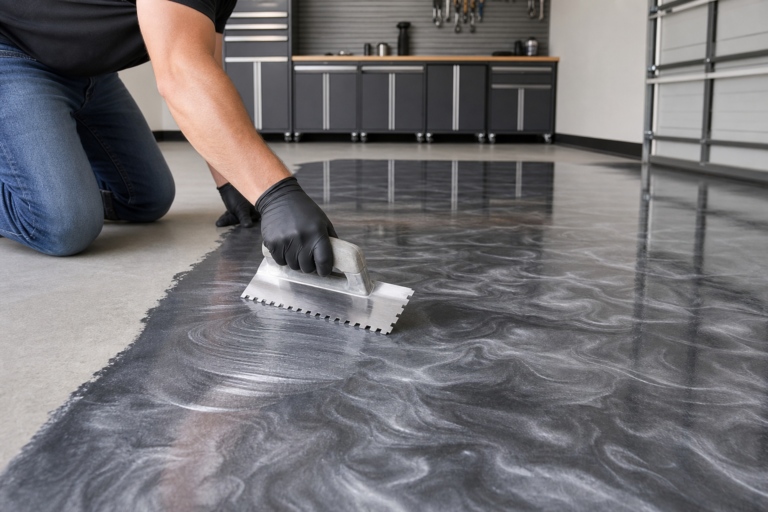
Whether you’ve been planning to apply metallic epoxy for a custom garage floor for months or decided to tackle it this weekend, a clear roadmap makes all the difference. Preparation accounts for about 80% of the success in projects like this.
Everything you need is below: tools, materials, step-by-step instructions, and the common pitfalls to avoid.
Understanding Metallic Epoxy Systems
Metallic epoxy creates those high-end showroom floors with swirling, three-dimensional color effects. The finish mimics polished marble, flowing water, or molten metal depending on pigment choice and application technique. It’s a two-part epoxy base coat mixed with metallic pigments, then manipulated while wet to create movement patterns, and sealed with a clear topcoat.
The system has three layers: a primer or base coat that bonds to concrete, a metallic pigmented layer where the visual effect happens, and a clear protective topcoat (usually polyurethane or polyaspartic) that shields the metallic layer and provides UV resistance. Each layer serves a specific purpose. Skip or shortcut any one and the entire system fails.
Concrete must be clean, sound, and properly profiled for the epoxy to bond. Profile means surface texture, think fine sandpaper rather than smooth. Acid etching alone won’t create enough profile for most epoxy systems. Mechanical grinding or shot blasting is standard prep for professional-grade results.
The concrete also needs to breathe properly. A moisture vapor barrier underneath or excessive moisture transmission through the slab will cause the epoxy to delaminate within months. You’ll want to check our guide on sealing garage floors before epoxy for more detailed prep information. If you notice water pooling on your concrete surface, proper drainage solutions should be addressed before any coating application.
Temperature and humidity control the working time and curing process. Most metallic epoxies require 60-85°F during application and cure. Below that range, the epoxy thickens and won’t flow properly. Above it, the material sets too fast to manipulate the metallic effect. Humidity over 85% can cause cloudiness or surface defects. Check weather forecasts for a stable three-day window before starting.
Essential Tools and Materials
For a standard two-car garage (400-500 square feet), you’ll need:
- Concrete grinder or shot blaster (rental runs competitively priced-150/day)
- Shop vacuum with HEPA filter
- Degreaser and concrete cleaner
- Crack filler and patching compound
- Moisture meter (plastic sheet test works but a meter gives hard numbers)
- Two-part epoxy base coat (coverage varies by product; typically 200-300 sq ft per gallon)
- Metallic pigments (powder or pre-mixed liquid)
- Mixing paddles and drill
- 9-inch or 18-inch rollers with 3/8-inch nap covers
- Squeegees
- Acetone or denatured alcohol in spray bottles
- Foam brushes for edges
- Clear topcoat (polyurethane or polyaspartic, 2-3 coats recommended)
- Spiked shoes for walking on wet epoxy
- Respirator with organic vapor cartridges
- Safety glasses and chemical-resistant gloves

Metallic Epoxy Garage Floor Kit
Complete kits include base coat, metallic pigments, and topcoat for professional results
Metallic epoxy kits for a two-car garage typically run mid-grade products, premium systems cost more. That doesn’t include surface prep materials or tool rentals. Budget another amount for prep supplies and grinder rental if you don’t own one.
Quality matters more here than with standard epoxy. The metallic pigments need to stay suspended and move properly during application. Cheap formulations clump, settle unevenly, or lose their luster under the topcoat. Stick with brands that publish technical data sheets with specific temperature ranges, pot life, recoat windows, and coverage rates. Consider how different colors will complement your garage space, as color selection impacts the overall aesthetic and apparent size of the room.
Surface Preparation: The Foundation of Success
Start with a completely empty garage. Move everything out, including items you think won’t interfere. You need clear access to every square inch of floor.
Inspect for oil stains, tire marks, previous coatings, efflorescence (white powdery deposits), and cracks. Oil penetrates concrete. Surface cleaning won’t remove it. Grind those areas down until you reach clean concrete, then treat with an oil-pulling degreaser. Let it dwell per product instructions, scrub with a stiff brush, and rinse thoroughly.
Removing Previous Coatings
Previous coatings must come off entirely. Epoxy won’t bond to paint, old sealers, or existing epoxy that’s delaminating. Grind or blast until you hit bare concrete across the entire floor. Spot removal doesn’t work, the new coating will only be as strong as its weakest bond point. If you’re dealing with an old epoxy coating, proper removal techniques are essential for ensuring the new metallic system bonds correctly.
Crack Repair
Crack repair comes next. Clean out cracks with a wire brush or grinder to remove loose material. Fill with a flexible epoxy crack filler rated for concrete movement. Cracks wider than 1/4 inch may need routing (cutting a V-groove) before filling to ensure proper adhesion. Structural cracks that run through the slab and show vertical displacement need professional evaluation before you coat over them.
Moisture Testing
Test for moisture. Tape a 2×2-foot plastic sheet to the concrete in several spots around the garage, sealing all edges with duct tape. Leave for 24 hours. If moisture appears under the plastic or the concrete looks darker, you have a moisture issue.
A moisture meter gives you a percentage, most epoxy systems require moisture vapor emission rates below 3-5 pounds per 1,000 square feet per 24 hours. Coating over excessive moisture causes blistering and delamination within weeks.
Grinding the Floor
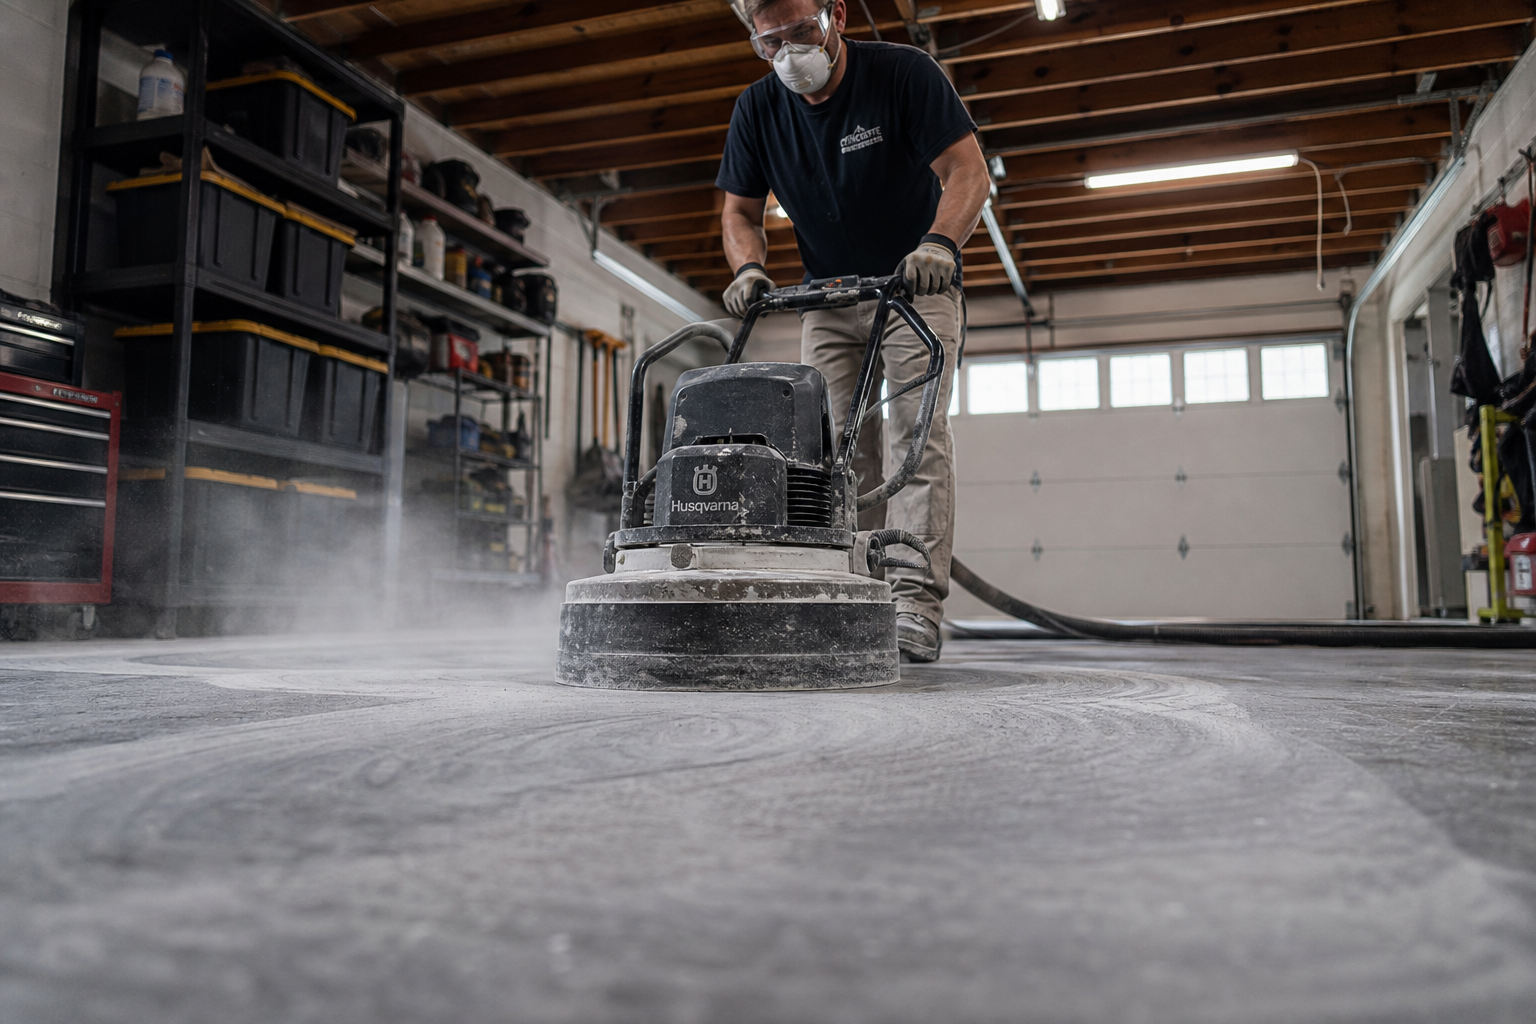
Grind the entire floor. Rent a planetary grinder or shot blaster and make overlapping passes until the concrete has a uniform profile similar to 80-grit sandpaper. You should see aggregate (the small stones in the concrete mix) clearly visible. A properly profiled surface looks lighter and feels slightly rough to the touch. This step creates mechanical tooth for the epoxy to grip.
Vacuum thoroughly with a HEPA-filtered shop vac. Blow out corners and edges with compressed air if you have it. Wipe the floor with a tack cloth or slightly damp microfiber mop to pick up the last dust. The concrete must be completely dry before coating, at least 24 hours after any wet cleaning.
Mixing and Applying the Base Coat
Most metallic epoxy systems start with a clear or tinted base coat. This coat primes the concrete and provides a uniform surface for the metallic layer. Read the product data sheet for exact mix ratios, pot life, and recoat windows. Epoxy chemistry isn’t forgiving, a ratio off by even 10% can prevent proper curing.
Pour Part A into a clean bucket. Add Part B according to the specified ratio (commonly 2:1 or 1:1 by volume). Mix with a paddle attachment on a corded drill at low speed for 3-4 minutes, scraping the sides and bottom. Transfer the mixed epoxy to a second clean bucket and mix again for 1 minute. This two-bucket method ensures complete blending of the two parts.
Pot life starts the moment you mix. For most products, you have 30-45 minutes of working time before the epoxy thickens too much to spread. Mix only what you can apply in that window. A two-car garage usually requires mixing in batches of 1-2 gallons at a time.
Pour the base coat onto the floor in ribbons, starting at the back corner farthest from the exit. Use a squeegee to spread it in one direction, then back-roll with a 3/8-inch nap roller to even out the thickness and eliminate squeegee lines. Work quickly but don’t rush. Consistent thickness matters, thin spots won’t hide concrete imperfections and thick spots waste material and extend cure time.
Cut in edges and corners with a foam brush before the main floor coating sets. Epoxy tends to pull away from vertical surfaces as it cures, leaving thin edges that fail first.
Let the base coat cure per manufacturer instructions, typically 4-8 hours at 70°F. The recoat window is critical. Apply the metallic layer too soon and the solvents in the second coat can re-dissolve the first. Wait too long and the base coat cures too hard for a chemical bond, requiring light sanding to create mechanical adhesion. Most systems have an optimal recoat window of 8-24 hours.
Creating the Metallic Effect
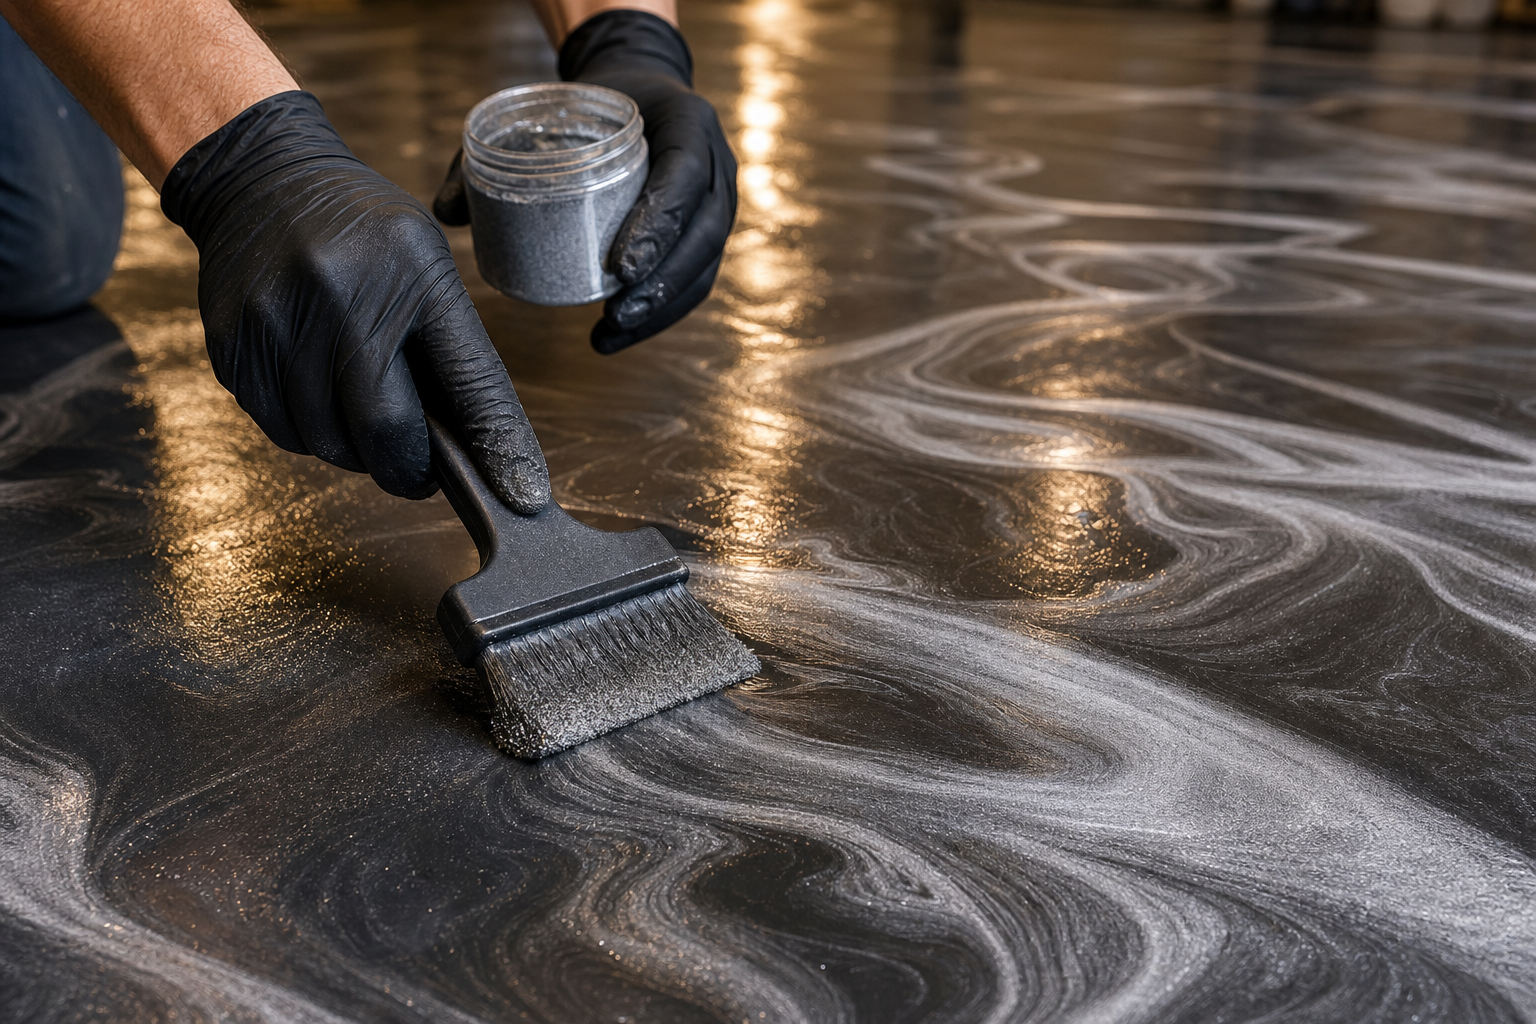
This is where metallic epoxy separates from standard garage coatings. The technique creates the visual movement and depth that make the floor unique.
Mix the metallic pigment into a batch of clear epoxy according to the system’s specifications. Some products use powder pigments you add to the mixed epoxy. Others use pre-dispersed liquid metallics. Powder gives you more control over color intensity but requires thorough mixing to avoid clumps. Liquid is easier but limits customization.
Application Technique
Stir the metallic epoxy gently. Overmixing can break up the metallic flakes and dull the effect. You want the pigment evenly distributed but not pulverized.
Pour the metallic epoxy onto the base coat in a random pattern, puddles, ribbons, waves, rather than in straight lines. Use a notched squeegee to spread it across the floor, leaving a texture pattern rather than a smooth surface. The texture creates the foundation for the swirl effect.
Creating the Swirl Pattern
Here’s where the magic happens. Fill a spray bottle with acetone or denatured alcohol. Lightly mist the wet metallic epoxy. The solvent disrupts the surface tension, causing the metallic particles to move and swirl. Different spray patterns create different effects:
- Fine mist creates subtle, tight swirls
- Heavy sprays push the metallics into bold, sweeping patterns
- Direct spray from close range creates cells and burst effects
- Spray from different angles as the epoxy sets to layer multiple movement patterns
Work in overlapping sections, maintaining a wet edge. If one section starts to set before you blend into the next, you’ll see a visible line where the two sections meet. Most applicators work in 4×4-foot or 4×6-foot areas, completing the spread-and-spray process before moving to the next section.
Use spiked shoes to walk on the wet epoxy without leaving footprints. Keep moving, standing still even for a few seconds can create marks. The epoxy’s working time varies with temperature. At 70°F, you might have 20-30 minutes to manipulate the metallic effect before the material gels. At 80°F, that window shrinks to 15 minutes or less.
Common Mistakes to Avoid
Step back periodically and check your work from different angles. The metallic effect looks different depending on viewing angle and lighting. Adjust spray patterns and pigment distribution as needed while the epoxy is still workable.
Common mistakes: over-spraying, which pushes all the pigment to the edges and leaves the center thin; under-spraying, which creates a flat, uniform look with no movement; inconsistent technique between sections, which creates obvious boundaries; and working too slowly, letting sections set before blending them together.
Let the metallic layer cure fully before topcoating, typically 12-24 hours depending on temperature and humidity. The surface should be tack-free and firm to the touch.
Applying the Clear Topcoat
The topcoat protects the metallic layer from abrasion, UV exposure, chemicals, and moisture. Most metallic epoxy systems recommend polyurethane or polyaspartic topcoats rather than epoxy. These coatings resist yellowing, provide better chemical resistance, and hold up to hot tire pickup (where car tires bonding to the floor pull up the coating when you drive away).
Apply at least two coats of clear topcoat, three if the garage sees heavy use or you park vehicles with performance tires that run hot. Mix the topcoat per instructions and apply with a clean roller using the same back-and-forth technique as the base coat. Don’t over
