

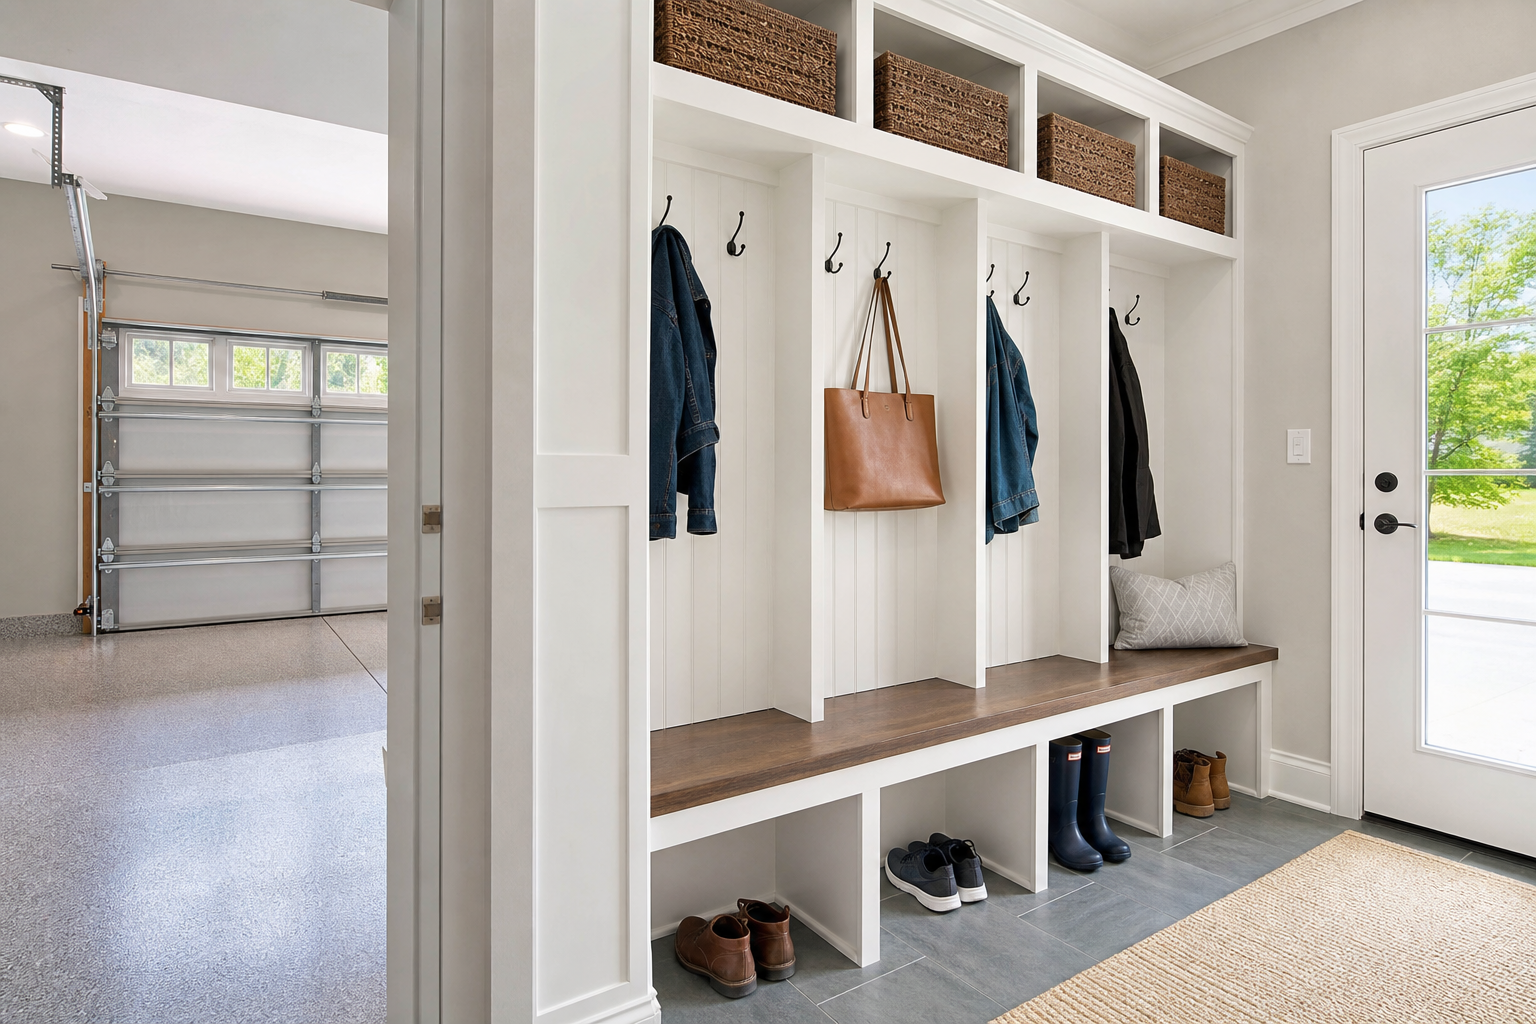
Taking on the project to build a garage mudroom entry area rewards careful planning and patience. Rushed work leads to results that need redoing within a year. A methodical approach delivers results that hold up for years.
This guide covers every stage from preparation to completion, with specific details on materials, tools, measurements, and techniques. Follow the sequence for the best outcome.
Understanding the Basics
Zone your garage before buying products. Common zones include tools and workbench areas, automotive storage, seasonal items, sports gear, lawn and garden equipment, and household overflow. Each zone stays self-contained so everything for a given task lives in one spot.
Weight capacity is critical and often misunderstood. Wall systems anchored into studs hold 50 to 75 pounds per linear foot. On drywall alone, that drops to 15 to 25 pounds before failure. Ceiling racks rated for 600 pounds assume even distribution. Concentrating weight in one area can cause failure well under the total limit.
Effective garage storage uses walls and ceiling as primary surfaces, keeping the floor clear for vehicles and work. Wall-mounted track systems, overhead ceiling racks, and sturdy cabinets provide organized access without eating into parking or workspace.
A mudroom entry zone in the garage serves a different purpose than storage for seasonal gear or tools. This is where daily traffic happens: kids coming home from school, you hauling groceries inside, wet boots after shoveling the driveway. The space needs to handle mess, repetitive use, and quick access to everyday items like coats, shoes, bags, and keys.
Most garages have a service door leading into the house. The area around this door is prime mudroom territory. A 4 to 6-foot wide zone gives you enough room for a bench, hooks, and some cubbies or shelves without blocking vehicle access.
Measure the clear space on both sides of the door before committing to a layout. You need at least 30 inches of clearance for the door swing, and another 36 inches for comfortable passage when someone’s sitting on the bench putting on shoes.
Creating a Functional Transition Zone
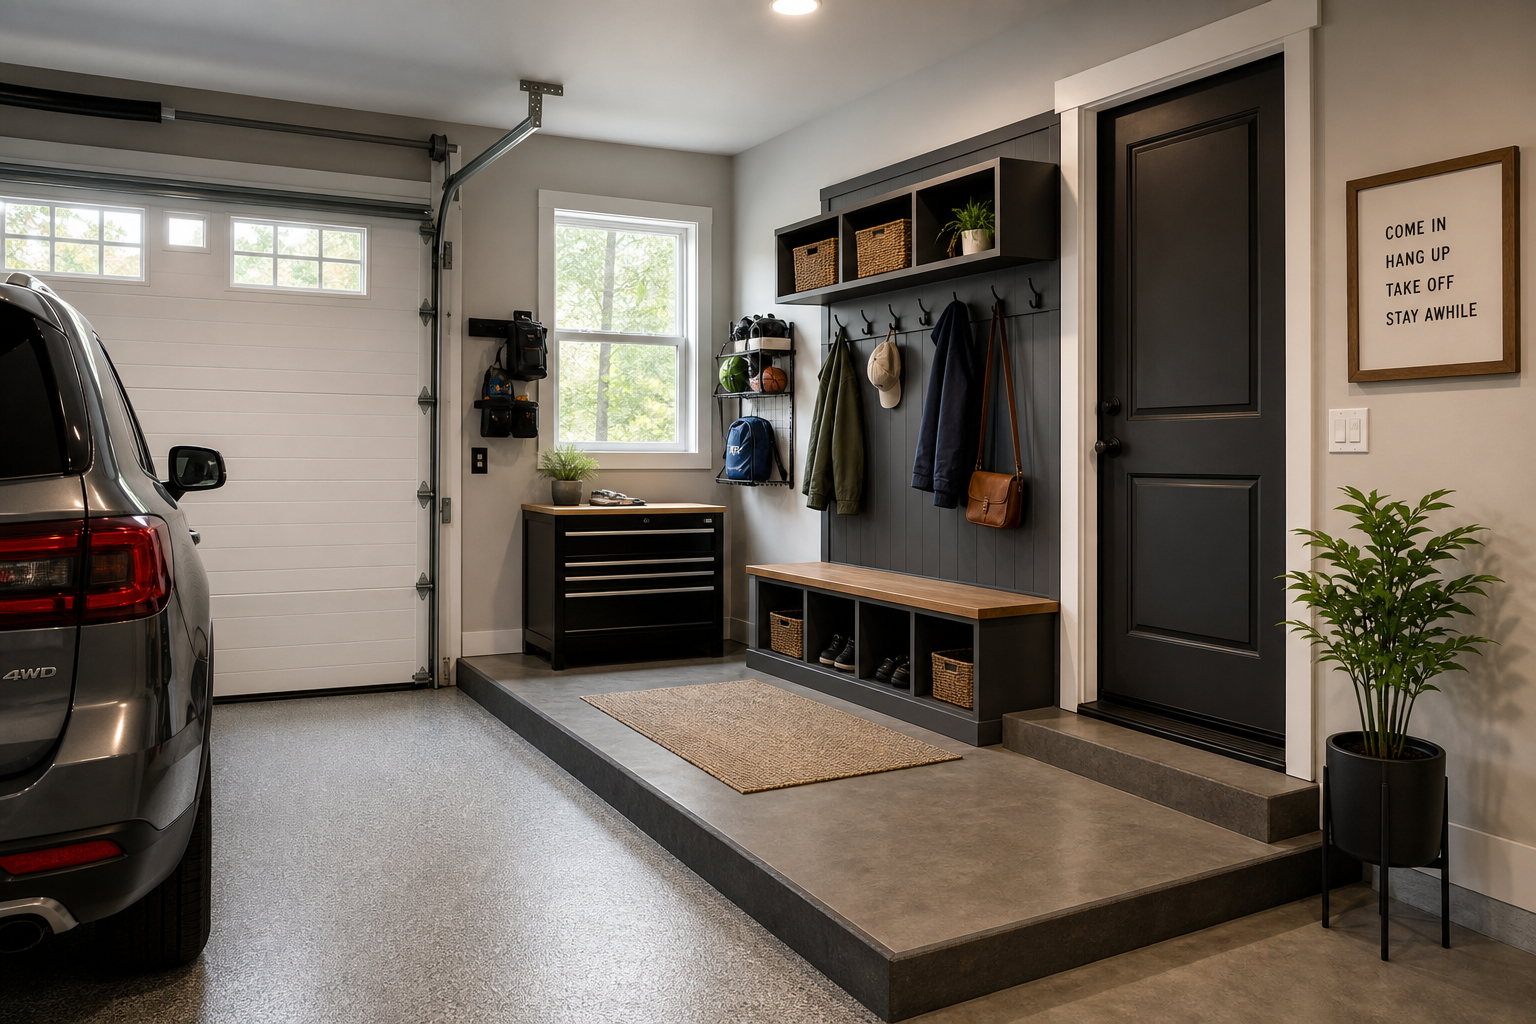
Creating a functional transition zone at the service door requires built-in cubbies or open shelving and coat hooks. Understanding the specifics of your situation helps you choose the right approach. Your garage’s age, construction type, and local climate all influence what works best and what to avoid.
Check specific requirements before purchasing materials. Measure the area, note unusual conditions like extreme temperatures, high humidity, or uneven surfaces, and read product specs carefully. A mismatch between your conditions and the product’s rated range is the most common cause of unexpected failures.
Locating Wall Studs and Installing Hooks
Start by identifying the wall studs around your service door. A stud finder makes this quick. Mark each stud location with painter’s tape so you know exactly where solid anchoring is available. Any shelving, hooks, or cubbies you install need to hit studs for long-term reliability. Drywall anchors fail fast under daily use, especially with heavy winter coats or backpacks loaded with books.
For coat hooks, heavy-duty models rated for 25 to 35 pounds each are the minimum. Cheap hooks bend or pull out after a few months of real use. Install hooks 48 to 54 inches off the floor for adult coats, and 36 to 42 inches for kids. Space hooks 6 to 8 inches apart so coats don’t overlap and create a tangled mess.
Designing and Building Cubbies
Cubbies work best when sized for actual use. A typical cubby for one person should be 12 to 15 inches wide and 12 to 18 inches deep. Shallower cubbies (8 to 10 inches) hold shoes and small bags but won’t fit bulky items like helmets or sports gear. Deeper cubbies eat into your garage space and collect clutter in the back where it’s hard to reach.
You can build cubbies from scratch using 3/4-inch plywood and pocket screws, or buy prefab cubby units and mount them to the wall. Prefab units save time but limit customization. Building from scratch lets you match the exact dimensions of your space and add features like adjustable shelves or extra compartments for specific gear.
When building, cut plywood panels for the top, bottom, sides, and dividers. Assemble the frame with pocket screws and wood glue. Attach the entire unit to wall studs using 3-inch lag screws. For a 6-foot-wide cubby unit, use at least four lag screws into studs, two on each side. This anchoring method handles the weight of the loaded cubbies plus the occasional kid climbing on the bench below.

Steel Garage Cabinet
Durable steel construction withstands daily use and garage temperature swings better than wood alternatives
Adding Open Shelving
Open shelving above the bench provides quick-access storage for items you grab on the way out: sunglasses, dog leashes, reusable shopping bags, car keys. Keep this shelf shallow (6 to 8 inches deep) so items don’t get lost in the back. Install it 60 to 66 inches off the floor, high enough that you won’t hit your head when standing but low enough to reach without a step stool.
Wire shelving is tempting because it’s cheap and fast to install, but it looks unfinished and items fall through the gaps. Solid wood or melamine shelves look cleaner and hold smaller items like sunscreen tubes or chapstick without things tipping over.
Building a Shoe Bench with Storage Underneath
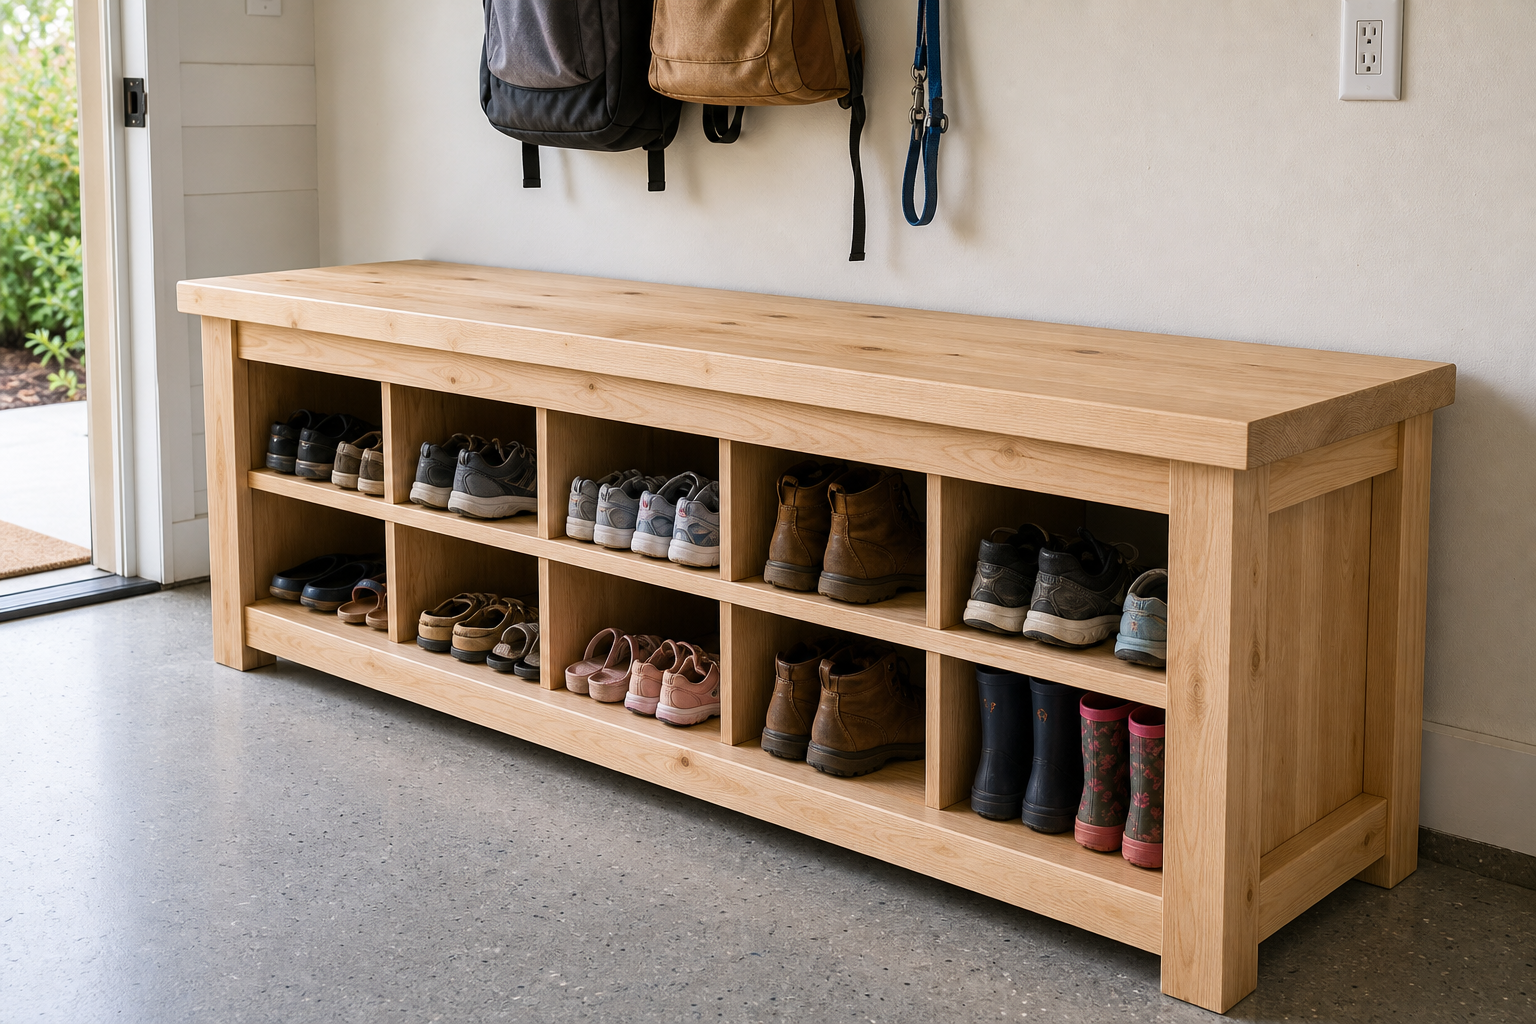
A shoe bench with storage underneath and durable flooring in a small footprint requires matching your approach to actual conditions rather than following a generic formula. Climate, surface condition, and usage patterns all influence the best path forward.
Start with a small test area if you’re uncertain. A 4 by 4-foot section in an inconspicuous spot lets you evaluate adhesion, appearance, and workability without committing to the full project. Troubleshooting a small test area is far easier than redoing everything.
Bench Construction Details
A bench in the mudroom zone serves two purposes: seating for putting on shoes, and a base for storage underneath. Standard bench height is 18 inches, the same as a dining chair. This height works for most adults and kids without being awkward. Bench depth should match your cubby depth if you’re building cubbies above it. A bench that’s 15 inches deep provides enough seating room without jutting out too far into the garage.
The simplest bench design uses a 2×4 frame with a 3/4-inch plywood top. Cut two 2×4 rails to the desired bench length (matching your cubby width if applicable). Cut four 2×4 legs to 16.5 inches, which gives you an 18-inch finished height after adding the plywood top. Assemble the frame with 3-inch screws, then attach the plywood top with 1.5-inch screws from underneath.
Sand the plywood smooth and finish with a durable paint or polyurethane to handle wet boots and daily wear. For more ambitious projects, consider a workshop-style approach with built-in tool storage underneath.
Storage Options Under the Bench
For storage underneath, you have two options: open space for slide-out bins, or built-in drawers. Open space is easier and more flexible. Buy plastic bins that fit the dimensions of your bench (typically 12 to 15 inches wide, 12 to 18 inches deep, and 10 to 12 inches tall). Label each bin for specific items: one for winter gloves and hats, one for pet supplies, one for outdoor toys.
Built-in drawers look cleaner but add complexity and cost. You need drawer slides rated for at least 75 pounds if you’re storing boots or sports gear. Soft-close slides prevent the constant slamming that shakes loose screws over time.
Anchor the bench to the wall studs even if it feels stable freestanding. Kids will climb on it, adults will sit on it while wrestling with stuck boots, and over time an unanchored bench walks forward and creates gaps. Two or three 3-inch lag screws through the back rail into studs keep everything tight.
Flooring Solutions
Flooring in the mudroom zone takes more abuse than any other part of the garage. Wet shoes, salt and sand tracked in during winter, dirt from spring gardening all concentrate here. Concrete is fine if you’re in a mild climate and don’t mind the industrial look. For better comfort and easier cleaning, add a surface layer.
Luxury vinyl plank (LVP) designed for commercial use holds up well in garages. Look for products rated for high foot traffic and moisture resistance. Standard residential LVP isn’t tough enough. Commercial-grade LVP installs as a floating floor over concrete, so no adhesive is needed if the concrete is smooth and level. Clean the concrete thoroughly, check for level with a 4-foot straightedge, and lay down a vapor barrier (6-mil plastic sheeting works) before installing the LVP.
Porcelain tile is another solid option, especially if your garage sees freeze-thaw cycles. Porcelain doesn’t absorb water like ceramic, so it won’t crack from freeze-thaw. Use large-format tiles (12×24 or bigger) to minimize grout lines where dirt collects. Tile requires thin-set mortar and grouting, adding complexity and drying time to the project.
Avoid rubber mats or carpet tiles in the mudroom zone. Rubber mats trap moisture underneath and grow mold. Carpet tiles soak up water and salt, then stink and deteriorate. Save rubber or carpet for workshop zones where liquid spills are rare.
Electrical and Lighting Considerations
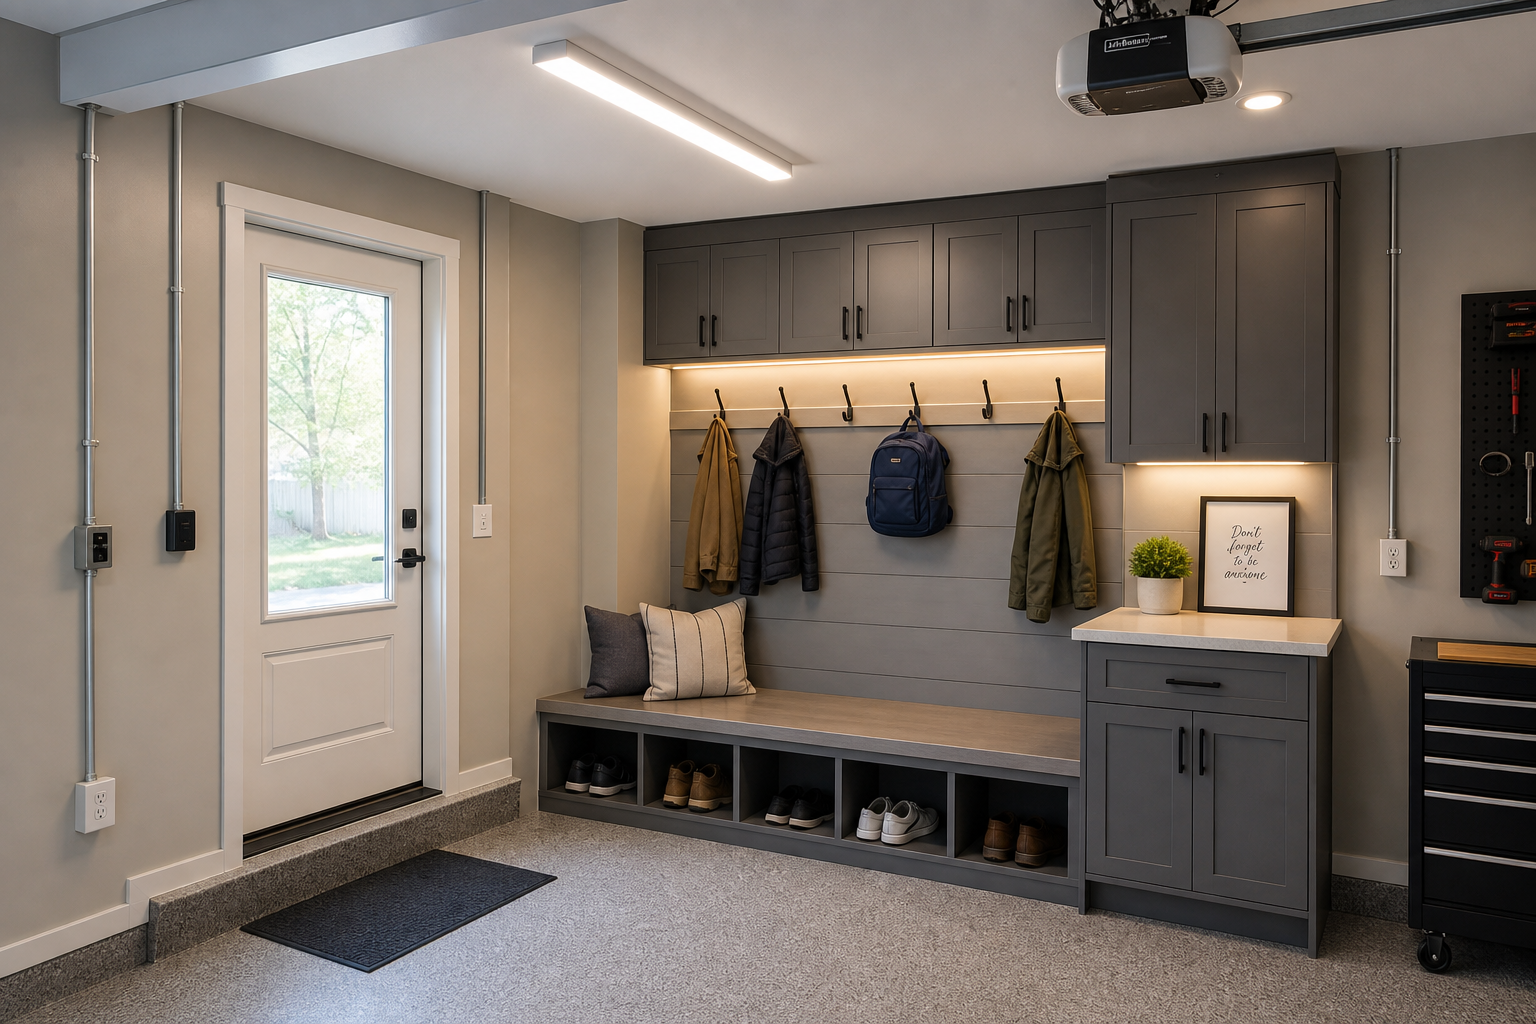
A mudroom entry area benefits from dedicated lighting and at least one outlet. Overhead garage lights often don’t illuminate the service door area well, leaving you fumbling for keys in the dark.
Add a wall-mounted light fixture above the bench or next to the door. Motion-activated LED fixtures work well here because they turn on automatically when you approach, and they don’t waste power when the area is empty. A basic motion-sensing LED fixture mounts with two screws.
Run power from an existing garage outlet if it’s nearby, or tap into the garage door opener circuit if you’re comfortable with electrical work. When considering garage door systems, a 1.25 HP vs 1.5 HP garage door opener comparison can help you understand power requirements for your space.
An outlet in the mudroom zone is useful for charging phones, plugging in a boot dryer, or running a small vacuum for quick cleanups. Mount the outlet 12 to 18 inches above the finished floor, not below the bench where it’s hard to reach. Use a GFCI outlet if your garage is damp or if local code requires it.
Climate-Specific Adjustments
Garages in four-season climates need different mudroom setups than garages in mild climates. If you deal with snow, ice, and road salt for months every year, plan for water management and material durability.
Managing Winter Conditions
A boot tray or drip pan under the bench catches meltwater from boots and shoes. Cheap plastic trays crack in cold temps, so get one made from heavy-duty rubber or metal. A 24×36-inch tray fits under most benches and holds several pairs of boots. Empty it weekly during winter or it overflows and creates puddles on your nice new floor.
Heated floors are a luxury upgrade that makes a mudroom zone far more comfortable in winter. Electric radiant heating mats install under tile or LVP and warm the floor to 75 to 85 degrees. This dries wet shoes faster and makes the space tolerable when you’re standing there in socks.
A small electric space heater (750 to 1,500 watts) mounted on the wall keeps the mudroom zone above freezing and helps gear dry overnight. Mount it high enough that kids can’t touch it, and use a model with an automatic shutoff if tipped.
Hot and Humid Climate Considerations
In hot, humid climates, ventilation matters more than heating. A small exhaust fan near the mudroom zone pulls out humid air from wet gear and prevents mold growth on wood surfaces. A basic bathroom exhaust fan (50 to 80 CFM) works fine. Vent it outside, not into the attic. Run it on a timer or humidity sensor so it operates automatically after someone comes home with wet gear.
Additional Considerations
Clear plastic bins beat cardboard for garage storage in every way: moisture resistance, pest resistance, visibility, and stackability. Label each bin on the front for easy identification. A label maker and 20 minutes of work saves hours of searching over the coming years.
Pegboard and Organization
Pegboard installed above the bench keeps frequently used items visible and accessible. A 2-foot-tall section of pegboard is enough for keys, dog leashes, reusable bags, and small tools like screwdrivers or scissors. Use metal pegboard hooks rated for 5 to 10 pounds each. Plastic hooks snap under load.

Heavy-Duty Garage Shelving
Built to handle the weight of loaded storage bins and seasonal gear without sagging or failure
Finishing Touches
Paint or stain your wood surfaces before installing them. Finishing pieces on sawhorses is faster and produces better results than trying to brush into corners after assembly. Use a semi-gloss or satin paint for easy cleaning. Flat paint shows every scuff and is impossible to wipe clean.
Add a small trash can or recycling bin to the mudroom zone. A 10 to 13-gallon can tucked under the bench or in a cubby gives you a place for junk mail, empty packaging, and other stuff that accumulates by the door. Empty it weekly or it overflows.
A whiteboard or corkboard next to the door provides a spot for shopping lists, reminders, school schedules, and keys. Mount it at eye level (around 60 inches off the floor). A 2×3-foot board is big enough to be useful without dominating the wall.
Practical Planning Tips
Before starting any garage project, take stock of what you have and what you need. Walk the space with a tape measure and a notepad. Record dimensions, note existing electrical outlets and their amperage, check for moisture issues, and photograph anything you want to change. This baseline assessment prevents surprises mid-project and helps you budget materials accurately.
Research local building codes and permit requirements for your specific project. Electrical work, structural modifications, and HVAC installations often require permits and inspections. Working without required permits can create liability issues, insurance complications, and problems when selling the home.
Timeline and Budget Planning
Set a realistic timeline and budget before buying anything. Most garage projects take 50% longer and cost 20% more than initial estimates, especially for first-timers. Build that buffer into your plan so unexpected discoveries don’t derail the entire project or blow the budget.
Sketch your layout on paper or use free design software before cutting any wood. Measure twice, cut once still holds true. A detailed sketch helps you spot problems like a bench blocking the door swing, or cubbies that interfere with the garage door track before you’ve wasted materials.
Tool and Material Tips
Buy materials in one trip if possible. This forces you to think through the entire project and creates accountability to finish once you’ve spent the money. Spreading purchases over weeks leads to scope creep and half-finished projects.
