You’ve finally installed that gorgeous slat wall system in your garage, and you’re staring at endless rows of horizontal grooves wondering what comes next. The secret to actually getting organized isn’t the wall itself. It’s choosing the right accessories and installing them in a way that makes sense for how you actually use your garage.
Most people grab a random assortment of hooks and baskets, throw them up wherever they fit, and wonder why their garage still feels chaotic. This guide will walk you through selecting the right accessories for your specific storage needs, installing them properly so they don’t come crashing down, and creating a system that actually works long-term.
Understanding Slat Wall Accessory Types
Before you start buying every hook you see, you need to understand what’s actually available and what each accessory does best. Different accessories serve different purposes, and matching the right one to your storage needs makes all the difference.
Standard slat wall hooks come in various lengths, from 2 inches to 12 inches or more. Short hooks work great for light items like hand tools or extension cords. Longer hooks handle bulkier items like leaf blowers or backpacks. Double hooks provide more stability for items you don’t want swinging around.
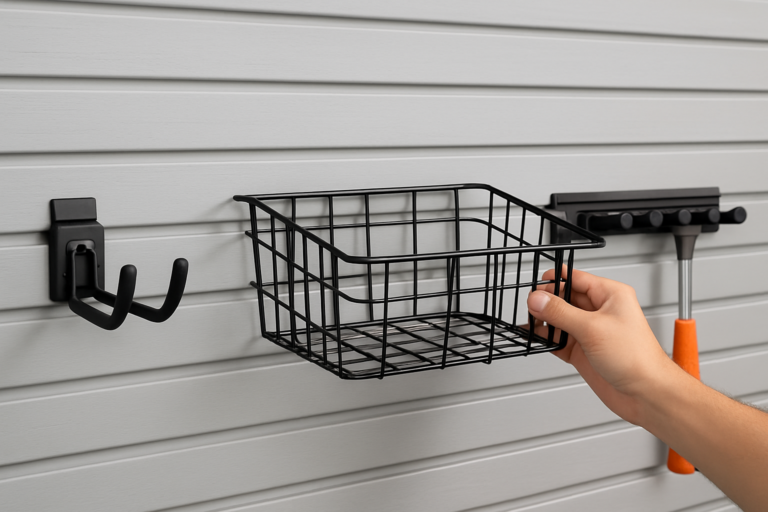
Slat wall baskets are perfect for corralling smaller items that would otherwise clutter up your workspace. Sports equipment, cleaning supplies, and gardening accessories all stay contained and visible. Most baskets measure between 12 and 24 inches wide and attach at two or more points for stability.

Slatwall Basket Set
Multiple basket sizes give you flexibility for different storage needs without buying accessories piecemeal
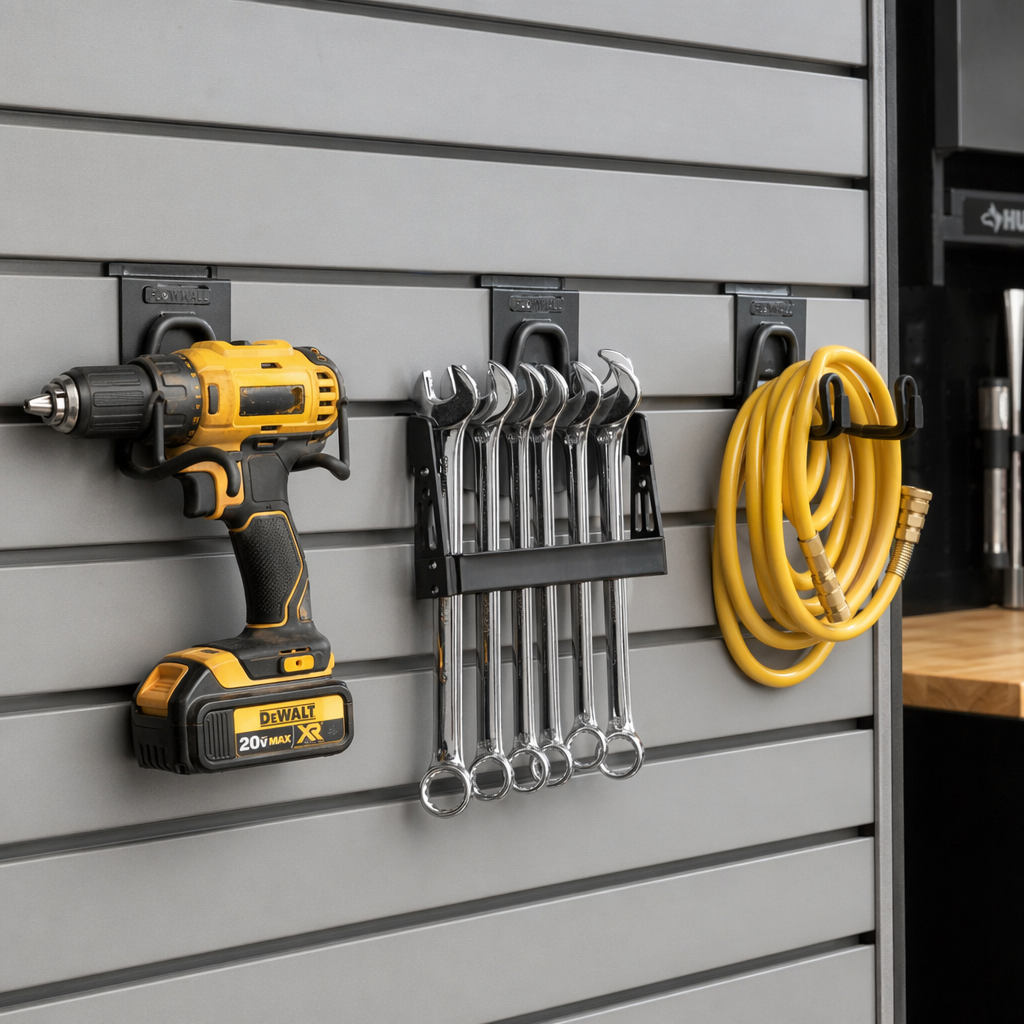
Specialty holders address specific storage challenges. Bike hooks keep your bicycles off the floor. Tool holders cradle power drills, circular saws, and other cordless tools while keeping batteries accessible. Garden tool holders have multiple prongs designed specifically for long-handled implements like rakes and shovels.
Slat wall shelves provide horizontal storage space for items that don’t hang well or need a stable platform. They typically range from 12 to 48 inches wide and can support surprisingly heavy loads when properly installed. For different wall organization approaches, consider rail organizers and track systems that offer similar functionality with different installation methods.
Weight Limits and Load Capacity
Every slat wall accessory has a weight rating, but the actual load capacity depends on three factors: the accessory itself, the slat wall material, and how many attachment points you’re using. Ignore any of these and you’ll find your stuff on the garage floor.
Most standard slat wall hooks rate between 25 and 75 pounds per hook. Heavy-duty versions can handle 100 pounds or more. But here’s what manufacturers won’t always tell you clearly: that rating assumes the slat wall itself can handle that load and that you’re using the hook correctly.
PVC slat wall panels typically max out around 50 pounds per square foot. Metal slat wall can handle significantly more, often 100-150 pounds per square foot. Wood or composite slat wall falls somewhere in between. Check your specific wall system’s specifications before loading it up.
For items over 25 pounds, use accessories with multiple attachment points. A shelf that hooks into three or four slats distributes weight better than a single hook. This isn’t just about preventing failures. It reduces stress on individual slats and keeps your wall looking straight over time.
Proper Installation Techniques
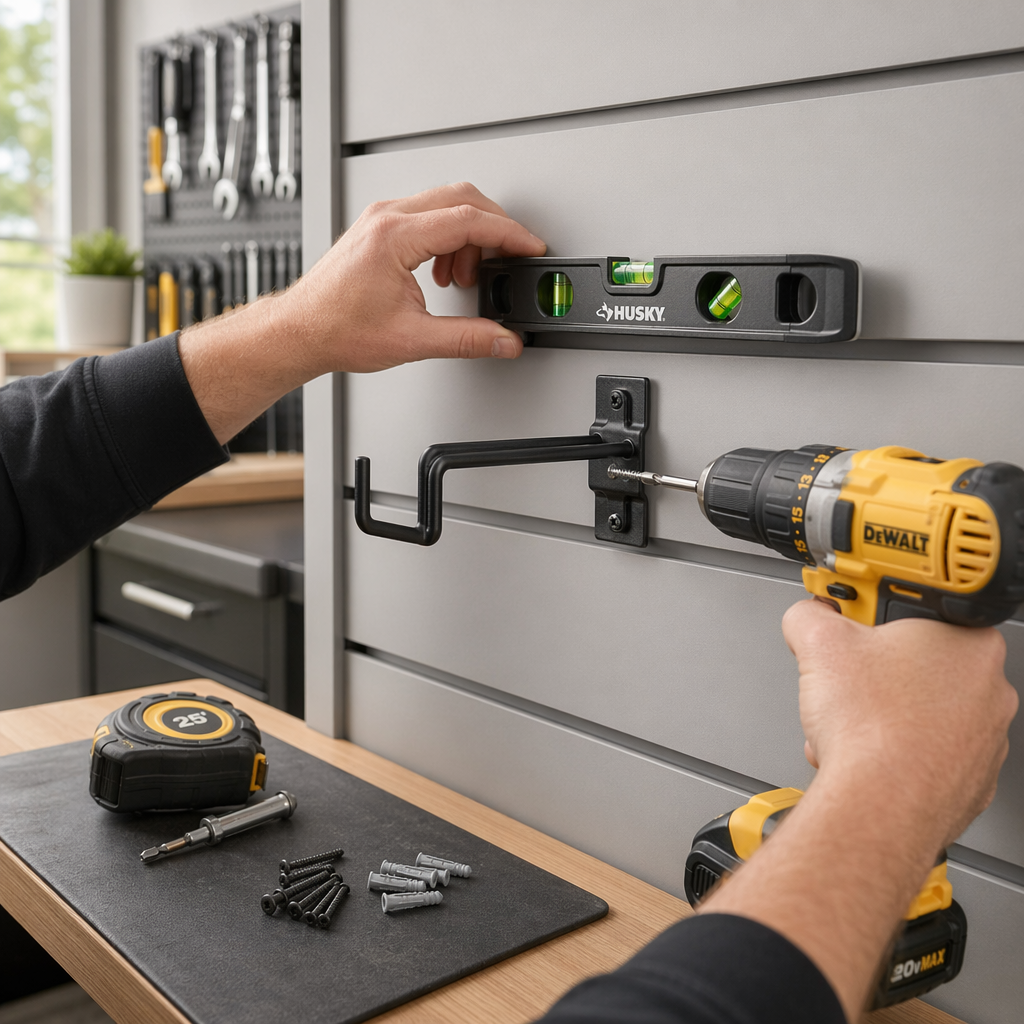
Installing slat wall accessories seems foolproof until you realize that not all accessories insert the same way, and doing it wrong can damage both the accessory and the wall. The insert-and-drop method works for most hooks, but larger items need more attention.
Standard hooks have a backplate that slides behind the top edge of one slat while a lip catches the bottom edge of the slat above. Angle the backplate upward at about 45 degrees, push it into the gap, then rotate it down until it clicks into place. You should feel resistance at the end as the lip engages.

Heavy Duty Slatwall Hooks
Reinforced construction handles heavier tools and equipment without the flexing you get from basic hooks
For shelves and multi-point accessories, start with the topmost attachment point. Get that one fully seated, then work your way down to the remaining hooks. Trying to install all attachment points simultaneously usually means none of them seat properly.
Some accessories include locking mechanisms or set screws to prevent them from lifting out accidentally. Use these, especially for items you’ll be pulling on regularly or accessories installed at heights where they could fall on someone. A bike hook that comes loose at the wrong moment can cause serious injury.
Test every accessory after installation by applying downward and outward pressure. A properly installed hook shouldn’t budge when you pull on it firmly. Any movement means it’s not fully engaged or the slat wall itself has an issue. These installation principles also apply to pegboard tool organization systems that use similar mounting concepts.
Strategic Spacing and Zone Planning
Random placement is the enemy of an organized garage. Creating functional zones and spacing accessories appropriately turns your slat wall from a fancy pegboard into an actual organizational system.
Start by grouping related items together. Create a gardening zone with tool holders, a basket for gloves and hand tools, and hooks for watering accessories. Set up a sports zone with bike hooks, ball storage, and equipment baskets. This approach puts everything you need for a specific activity in one area.
Leave breathing room between zones. A 6 to 12-inch gap between functional areas creates visual separation and gives you flexibility to expand zones later. You’ll also appreciate the buffer when you’re grabbing items quickly and not worrying about knocking adjacent stuff around.
For frequently accessed items, install accessories at eye level or just below. Items you use seasonally can go higher or lower. This seems obvious, but watch people organize their garages and you’ll see extension cords at ankle height and rarely used camping gear at the perfect working height.
Consider the swing radius of hanging items. A ladder on a hook needs clearance to rotate as you lift it off. Bikes need space for handlebars. Place these items at zone edges or in areas where the swing won’t interfere with accessing other accessories.
Creating Specialized Storage Solutions
Generic hooks and baskets cover basic needs, but specific storage challenges require purpose-built solutions. Knowing which specialty accessories exist saves you from fighting with improvised setups that never quite work.
Power tool holders cradle cordless drills, impact drivers, and circular saws at an angle that prevents them from sliding out. Many include spots for batteries and chargers, keeping your entire charging station in one place. This beats scattering tools across shelves or leaving them in cases that take up valuable space. If you want a comprehensive solution for your entire collection, check out our guide to garage power tool organizers.
For sports equipment, look beyond basic hooks. Ball storage accessories have wire cages or open fronts that let kids grab basketballs and soccer balls without adult help. Ski and snowboard racks hold equipment securely without scratching the finish.

Slatwall Bike Hook
Vertical bike storage maximizes your wall space and these hooks have protective coating to prevent frame damage
Overhead items need special consideration. Some slat wall systems offer shelf brackets that extend 16 to 24 inches from the wall, creating storage platforms for bins and rarely used items. Combine these with clear bins so you can see contents without pulling everything down. Keep items like car covers accessible on these shelves, especially if you’re deciding whether to use a car cover in your garage.
Garden tool holders deserve their own mention. The best versions have multiple rubberized prongs at different heights and angles, accommodating various handle sizes and tool head shapes. One holder can organize five or six long-handled tools in the space a single shovel would occupy leaning in a corner.
Maintenance and Adjustment Over Time
Your storage needs will change, and accessories will wear out or get damaged. Planning for adjustments from the start prevents headaches later and keeps your system functional.
Every few months, walk along your slat wall and wiggle each accessory. Temperature changes, humidity, and regular use can work hooks loose over time. Reseat any that feel less secure than when you installed them. This takes five minutes and prevents the domino effect of one falling accessory knocking others loose.
Clean the slat wall