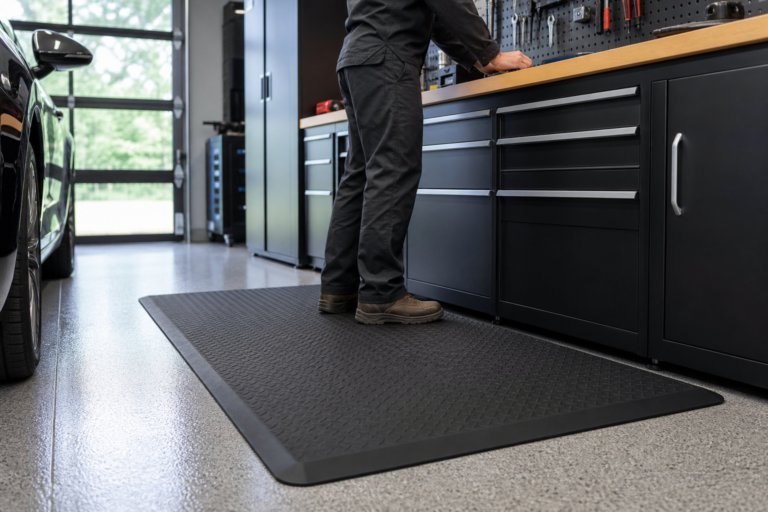
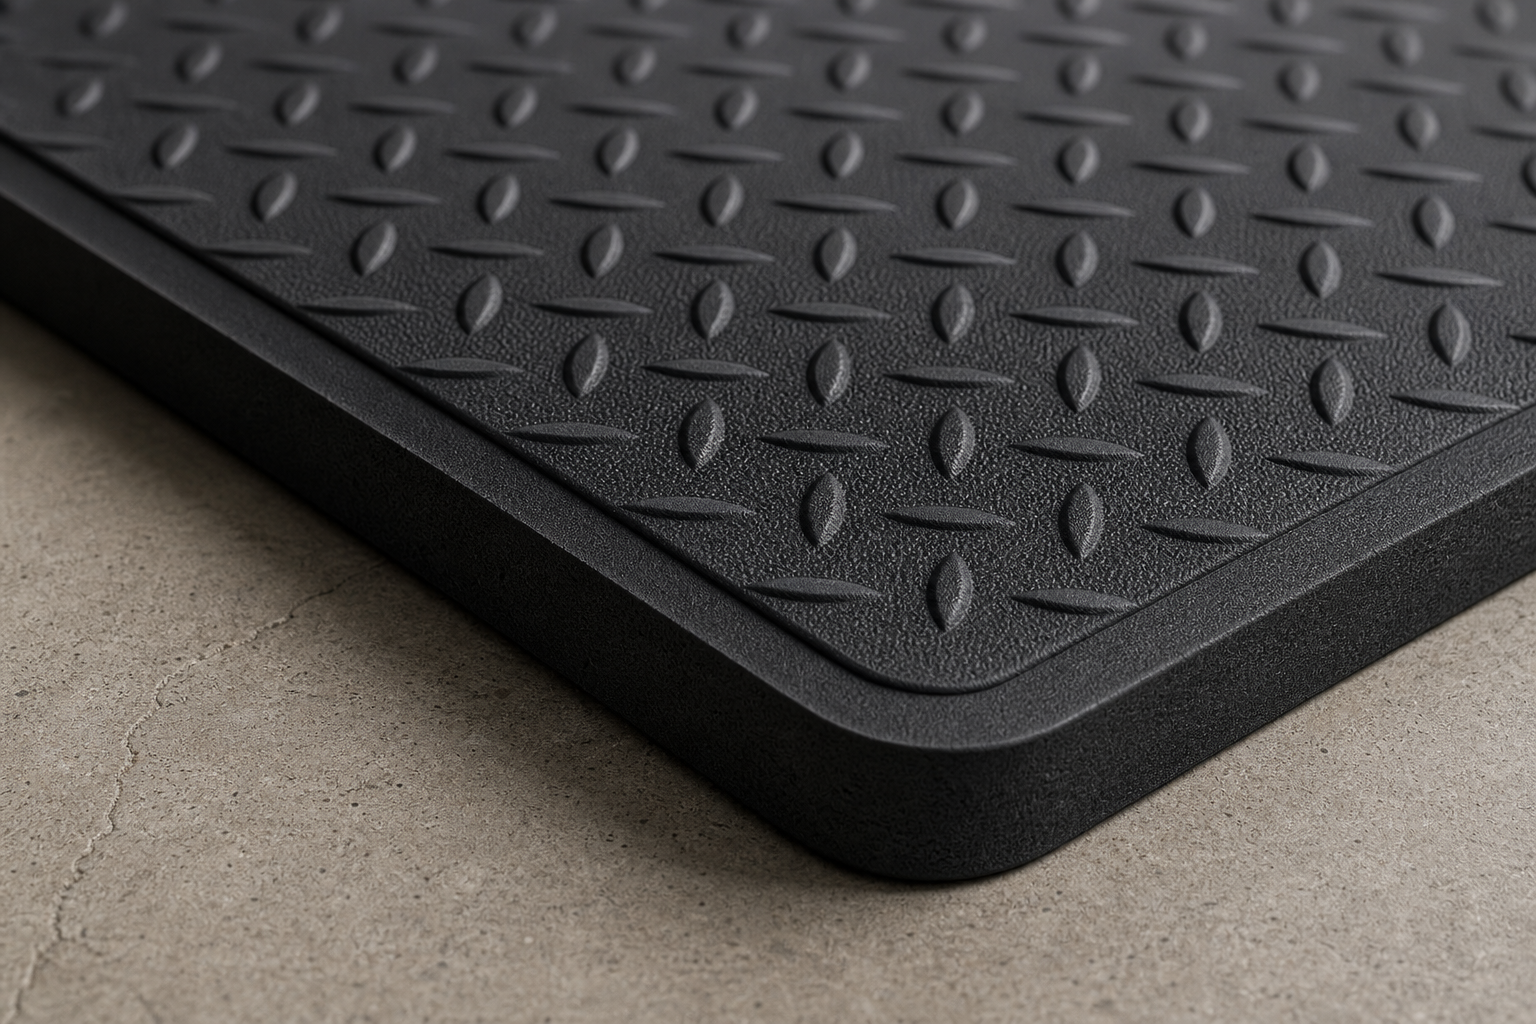
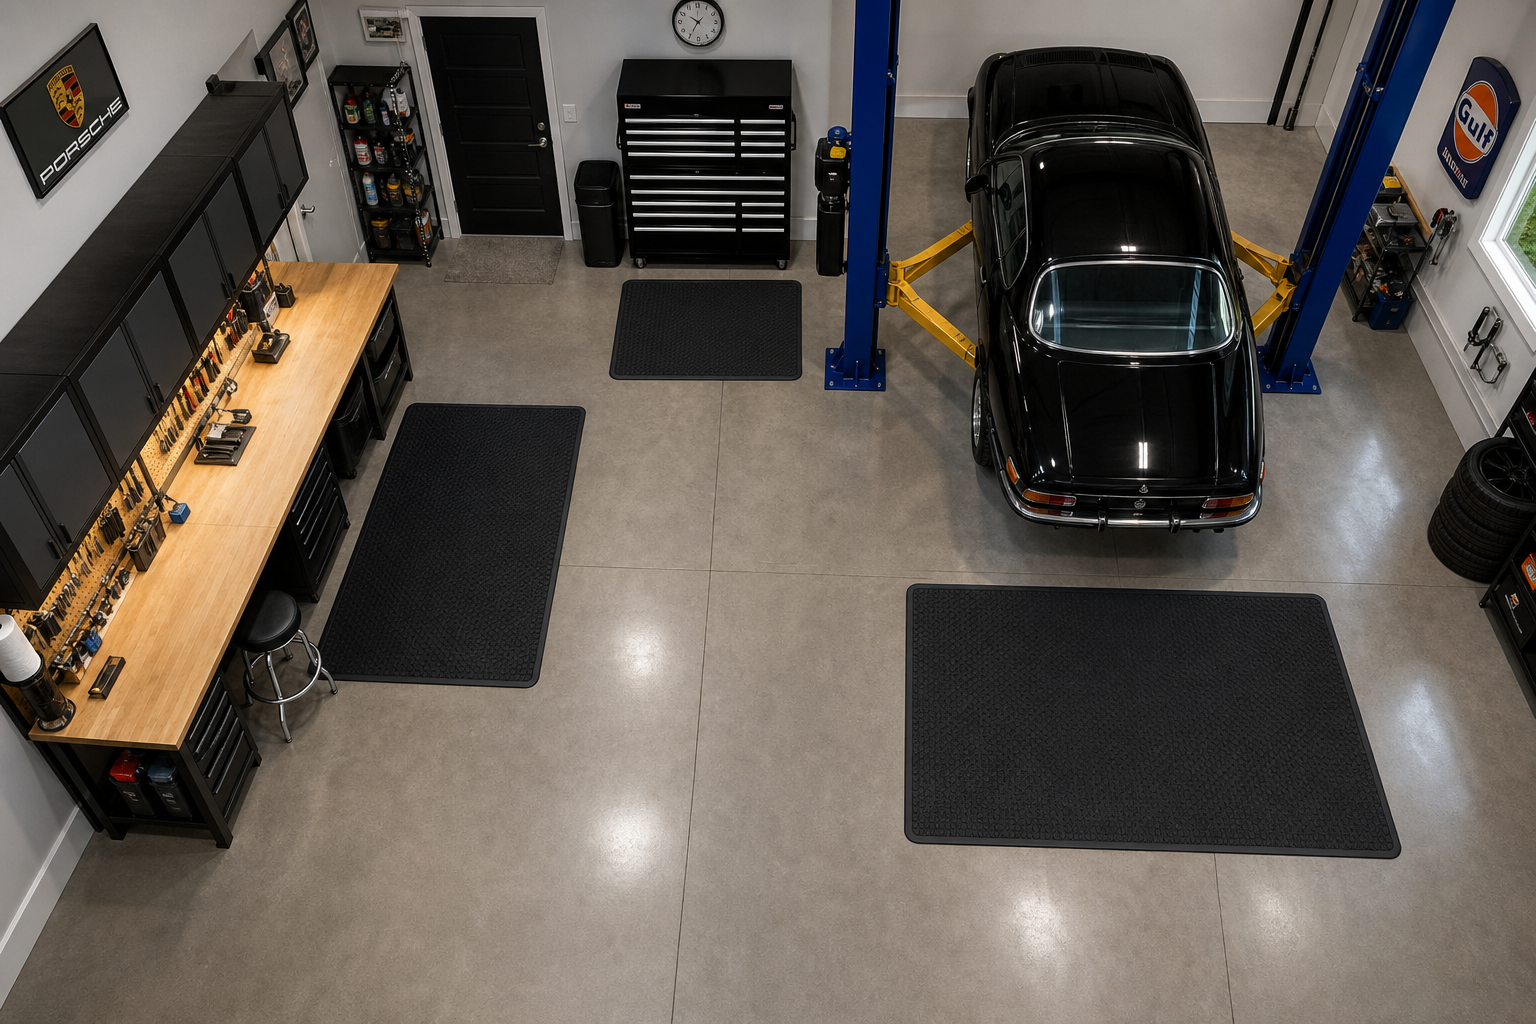
Picking the right anti-fatigue garage floor mats isn’t about finding the highest star rating. It’s about matching product strengths to your needs: durability, ease of installation, or budget constraints.
Below, you’ll find honest assessments of top contenders, what separates them, and which ones fall short of their marketing. Check Amazon for current pricing.
Understanding the Basics
The garage door bottom seal is the most common pest entry point. A 1/4-inch gap admits mice, insects, and spiders. Inspect the entire seal length for cracks, compressed areas, or hardened rubber that no longer contacts the ground fully.
Steel wool packed into openings and secured with expanding foam stops rodents (foam alone gets chewed through). Copper mesh is even better. For larger gaps, 1/4-inch galvanized hardware cloth screwed in place creates a permanent, chew-proof barrier.
Other entries include gaps around pipes and wires, sill plate-to-foundation spaces, unscreened vents, and deteriorated weatherstripping on side doors. Physical exclusion (sealing gaps) beats traps because it prevents entry entirely.
For weatherstripping issues specifically, our guide on garage door weather stripping replacement covers the replacement process step by step.

Steel Wool Pest Barrier
Essential for blocking rodent entry points permanently
Practical Planning Tips
Research local building codes and permit requirements for your specific project. Electrical work, structural modifications, and HVAC installations often require permits and inspections. Working without required permits can create liability issues, insurance complications, and problems when selling the home.
Set a realistic timeline and budget before buying anything. Most garage projects take 50% longer and cost 20% more than initial estimates, especially for first-timers. Build that buffer into your plan so unexpected discoveries don’t derail the entire project or blow the budget.
Getting Started the Right Way
Before starting any garage project, take stock of what you have and what you need. Walk the space with a tape measure and a notepad. Record dimensions, note existing electrical outlets and their amperage, check for moisture issues, and photograph anything you want to change.
This baseline assessment prevents surprises mid-project and helps you budget materials accurately. Whether you’re planning a garage workshop or upgrading your flooring, documentation saves headaches later.
Consider the seasonal timing of your project. Floor coatings apply best in mild weather (50 to 85 degrees). Insulation projects are most motivating (and noticeable) before extreme weather hits. Electrical and plumbing work can happen year-round but should be completed before insulating or finishing walls over the wiring.

What to Avoid
Knowing what to skip prevents expensive mistakes:
- Products with vague specs or missing data sheets. If a manufacturer won’t publish details, that’s a red flag.
- “Universal” products claiming to work everywhere. Specialized products consistently outperform generalists.
- Suspiciously cheap deals from unauthorized sellers. Counterfeit products are a real issue on major platforms.
For garage pest control specifically, check out our detailed guide on DIY garage bug control for more targeted solutions.
Getting the Most From Your Project
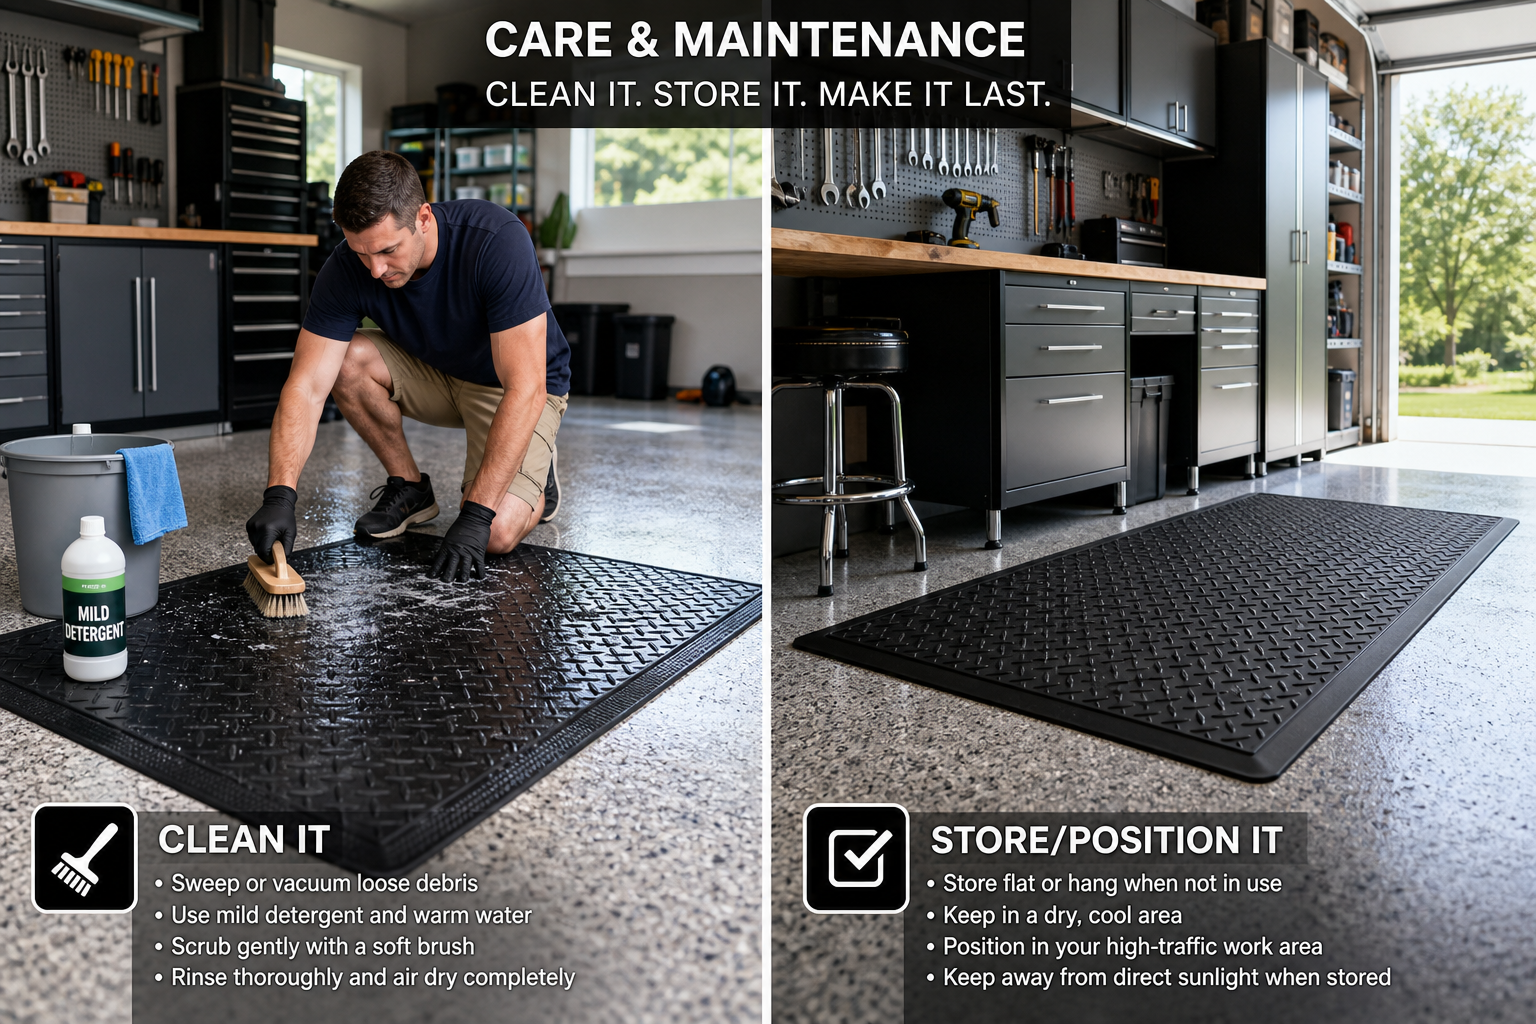
Keep all receipts, warranty cards, and product data sheets for garage projects in a dedicated folder or binder. Many products come with warranties that require proof of purchase. When a repair or replacement is needed three years from now, having that documentation readily available can save you the full cost of the product.
Before starting any garage project, take a few minutes to photograph the existing conditions from multiple angles. These “before” photos serve as a reference during the project, help you troubleshoot if something doesn’t look right, and provide satisfying “before and after” comparisons when you’re done.
They’re also useful documentation if you need warranty service. This documentation approach works for any major garage upgrade, from installing floor drains to sealing your garage floor before epoxy.

Frequently Asked Questions
How much should I budget for anti-fatigue garage mats?
Budget varies widely by scope and materials. DIY installation saves significantly on labor costs. Check current Amazon pricing for accurate material estimates rather than relying on outdated quotes.
What mistake should I avoid above all?
Rushing preparation. Whether it’s surface prep, measuring, or reading installation instructions, upfront time prevents expensive do-overs. Preparation quality determines your results more than any other factor.
How long will anti-fatigue mats last?
You’ll get years of reliable performance with quality materials and proper installation. Preparation quality is the single biggest longevity factor, not the brand name on the mat.
Can I handle mat installation as a DIY project?
Most installation steps are DIY-accessible with basic tools. However, any electrical work, structural modifications, or high-tension spring work should go to licensed professionals for safety reasons.
This article contains affiliate links. We may earn a small commission at no extra cost to you.