That thin strip of material running along the bottom of your garage door might not look like much, but it’s working overtime to keep out rain, snow, drafts, and even insects. When it starts to crack, tear, or compress, you’ll notice higher energy bills, puddles on your garage floor, and maybe even unwelcome critters making themselves at home.
Replacing garage door weather stripping is one of those weekend projects that pays immediate dividends. You’ll feel the difference the first time you walk into your garage after a rainstorm and find it completely dry. Let’s walk through everything you need to know to get this job done right.
When to Replace Your Weather Stripping
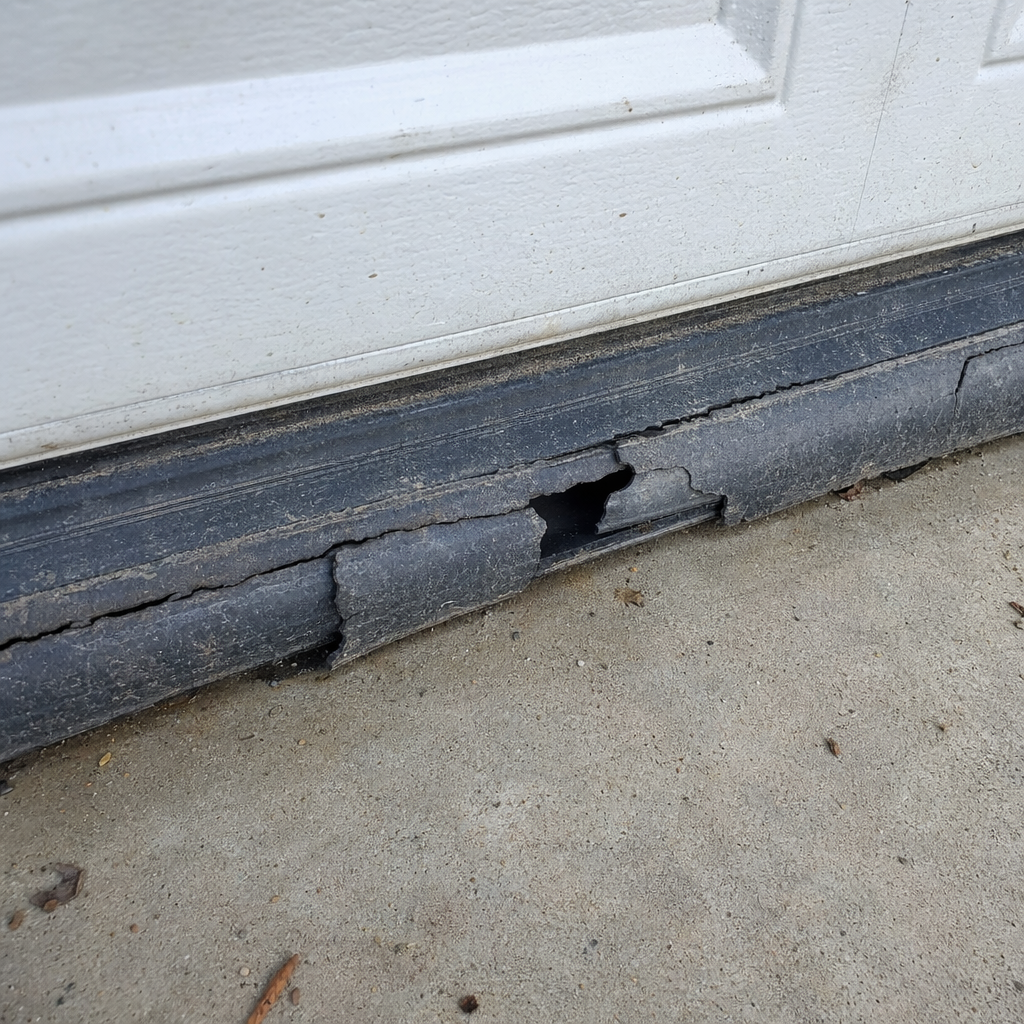
Weather stripping doesn’t fail all at once. It degrades gradually, so you might not realize how worn it’s gotten until you really look at it. Check your seals if you’re seeing water pooling near the door, feeling drafts when it’s windy, or noticing your garage is dustier than usual.
The bottom seal takes the most abuse. It scrapes against your driveway every time the door opens and closes, plus it bears the brunt of weather exposure. Look for visible cracks, missing chunks, or areas that have compressed flat and lost their original shape. Most bottom seals need replacement every 5-7 years, though cheaper materials might only last 2-3 years.
Side and top seals typically last longer since they don’t get the same wear and tear. Replace them when you see gaps forming between the seal and the door frame, or when the material has hardened and lost its flexibility. A simple test is to run your hand along the seal while the door is closed. You should feel consistent contact with no air gaps. If your seal consistently freezes to the ground in winter, it’s definitely time for a replacement.
Understanding Different Weather Stripping Materials
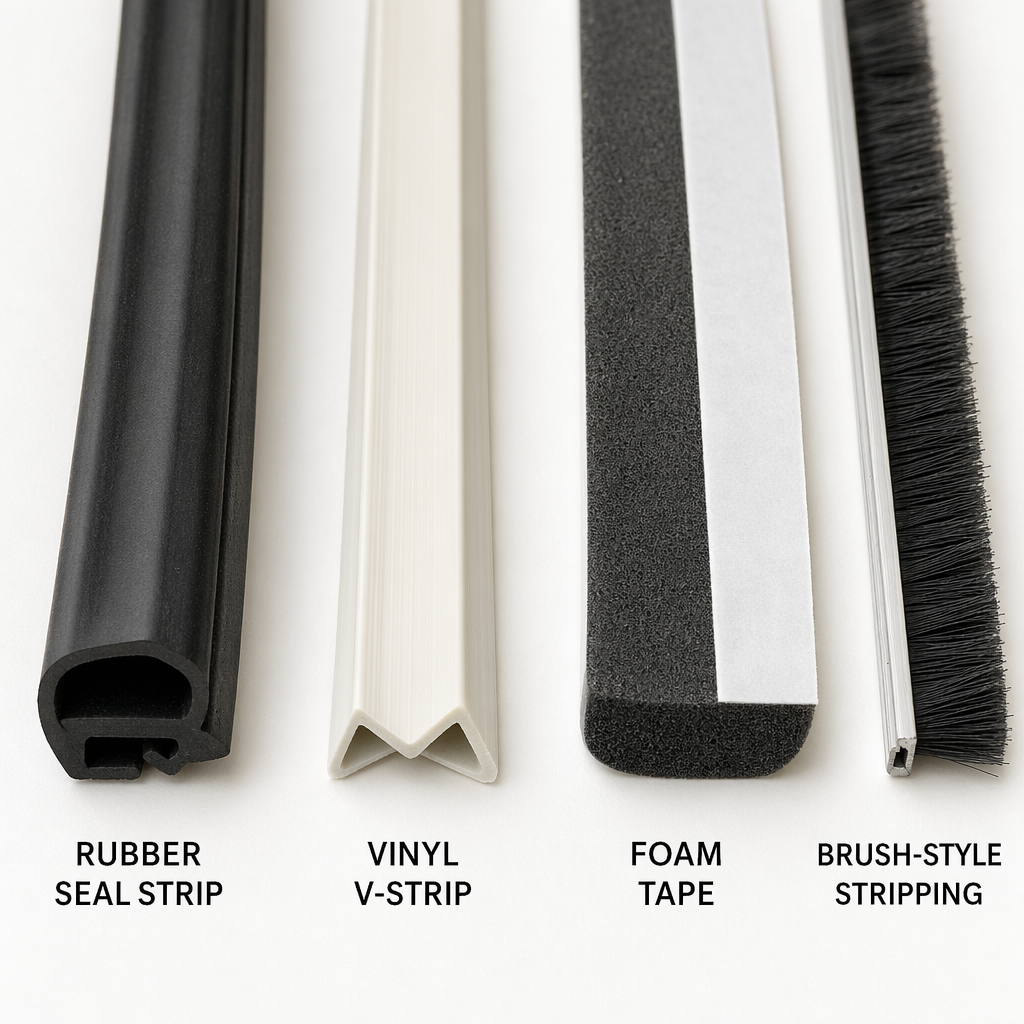
You’ve got three main options when selecting weather stripping material, and each has its place depending on your climate and budget.
Rubber seals (EPDM rubber specifically) offer the best durability and weather resistance. They stay flexible in extreme cold, resist UV damage better than alternatives, and typically last the longest. These are your best bet if you live somewhere with harsh winters or intense sun exposure. Quality EPDM rubber garage door seals will outlast cheaper options by several years.

Garage Door Bottom Seal
A durable EPDM rubber bottom seal provides excellent protection against water, drafts, and pests while lasting for years.
Vinyl weather stripping costs less but won’t hold up as well in extreme temperatures. It can become brittle and crack when temperatures drop below freezing, making it a better choice for mild climates. The upside is that vinyl installs easily and provides decent insulation for the money.
Brush seals work differently than rubber or vinyl. Instead of forming a solid barrier, they use dense bristles to block gaps while allowing some air circulation. You’ll find these most often on side seals where they help keep out dust and insects without creating too much resistance when the door operates. They’re particularly useful if your garage door doesn’t sit perfectly flush with the frame.
Replacing the Bottom Seal
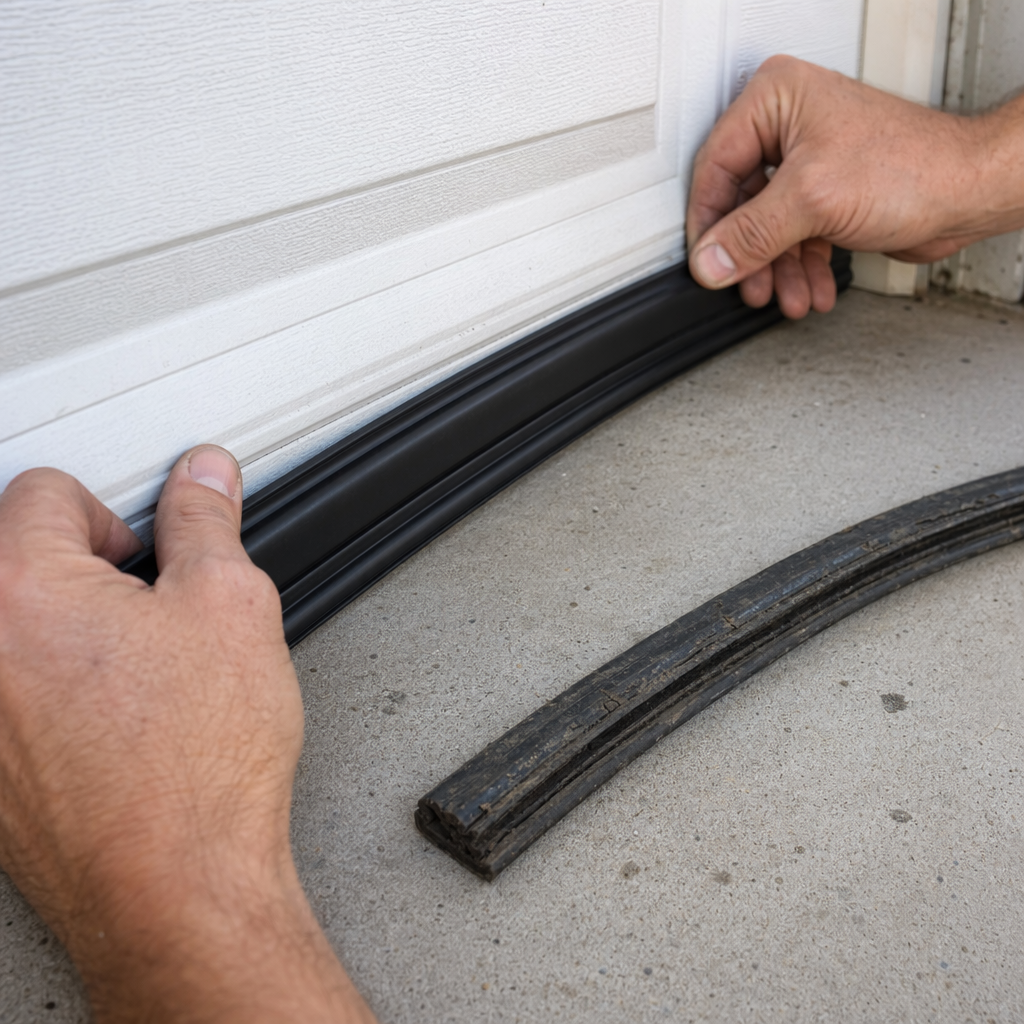
The bottom seal replacement is the most common job and the one that makes the biggest difference. Most garage doors use a T-shaped or bulb-shaped seal that slides into a track along the bottom edge of the door.
Start by measuring the width of your garage door. Buy a seal that’s a few inches longer than your door width so you don’t end up short. Open your garage door about chest height so you can work comfortably without bending over.
Remove the old seal by pulling it out of the track. On some doors, you’ll need to remove end caps or retaining screws first. Clean out the track thoroughly using a wire brush or old rag. Decades of dirt and debris can build up in there, and you want a clean surface for the new seal.
Slide the new seal into the track from one end. This is easier if you wet the seal with soapy water first, which acts as a lubricant. Work slowly and make sure the seal is fully seated in the track as you go. Don’t try to force it or you might tear the material.
Once the seal is in place, trim any excess length with a sharp utility knife. Close the door and check that the seal makes complete contact with the floor across the entire width. You might need to adjust the door’s limit settings if there are gaps.

Garage Door Seal Lubricant
Silicone spray makes installation much easier and helps maintain weather stripping flexibility over time.
Side and Top Seal Installation
Side and top seals typically attach to the door frame rather than the door itself. These usually come with a mounting track that you nail or screw to the frame, then the seal material snaps or slides into the track.
Remove the old seals and mounting hardware completely. Examine the door frame for any damage or rot, especially at the bottom corners where water tends to collect. This is a good time to make repairs before installing new seals.
Mount the new track starting at the top of the frame. Use a level to ensure it’s perfectly straight. Slight misalignment here will create gaps that defeat the entire purpose of new weather stripping. Most garage door side seal kits include all the mounting hardware you’ll need.
Insert the seal material into the track, working from top to bottom on the sides. The seal should compress slightly when the door closes, creating a tight barrier without preventing the door from operating smoothly. You may need to adjust the track position if the door binds or if gaps remain.
Maintenance Tips to Extend Seal Life
New weather stripping won’t last if you neglect basic maintenance. Clean your seals twice a year using mild soap and water. This removes corrosive road salt, dirt, and debris that break down the material over time.
Apply a silicone-based lubricant to rubber seals annually. This keeps them flexible and prevents cracking. Avoid petroleum-based products which can actually degrade rubber. Spray a light coating on the seal and wipe away any excess. If you’re working on multiple garage projects, consider adding anti-fatigue mats to make standing work more comfortable.
Check your garage door alignment regularly. A door that’s out of alignment puts uneven pressure on the seals, causing premature wear in certain spots. You’ll notice this as gaps that appear on one side but not the other.
Frequently Asked Questions
How long does garage door weather stripping typically last?
Bottom seals usually need replacement every 5-7 years with quality EPDM rubber, though cheaper vinyl might only last 2-3 years. Side and top seals often last 10+ years since they experience less wear. Your climate makes a huge difference too. Extreme temperature swings, intense UV exposure, and heavy precipitation all shorten seal life.
Can I install weather stripping on an old wooden garage door?
Absolutely. Wooden doors actually benefit more from weather stripping than modern steel or aluminum doors since wood swells and contracts with moisture. You’ll need to attach the mounting hardware directly to the wood using rust-resistant screws. Make sure the wood is in good condition first. Rotten or damaged wood won’t hold the mounting hardware securely.
Why does my new bottom seal drag on the ground in some spots?
This usually means your garage floor isn’t level or your door is out of adjustment. Most garage doors have limit screws that control how far down the door travels. You can adjust these to raise the door slightly. Alternatively, if your floor slopes significantly, you might need a taller seal profile in certain areas or consider leveling the floor section where the door closes.
This article contains affiliate links. We may earn a small commission at no extra cost to you.