Winter’s over, your driveway is clear, and now you’re staring at a bulky snow blower taking up valuable garage real estate. Proper storage isn’t just about reclaiming floor space. It’s about protecting a machine that costs hundreds or thousands of dollars and making sure it fires up reliably when the first snow flies next season.
Most garage owners make the same mistake: they roll their snow blower into a corner, maybe throw an old tarp over it, and forget about it until November. Then they wonder why it won’t start or why rust has claimed the auger blades. Let’s fix that with storage solutions that actually work and maintenance steps that take 30 minutes but save you from expensive repairs.
Why Proper Snow Blower Storage Matters
Your snow blower faces two major threats during storage: moisture and stale fuel. Garages naturally accumulate humidity, especially in spring and summer. That moisture condenses on cold metal surfaces, leading to rust on critical components like the auger, impeller, and scraper bar.
Stale gasoline is equally problematic. Modern ethanol-blended fuel starts breaking down within 30 days. The ethanol absorbs water, and the whole mixture turns into a gummy mess that clogs carburetors and fuel lines. I’ve seen snow blowers rendered useless by a single season of neglect.
Dust is the third enemy. Fine particles work their way into the engine, coat moving parts, and can even block ventilation slots. A layer of dust might seem harmless, but over months it acts like sandpaper on precision components.
Pre-Storage Maintenance Checklist
Before you even think about covers or mounts, prepare the machine properly. This 30-minute process will save you hours of frustration next winter.
Start with the fuel system. You have two options: run it completely dry or fill it with stabilized fuel. Running it dry means adding fuel stabilizer to the tank, running the engine for five minutes to circulate it through the carburetor, then shutting off the fuel valve and letting the engine run until it dies. This burns off all fuel in the carburetor.
The alternative is filling the tank completely with stabilized fuel. A full tank prevents condensation inside the tank, which is important if you live in humid climates. I prefer this method for two-stage blowers with larger tanks.

STA-BIL Storage Fuel Stabilizer
Keeps fuel fresh for up to 24 months and prevents gum and varnish formation in your carburetor
Change the oil while the engine is still warm from your last use. Dirty oil contains combustion byproducts and moisture that can corrode internal engine parts during storage. Use the oil weight specified in your owner’s manual, typically 5W-30 for most snow blower engines.
Remove or disconnect the spark plug. Spray a small amount of fogging oil into the cylinder, then pull the starter cord a few times to distribute it. This coats internal parts and prevents rust. Reconnect or replace the spark plug, but leave the wire disconnected for safety.
Inspect the belts, scraper bar, and skid shoes. Replace anything that’s worn now rather than discovering it’s shot when you need the machine. Tighten all loose bolts and lubricate all grease fittings with lithium grease.
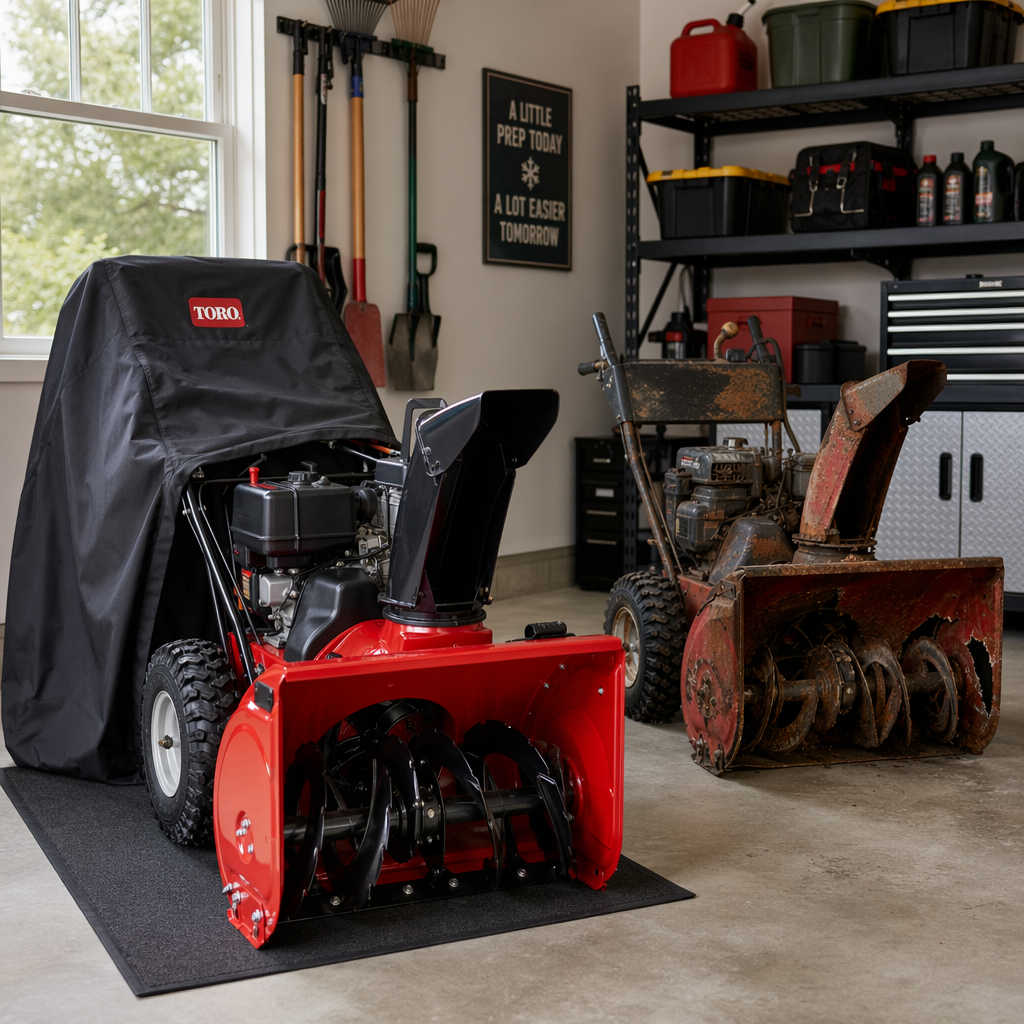
Snow Blower Cover Options
Covers are your first line of defense against dust and moisture, but not all covers work equally well. The cheap polyethylene tarps you’ll find at discount stores trap moisture underneath, creating a greenhouse effect that accelerates rust.
Look for covers made from breathable materials that allow air circulation while blocking dust. The best options use heavy-duty polyester with a water-resistant coating on the outside but breathable backing. These typically have elastic hems or drawstrings to secure them against the machine.
Universal covers work fine if you match the size correctly. Measure your snow blower’s length, width, and height, then add a few inches to each dimension. A cover that’s too tight won’t fit over the handlebars, while one that’s too loose will blow off or sag and collect dust in the folds.

Classic Accessories Heavy-Duty Snow Blower Cover
Features weather-resistant fabric with air vents that prevent moisture buildup while keeping dust out
Custom-fit covers designed for specific models offer the best protection but cost more. They’re worth considering if you own a premium two-stage or three-stage blower. The snug fit prevents shifting and provides better weather protection if your garage isn’t climate controlled.
Don’t cover a wet or cold snow blower immediately after use. Let it sit in the garage for at least an hour so condensation can evaporate. Covering a cold machine traps moisture underneath, defeating the entire purpose.
Wall-Mounted Storage Systems
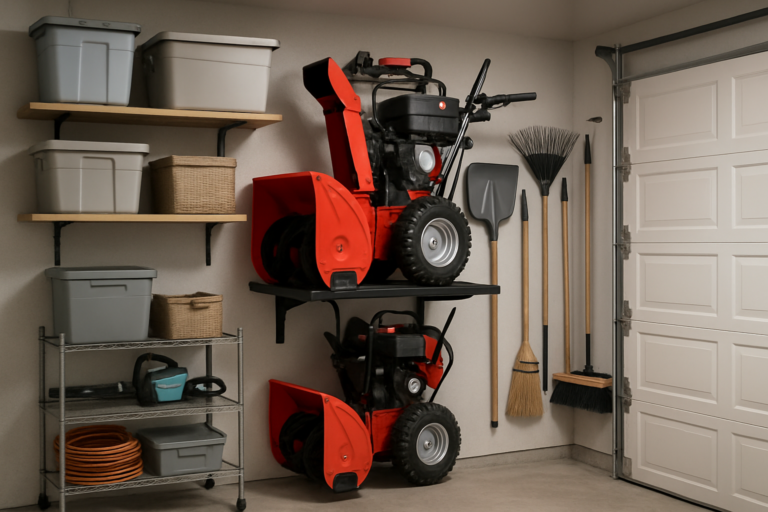
Getting your snow blower off the floor opens up surprising amounts of garage space. Several manufacturers now make wall-mount brackets specifically designed for snow blowers, though you need to consider weight limits and wall construction.
Single-stage electric snow blowers weighing 30 to 60 pounds are easiest to wall-mount. You can use heavy-duty garage hooks rated for 100+ pounds each, mounted into wall studs. Position them to support the frame or handlebars, not plastic components.
Two-stage gas blowers weighing 200+ pounds require specialized lift systems. The most practical option is a ceiling-mounted pulley system with a platform. You roll the blower onto the platform, then use a crank or electric winch to lift it. These systems work well in garages with 9-foot or higher ceilings.
Installation requires locating ceiling joists and using lag bolts rated for the total weight. Most systems can handle 300 to 400 pounds, but verify your ceiling construction can support it. Older garages with simple truss systems work better than modern engineered trusses with webbing.
Vertical storage is another option for lighter single-stage models. Some brackets let you stand the blower upright on its auger housing, reducing the floor footprint by 60 to 70 percent. Check your owner’s manual first, as not all models should be stored vertically due to oil migration concerns.
Designated Storage Spaces and Zones
Creating a specific storage zone keeps your garage organized and protects the snow blower from accidental damage. The back corner works well for most people, but avoid areas directly under roof leaks or near water heaters that might leak.
Consider a small equipment shed or storage box if your garage is packed. Resin sheds sized at 4×6 feet provide enough room for a snow blower plus accessories like shovels and ice melt. These offer better moisture protection than garage storage if you live in humid climates.
Mark the storage area with floor tape or paint to ensure the space stays reserved. It’s amazing how quickly a designated snow blower spot becomes a dumping ground for bikes, lawn equipment, or holiday decorations.
Store accessories nearby using pegboard or wall-mounted bins. Spare shear pins, a scraper blade, oil, and fuel stabilizer should all live in the same zone. You’ll appreciate this organization during the first snowstorm when you’re rushing to get the machine running.
Keep the area around the storage spot clear by at least three feet. You need room to maneuver the blower in and out without playing Tetris with every other item in your garage.
Vertical Storage Solutions
Vertical storage cuts the floor footprint in half but requires careful planning. Not every snow blower can safely stand upright, and you need the right support system to prevent tipping.
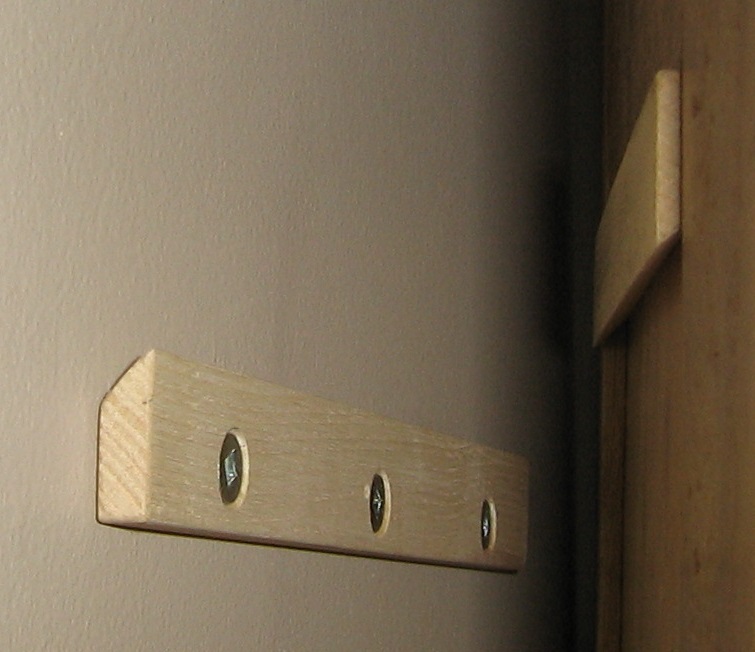
Single-stage electric models are ideal candidates. Most weigh under 50 pounds and have a compact design that balances well vertically. You can build a simple rack from 2×4 lumber with a base platform and vertical supports that cradle the sides.
Two-stage blowers are trickier. The weight distribution changes significantly when upright, and some models will leak oil from the crankcase breather. Always check the manual before attempting vertical storage.

Extreme Max Storage Rack
Holds single-stage blowers upright securely while reducing storage footprint by more than half
Commercial vertical racks typically include a base plate bolted to the floor and adjustable side arms that grip the blower frame. The best designs have rubber-coated contact points to prevent scratching and a safety strap to prevent forward tipping.
DIY vertical storage works well if you’re handy. Use 3/4-inch plywood for the base, secured to the floor with tapcons or lag bolts. Add vertical 2x4s on each side, padded with foam pipe insulation. Total cost runs competitively priced in materials.
Protecting Against Moisture and Dust
Even with a good cover, moisture management requires additional steps. Place a desiccant pack or two inside the cover, especially if you store the blower in an attached garage that experiences temperature swings. Reusable desiccant packs can be dried in the oven and used season after season.
A wooden pallet or plastic equipment mat underneath the snow blower prevents direct contact with concrete. Concrete wicks moisture, and metal sitting directly on concrete will eventually rust. The air gap created by a pallet or mat makes a significant difference.
Spray exposed metal surfaces with a light coating of WD-40 or similar moisture-displacing spray before covering. Focus on the auger, impeller, and chute rotation mechanism. This creates a protective barrier against humidity.
Consider a small electric dehumidifier if your garage stays humid year-round. Models designed for small spaces run continuously and drain automatically. Position it near your snow blower storage area for maximum benefit.
Check on the machine monthly during storage. Look for any signs of moisture accumulation, rust spots, or pest activity. Mice love building nests in snow blower engines, and a monthly inspection catches this before they chew through wiring.
Space-Saving Storage Hacks
Small garages demand creative solutions. A rolling platform with locking casters lets you move the snow blower easily and slide it under a workbench or into a narrow space between other equipment.
Build the platform from 3/4-inch plywood cut to match your blower’s footprint. Add a 2×4 frame underneath for strength, then install four heavy-duty locking casters rated for at least 100 pounds each. Add a pull handle to the front for easy maneuvering.
Overhead storage using a ceiling hoist works for lighter blowers. The pulley system mentioned earlier can also accommodate bicycles, lawn equipment, or kayaks when the snow blower is in use during winter. This dual-purpose approach maximizes limited garage space.
Fold-down shelves above the storage spot hold accessories without taking permanent floor space. Mount a hinged shelf to the wall that folds up when not needed. Store oil, stabilizer, spare parts, and tools here for quick access.
Use the snow blower itself as storage. The bucket can hold cleaning supplies, the bag of ice melt, or snow shovels during summer. Just make sure these items won’t scratch surfaces or hold moisture against metal parts.
Frequently Asked Questions
Should I store my snow blower with a full or empty gas tank?
Store it with a full tank of stabilized fuel. A full tank prevents moisture condensation inside the tank, which leads to rust and contaminated fuel. Add fuel stabilizer before the last use of the season, run the engine to circulate it through the system, then top off the tank completely. Empty space in a fuel tank allows humid air to enter and condense as temperatures change.
Can I store a snow blower in a shed or does it need to be in the garage?
A shed works fine as long as it’s dry and secure. Actually, a dedicated outdoor shed can provide better protection than a damp garage. Make sure the shed has adequate ventilation to prevent moisture buildup and that the floor stays dry. Elevate the snow blower on a platform or pallet. Secure the shed properly since snow blowers are attractive targets for theft.
How do I prevent mice from nesting in my stored snow blower?
Block all openings with steel wool or wire mesh, which mice can’t chew through. Stuff steel wool in the exhaust pipe, air intake, and any gaps in the housing. Remove it before starting the engine next season. Place dryer sheets or cotton balls soaked in peppermint oil around the storage area, as mice dislike these scents. Check monthly and refresh the deterrents as the scent fades.
Is it okay to store a snow blower on its side to save space?
Never store a gas snow blower on its side. This causes oil to leak into the cylinder, air filter, and exhaust system, creating serious problems. You’ll face difficult starting, smoking, and potential engine damage. Only store snow blowers in their normal upright position or, for some models, completely vertical. Check your owner’s manual for approved storage positions specific to your model.
This article contains affiliate links. We may earn a small commission at no extra cost to you.