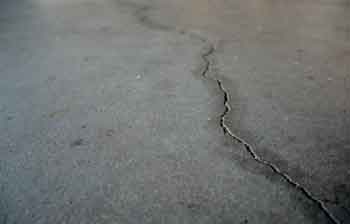
The first time I saw a crack in my concrete garage floor, I didn’t know what to think.
Was this just an unsightly gap? Or was my foundation about to crumble and my whole house collapse?
If you have one or more garage floor cracks, it could be the house settling or a sign of an enormous repair bill soon.
In this article, we’ll discuss what causes them and when to worry about cracks in garage floors. Then, I’ll tell you how to fix them.
When to Worry About Cracks in Garage Floors
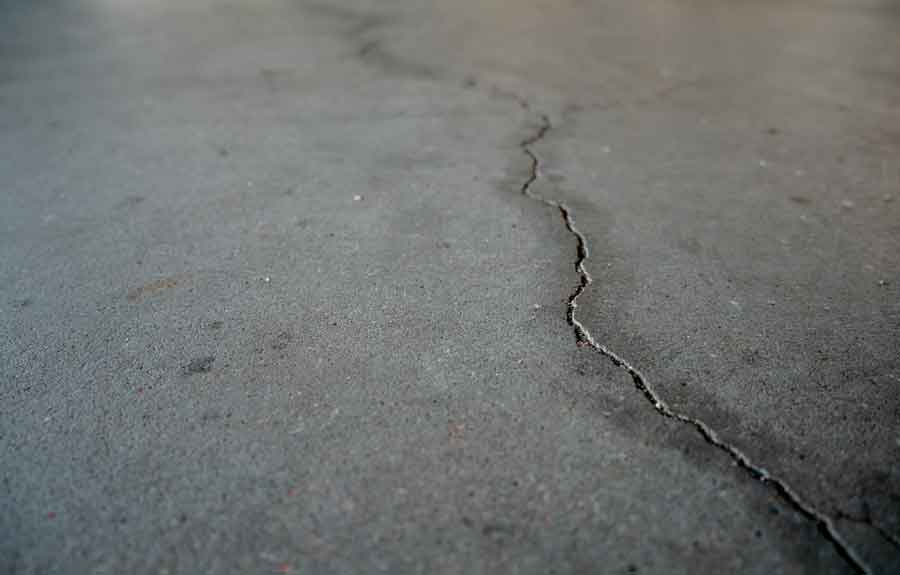
Garage floor cracks may look like your house will be a special effect in an earthquake movie. But even if they’re a bit unsettling, they’re very common. You do not have to worry about most of them.
It May Not Be a Crack
Let’s get one thing out of the way first.
Is it really a crack that you’re looking at? It could be a joint.
Unlike unpredictable cracks, joints are intentionally put in by your home builder.
There are two main kinds of concrete joints:
- A cold joint forms when a worker pours a concrete section next to another already hardened section.
- Because contractors realize that concrete will crack eventually, they want to control where it will happen. They do this by putting control or contraction joints on the floor about 10 to 20 feet apart in both directions. A typical two-car garage can have joints separating the floor into four slabs. These joints weaken the concrete at specific points, so any cracks can happen at the joint in a straight line instead of wildly across the entire floor.
What to Look At
A tiny crack that is 1/8-inch wide or less isn’t a concern unless you think it might fill up with dirt, oil, and automotive fluids.
You also don’t have to worry about surface gouges or a shallow pit, which can happen if you accidentally drop that heavy power tool you borrowed from your neighbor.
You do have to check things out more if:
- The crack is wider than 1/8-inch,
- The floor has many small cracks across it,
- Or one side of the crack is lower or higher than the other side.
What Causes Cracks in Your Garage Floor?
Garage floor cracks can appear for many reasons.
- Shrinking: When the concrete hardens, it shrinks, which makes cracks appear. These are no problem, so you can move on.
- Bad installation: The garage worker used low-quality materials or by not reinforcing the concrete with enough steel bars or steel mesh. You may need to do something about these cracks soon.
- Poor drainage: If the soil under your garage has heavy clay or is denser than usual, it would retain moisture that can freeze during winter. That frozen soil then expands, spreading the concrete apart from itself and making it crack. You want to fix this before cold weather strikes.
Settling a Problem
I’m breaking this into a separate section because it’s a biggie.
Over many years, the ground under your foundation can move or settle. This movement produces small cracks on a concrete slab, usually within the first years after a house is built. These blemishes are typically nothing to fuss about.
Significant shifts in the soil can produce major cracks in your garage floor. These cracks can accumulate water and get more prominent, with different floor sections sinking unevenly.
This type of major settling doesn’t just happen under the garage. You can find out if it’s going on in other parts of your home by laying a marble or small ball on a floor without carpet, such as in the kitchen or bathroom. If the ball moves on its own, the area it rolls to is lower than where it started.
You’ve potentially got a significant issue that can get worse over time.
If you suspect your foundation is becoming uneven, don’t try to figure it out on your own. Call for a pro to check this out immediately, or your house may still appear in that earthquake movie.
How to Fix Cracks in Your Garage Floor
For most garage floor cracks, the good news is that you don’t need a pro that can cost plenty. You can do the job yourself if you follow these simple steps.
1. Examine the Crack
Use a level to ensure both sides of the crack are even. If they are, you can repair it on your own.
Now check the grade and drainage around your house.
If the slope is not apparent, turn on a garden hose away from the foundation.
You want the water to be flowing away from the foundation. If it flows toward your home, it may get under the garage and worsen the crack.
You want to address this issue before you repair the floor because it will mess up your work.
Measure the size of the crack, which can determine the product and method for filling it.
- Small garage floor cracks that are half-an-inch or smaller can be filled with an epoxy concrete crack filler.
- Large garage floor cracks over a half-inch may require a mortar mix.
2. Pick the right materials.
Avoid using the water- or latex-based repair products you typically find in home improvement stores.
While inexpensive and easy to use, they shrink over time and pull away from the concrete. They also do not accept sanding, paint, or epoxy very well.
Also, avoid self-leveling sealants. They’re used by a builder for control or contraction joints that I’ve already talked about. They won’t work for repairs.
Rely on compounds that are based on epoxy, polyurethane, or polyurea. They’re formulated to harden stronger than concrete and prevent water from leaking through.
You can sand or grind them so they are flush with the floor and cover them with paint, a clear coat, or epoxy.
2. Prep the Area
You want to clean the area in and around the crack so that the repair material bonds solidly to the concrete.
That material won’t do that if the crack is full of dirt, loose concrete, and auto fluids. Also, dirt and dust can mix with the filler, weakening it.
Start by parking your car outside the garage. You’ll need to keep the repaired area free of weight for at least a few days.
Clean the entire garage of any dirt and debris. Don’t forget the shelves and the top of any cabinets. You don’t want any dust from a cabinet floating into the concrete repair material and weakening it.
Keep the garage door closed! I made the mistake once of cleaning my garage with the door open to let in light and air on a hot day. A sudden wind blew in leaves and dirt, undoing all my hard work.
A small crack may only need cleaning and vacuuming before it is prepped. A larger one may require you to prepare the filler area by breaking off loose pieces.
Always wear eye protection before doing this because concrete chips may fly into your eye.
You can break away any chips using a cold chisel made of hard materials like concrete. They call it that because blacksmiths used it to cut cold metal instead of other tools for cutting hot metal.
Put the chisel blade at an angle that aligns with the crack. Then with a hammer, hit the top of the chisel to break away the loose material. Do this on both sides of the crack until you’ve prepped its length.
Scrub the damage with a stiff wire brush and sweep out the debris. Then vacuum what’s left.
You can also use a circular saw or diamond blade to cut into the sides of larger cracks in garage floors.
Aim for a groove that is at least half an inch wide.
If there’s any oil or other fluid in the crack, you need to clean that off.
If the oil is wet, use kitty litter, sand, or baking soda to absorb any liquid.
After the oil has dried, vacuum or sweep up the absorbent material. Scrub the area with water and a paste of baking soda. Wash the area and let it air dry. If needed, vacuum any remaining particles.
The crack is now ready to accept the filler.
![Sikaflex Self Leveling Sealant [29 oz]](https://m.media-amazon.com/images/I/311TjCqsfxL._SL500_.jpg)
Paint over it in 1 hour, and can be exposed to water in 3 hours. Great for filling cracks in sidewalks, concrete driveways and floors.
3. Fill It In
Nobody likes to read instructions, even me. But take time to read what’s printed on your filler material.
Each one mixes and applies differently. Some may even require that you add in substances like sand.
You want to get it right the first time and make the repair permanent, especially since your car will be rolling over your repair every day.
- With small garage floor cracks, pitting, or spalling, all you may need to do is apply a bead of filler in the area that is lower than the floor.
- With a large crack, use a small trowel to apply the filler. Depending on the material you’re using, you can apply more material right away if it’s looking a bit thin, or may need to let it dry before adding another layer.
Don’t worry if the filler you apply spills over and around the crack. You’ll take care of that at the next stop.
4. Smooth It Out
With the trowel, smooth out the top of the filler material until it is level with the floor. Allow the filler to dry thoroughly and cure completely, which may take a few days if you have low temperatures and high humidity.
Sand the top of the filler until it is as smooth as the rest of the floor. Sweep and vacuum any loose material. You can now finish the repair with paint, epoxy, or a clear coat sealer. Allow that to dry as well.
If you do it right, your repair will blend in with the rest of the concrete floor and be hard to spot. You can drive your vehicle right on top of it without further problems.
In some cases, it’s better to replace your garage floor rather than repair it. If you’re unsure which camp you’re in, check out my article here.
Wrapping It Up
Garage floor cracks can seem scary, but they’re usually not as big a problem as you think. In this article, we’ve discussed when to worry about cracks in garage floors and what some of the causes are.
Some garage floor cracks may be joints installed by your home builder, while others might be due to natural concrete shrinkage, poor drainage, improper installation, or major soil shifts.
The crack’s size and makeup often clue you in to the next steps. Various DIY solutions can save you both time and money for minor issues. Of course, if you’re dealing with more serious garage floor cracks, don’t hesitate to bring in a professional.