

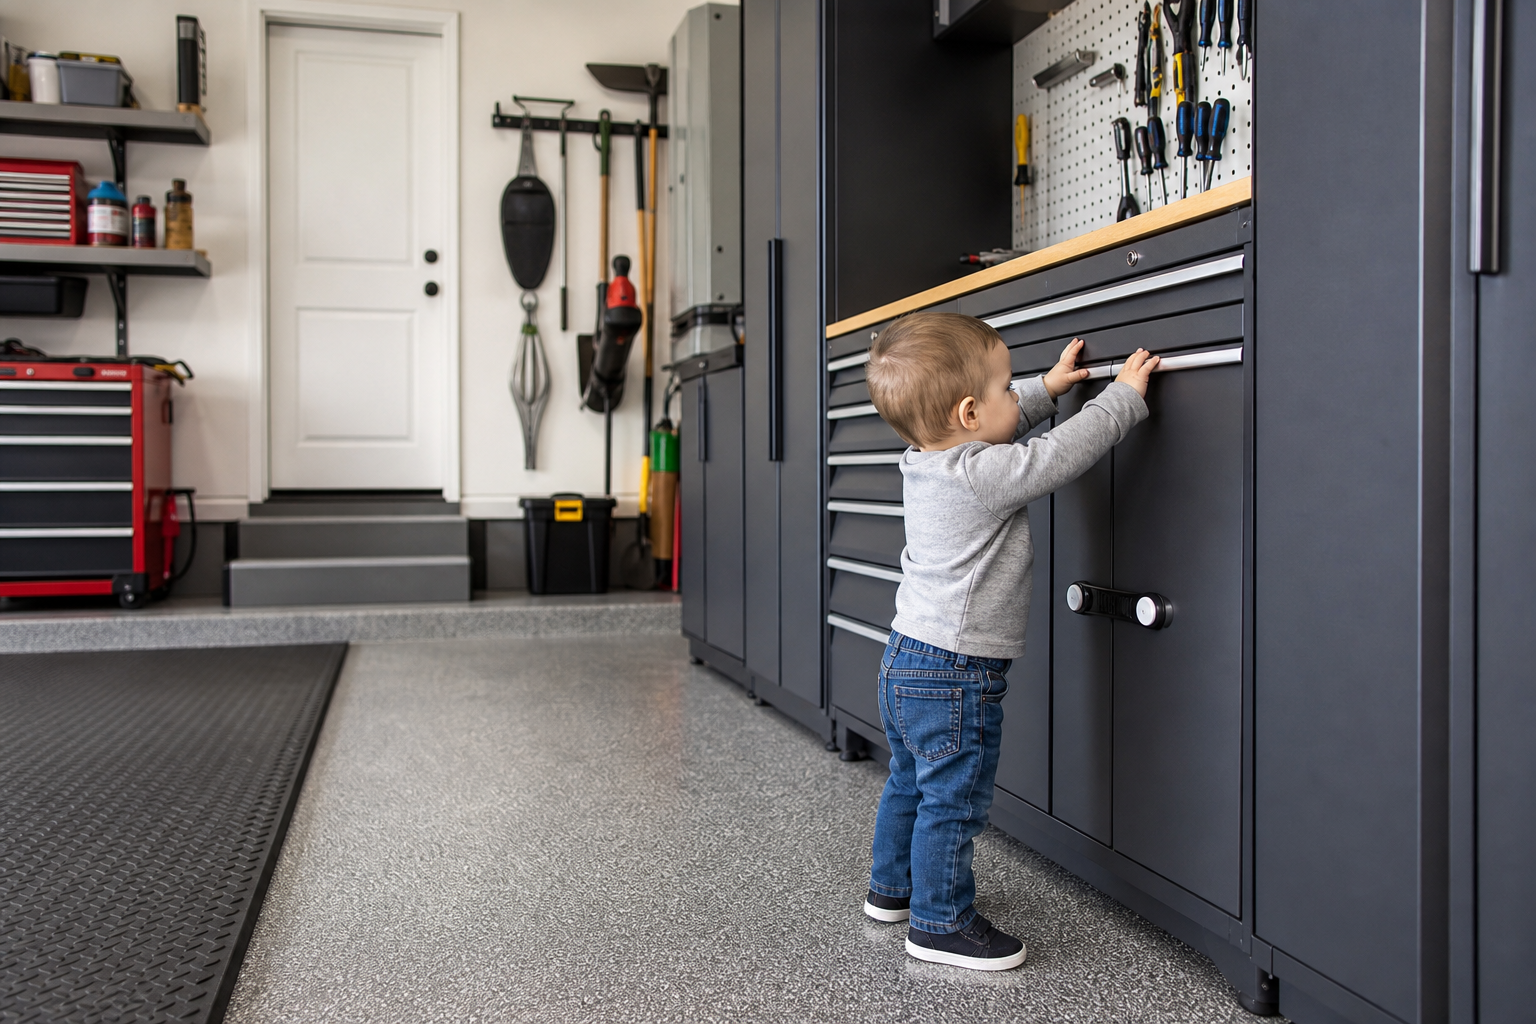
Whether you’ve been planning to childproof your garage workshop for months or decided to tackle it this weekend, a clear roadmap makes all the difference. Preparation accounts for about 80% of the success in projects like this.
Everything you need is below: tools, materials, step-by-step instructions, and the common pitfalls to avoid.
Understanding the Basics
Childproofing a garage workshop starts with recognizing what makes garages dangerous. Sharp tools, heavy equipment, chemical storage, electrical outlets at child height, and overhead hazards all cluster in one unfinished space. Most garages weren’t designed with kids in mind, so retrofitting safety requires deliberate choices about access, storage, and physical barriers.
Think in layers. The first layer blocks access to the garage entirely when you’re not present. The second layer secures individual hazards within the garage. The third layer teaches kids what’s off-limits and why. All three matter, but physical barriers do the heavy lifting when supervision lapses.
Clear plastic bins beat cardboard for garage storage in every way: moisture resistance, pest resistance, visibility, and stackability. Label each bin on the front for easy identification. A label maker and 20 minutes of work saves hours of searching over the coming years. For childproofing purposes, clear bins let you confirm dangerous items are actually locked away without opening every container.
Weight capacity is critical and often misunderstood. Wall systems anchored in studs hold 50 to 75 pounds per linear foot. On drywall alone, that drops to 15 to 25 pounds before failure. Ceiling racks rated for 600 pounds assume even distribution; concentrating weight in one area can cause failure well under the total limit. This matters for childproofing because heavy items stored overhead become projectile hazards if mounting fails. Secure heavy tools and equipment at adult height or higher, but verify the mounting can actually support the load.
Zone your garage before buying products. Common zones: tools/workbench, automotive, seasonal items, sports gear, lawn/garden, and household overflow. Each zone stays self-contained so everything for a given task lives in one spot. For families with young children, add a safety zone evaluation: red zones contain immediate hazards (power tools, chemicals, sharp objects), yellow zones need supervision (bikes, sports equipment, stepladders), and green zones are kid-safe (outdoor toys, balls, chalk).

Step-by-Step Safety Upgrades
Getting this right requires matching your approach to actual conditions rather than following a generic formula. Climate, surface condition, and usage patterns all influence the best path forward.
Start with door access. A keyed deadbolt on the door from the house to the garage prevents unsupervised entry. If your garage door opener lacks a lockout feature, unplug it or install a switch cover when kids are playing nearby. Garage doors cause injuries every year when children activate them unintentionally or get caught underneath during closing.
Cabinet locks come next. Retrofit locks work on existing cabinets without drilling if you’re renting or want a temporary solution. Magnetic locks stay invisible and require an external magnet key to open, which keeps toddlers out while remaining convenient for adults. Slide locks mounted high on cabinet doors work for younger kids but become ineffective once children grow tall enough to reach them. Plan for your kids’ current height plus two years of growth.
Lower-mount cabinet locks, the kind used in kitchens, fail in garages because they’re visible and kids quickly learn to defeat them. Mount locks at adult eye level or use keyed cam locks for cabinets storing chemicals, paint, pesticides, and solvents. A single keyed lock system lets you use one key across all secured cabinets rather than juggling a dozen keys.
Electrical outlets pose two risks: shock and access to plugged-in tools. Outlet covers for standard 120V outlets cost pennies and stop young children from inserting objects. Sliding plate covers work better than plug-in caps because kids can’t remove them. For outlets at floor level or within 6 feet of concrete or water sources, GFCI protection is code in most areas and provides critical shock protection.
Secure cords and power strips off the floor using cable clips or wire channels mounted to walls. Loose cords become tripping hazards and give kids access to pull plugged-in equipment off benches. Unplug tools after every use and coil cords out of reach. Battery-powered tools should have batteries removed and stored separately in a locked cabinet.
Measure twice and commit once. A tape measure and five minutes of verification prevent the mistakes that take hours to fix. This applies doubly to cuts, holes, and any irreversible step.
Factor in maintenance when choosing your approach. The lowest-maintenance option isn’t always cheapest initially, but it usually wins over a 5 to 10-year window when you include touch-ups, repairs, and replacements.
A quality ceiling storage rack makes a noticeable difference in results. Check current pricing and reviews on Amazon to find the right match for your project and budget. Ceiling storage moves rarely-used items and genuine hazards completely out of reach. Ladders, long-handled tools, and seasonal equipment belong overhead once kids are mobile.
Tool Tethering and Chemical Storage
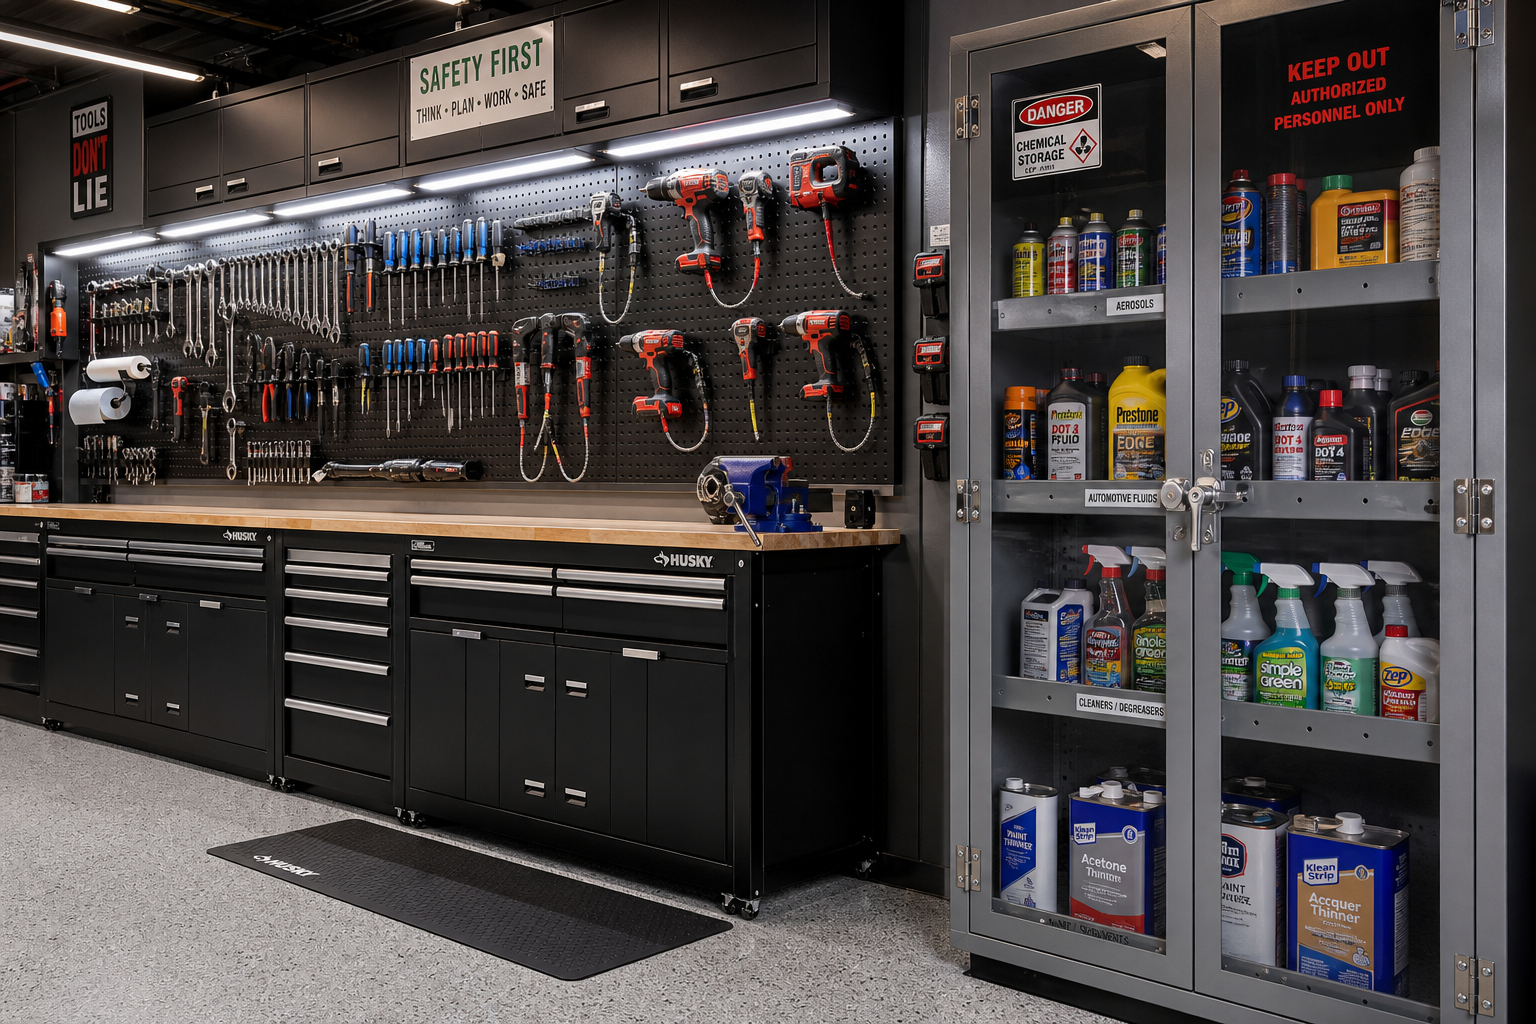
Tool tethering and chemical storage matter most for families with young children turning garages into play-adjacent spaces. This is an area where cutting corners comes back to haunt you. Invest the effort upfront and you’ll save significant time and money over the next several years of use.
Tethering keeps tools on the bench or wall even when you step away briefly. Retractable tool lanyards, the same type used in industrial settings, attach to belt loops and connect to drills, impact drivers, or hand tools. Coiled tethers work for lighter items. The goal isn’t to prevent theft but to ensure a sharp chisel or heavy wrench doesn’t end up on the floor where a toddler can grab it.
Shadow boards, where each tool has an outlined space on pegboard or foam, make missing tools immediately obvious. If the hammer outline is empty, you know to locate it before a child does. Combine shadow boards with a wall-mounted tool rack at 5 feet or higher for items you use frequently but want secured when not in active use.
Chemical storage requires more than a locked cabinet. Segregate chemicals by type: flammables (gas, paint thinner, aerosols) separate from oxidizers (pool chemicals, fertilizers), and acids (battery acid, concrete cleaner) away from bases (drain cleaners, ammonia). Even within a locked cabinet, store liquids below powders so leaks don’t contaminate everything below. Keep original containers with intact labels. Transferring gasoline or solvents to unmarked jugs creates poisoning risks when someone can’t identify contents.
Ventilation matters for chemical storage. Fume buildup in sealed cabinets accelerates corrosion and creates fire hazards. Vented cabinets designed for flammable storage cost more but meet fire codes for significant quantities. For home garages with moderate chemical storage, a standard locking cabinet placed against an exterior wall with gaps at top and bottom provides adequate airflow.
Dispose of expired or unneeded chemicals through hazardous waste collection events rather than stockpiling them indefinitely. Half-empty paint cans, old pesticides, and mystery solvents from previous owners accumulate in garages for years. Reducing inventory reduces risk.
Keep the workspace organized throughout. Debris and clutter cause errors and safety issues. Clear tools and waste between major steps rather than letting mess accumulate to the end.
If this is your first project of this type, budget 50% more time than guides suggest. The learning curve is real, and careful work produces better results than rushing to meet an estimated timeline.

Steel Garage Cabinets
Superior security and durability for chemical and tool storage
Physical Barriers and Layout Changes
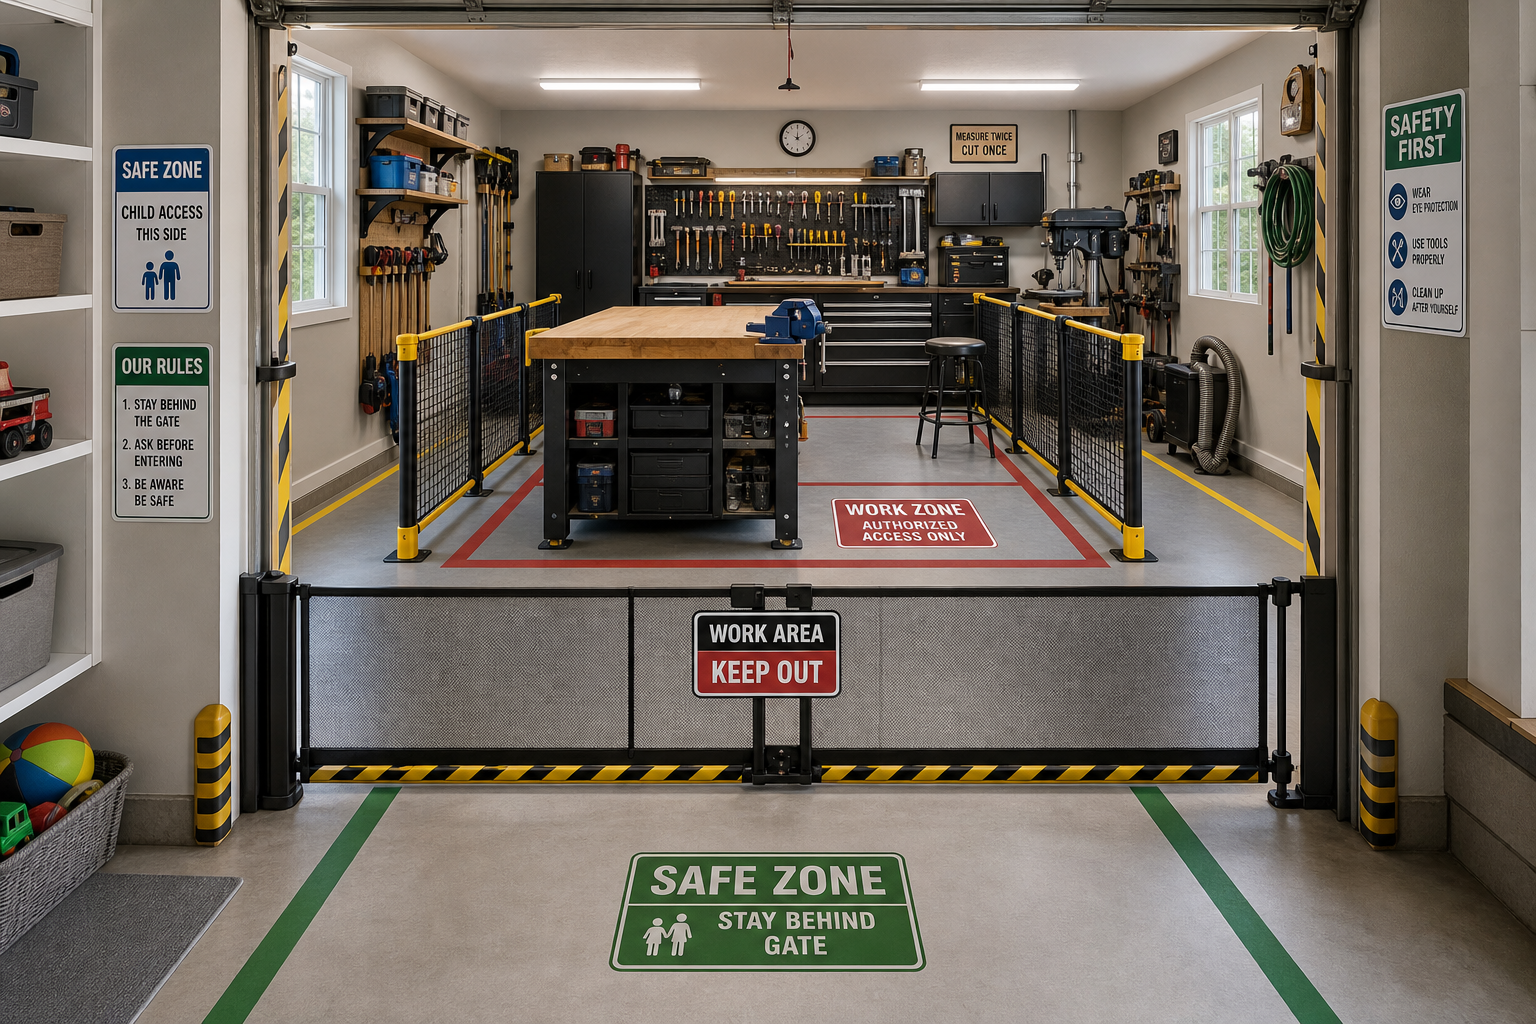
Effective garage storage uses walls and ceiling as primary surfaces, keeping the floor clear for vehicles and work. Wall-mounted track systems, overhead ceiling racks, and sturdy cabinets provide organized access without eating into parking or workspace. For childproofing, vertical storage also removes hazards from ground level where children play and explore.
Freestanding shelving units tip easily unless anchored to walls. Use furniture straps or L-brackets to secure tall shelves to studs. Place heaviest items on lower shelves and lightest items up high, which lowers the center of gravity and reduces tip risk. Open shelving works for adults but provides unrestricted access to children. Substitute enclosed cabinets with locking doors for any shelving within 4 feet of the floor.
Workbenches need defined boundaries. If kids are allowed in the garage while you work, mark a safety perimeter with colored tape on the floor 4 feet out from the bench. Teach kids to stay outside the line when tools are in use. Bench-mounted vises, grinders, and saws should have blade guards and power switches positioned toward the back of the bench, not the front edge where kids can reach.
Consider a dedicated kid zone in the garage if space allows. A 4-by-6-foot area with a small table, outdoor toys, and sports equipment gives kids a reason to be in the garage without wandering into work zones. Position the kid zone where you can see it from the workbench but away from vehicle paths, tool storage, and chemical cabinets.
240V circuits (for welders, compressors, EV chargers) use thicker wire (10 AWG for 30A, 6 AWG for 50A) and double-pole breakers. Installation typically requires a permit and licensed electrician unless you have substantial electrical experience. These higher-voltage outlets need lockout covers or keyed switches to prevent children from plugging in devices or inserting objects into the receptacle.
Practical Planning Tips
Research local building codes and permit requirements for your specific project. Electrical work, structural modifications, and HVAC installations often require permits and inspections. Working without required permits can create liability issues, insurance complications, and problems when selling the home.
Consider the seasonal timing of your project. Floor coatings apply best in mild weather (50 to 85 degrees). Insulation projects are most motivating (and noticeable) before extreme weather hits. Electrical and plumbing work can happen year-round but should be completed before insulating or finishing walls over the wiring. Childproofing upgrades work best when scheduled before a new baby becomes mobile, typically giving you 6 to 9 months to complete the work without urgency.
Before starting any garage project, take stock of what you have and what you need. Walk the space with a tape measure and a notepad. Record dimensions, note existing electrical outlets and their amperage, check for moisture issues, and photograph anything you want to change. This baseline assessment prevents surprises mid-project and helps you budget materials accurately.
Make a hazard inventory specific to your garage. List every power tool, sharp implement, chemical container, heavy object, and electrical device. Note current storage method and accessibility to children. Rank items by danger level and prioritize securing the highest-risk items first. A running chainsaw is more dangerous than a hand saw, but both need secured storage.
Set a realistic timeline and budget before buying anything. Most garage projects take 50% longer and cost 20% more than initial estimates, especially for first-timers. Build that buffer into your plan so unexpected discoveries don’t derail the entire project or blow the budget. Childproofing often uncovers deferred maintenance: a leaking water heater, deteriorated weatherstripping, or an overloaded circuit that needs correction before you can safely add locks and barriers.
Common Mistakes to Avoid
Assuming older kids don’t need the same protections as toddlers. Curious 8-year-olds experiment with power tools when unsupervised. Teenagers underestimate risks. Keep high-hazard items locked regardless of your children’s ages.
Relying solely on verbal warnings. “Don’t touch” works until it doesn’t. Physical barriers provide backup when supervision lapses or curiosity overrides caution.
Locking away tools but leaving keys in obvious places. Keys hidden on top of the door frame or in an unlocked drawer defeat the entire system. Store keys in the house, not the garage.
Overlooking small items. Nails, screws, drill bits, and razor blades scatter across workbenches and floors. Magnetic trays, small parts organizers, and a strict clean-up routine prevent children from finding these items underfoot.
Installing childproofing measures once and never updating them. Kids grow, new tools get added, and cabinet locks wear out. Review your system twice a year and adjust as needed.
Forgetting about garage refrigerators and freezers. Old units with latching doors can trap children inside. Modern units have internal release mechanisms, but older models don’t. If you have an old fridge or freezer in the garage, remove the door or add an external childproof lock that prevents closing from the inside.
Ignoring window access. Ground-level garage windows let kids see inside and sometimes climb through if unlocked. Secure windows with locks or guards, especially if windows face play areas.
Tips for Better Results
- Read all product instructions before opening anything. Temperature, humidity, and timing requirements affect when and how you can work.
- Stage tools and materials within reach before starting. Mid-project supply runs interrupt time-sensitive steps.
- Work in sections small enough to finish before material sets. Consistent technique across sections produces the most uniform results.
- Allow extra curing time beyond manufacturer minimums. Those minimums assume ideal conditions that garages rarely provide.
- Test locks and latches after installation. Confirm they actually prevent access and that you can operate them smoothly.
- Label everything. Mark locked cabinets with contents so you don’t have to unlock three cabinets to find sandpaper.
For comprehensive workshop organization, steel cabinets resist tampering better than particle board and hold up to garage temperature swings and humidity. Check current pricing on Amazon for the latest selection.

Long-Term Maintenance and Adaptation
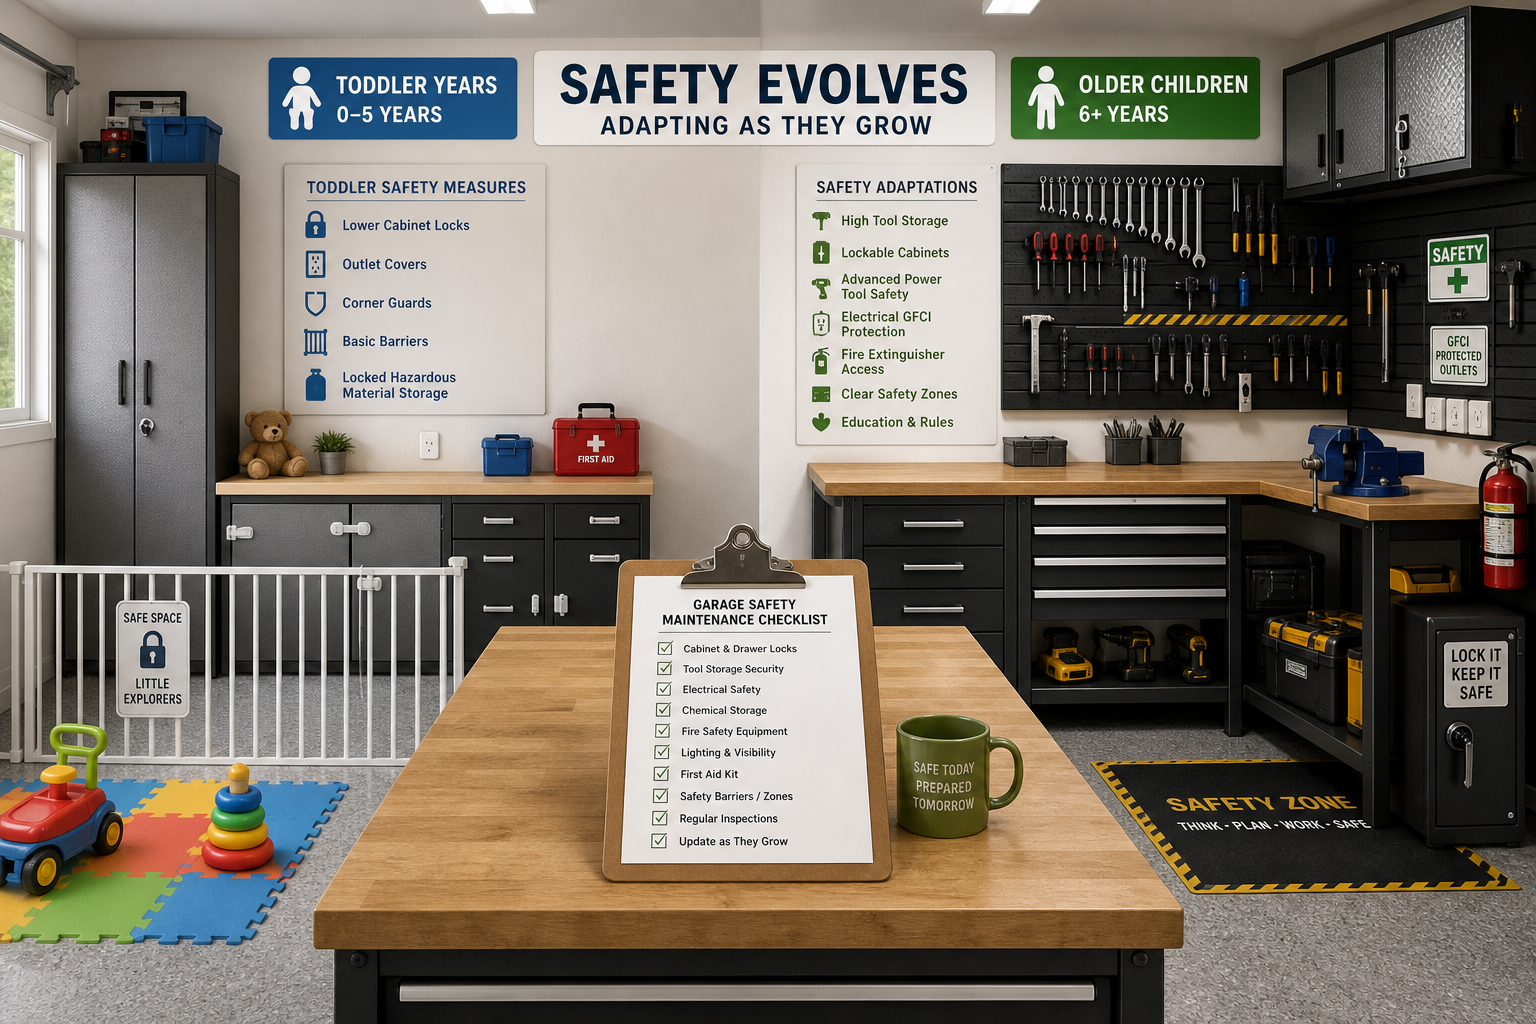
Childproofing isn’t one-and-done. As kids grow, they develop new abilities and interests that require adjustments to your safety setup. A lock positioned above a 3-year-old’s reach becomes accessible to a 5-year-old. A barricade that stops a toddler won’t slow down a determined 10-year-old.
Reassess every 6 months for the first few years, then annually as kids age. Watch where they explore, what captures their attention, and how they interact with the garage environment. Adapt before they outgrow current protections.
Teach workshop safety as an ongoing conversation, not a one-time lecture. Explain why certain tools are dangerous, demonstrate proper use when age-appropriate, and involve older kids in maintenance tasks under supervision. The goal is eventual competence, not permanent exclusion.
Document what you’ve done. Photograph installed locks, save receipts for safety equipment, and note locations of hidden keys or lock combinations. This helps other caregivers (babysitters, grandparents) maintain the same safety standards and prevents you from forgetting your own setup months later.
Plan for hand-me-down or resale. Magnetic locks remove cleanly without damage. Drilled installations leave holes. Choose methods that balance security with reversibility if you’ll eventually remove the childproofing or sell the home.
Frequently Asked Questions
Why does my GFCI keep tripping in the garage?
Common causes include overloaded circuits, moisture on the outlet, cold temperatures affecting electronics, or
