
Adding window inserts to your garage door can completely transform its appearance without the expense of replacing the entire door. You’ll get natural light in your garage, boost your curb appeal, and potentially increase your home’s value. The process requires careful planning and proper technique, but it’s manageable for most homeowners with basic DIY skills.
Before you grab your tools, understand that this project involves permanently altering your garage door. Once you cut those openings, there’s no going back. But if you’re ready to commit, you can achieve professional-looking results that match your home’s architectural style.
Planning Your Window Layout
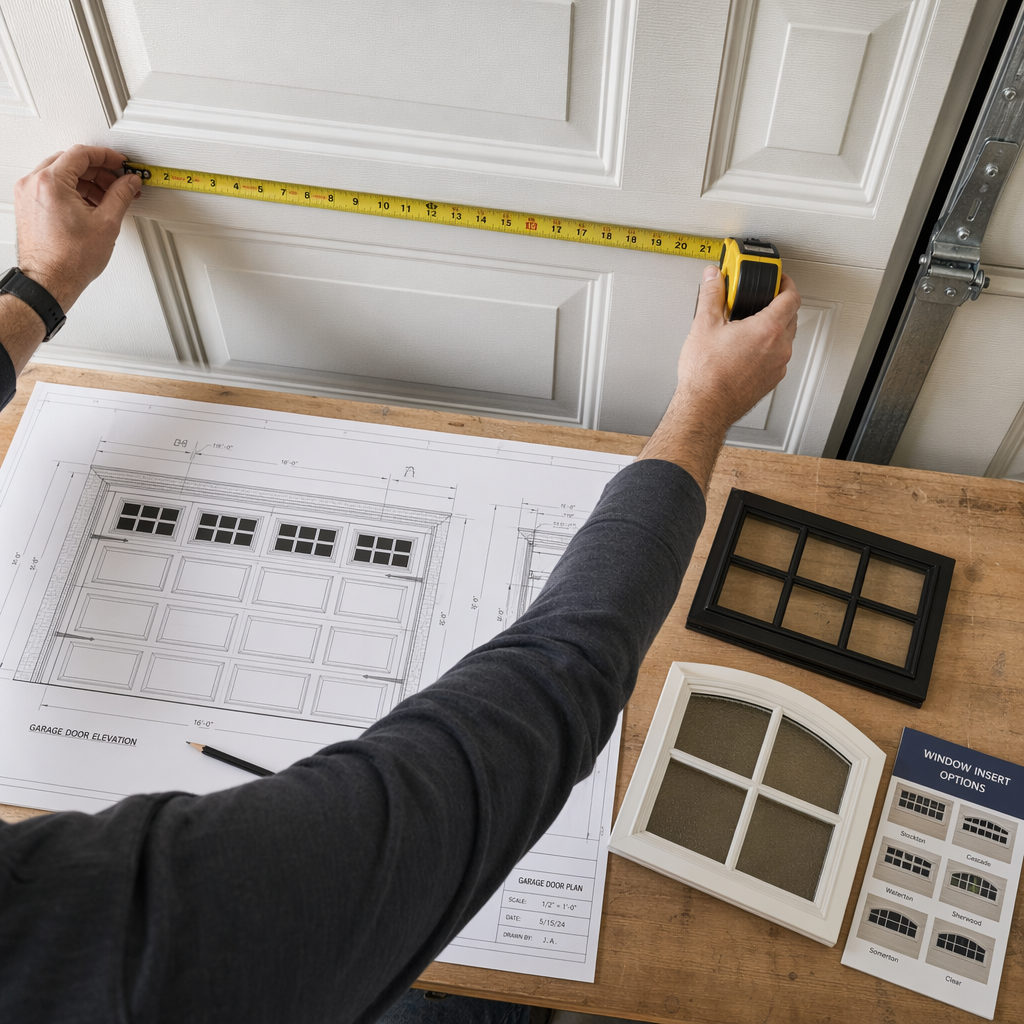
Start by choosing a window pattern that complements your home’s design. Traditional homes typically look best with symmetrical rectangular windows arranged in a single row. Craftsman-style homes pair well with square windows in a grid pattern. Modern designs can handle more creative arrangements.
Measure your garage door panels carefully. Most window inserts are installed in the top section of the door, typically 6 to 12 inches from the top edge. You’ll need at least 3 inches of space between each window and the panel edges to maintain structural integrity.
Check your door’s construction before proceeding. Steel doors with foam insulation inside are the easiest to work with. Solid wood doors require different cutting techniques. You’ll also want to verify that cutting windows won’t interfere with the door’s internal bracing or hardware.

Garage Door Window Insert Kit
Complete kits include frames, acrylic panels, and all necessary hardware for installation
Cutting the Openings
Mark your window locations using a level and measuring tape. Double-check all measurements and use painter’s tape to outline each opening. This gives you a clear visual guide and helps prevent the drill bit from wandering.
For steel doors, drill a starter hole in each corner of your marked rectangle. Use a metal-cutting blade in your jigsaw to connect the holes, moving slowly to maintain control. Wear safety glasses and gloves throughout this process. The cut edges will be extremely sharp.
You’ll need to deburr and file the edges smooth after cutting. A metal file works well for this, though it takes some elbow grease. Remove all metal shavings and burrs to prevent injury during installation and to ensure the window frame sits flush.
Apply rust-inhibiting primer to all exposed metal edges immediately after cutting. This prevents corrosion from moisture exposure. Let it dry completely before moving to the next step.
Choosing Your Glass Options
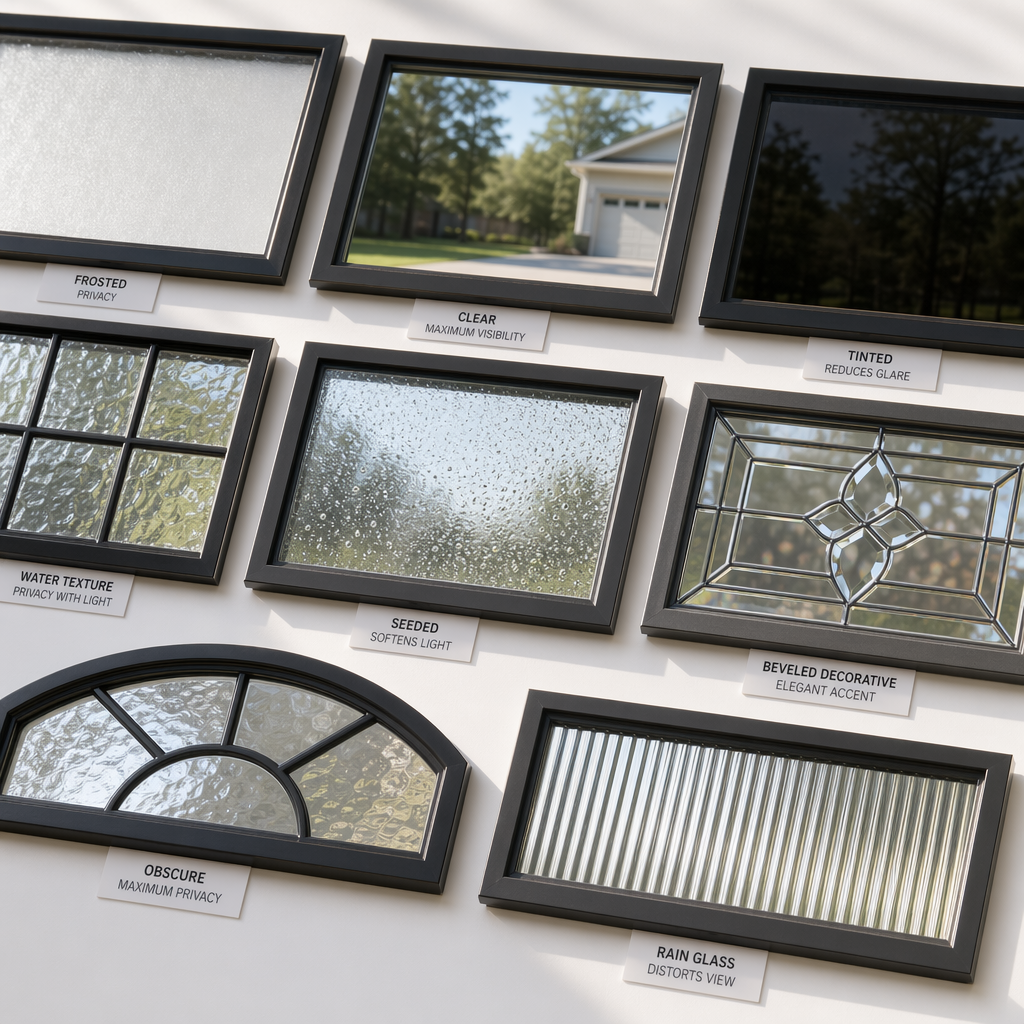
Real glass provides the clearest view and most upscale appearance, but it’s heavy and can break. Tempered glass is the safest option if you go this route, as it crumbles into small pieces rather than dangerous shards when broken.
Acrylic panels are lighter, more affordable, and nearly as clear as glass. They’re harder to break and won’t shatter dangerously. The downside is they scratch more easily and can yellow over time with UV exposure.
Consider decorative options like frosted, etched, or textured panels for privacy. These work especially well if your garage faces the street or you use the space for activities beyond parking. Bronze or gray-tinted panels reduce heat gain and glare while maintaining visibility. For improved airflow, you might also consider installing a garage screen door for better ventilation during warmer months.
Installing the Window Inserts
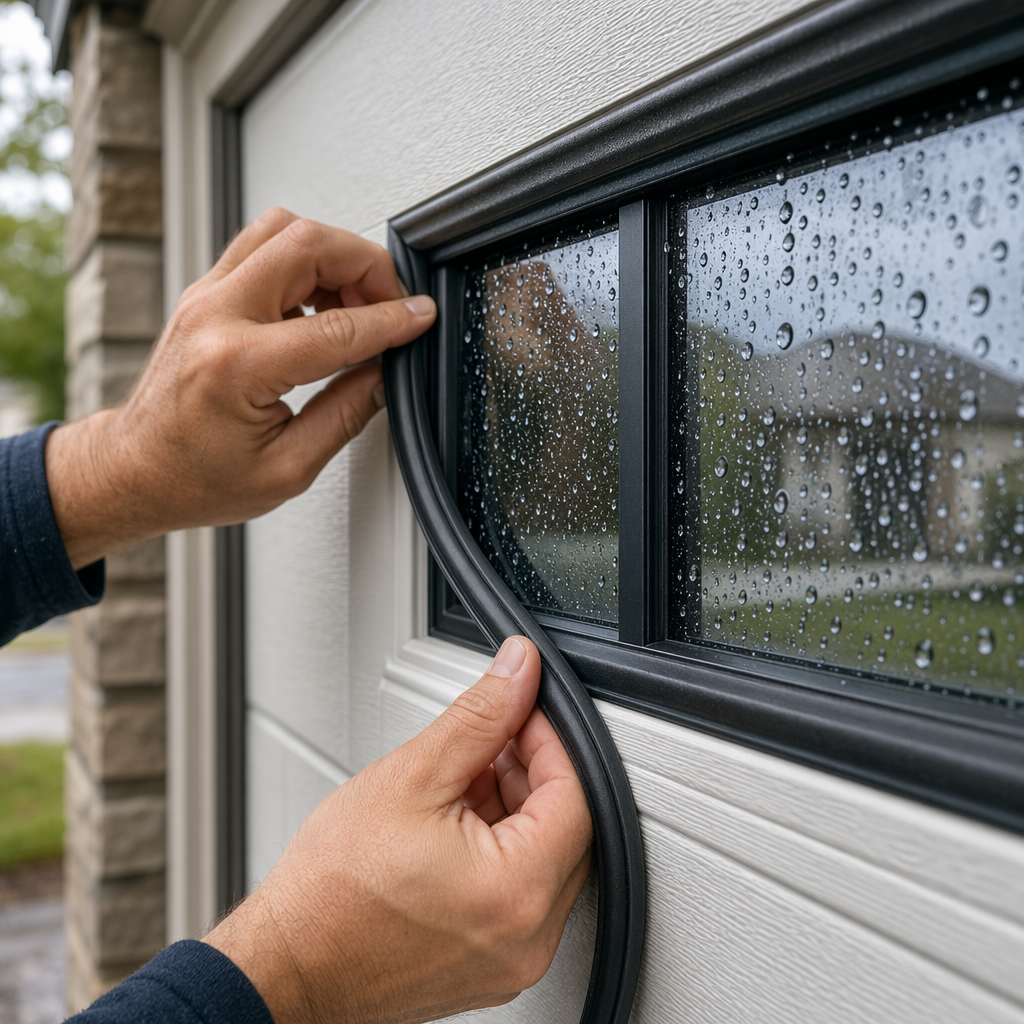
Most window insert kits come with aluminum or vinyl frames that sandwich around the door panel. You’ll typically install the exterior frame first, apply weatherstripping, insert the glass or acrylic panel, then secure the interior frame.
Use a high-quality exterior silicone sealant around the frame before installation. This creates a waterproof barrier that prevents moisture from seeping between the frame and door. Don’t skimp on this step or you’ll deal with rust and water damage later.
Tighten the mounting screws gradually and evenly. Over-tightening can crack acrylic panels or warp aluminum frames. The goal is snug contact without excessive pressure. You want the frames to compress the weatherstripping slightly but not deform it.
Install additional weatherstripping if needed. Some kits include basic strips that may not provide adequate protection in harsh climates. Adding a second layer of foam weatherstripping can improve insulation and prevent water intrusion.
Working with Different Door Materials
Wooden garage doors require different cutting tools. Use a fine-tooth blade in your circular saw or jigsaw to minimize splintering. Seal all exposed wood edges with exterior primer and paint to prevent moisture absorption and rot.
Fiberglass doors need special attention to avoid cracking. Score your cut line first with a utility knife, then use a fine-tooth blade at slower speeds. Support the panel from below to prevent flexing during cuts.
Weatherproofing and Maintenance
After installation, inspect all seams and joints for gaps. Apply additional silicone sealant anywhere you can see daylight or feel air movement. Pay special attention to the corners where frames meet, as these are common leak points.
Clean your new windows regularly with mild soap and water. Avoid ammonia-based cleaners on acrylic, as they can cause clouding and micro-cracks over time. For stubborn dirt, use a dedicated plastic cleaner.
Check the weatherstripping annually and replace it when it becomes compressed or cracked. This simple maintenance step prevents air and water leaks. You can find replacement garage door weatherstripping for most standard frame profiles. If you notice seals freezing to the ground in winter, proper weatherseal maintenance can prevent this common problem.
Inspect the sealant around the frames each year, particularly after extreme weather. Reapply silicone to any areas showing cracks or separation. Catching small issues early prevents costly water damage repairs.
Safety Considerations
Wear proper protective equipment throughout this project. Safety glasses protect your eyes from metal shavings and debris. Heavy gloves prevent cuts from sharp edges. A dust mask is essential when cutting or sanding.
Disconnect your garage door opener before starting work. You don’t want the door to move unexpectedly while you’re cutting or installing windows. Work with the door fully closed and support it with C-clamps or locking pliers to prevent movement.
Be aware of your door’s torsion springs. These are under extreme tension and can cause serious injury if disturbed. Your window installation shouldn’t require touching them, but if you need to work near the springs, call a professional.
Consider the impact on your door’s balance after installation. Adding windows changes the weight distribution, which can affect how the door operates. You may need to adjust the spring tension or opener force settings. Test the door’s balance after installation by disconnecting the opener and manually lifting the door halfway. It should stay in place without drifting up or down. Regular maintenance of your garage door lubrication and opener components will help ensure smooth operation after modifications.
Frequently Asked Questions
Will cutting windows weaken my garage door?
Properly installed windows won’t significantly compromise your door’s structural integrity if you maintain adequate spacing from edges and bracing. Most garage doors are overbuilt for their typical load requirements. However, cutting large openings or placing them poorly can create weak points. Stick to manufacturer-recommended sizes and positions, typically no larger than 16 by 24 inches per window. After installation, testing your safety sensors ensures your door continues to operate safely.
Can I install windows in an insulated garage door?
Yes, but you’ll lose some insulation value where the windows are placed. The foam insulation between the steel layers will be removed when you cut the openings. You can minimize heat loss by choosing insulated window inserts or dual-pane options. Consider your climate and how much you heat or cool your garage when deciding on window size and quantity.
How do I match the window style to my house windows?
Look at the shape, grid pattern, and color of your home’s windows. Many decorative garage door window inserts come with optional grids that mimic traditional window panes. Choose frames that match your home’s trim color, typically white, bronze, or black. For colonial or traditional homes, rectangular windows with grids work best. Contemporary homes can handle clean, grid-free windows in various shapes.
Related Articles
- Installing a Garage Screen Door for Better Ventilation
- Testing and Adjusting Garage Door Safety Sensors
- Properly Lubricating Your Garage Door and Opener
- Fixing a Garage Door Weather Seal That Freezes to the Ground
This article contains affiliate links. We may earn a small commission at no extra cost to you.