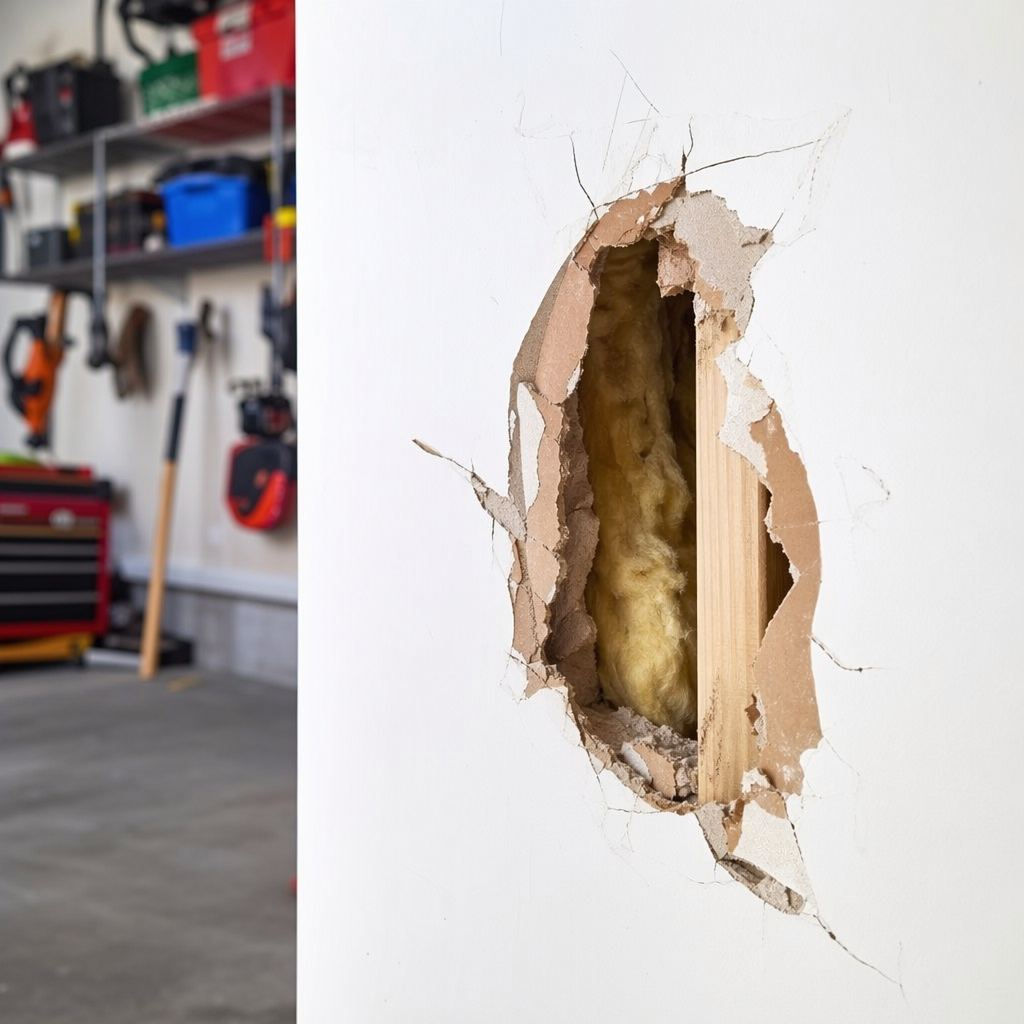
You walk into your garage and there it is: a gaping hole in the drywall where you accidentally backed into the wall, where the kids got too enthusiastic with their sports equipment, or where that old shelf finally gave up and tore away from the wall. Large holes in garage drywall are more common than you’d think, and the good news is that you can fix them yourself without calling in a pro.
This guide will walk you through patching holes larger than 6 inches in diameter. We’re talking about the kind of damage that needs more than just a simple patch kit from the hardware store. You’ll need backing boards, proper technique, and a bit of patience, but the results will be worth it.
Common Causes of Large Drywall Holes in Garages
Before we get into the repair process, let’s talk about how these holes happen in the first place. Understanding the cause can help you prevent future damage.
Vehicle accidents are probably the most common culprit. You’re backing out in a hurry, misjudge the distance, and boom. The corner of your bumper or a trailer hitch punches right through that half-inch drywall.
Heavy shelving failures are another frequent cause. You load up those garage shelves with paint cans and chemicals without proper anchoring. Eventually, the weight pulls the whole thing off the wall, taking a chunk of drywall with it.
Water damage can also create large compromised areas that need replacement. Leaking roofs, burst pipes in winter weather, or poor drainage can soften drywall to the point where it crumbles away. Impact from sports equipment, ladders falling, or even pest damage can also create holes that need serious attention.
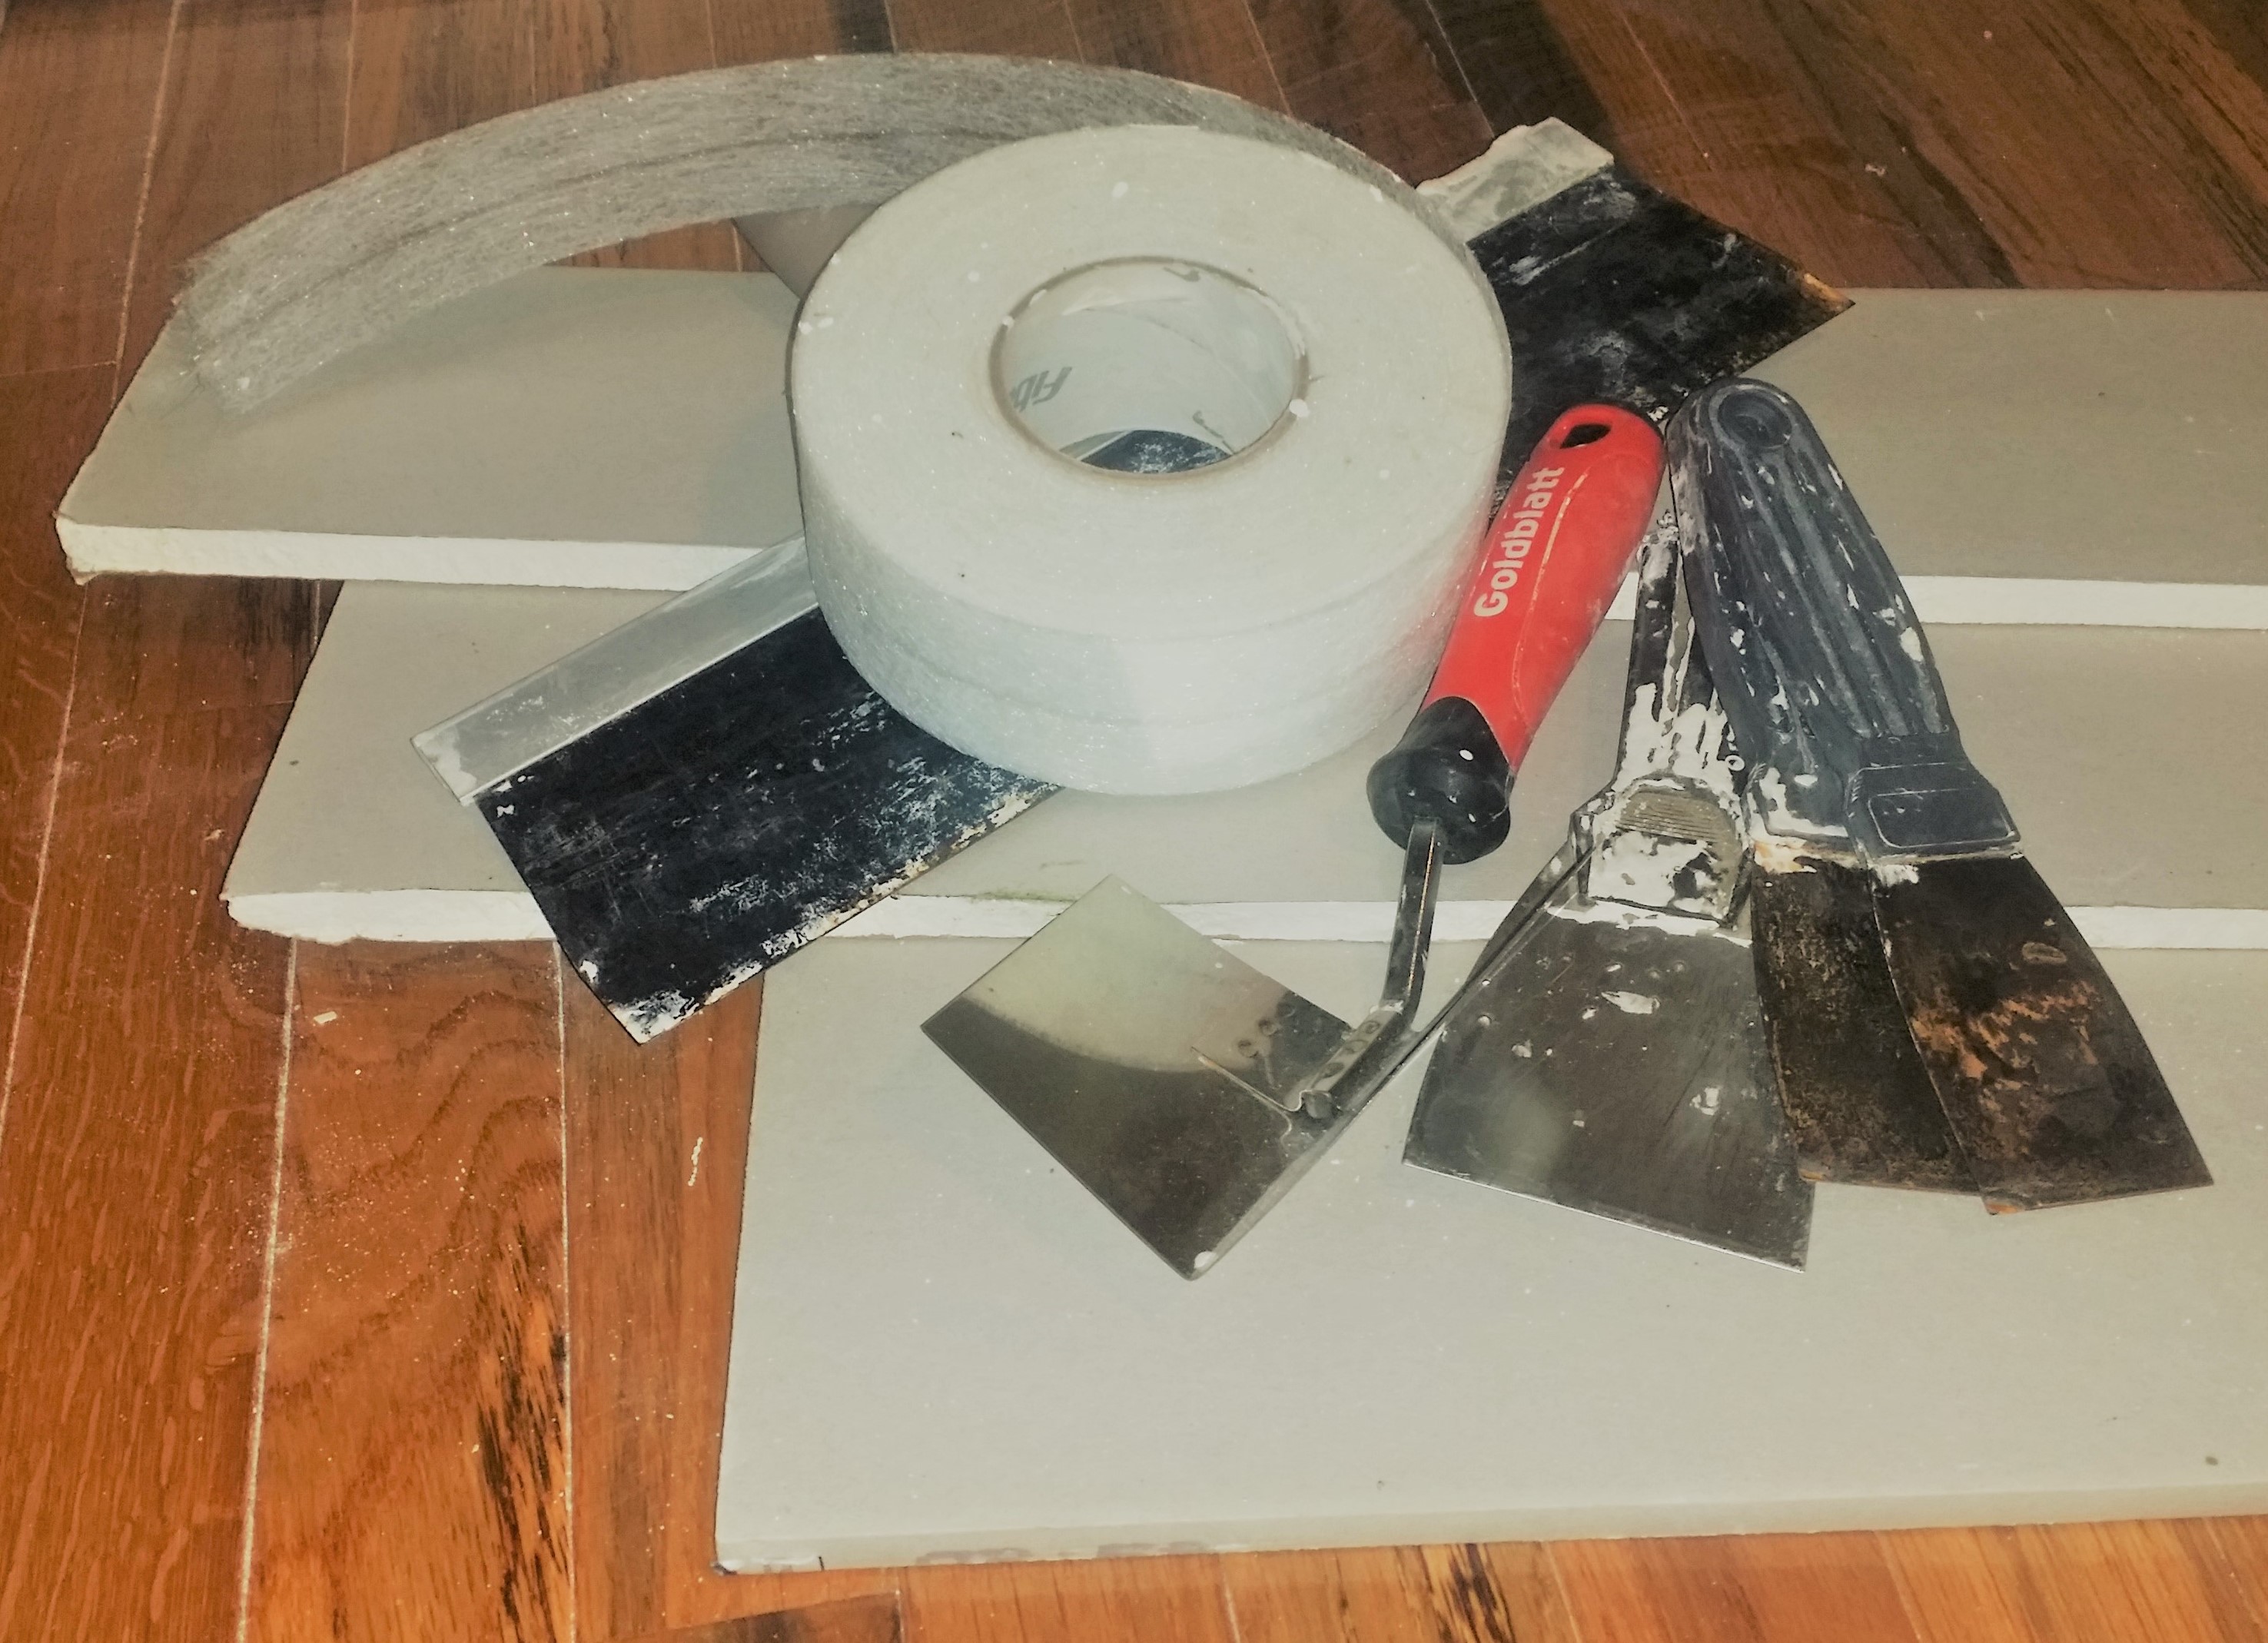
What You’ll Need for the Repair
For a proper large hole repair, you’ll need more than the basic patch kits designed for small dings. Here’s what to gather before you start:
- A drywall saw or utility knife for cutting clean edges
- Scrap drywall piece (same thickness as your existing wall, usually 1/2 inch)
- Two pieces of lumber for backing boards (1×3 or 1×4 pine works great)
- Drywall screws (1-1/4 inch length)
- Joint compound (also called mud)
- Drywall tape (paper or mesh)
- Putty knives in various sizes (4-inch, 6-inch, and 10-inch)
- Sanding block or pole sander with 120-grit sandpaper
- Drill or screwdriver
- Primer and paint to match your wall

DAP Elastomeric Patch and Caulking Compound
A quality all-in-one repair kit that includes everything you need for medium to large repairs.
Step 1: Cut Clean Edges Around the Damage
Your damaged hole probably has irregular, crumbling edges. The first step is to turn that messy hole into a clean square or rectangle that you can work with.
Use a pencil and straightedge to draw a rectangle around the damaged area. Make sure your lines are perfectly vertical and horizontal. This matters more than you might think because clean angles make the rest of the job much easier.
Cut along your pencil lines with a drywall saw. Push the saw through the drywall and use smooth, controlled strokes. Don’t worry about hitting studs at this point since you’ll be adding your own backing boards.
Clean up any loose paper or crumbling gypsum around the edges. You want a solid, clean edge for your patch to sit against. This will also help reduce dust in your garage workspace during the repair process.
Step 2: Install Backing Boards
Large holes need structural support behind them. This is what separates a professional repair from one that will crack and fail in a few months.
Cut two pieces of 1×3 or 1×4 lumber about 4 inches longer than the height of your hole. Slide one board into the hole and position it so it spans from behind the existing drywall on one side to behind the drywall on the other side. The board should sit vertically along the left or right edge of your hole.
Hold the board in place and drive drywall screws through the existing drywall into the backing board. Put two or three screws on each side of the hole. The screws will pull the board tight against the back of your existing drywall.
Repeat this process on the opposite side of the hole. You now have solid backing on both vertical edges where your patch will attach.
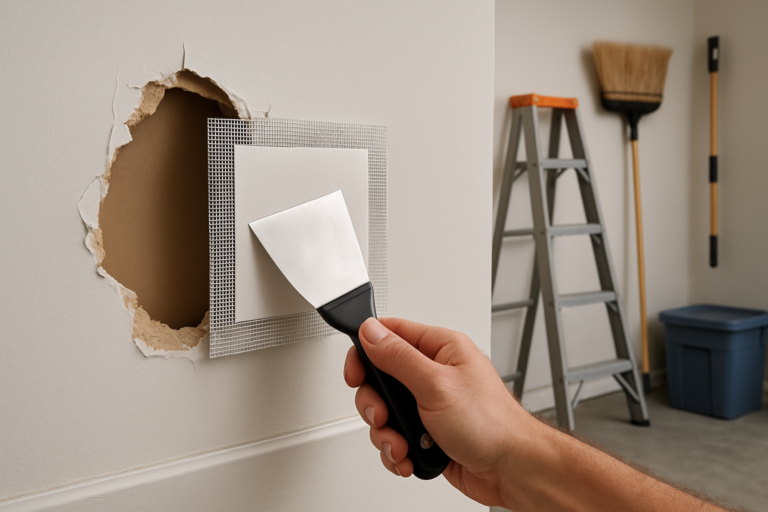
Step 3: Cut and Install Your Drywall Patch
Measure the dimensions of your hole carefully. Cut a piece of drywall to fit snugly into the opening. Most garage walls use 1/2-inch drywall, but measure your existing wall to be sure.
When cutting drywall, score the front paper with your utility knife along a straightedge, then snap the board along the score line. Cut through the back paper to separate the piece completely.
Test fit your patch in the hole. It should fit snugly but not be so tight that you have to force it. A gap of about 1/8 inch around the edges is perfect.
Once you’re satisfied with the fit, apply a thin bead of construction adhesive to the faces of your backing boards. Position your patch in the hole and drive drywall screws through the patch into the backing boards. Space screws about 6 inches apart. Don’t overtighten or you’ll create dimples that need extra filling.

USG Sheetrock All Purpose Joint Compound
Professional-grade compound that’s easy to sand and provides excellent results for garage repairs.
Step 4: Apply Joint Compound (The Mudding Process)
This is where patience becomes your best friend. A proper repair needs multiple thin coats of joint compound, not one thick glob that will crack and shrink.
For your first coat, apply paper drywall tape over all the seams. Spread a thin layer of joint compound along each seam, press the tape into it, then smooth another thin layer over the tape with your putty knife. Hold the knife at about a 45-degree angle and use firm, smooth strokes.
Also fill all the screw dimples with compound. Let this first coat dry completely, which usually takes 12 to 24 hours depending on temperature and humidity in your garage.
For the second coat, use a wider knife (6-inch or larger) and spread compound beyond your first coat, feathering the edges out several inches onto the surrounding wall. This gradual transition is what makes the repair invisible. Let it dry completely.
Apply a third coat if needed, using an even wider knife to extend the feathered edges further. Most repairs need at least three coats for a professional look.
Step 5: Sanding and Finishing
Once your final coat is completely dry (give it a full 24 hours), it’s time to sand. Use 120-grit sandpaper on a sanding block or pole sander. Wear a dust mask because drywall dust is nasty stuff.
Sand with light, circular motions. Your goal is to smooth out any ridges or tool marks and create a seamless transition between the patch and the existing wall. Run your hand over the repair frequently. It should feel completely smooth with no bumps or valleys.
Wipe down the area with a damp cloth to remove all dust. Let it dry, then apply a coat of drywall primer. This seals the compound and prevents the paint from being absorbed unevenly.
Matching the Texture
Many garage walls have a texture, like orange peel or knockdown. Matching this texture is what separates a good repair from a great one.
For orange peel texture, you can use a spray texture can from the hardware store. Practice on cardboard first to get the right pattern and distance. For knockdown texture, spray the orange peel pattern, wait a few minutes for it to partially dry, then lightly knock down the peaks with a trowel or putty knife.
If your garage wall is smooth (no texture), you’re in luck. Just make sure your sanding created a perfectly smooth surface and you’re ready to paint.
Prime the textured area again if needed, then paint to match your existing wall color. You might need two coats to fully blend the repair with the surrounding area.
Frequently Asked Questions
Can I use a patch kit for holes larger than 6 inches?
Most patch kits work best for holes up to about 5 or 6 inches. Beyond that size, the patch material doesn’t provide enough structural support and will eventually sag or crack. For larger holes, the backing board method described here gives you a much more durable repair that will last for years. The extra effort is worth it.
How long does the entire repair process take?
Plan on spreading the work over 3 to 4 days. The actual working time is only a few hours total, but you need to allow proper drying time between coats of joint compound. Rushing this process by applying coats too quickly leads to cracking and shrinking. Each coat needs a full 12 to 24 hours to cure properly before you add the next one.
Do I need different drywall for garage walls?
Standard 1/2-inch drywall works fine for most garage applications. However, if your garage has moisture issues or is attached to living space where fire rating matters, you might want to use moisture-resistant drywall (green board) or fire-rated Type X drywall. Check what’s currently on your walls and match it for your patch. You can tell Type X by its thicker profile (5/8 inch) and slightly different texture. When choosing the right material for your project, it’s worth understanding the differences between drywall and other wall finishes available for garage applications. For more comprehensive information