

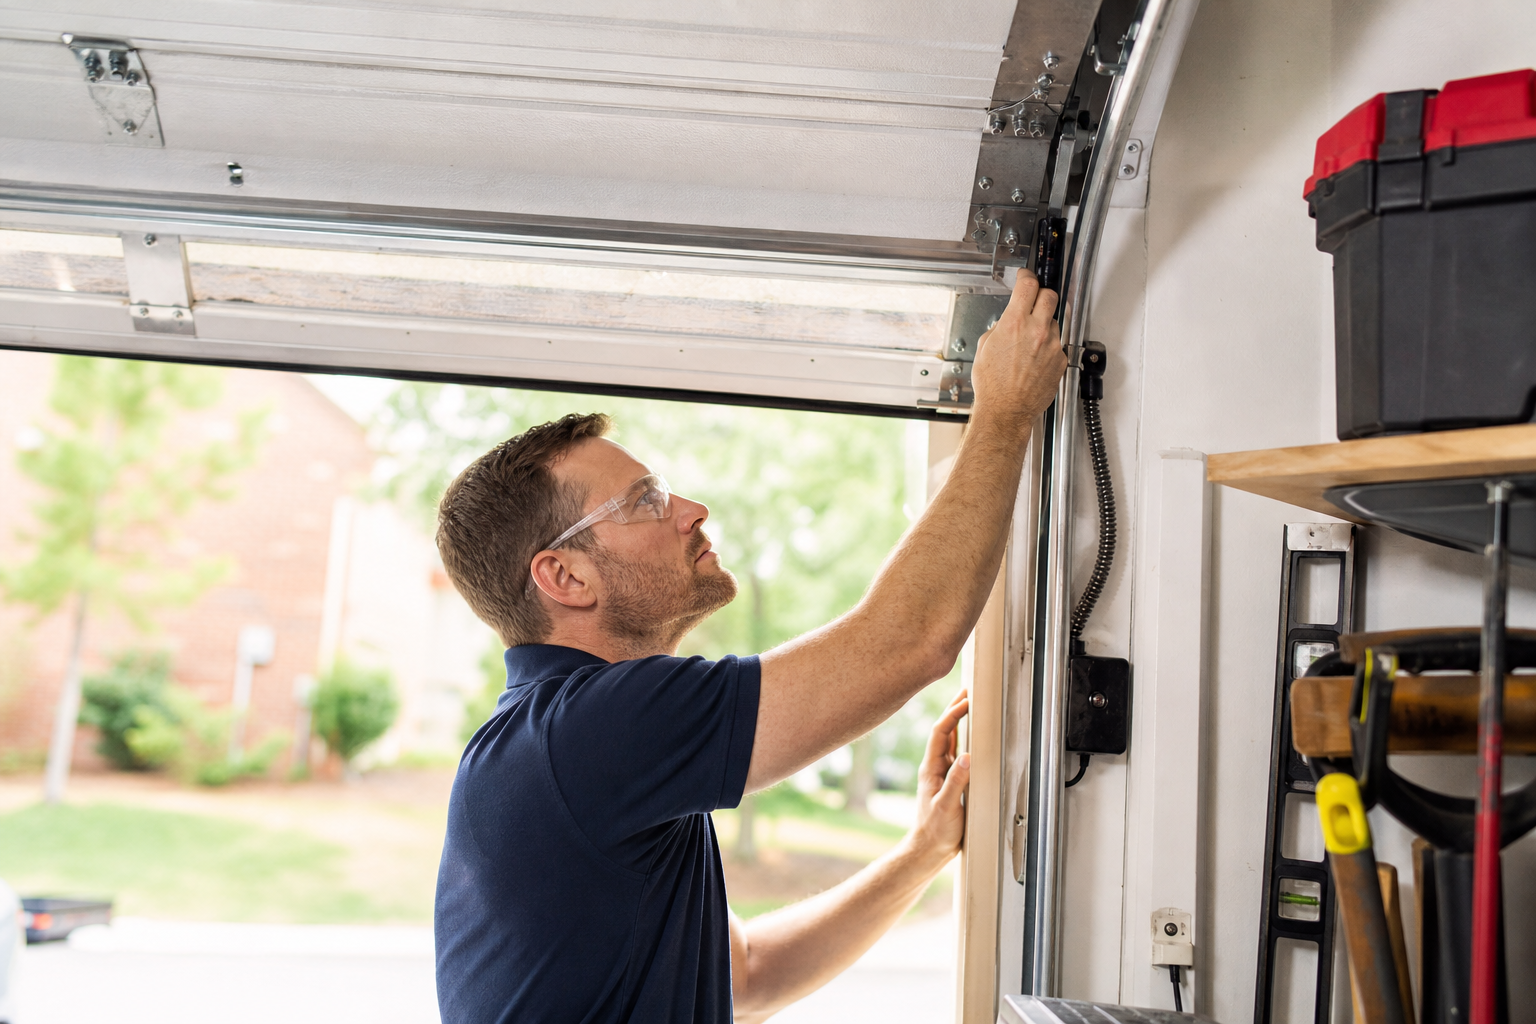
If your garage door keeps reversing, you’re dealing with one of the most reported garage issues. Climate, age, and usage all play a role, but the root causes fall into a surprisingly short list.
This troubleshooting guide covers each possibility with clear explanations and actionable fixes. By the end, you’ll have the problem solved or know exactly what to tell a technician.
Understanding the Basics
Start troubleshooting by disconnecting the opener (pull the red emergency release cord) and testing the door by hand. If it moves smoothly and holds at the halfway point, the mechanical system is fine and the problem is in the opener or electronics. If the door is heavy or drifts, suspect the springs.
Lubrication is the cheapest, most effective maintenance. Apply white lithium grease or silicone-based lubricant to hinges, rollers (unless sealed nylon), spring coils, and track contact points every 6 months. Skip WD-40 for this; it’s a solvent that displaces moisture but doesn’t provide lasting lubrication.
Safety sensors mount about 6 inches above floor level on both sides of the door opening. They send an infrared beam across the gap. If anything blocks or misaligns that beam, the door won’t close. Sensor issues are the number-one cause of “door won’t close” complaints and are almost always a quick fix.
Safety Sensor Alignment
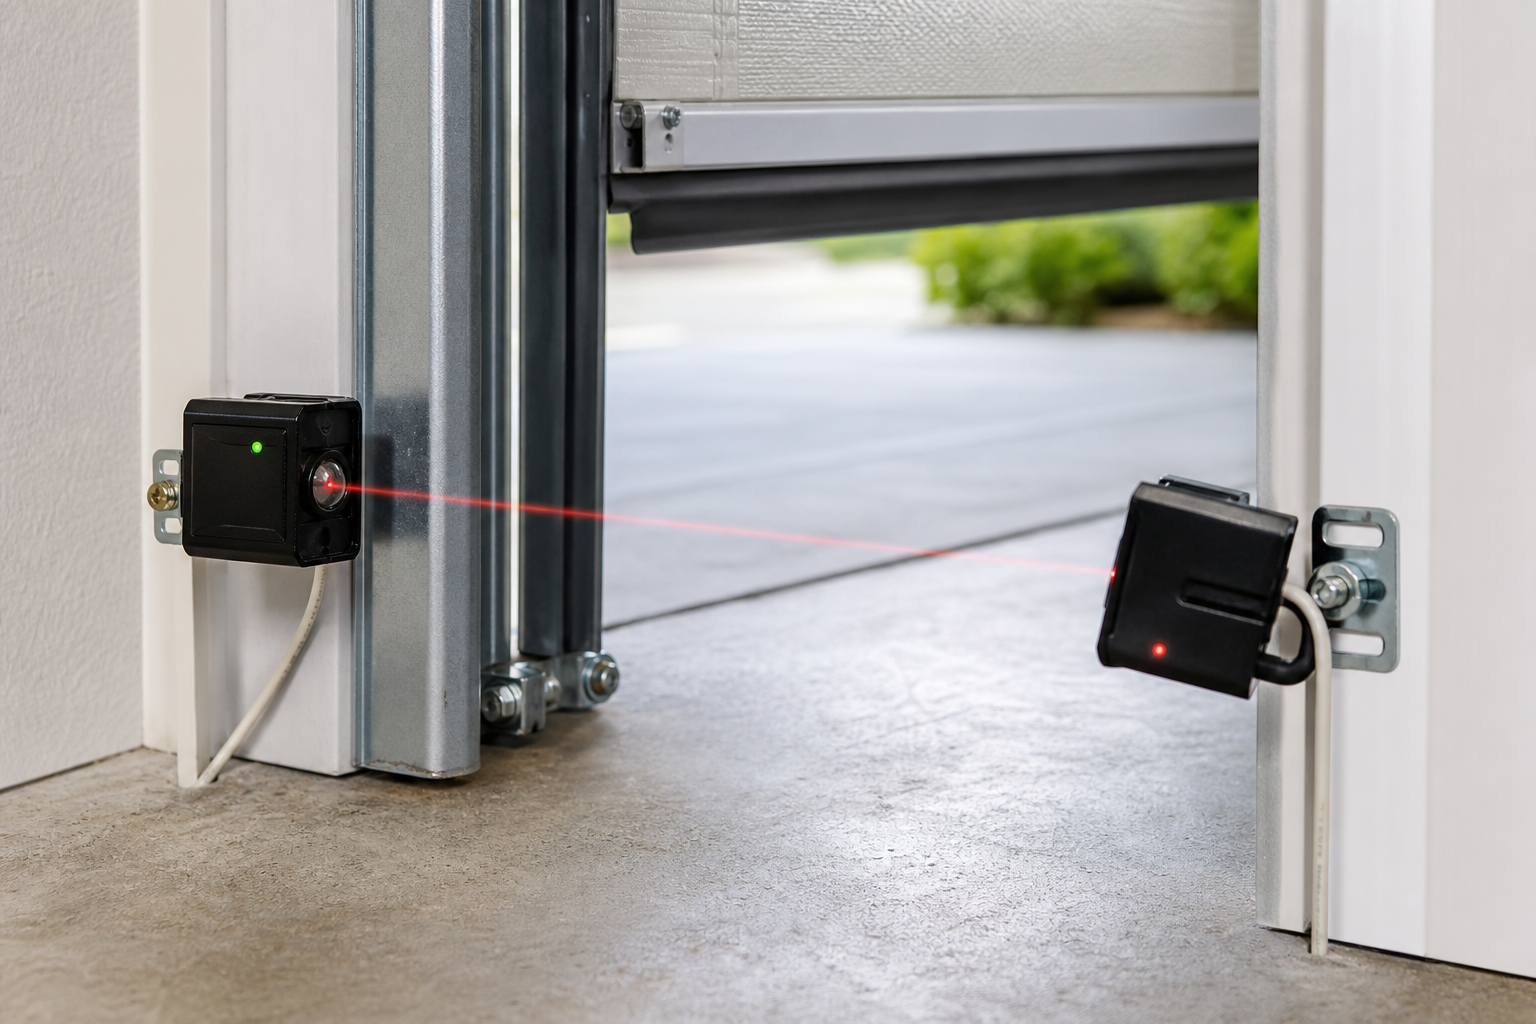
When safety sensors are misaligned, your garage door will reverse every time you try to close it. The sensors need to create an unbroken infrared beam across the door opening.
Check the LED lights on each sensor first. Most systems show a solid light when properly aligned and a blinking light when something’s wrong. Clean the sensor lenses with a soft cloth, as dust and spider webs are common culprits.
If cleaning doesn’t solve it, adjust the sensor brackets by loosening the wing nuts and gently moving them until both sensors point directly at each other. The beam path should be perfectly horizontal. For detailed guidance on this process, check out our garage door safety sensor alignment guide.

Force Settings Adjustment
Force settings control how hard the opener pushes the door. Too high: it pushes through obstacles. Too low: reverses at slight resistance. Most openers have “up force” and “down force” screws.
Make quarter-turn adjustments and test after each change until operation is smooth with no false reversals. Turn clockwise to increase force, counterclockwise to decrease. Most doors need different settings for up and down travel due to spring assistance.
Our detailed garage door opener force settings guide covers specific adjustment procedures for different opener brands.
Obstruction in the Track
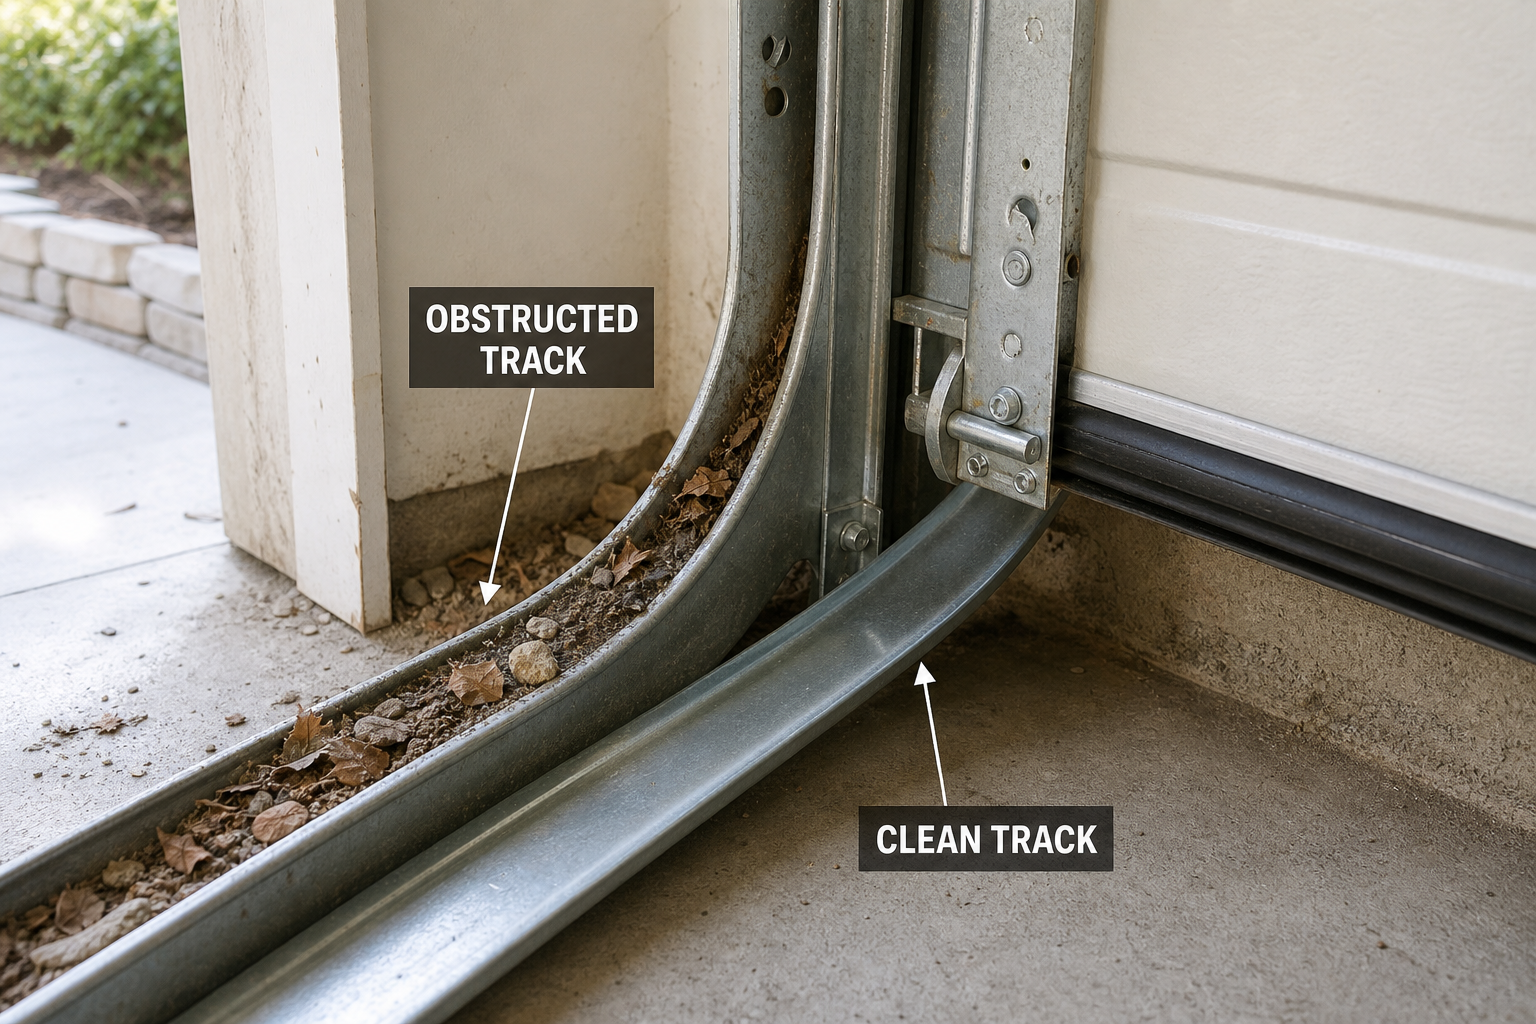
Physical obstructions cause immediate reversals when the door hits them. Check the entire track system for debris, warped sections, or damaged rollers.
Start by visually inspecting the vertical and horizontal track sections. Look for dents, rust buildup, or accumulated debris. Small stones, leaves, or ice can block smooth operation.
Clean tracks with a damp cloth and mild detergent. Never use lubricants on the tracks themselves, as this attracts more dirt. Only lubricate the rollers and moving hardware.
If your door stops partway through its travel rather than reversing, you might be dealing with a different issue covered in our guide to doors that stop halfway.
Travel Limits and Worn Components
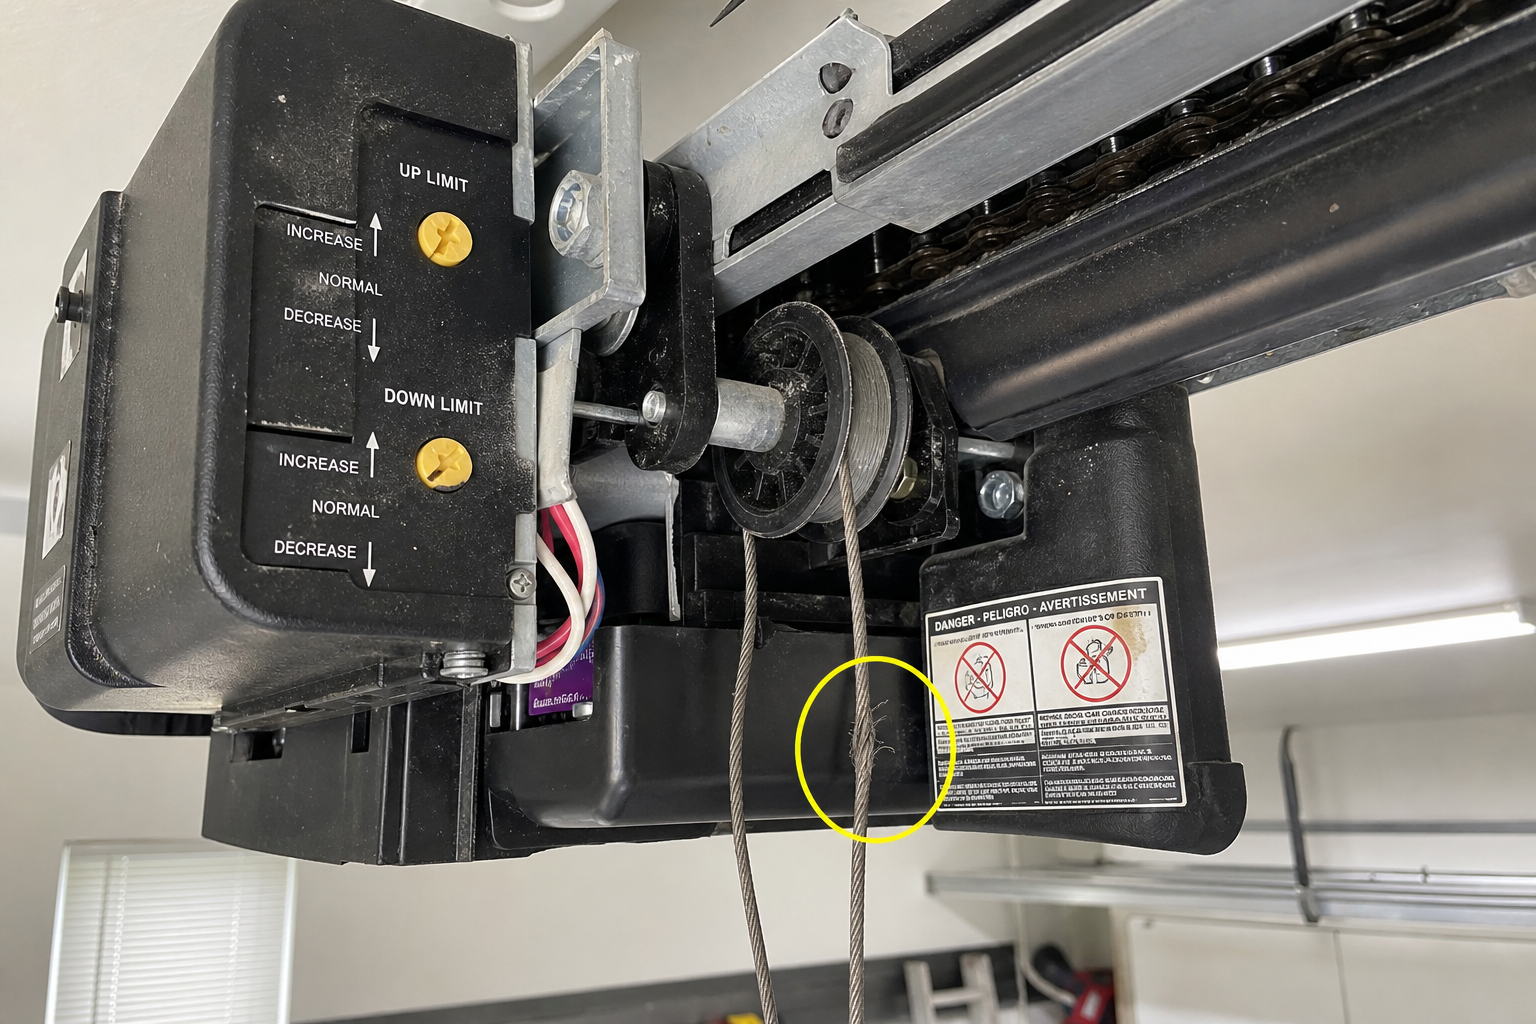
Incorrect travel limits make the opener think the door has hit an obstruction when it reaches the fully closed position. This triggers the safety reverse feature.
Most openers have “up limit” and “down limit” adjustment screws or digital settings. The door should stop just as it contacts the floor, with minimal pressure against the weatherstripping.
Check our garage door opener travel limits adjustment guide for brand-specific procedures.
Worn gears in older openers can also cause erratic behavior. You’ll typically hear grinding or clicking noises when this happens. Gear replacement requires disassembly and is often worth professional attention.
Brand-Specific Reset Instructions
Different opener brands have unique adjustment and reset procedures. Getting this right requires matching your approach to your specific model rather than following a generic formula.
Chamberlain and LiftMaster
These brands typically use force adjustment screws located on the motor unit. Turn in small increments and test after each adjustment. Some newer models have digital force settings accessed through the learn button.
Genie Openers
Genie systems often use a different adjustment method with force dials rather than screws. The process involves pressing and holding specific buttons while adjusting the settings.

Genie Garage Door Openers
Reliable performance with straightforward adjustment procedures
Craftsman Models
Craftsman openers vary by manufacturing date and model. Older units use screw adjustments, while newer ones may have digital controls. Check the model number for specific instructions.
When considering an opener upgrade, our comparison of 1.25 HP vs 1.5 HP garage door openers can help you choose the right power level for your door.
Additional Maintenance Considerations
A garage door system includes panels, tracks, rollers, springs (torsion or extension), cables, hinges, weatherstripping, and the opener with its motor, drive mechanism, and safety sensors. When symptoms appear, the root cause isn’t always in the most obvious component.
Regular maintenance prevents most reversing issues. Every six months, lubricate all moving parts, tighten loose hardware, and test the auto-reverse feature by placing a 2×4 under the door.
Weather stripping problems can also cause issues. If the bottom seal is too thick or improperly installed, it creates excessive resistance. Our weather stripping replacement guide covers proper installation techniques.
Spring problems require immediate professional attention. Never attempt to adjust or replace torsion springs yourself. The stored energy can cause serious injury or death.
When to Call a Professional
DIY covers most of what’s listed above, but some situations need professional help. High-voltage electrical work, garage door spring replacement, structural modifications, and issues requiring specialized diagnostic equipment are all worth outsourcing.
A botched repair often costs more to fix than hiring the right person from the start. Call a pro if you’ve tried the basic adjustments without success, if you hear unusual grinding or scraping noises, or if the door operates differently on one side than the other.
Get two to three quotes, verify licensing and insurance, and ask for recent references. A reputable contractor explains the process clearly, provides a written estimate, and backs the work with a written warranty.
For complex panel damage issues, professional help becomes essential. Check our garage door panel replacement guide to understand when repair versus replacement makes sense.
Frequently Asked Questions
Should I replace garage door springs myself?
Torsion springs store enough energy to cause serious injury or death. This repair should always go to a trained technician with proper tools. Extension springs are somewhat safer but still require caution and experience.
How often should I service my garage door?
Every 6 months: lubricate moving parts, tighten hardware, test auto-reverse, and visually inspect springs and cables. This routine maintenance takes about 20 minutes but prevents most common problems.
Why does my garage door reverse randomly?
Random reversals usually indicate intermittent sensor problems, loose wiring connections, or force settings that are too sensitive. Start with sensor cleaning and alignment, then check all electrical connections for corrosion or damage.
Can I bypass safety sensors temporarily?
While technically possible on older systems, bypassing safety sensors creates serious injury risks. Modern openers won’t function without working sensors, and this safety feature has prevented countless accidents since becoming mandatory in 1993.
This article contains affiliate links. We may earn a small commission at no extra cost to you.
