Shopping for energy-efficient garage doors means sifting through dozens of options that all claim to be the best. Marketing language is unreliable, and Amazon reviews can be misleading with incentivized ratings mixed in.
This guide focuses on specs and features that matter for real-world garage use. Every recommendation is based on performance, durability, and value, not advertising budgets.
Understanding the Basics
The garage door accounts for 30 to 40% of total thermal loss. An uninsulated steel door has near-zero R-value, while an insulation kit or pre-insulated replacement reaches R-6 to R-12 depending on material thickness. This single upgrade makes the largest temperature impact.
After upgrading the door, seal air leaks around the frame. Gaps between door frame and wall, worn weatherstripping, and unsealed pipe/wire penetrations let conditioned air escape. Weatherstripping replacement and expanding foam provide immediate, noticeable improvement for minimal cost.
Wall options include fiberglass batts (R-13 for 2×4 walls, R-19 for 2×6), rigid foam boards, and spray foam. Fiberglass is most cost-effective for exposed-stud garages. Already have drywall? Blown-in or exterior foam are alternatives that don’t require opening walls.

Reflective Insulation Roll
Makes a noticeable difference in thermal performance with radiant barrier technology
Insulated Steel vs. Fiberglass Doors
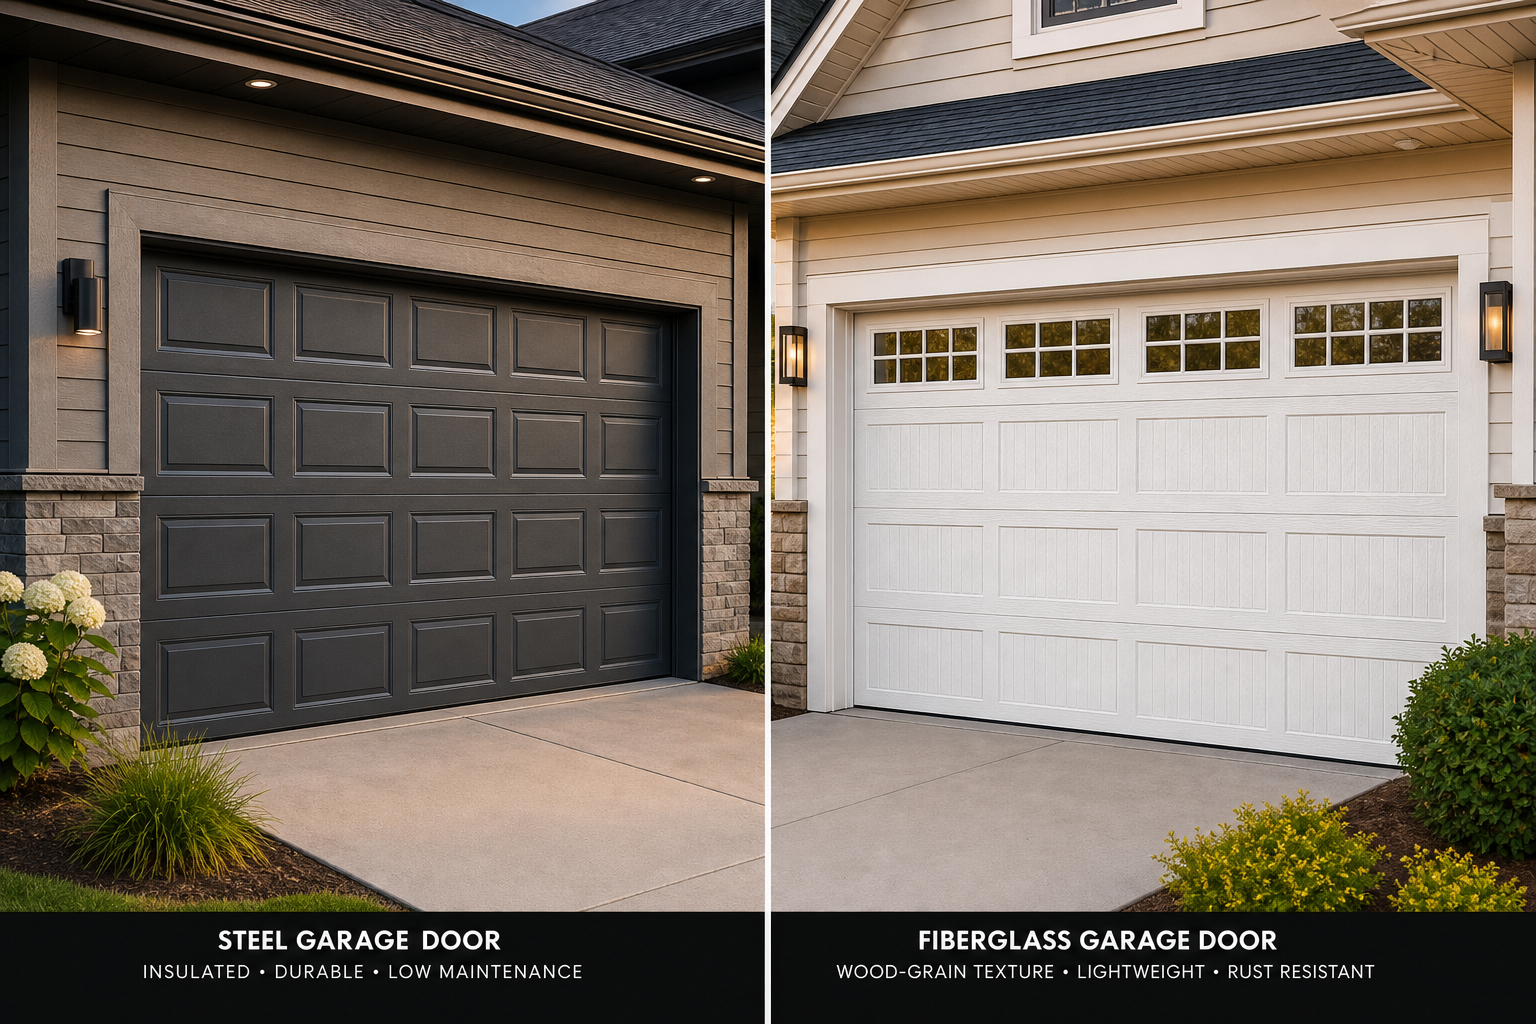
Comparing insulated steel and fiberglass doors reveals where cutting corners comes back to haunt you. Invest the effort upfront and you’ll save significant time and money over the next several years of use.
Steel doors with polystyrene insulation offer good value and adequate performance for most climates. They resist dents better than single-layer doors and provide R-values between 6 and 8.
Keep the workspace organized throughout installation. Debris and clutter cause errors and safety issues. Clear tools and waste between major steps rather than letting mess accumulate to the end.
Expect at least one surprise during the project. Hidden moisture, non-standard dimensions, or outdated wiring are common discoveries. Having backup materials and a flexible timeline reduces the stress when they appear.
Polyurethane-Core Doors: Premium Performance
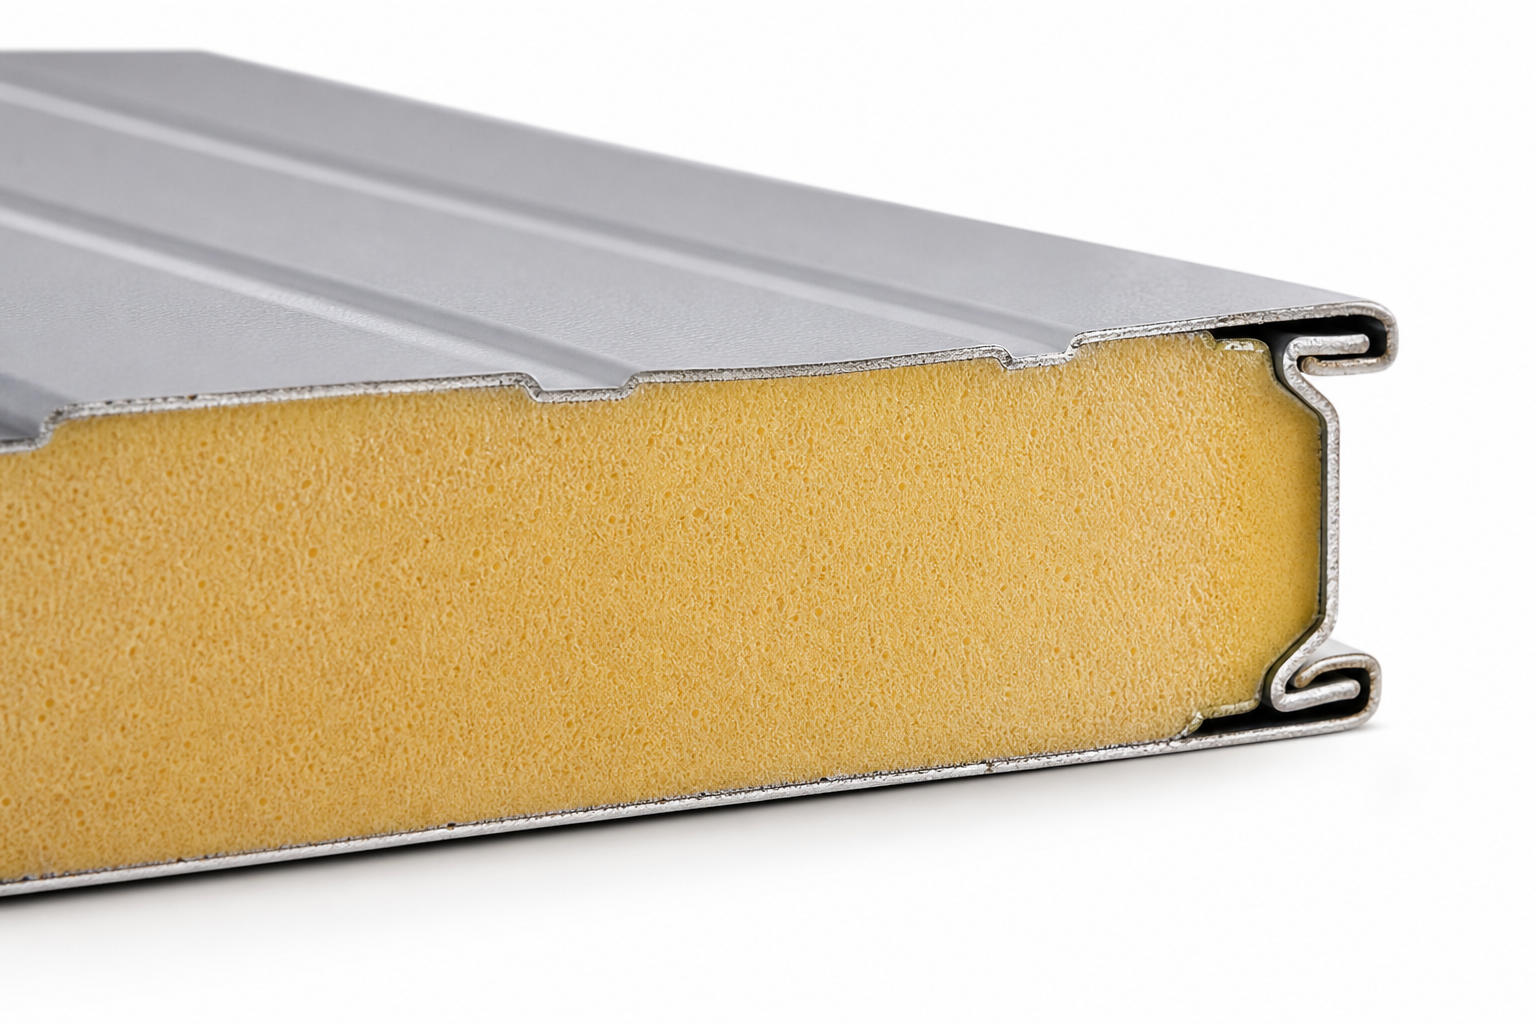
Polyurethane-core doors from brands like Clopay and Overhead Door represent the top tier of insulation performance. The details here make the difference between a result that lasts and one that needs replacing within a year. Take the time to assess your conditions before committing to a method or product.
These doors typically achieve R-values of 12 or higher. The foam bonds directly to the steel, creating a stronger panel that resists denting and temperature transfer more effectively than polystyrene alternatives.
Document every product you use: brand, color, batch number, application date. Future touch-ups need exact material matches. Tape the info inside a cabinet door or take a quick phone photo for your records.
Wear appropriate protection throughout: safety glasses, gloves, respirator when working with chemicals or dust. Ventilate when using adhesives, paints, or solvents. These aren’t optional precautions.
Garage Door Insulation Kit
Well-reviewed by garage owners for reliable performance and easy DIY installation
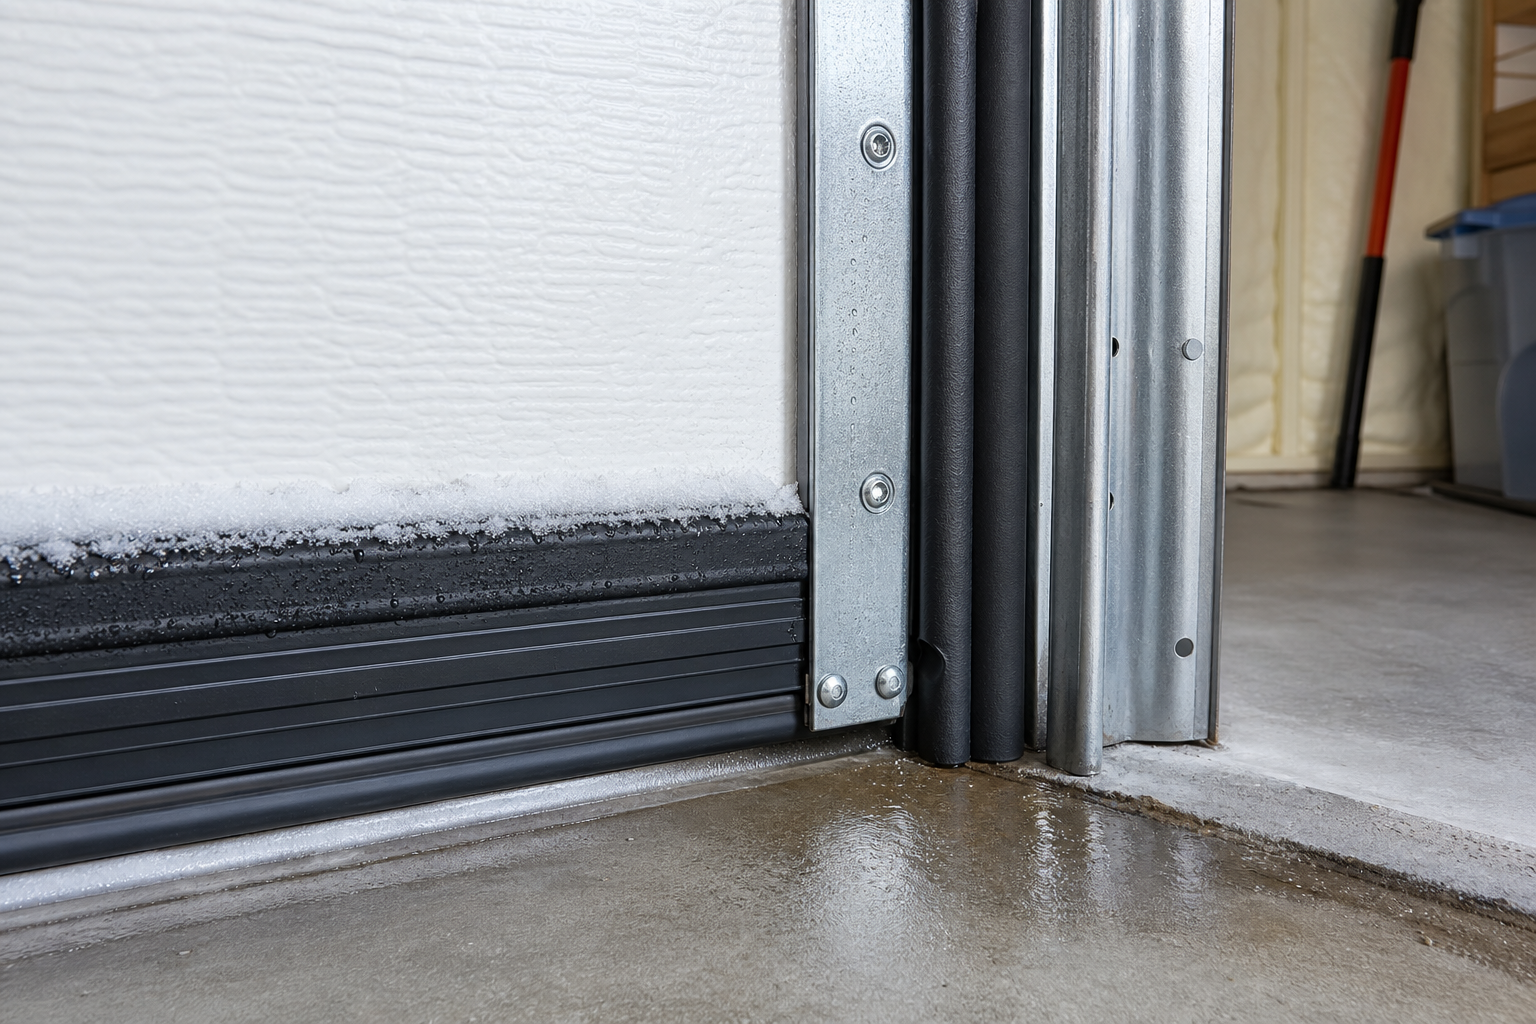
R-Value Ratings and Weatherstripping Upgrades
Understanding R-value ratings, weatherstripping upgrades, and which models qualify for current rebates helps you choose the right approach. Your garage’s age, construction type, and local climate all influence what works best and what to avoid.
Follow manufacturer instructions exactly, even when online tutorials suggest shortcuts. Formulations differ between brands. What works for one product can cause failure with another. If the data sheet says 4 hours between coats at 60 degrees minimum, those numbers aren’t suggestions.
If this is your first project of this type, budget 50% more time than guides suggest. The learning curve is real, and careful work produces better results than rushing to meet an estimated timeline.
Garage doors use three seal types: bottom, side (jamb), and header (top). Replacing all three gives the best results. If budgeting, start with the bottom seal, which takes the most abuse and makes the biggest difference.
Additional Considerations
Ceiling insulation matters most when living space sits above the garage. An uninsulated ceiling lets heat transfer freely, making the room above uncomfortable and increasing energy bills. R-30 to R-38 is the standard recommendation for most climate zones.
For garages converted to home offices or workshop spaces, proper insulation becomes even more critical for year-round comfort.
Consider adding radiant barrier installation to further improve thermal performance, especially in hot climates where summer cooling costs are a concern.
Practical Planning Tips
Invest in quality tools for tasks you’ll repeat. A reliable stud finder, a good level, a quality tape measure, and proper safety gear (eye protection, hearing protection, respirator) make every project easier and safer. These tools pay for themselves across multiple projects over the years.
Research local building codes and permit requirements for your specific project. Electrical work, structural modifications, and HVAC installations often require permits and inspections. Working without required permits can create liability issues, insurance complications, and problems when selling the home.
Prioritize your projects based on impact and urgency. Safety issues (faulty wiring, CO risk, structural problems) come first. Comfort improvements (insulation, lighting, climate control) come second. Cosmetic upgrades (floor coatings, paint, organization systems) come last. Following this order ensures you’re building each improvement on a solid foundation.
What to Avoid
Knowing what to skip prevents expensive mistakes:
- Unknown brands at rock-bottom prices: Established brands charge more for proven materials and real warranties.
- “Universal” products claiming to work everywhere: Specialized products consistently outperform generalists.
- Products with vague specs or missing data sheets: If a manufacturer won’t publish details, that’s a red flag.
Avoid rushing into major door replacement if your current door is structurally sound. Sometimes panel replacement or adding insulation to existing panels provides adequate improvement at lower cost.
Don’t ignore related maintenance issues. If your garage door stops halfway during operation, address those mechanical problems before investing in efficiency upgrades.
How long will the results last?
Years of reliable performance with quality materials and proper installation. Preparation quality is the single biggest longevity factor. Properly installed insulation and weatherstripping typically maintain effectiveness for 10-15 years.
Can I handle this as a DIY project?
Most steps are DIY-accessible with basic tools. Electrical, structural, and high-tension spring work should go to licensed professionals. Door panel insulation and weatherstripping replacement are well within most homeowners’ capabilities.
What mistake should I avoid above all?
Rushing preparation. Whether it’s surface prep, measuring, or reading instructions, upfront time prevents expensive do-overs. Take accurate measurements multiple times before ordering materials.
Which type of insulation provides the best value?
Polyurethane-core doors offer the highest R-values but cost significantly more. For most homeowners, polystyrene insulation or retrofit kits provide the best balance of performance and cost. Focus on sealing air leaks first, then add insulation.
This article contains affiliate links. We may earn a small commission at no extra cost to you.