The market for garage floor crack repair products keeps growing, giving you more options and more chances to pick wrong. Understanding what separates quality from marketing hype saves real money and frustration.
This guide compares the leading products across the specs that actually matter, with clear recommendations at different price points.
Understanding the Basics
Two-part epoxy creates a chemical bond far stronger than any single-can product. When resin and hardener mix, cross-linking produces a dense, chemical-resistant surface. This reaction is sensitive to temperature, humidity, and mixing ratios, making adherence to the data sheet critical.
Surface preparation drives roughly 80% of a coating’s long-term performance. Concrete needs a CSP 2 to 3 surface profile for proper adhesion. Diamond grinding achieves this reliably.
Acid etching is a budget alternative on clean, unsealed concrete but creates a lighter profile that’s less durable in high-traffic areas. If you’re planning a complete garage makeover alongside your crack repairs, consider proper primer application to ensure maximum adhesion.
Pot life varies by product: 30 to 60 minutes for standard epoxies, as little as 10 to 15 minutes for polyaspartic coatings. Plan your approach before mixing and work in manageable sections so you never feel rushed near the end of a batch.
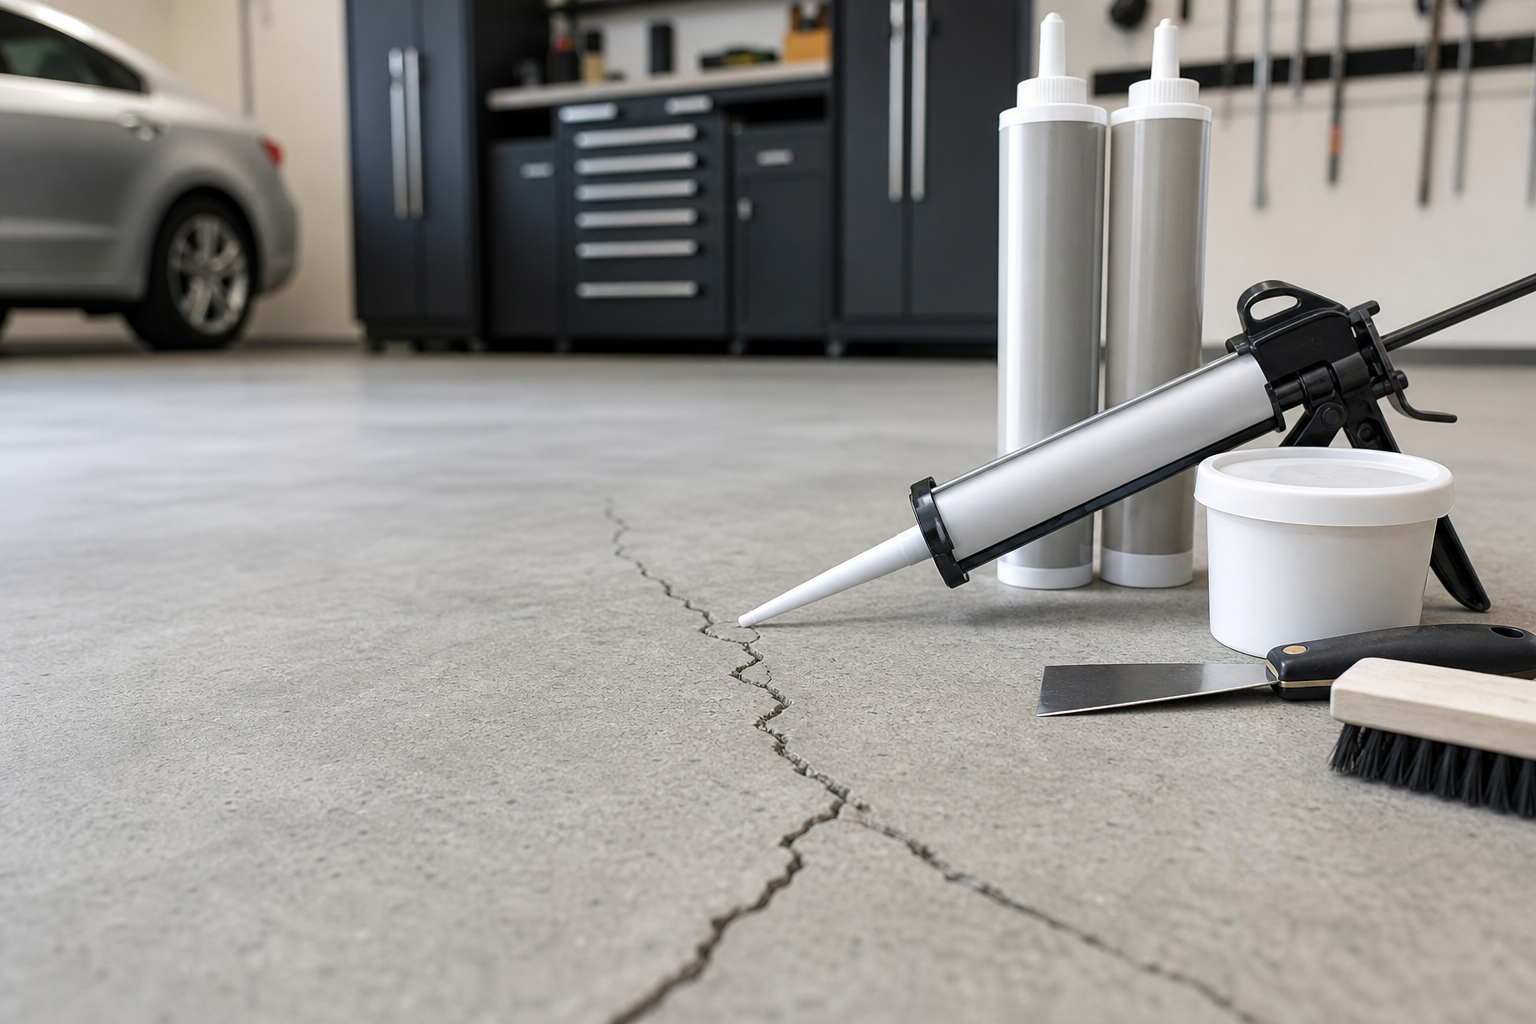
Polyurea Crack Fillers

Polyurea crack fillers and epoxy paste require attention to detail. The specifics here make the difference between a result that lasts and one that needs redoing within a year. Take the time to assess your conditions before committing to a method or product.
Document every product you use: brand, color, batch number, application date. Future touch-ups need exact material matches. Tape the info inside a cabinet door or take a quick phone photo for your records.

Rust-Oleum Epoxy Crack Filler
Solid reputation among homeowners with proven durability
For this application, Rust-Oleum products have a solid reputation among homeowners. Check current selection and pricing on Amazon, and read recent reviews from buyers with conditions similar to yours.
If this is your first project of this type, budget 50% more time than guides suggest. The learning curve is real, and careful work produces better results than rushing to meet an estimated timeline.
Hydraulic Cement
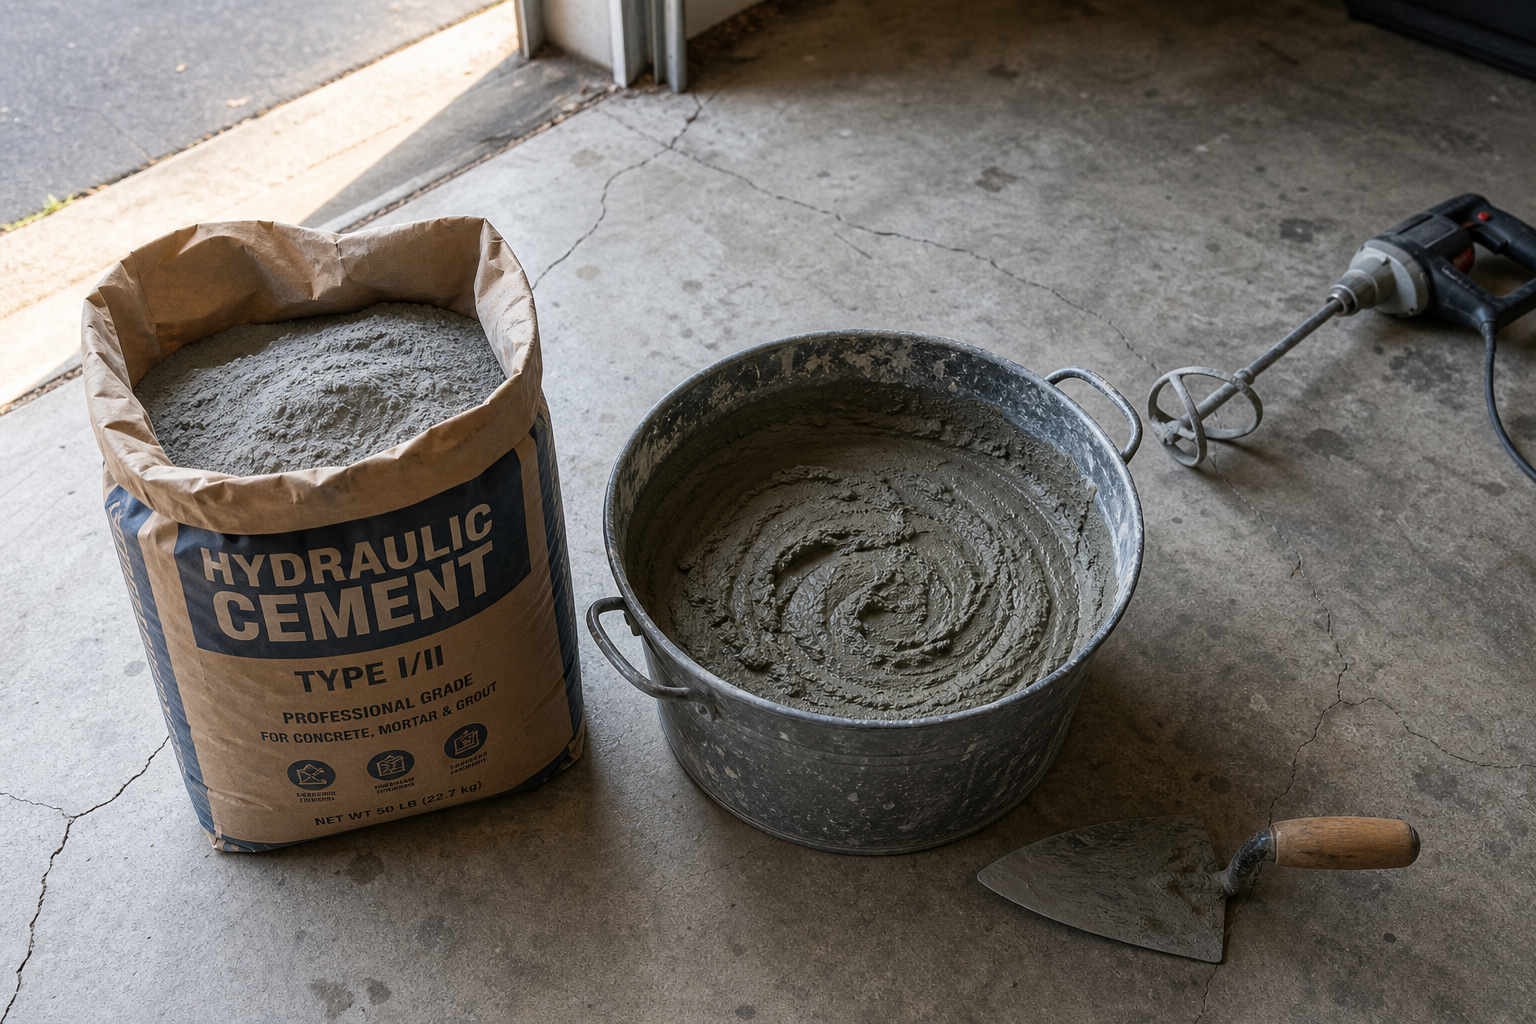
Hydraulic cement and flexible caulk-style fillers from brands like Quikrete handle different crack types. This is an area where cutting corners comes back to haunt you. Invest the effort upfront and you’ll save significant time and money over the next several years of use.
Check specific requirements before purchasing materials. Measure the area, note unusual conditions (extreme temps, high humidity, uneven surfaces), and read product specs carefully. A mismatch between your conditions and the product’s rated range is the most common cause of unexpected failures.
If you’re dealing with water intrusion issues that caused the cracks, you might also need to address proper drainage solutions before applying any permanent fixes.
Wear appropriate protection throughout: safety glasses, gloves, respirator when working with chemicals or dust. Ventilate when using adhesives, paints, or solvents. These aren’t optional precautions.
PC Products and Professional-Grade Options
PC Products and Rust-Oleum offer different approaches to crack repair. Understanding the specifics of your situation helps you choose the right approach. Your garage’s age, construction type, and local climate all influence what works best and what to avoid.
Keep the workspace organized throughout. Debris and clutter cause errors and safety issues. Clear tools and waste between major steps rather than letting mess accumulate to the end.
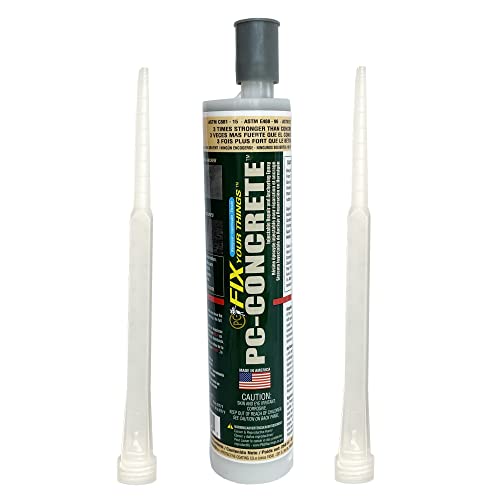
PC Products PC-Concrete Crack Repair
Two-part epoxy system with excellent adhesion for structural repairs
PC Products offers reliable options in this category. Look past overall star ratings and focus on detailed reviews discussing long-term durability rather than just first impressions.
Consider how this change fits the larger garage picture. Improvements in one area can shift dynamics elsewhere. Better insulation changes humidity patterns. Heavy storage affects the floor underneath. Think about interactions.
Matching Products to Crack Types
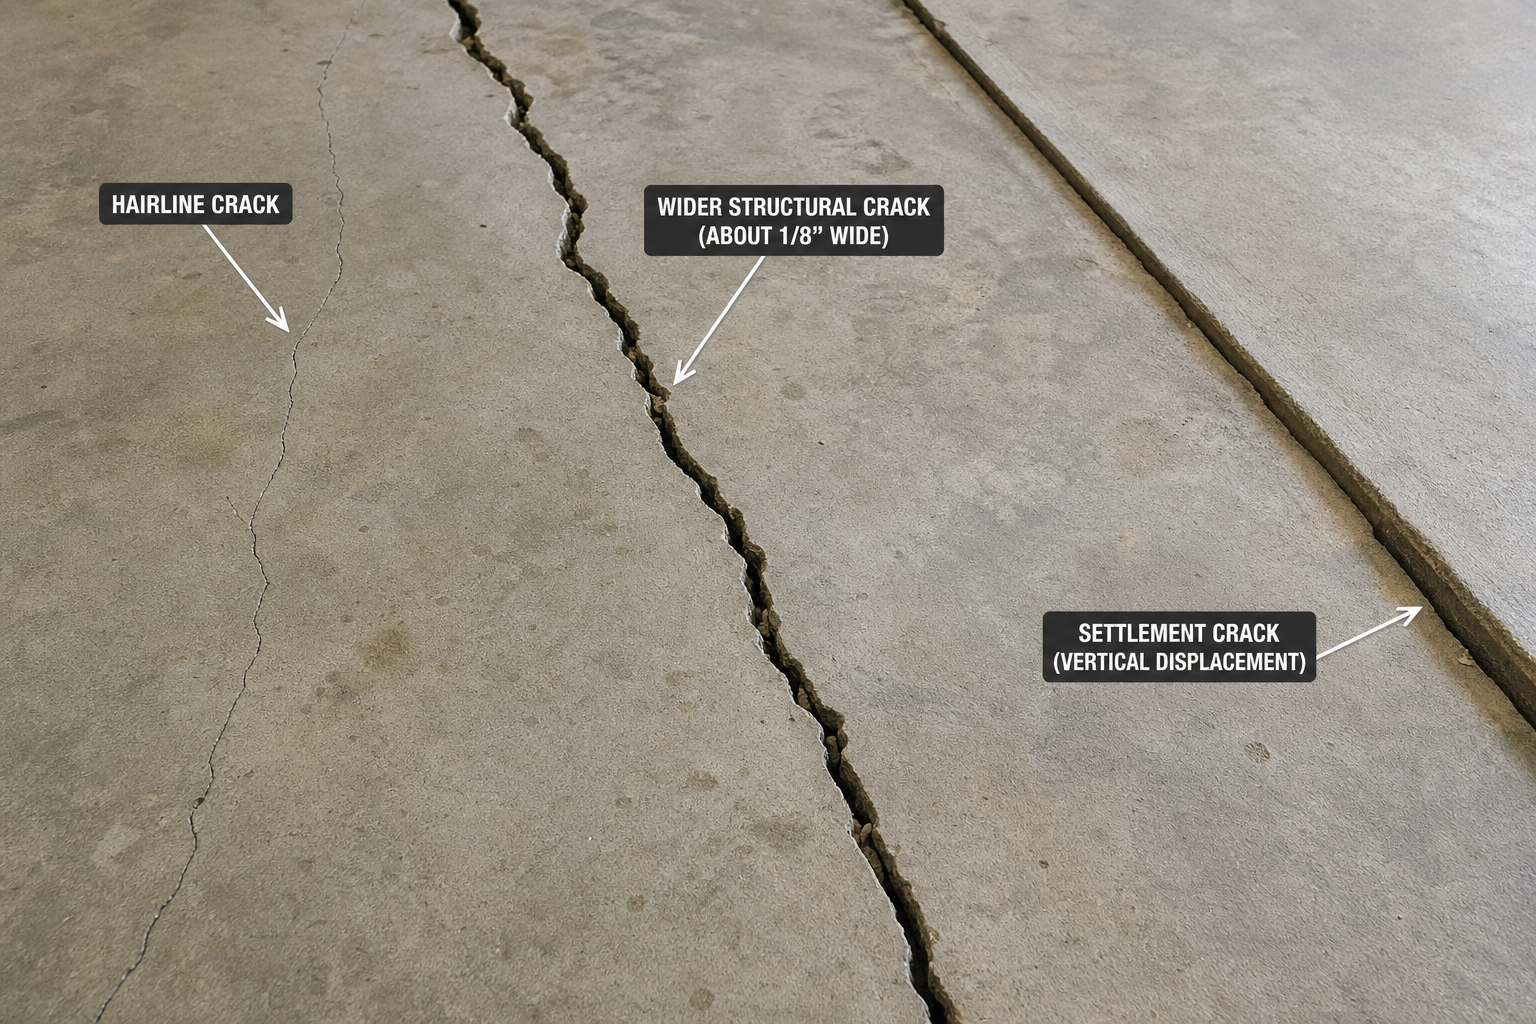
Which product matches each crack type depends on whether you’re dealing with hairline, structural, or expansion joint cracks. Getting this right requires matching your approach to actual conditions rather than following a generic formula. Climate, surface condition, and usage patterns all influence the best path forward.
Hairline cracks (less than 1/8 inch): Polyurea fillers or thin epoxy work well. These products flow into narrow spaces and create flexible repairs that won’t re-crack with minor movement.
Medium cracks (1/8 to 1/4 inch): Two-part epoxy paste provides the strength needed. Sand-filled epoxy adds bulk and reduces shrinkage during cure.
Large cracks (over 1/4 inch): Hydraulic cement or structural epoxy. These may indicate foundation issues requiring professional assessment before repair.
Work in small, manageable sections for better quality control. For floor coatings, that means strips the width of your roller from back to front. For wall systems, complete one section fully before starting the next. Rushing large areas creates inconsistencies and errors.
Before sealing major cracks, you might want to review proper floor sealing techniques to ensure your repair integrates well with any future coating projects.
Expect at least one surprise during the project. Hidden moisture, non-standard dimensions, or outdated wiring are common discoveries. Having backup materials and a flexible timeline reduces the stress when they appear.
Application Tips and Timing
Never shortcut cure time. Most two-part epoxies need 24 hours for foot traffic, 72 hours for heavy use, and 7 days before vehicle parking. Polyaspartic systems cure faster, often allowing vehicles within 24 hours. Parking too early causes tire marks, soft spots, or full sheet delamination.
Apply coatings when temperatures are falling, not rising. Warming concrete expels trapped air through the wet coating (outgassing), creating bubbles. Evening application avoids this. Most epoxies perform best between 55 and 85 degrees Fahrenheit with the slab surface in the same range.
If you’re dealing with stubborn stains around the crack area, address those first with proper stain removal techniques before applying your repair product.
What to Avoid
Knowing what to skip prevents expensive mistakes:
- Unknown brands at rock-bottom prices: Established brands charge more for proven materials and real warranties.
- “Universal” products claiming to work everywhere: Specialized products consistently outperform generalists.
- Products with vague specs or missing data sheets: If a manufacturer won’t publish details, that’s a red flag.
- Single-part “permanent” crack fillers: Chemistry doesn’t support permanent repairs without proper cross-linking reactions.
Budget Considerations
Quality crack repair products range from budget-friendly caulk-style fillers to professional-grade structural epoxies. Check current pricing on Amazon rather than assuming expensive means better.

Quikrete Concrete Crack Seal
Budget-friendly option for minor cracks with good weather resistance
For minor cosmetic cracks, a quality epoxy crack filler provides excellent value. For structural concerns, invest in professional-grade materials from established manufacturers.
Factor in tool costs: mixing paddles, application tools, protective equipment. Renting or borrowing specialized tools often makes more sense than purchasing for a single project.
Frequently Asked Questions
When are floor cracks a serious concern?
Cracks wider than 1/4 inch, where one side sits higher than the other, or cracks that are visibly growing indicate potential settlement issues. These may require professional structural assessment before any repair attempts.
Can I apply crack filler over an existing floor coating?
If the existing coating is well-adhered and just worn thin, you can scuff-sand it and apply new material. If it’s peeling or bubbling, strip it completely first. Poor adhesion to the existing coating will cause your repair to fail.
How long should I wait before applying a full floor coating over crack repairs?
Most crack repair products need 24-48 hours to fully cure before topcoating. Check the manufacturer’s data sheet for specific timing. Rushing this step can cause chemical incompatibility issues or poor adhesion.
Do I need to remove all loose concrete before filling cracks?
Yes, absolutely. Use a wire brush, vacuum, or compressed air to remove all loose debris, dust, and crumbling concrete. The repair product needs solid concrete edges to bond to for long-term success.
This article contains affiliate links. We may earn a small commission at no extra cost to you.