

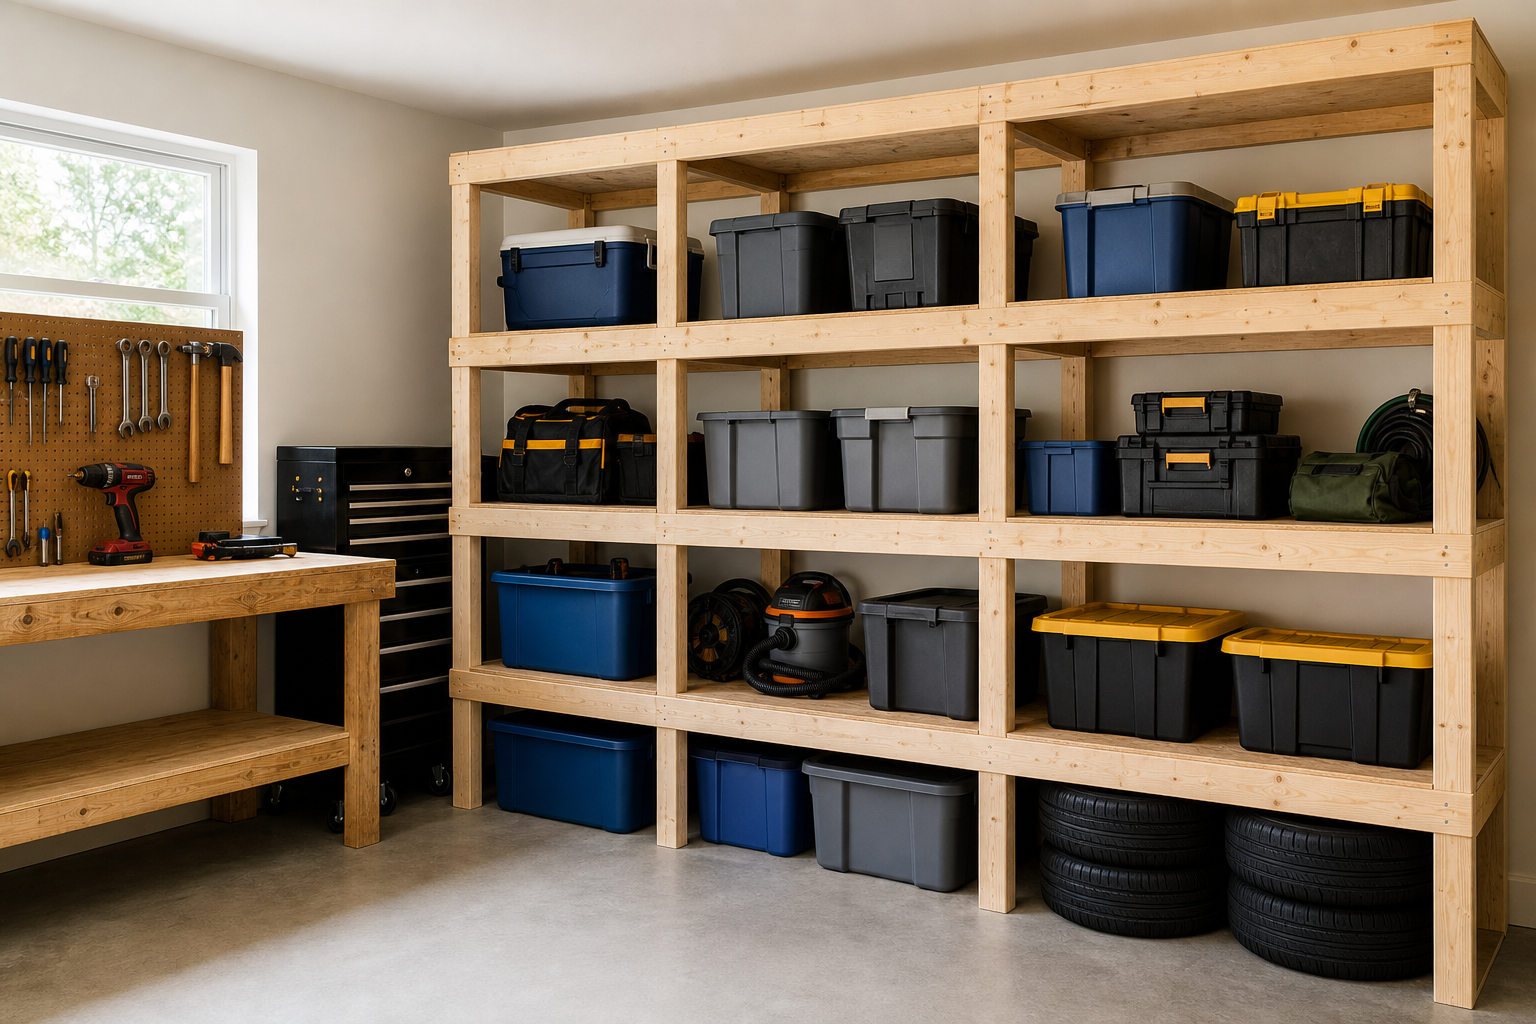
Deciding to build DIY garage shelving for heavy storage is a smart garage upgrade that most homeowners can handle over a weekend. The key is that technique matters, and details that seem minor during the process determine long-term quality.
Here’s the complete process organized into manageable steps. Read through it entirely first, then work section by section.
Understanding the Basics
Clear plastic bins beat cardboard for garage storage in every way: moisture resistance, pest resistance, visibility, and stackability. Label each bin on the front for easy identification. A label maker and 20 minutes of work saves hours of searching over the coming years.
The bins you choose matter more than you’d think. Opt for ones with reinforced corners and interlocking lids. Cheap bins crack when stacked high or exposed to temperature swings. A bin that fails under load dumps its contents and often damages what’s stored below. Spend the extra few dollars per bin upfront.

Heavy Duty Garage Storage Bins
These reinforced bins handle temperature swings and heavy stacking better than budget alternatives
Standard bin sizing follows a logic: 12-quart bins work for hand tools and fasteners, 32-quart bins handle seasonal decorations and sporting goods, 64-quart bins are right for bulky items like camping gear. Stick to one or two bin brands so lids interchange and stacks remain stable.
Effective garage storage uses walls and ceiling as primary surfaces, keeping the floor clear for vehicles and work. Wall-mounted track systems, overhead ceiling racks, and sturdy cabinets provide organized access without eating into parking or workspace.
Floor space in a standard two-car garage (roughly 20 by 20 feet) is precious. Two vehicles occupy 340 square feet. A workbench takes another 16 to 24 square feet. That leaves minimal room for boxes or freestanding shelves. Going vertical reclaims that space without compromise.
Zone your garage before buying products. Common zones: tools/workbench, automotive, seasonal items, sports gear, lawn/garden, and household overflow. Each zone stays self-contained so everything for a given task lives in one spot.
Draw a rough floor plan on graph paper. Mark door swings, window locations, electrical outlets, and any obstacles like water heaters or HVAC equipment. This prevents buying a shelving unit that blocks access or positioning storage where it interferes with garage door operation.
How to Construct Durable Wooden Shelving
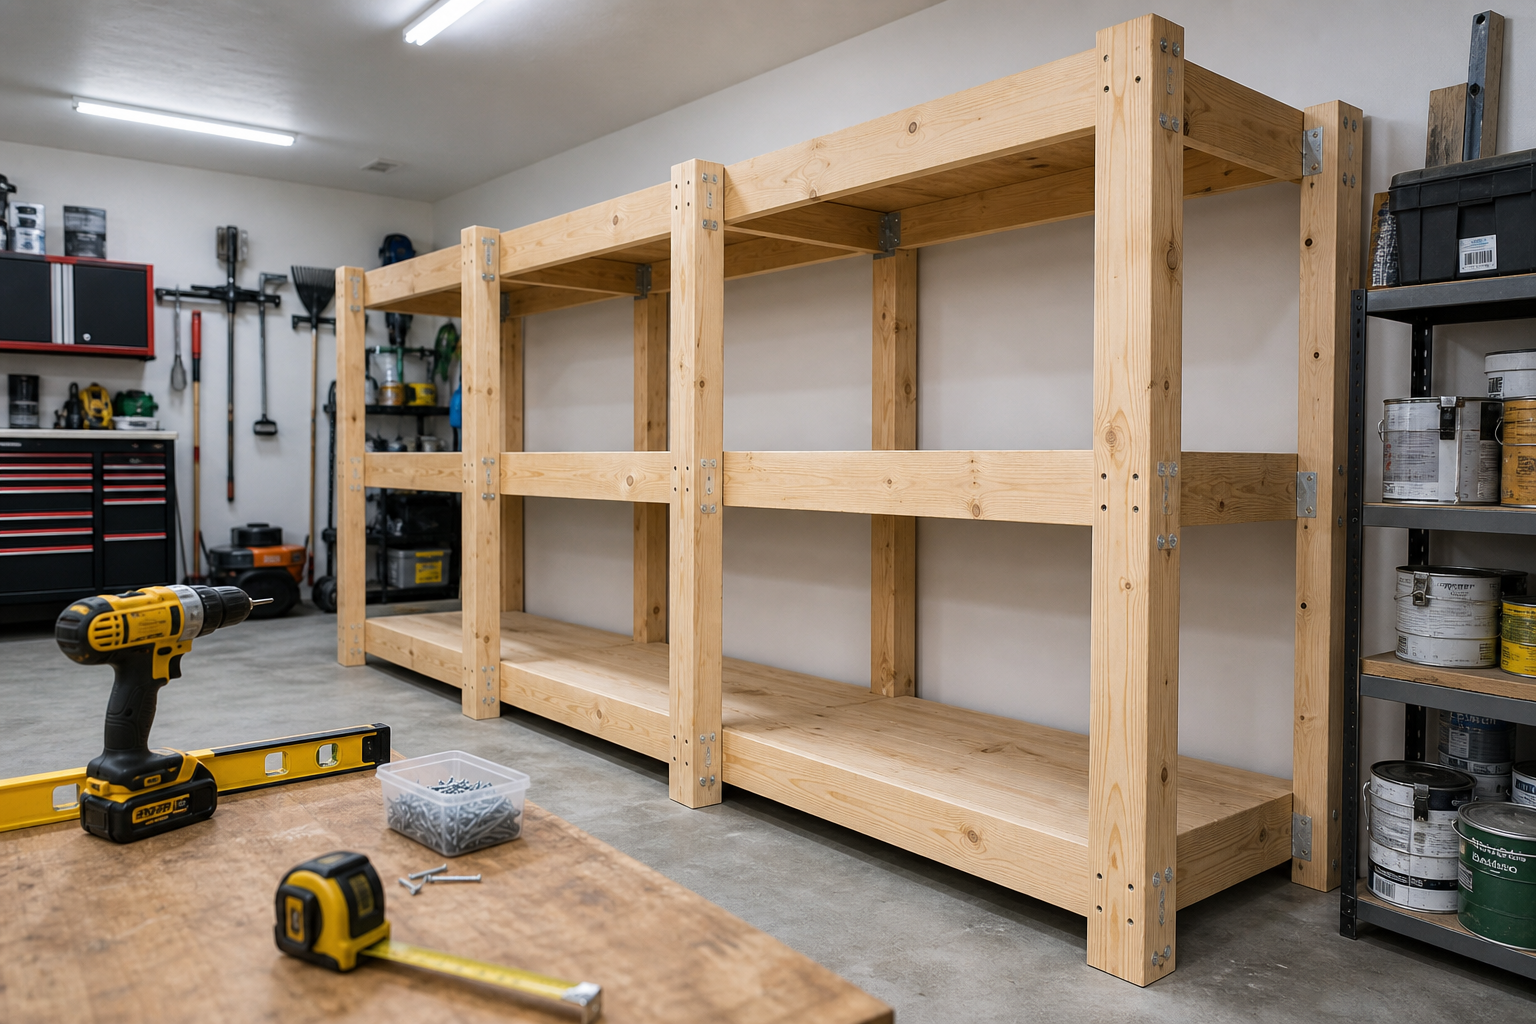
Building your own shelving from dimensional lumber costs less than comparable commercial units and allows custom sizing for odd spaces. The materials are simple: 2x4s for the frame, 3/4-inch plywood for shelves, 3-inch construction screws, and heavy-duty brackets or cleats.
Start by locating studs. A magnetic stud finder works reliably in garages where drywall thickness varies. Mark stud centers with painter’s tape. Studs in most garages sit 16 inches on center, though older homes sometimes use 24-inch spacing. Confirm spacing before cutting lumber.
Cut 2×4 vertical supports to your desired height. Most garage shelving runs 72 to 84 inches tall, providing four to five shelf levels with 16 to 18 inches between each shelf. Shorter spacing (12 inches) works for small bins; taller spacing (24 inches) accommodates bulk storage like coolers or lawn equipment.
Attach vertical supports directly to studs using 3-inch lag screws or structural screws rated for at least 100 pounds each. Two screws per stud, spaced vertically, prevent rotation under load. Pre-drill holes to avoid splitting the 2x4s. Use a level to ensure supports run plumb; even a slight lean compounds across multiple shelves.
Horizontal cross braces connect the vertical supports. Cut 2x4s to span between supports (typically 48 to 96 inches depending on your layout). Attach these with 3-inch screws driven at angles through the cross brace into the vertical support. Two screws per joint, one high and one low, creates a rigid connection.
Shelf surfaces cut from 3/4-inch plywood span the horizontals. Standard 4-by-8 sheets rip easily into shelves. A 24-inch-deep shelf is common for bins and tools. Shallower 16-inch shelves work where you need to access items behind the shelving without reaching too far.
Support plywood shelves every 32 inches to prevent sagging under heavy loads. A shelf longer than 32 inches without mid-span support will bow noticeably under 50 pounds. Add a vertical support or use thicker material (two layers of 3/4-inch plywood) for longer unsupported spans.
Seal plywood edges with exterior paint or polyurethane. Exposed plywood edges wick moisture, causing delamination and swelling. Two coats of sealer extend shelf life significantly in humid climates.
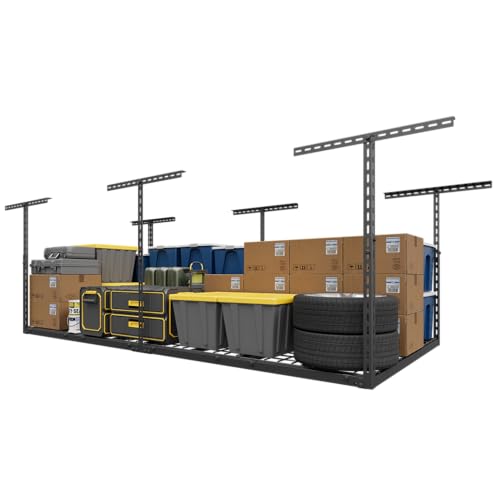
Heavy Duty Ceiling Storage Rack
Perfect for maximizing vertical storage space while keeping floors clear for parking
Lumber Sizes and Load Capacity Considerations
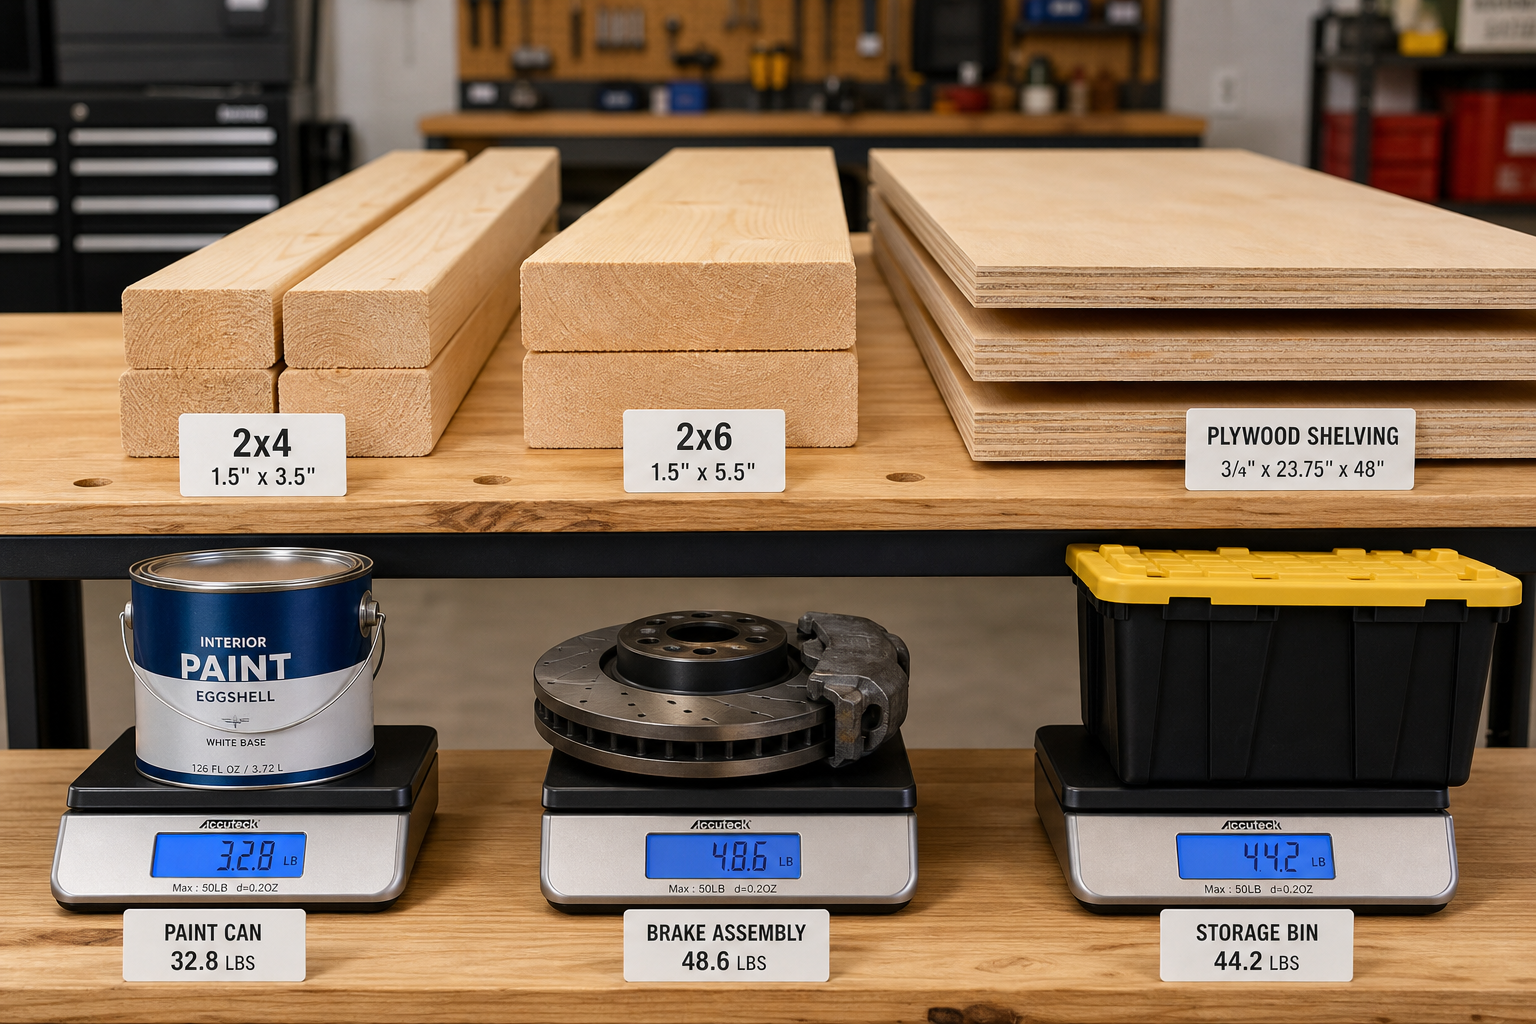
Dimensional lumber naming is confusing. A 2×4 measures 1.5 by 3.5 inches. A 2×6 is 1.5 by 5.5 inches. A 2×8 runs 1.5 by 7.25 inches. These actual dimensions matter when calculating spans and loads.
For heavy storage, use 2x4s for vertical supports and 2x6s or 2x8s for horizontal shelf supports. The wider material resists bending under load. A 2×4 shelf support sags noticeably under 75 pounds across a 48-inch span. A 2×6 in the same application handles 150 pounds with minimal deflection.
Load capacity math: A 2×4 stud anchored properly into framing holds approximately 1,000 pounds in vertical compression. Your shelving rarely loads studs in pure compression because horizontal shelves create bending forces and torque at the wall connection.
Practical shelf loading for DIY wood shelving anchored into studs: 50 to 75 pounds per linear foot when built with 2×4 framing and 3/4-inch plywood decking. A 4-foot shelf holds 200 to 300 pounds safely. An 8-foot shelf holds the same total load but distribute it evenly rather than concentrating weight at the center.
Shelf sag becomes visible and problematic around 1/8 inch of deflection. Once a shelf bows, bins slide toward the center and stacking becomes unstable. Size your supports and materials to keep deflection under 1/16 inch at expected loads.
Anchor placement is non-negotiable for heavy shelving. Screws into drywall alone fail catastrophically. Drywall anchors rated for 50 pounds each sound adequate until you realize that rating assumes ideal conditions: new drywall, proper installation, static loads, and no vibration. Real-world garage conditions rarely match those assumptions. Hitting studs is the only reliable method.
Use 5/16-inch lag screws or structural screws (like GRK or Spax brands) for stud connections. These create mechanical connections that won’t pull out under load. Toggle bolts and expansion anchors belong on light-duty applications only.
Material Selection for Garage Conditions
Garages in four-season climates swing from below freezing to over 100 degrees. Humidity spikes during wet seasons and plummets in winter when heating systems run. These swings stress materials.
Pressure-treated lumber resists rot and insect damage but costs more and weighs more than standard pine. For shelving that might contact damp concrete floors or experience condensation, the upgrade pays off. Use it for any bottom shelf or support touching the floor.
Standard pine framing lumber works fine for upper shelves and supports in climate-controlled or well-ventilated garages. Seal cut ends with primer to prevent moisture uptake. Unfinished cut ends are the entry point for rot.
Avoid particleboard and MDF for garage shelving. Both materials swell and crumble when exposed to humidity. They might survive in a climate-controlled attached garage but fail quickly in detached or uninsulated spaces.
Plywood grading affects performance. BC or better exterior-grade plywood costs a few dollars more per sheet than sheathing-grade plywood but the face veneer is thicker and more uniform. Sheathing plywood often has voids and thin veneers that splinter under use.
Metal shelving units avoid wood’s moisture sensitivity but introduce other concerns. Steel shelving rusts in humid garages unless powder-coated or galvanized. Aluminum shelving resists corrosion but costs significantly more. Wire shelving (the adjustable type that hangs from wall tracks) works well for light storage but sags under heavy bins.
Assembly Techniques That Matter
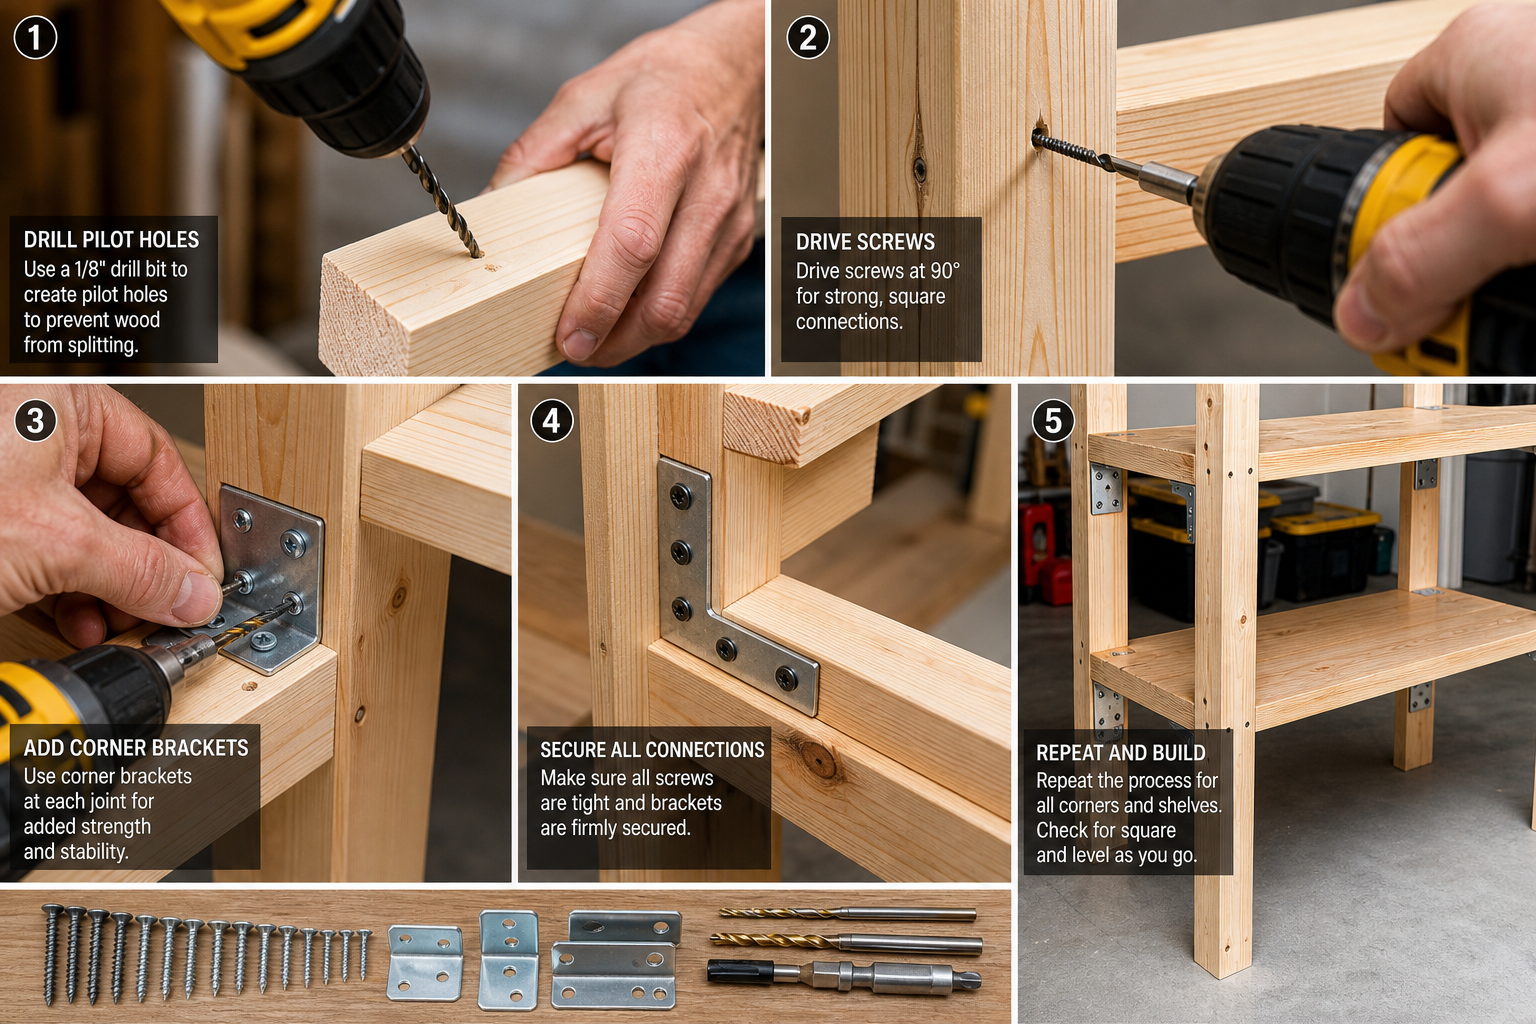
Work in small, manageable sections for better quality control. Complete one vertical support fully, confirm it’s level and secure, then move to the next. This approach catches errors early before you’ve committed materials.
Wear appropriate protection throughout: safety glasses, gloves, respirator when working with chemicals or dust. Ventilate when using adhesives, paints, or solvents. Cutting treated lumber releases compounds you don’t want to inhale. A P100 respirator is cheap insurance.
Pre-assemble sections on the garage floor when possible. Build a shelf frame flat, square it with diagonal measurements, then lift it into position and attach it to wall supports. This produces tighter joints than trying to assemble everything in place overhead.
Squaring frames correctly prevents racking. Measure diagonally from corner to corner. If both diagonal measurements match, the frame is square. If they differ, the frame is a parallelogram and will twist under load. Adjust until diagonals match within 1/8 inch.
Clamps are temporary third hands. Use bar clamps or spring clamps to hold pieces in alignment while you drill and fasten. Trying to hold, align, and drive screws simultaneously produces sloppy work.
Countersink screws slightly below the surface so shelf bins don’t catch on protruding heads. A combination countersink bit drills the pilot hole and countersink in one step.
Back-bracing diagonal 2x4s from upper corners to lower opposite corners dramatically increases rigidity. A shelf unit without diagonal bracing can rack side to side under uneven loading. Adding one diagonal brace per section eliminates this movement.
Common Mistakes to Avoid
Overestimating your storage needs leads to shelving that’s too deep or too tall. Deep shelves (over 24 inches) become black holes where items get buried and forgotten. Extremely tall shelving (over 84 inches) puts the top shelf out of comfortable reach, rendering that space effectively useless unless you keep a step stool nearby.
Underestimating weight is the opposite problem. Homeowners routinely assume their storage weighs less than it does. A banker’s box of books weighs 40 to 50 pounds. A tote of hardware and hand tools easily hits 60 pounds. Five bins per shelf, four shelves high, means 1,200 pounds on a single shelving unit. Build accordingly.
Ignoring seasonal access patterns creates frustration. Christmas decorations belong on upper shelves because you access them once per year. Frequently used tools belong at eye level. Heavy seasonal items (like bags of ice melt or mulch) belong low so you’re not lifting 50-pound bags overhead.
Installing shelves that interfere with garage door tracks is surprisingly common. Measure door track projection when the door is open. Tracks typically extend 12 to 18 inches from the wall. Leave clearance or position shelving to start beyond the track’s farthest point.
Mixing fastener types within a project invites problems. Stick with one screw type and length for similar connections. Having to hunt for the right screw mid-project breaks your flow and increases error rates.
Skipping the sealer step on cut plywood edges is tempting but short-sighted. An hour spent sealing edges adds years to shelf life. Use exterior primer or polyurethane and a foam brush. Two coats suffice.
Practical Planning Tips
Consider the seasonal timing of your project. Floor coatings apply best in mild weather (50 to 85 degrees). Insulation projects are most motivating (and noticeable) before extreme weather hits. Electrical and plumbing work can happen year-round but should be completed before insulating or finishing walls over the wiring.
Shelving construction is a year-round project. The materials aren’t temperature-sensitive and you’re working indoors. Working in a 95-degree garage or a 30-degree garage is miserable though. Spring and fall offer the most comfortable conditions.
Invest in quality tools for tasks you’ll repeat. A reliable stud finder, a good level, a quality tape measure, and proper safety gear (eye protection, hearing protection, respirator) make every project easier and safer. These tools pay for themselves across multiple projects over the years.
A corded drill provides consistent power and torque for driving dozens of 3-inch screws through framing lumber. Cordless drills are convenient but a big shelving project drains batteries fast. Have a backup battery or stick with corded power.
A circular saw or miter saw cuts dimensional lumber and plywood quickly and accurately. Cutting full sheets of plywood with a handheld circular saw requires a straight edge guide and a stable work surface. Many lumberyards cut plywood to size for a small fee, saving you time and producing cleaner cuts than you’re likely to achieve with a handheld saw.
Prioritize your projects based on impact and urgency. Safety issues (faulty wiring, CO risk, structural problems) come first. Comfort improvements (insulation, lighting, climate control) come second. Cosmetic upgrades (floor coatings, paint, organization systems) come last. Following this order ensures you’re building each improvement on a solid foundation.
Weight Capacity Realities
Weight capacity is critical and often misunderstood. Wall systems in studs hold 50 to 75 pounds per linear foot. On drywall alone, that drops to 15 to 25 pounds before failure. Ceiling racks rated for 600 pounds assume even distribution; concentrating weight in one area can cause failure well under the total limit.
The failure mode matters. Shelves fail gradually by sagging and bowing. Wall anchors fail suddenly and catastrophically. A shelf loaded beyond its capacity sags visibly before failure, giving you warning. A wall anchor pulled from drywall gives no warning; it rips out and dumps the entire shelf load instantly.
Testing load capacity before putting the shelving into service reveals problems before they cause damage. Load test shelves with sandbags or water jugs to the expected maximum weight. Leave the test load in place for 24 hours and check for deflection, cracking sounds, or movement at connections. If anything shifts or sags excessively, reinforce before loading with your actual storage items.
Dynamic loads (items you’re actively moving on and off shelves) stress connections more than static loads (items that sit undisturbed). A shelf that holds 200 pounds of stationary bins might fail if you repeatedly lift and drop 50-pound items onto it. The impact force exceeds the static weight.
Distribute weight across the shelf width. Concentrating 100 pounds in
