

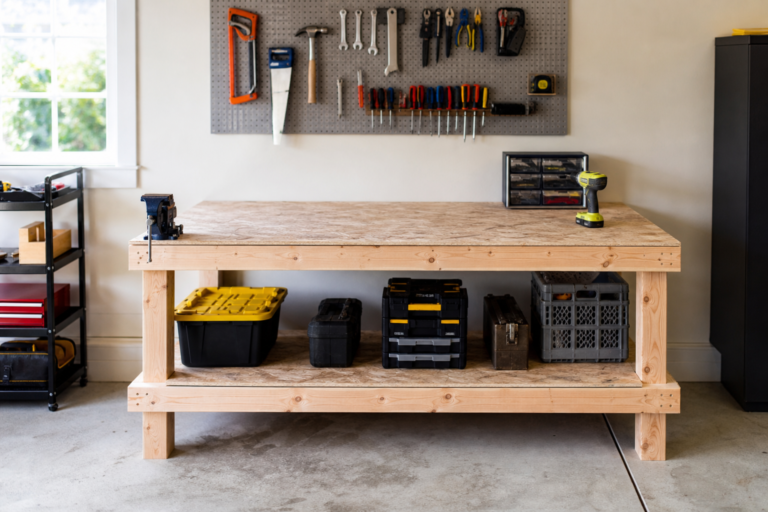
Whether you’ve been planning to build a garage workbench on a budget for months or decided to tackle it this weekend, a clear roadmap makes all the difference. Preparation accounts for about 80% of the success in projects like this.
Everything you need is below: tools, materials, step-by-step instructions, and the common pitfalls to avoid.
Understanding the Basics
A solid workbench is the anchor of a functional garage workspace. Before you cut a single board, understand what makes a bench work: stable height for your tasks, adequate depth to hold projects without tipping, and a sturdy frame that doesn’t rack or wobble under load. Most budget builds fail because they skimp on structure, not materials.
The right height matters more than most builders realize. Standard kitchen counter height is 36 inches, which works fine for light assembly but causes shoulder fatigue during heavy work like sanding or planing. A 34-inch bench puts your work at a more natural height for applying downward force. If you’re taller than 6 feet, consider 35 to 36 inches. Shorter than 5’6″? Go 32 to 33 inches. Test before you commit: stack some scrap lumber to different heights and simulate work motions to find what feels right.
Depth determines what projects you can handle. A 24-inch bench is the practical minimum for most work. It holds a toolbox or small project without things sliding off the back. Go 30 inches if you have space and regularly work on larger assemblies, automotive parts, or anything that benefits from spreading out. Anything deeper than 36 inches becomes hard to reach across and wastes material unless you’re building a full assembly table.
Length depends on your garage footprint and what you store underneath. A 4-foot bench fits along most garage walls without blocking doors or vehicle clearance. An 8-foot bench maximizes a standard wall and gives you room to spread out projects, but it only makes sense if you won’t be cramming against it with a parked car. Measure your actual garage space with vehicles in place before deciding.
Materials and Tools You’ll Need
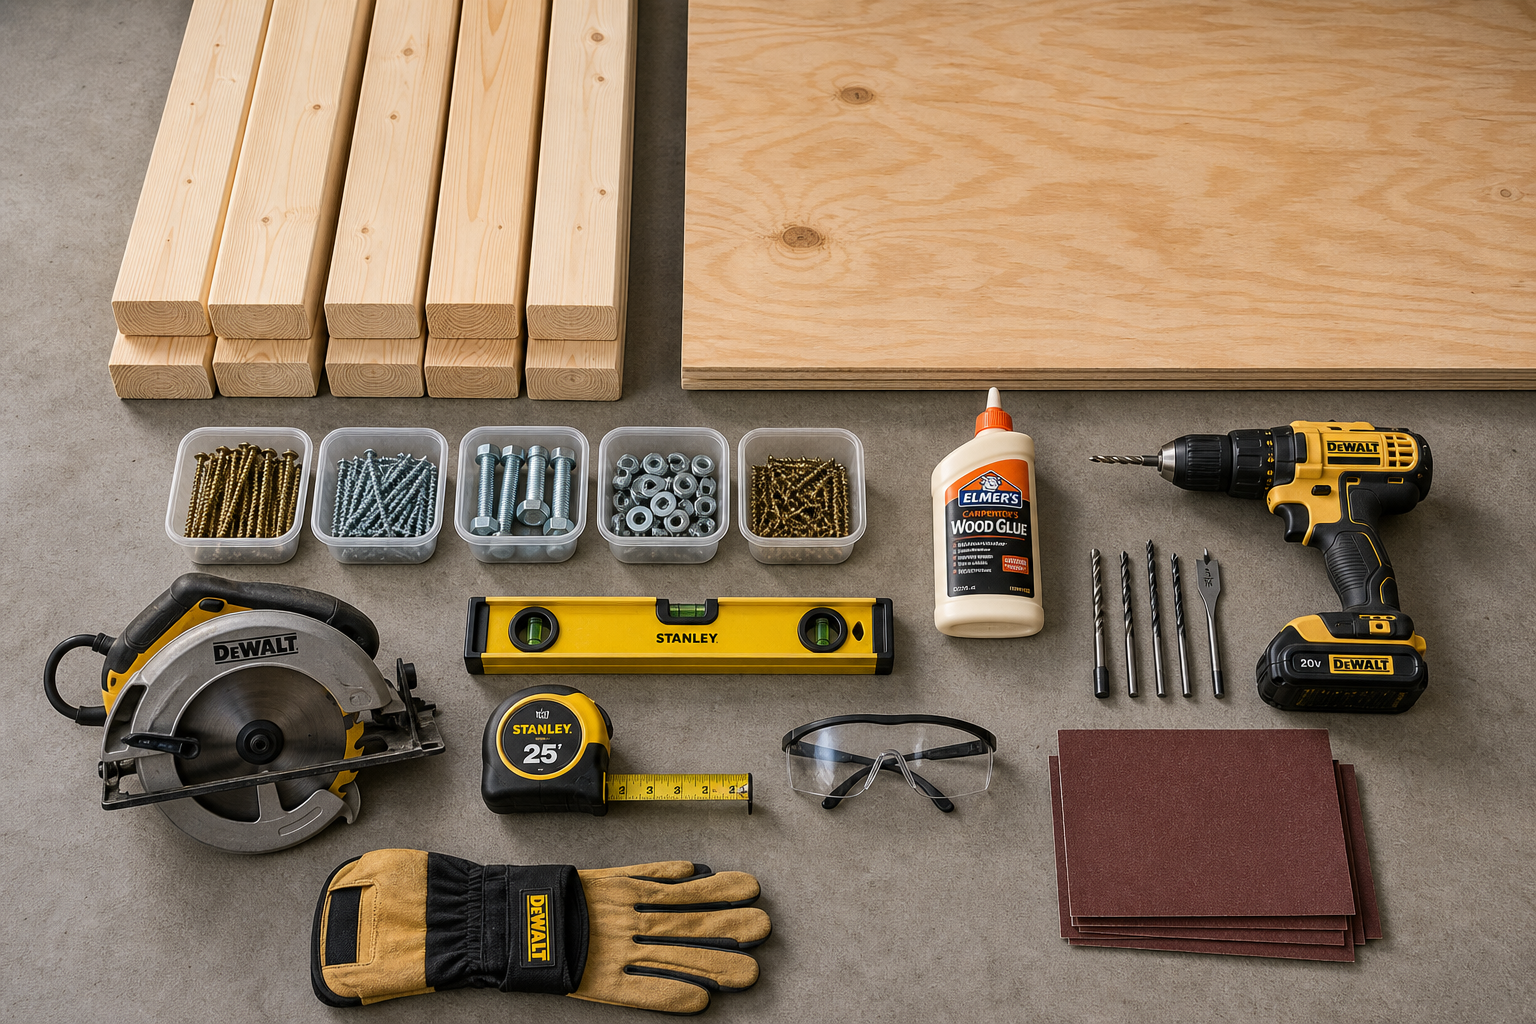
For a budget build under competitively priced, dimensional lumber delivers the best strength-to-cost ratio. You’ll need:
- (4) 2x4x8 boards for the frame legs and cross bracing
- (4) 2x4x8 boards for the top frame rails
- (1) 4×8 sheet of 3/4-inch plywood or MDF for the work surface
- (1) 4×8 sheet of 1/2-inch plywood for the lower shelf (optional but recommended)
- Box of 3-inch deck screws (1 pound)
- Box of 2-inch deck screws (1 pound)
- Wood glue
Total material cost runs competitively priced to competitively priced depending on local lumber prices and whether you add the shelf. MDF costs less than plywood and gives you a flatter surface, but it doesn’t handle moisture well. In a climate-controlled garage, MDF works fine. In an uninsulated space that sees humidity swings, plywood holds up better over time.
Tools required:
- Circular saw or miter saw
- Drill/driver
- Level (4-foot recommended)
- Tape measure
- Speed square
- Pencil
- Safety glasses
- Hearing protection
- Dust mask
If you don’t own a saw, most home centers cut lumber to length for a small fee or free with purchase. Bring exact measurements. Pre-cut lumber eliminates the single biggest error source in DIY builds.

2×4 Lumber Workbench Materials
Essential building materials for your workbench frame
Step-by-Step Build Process
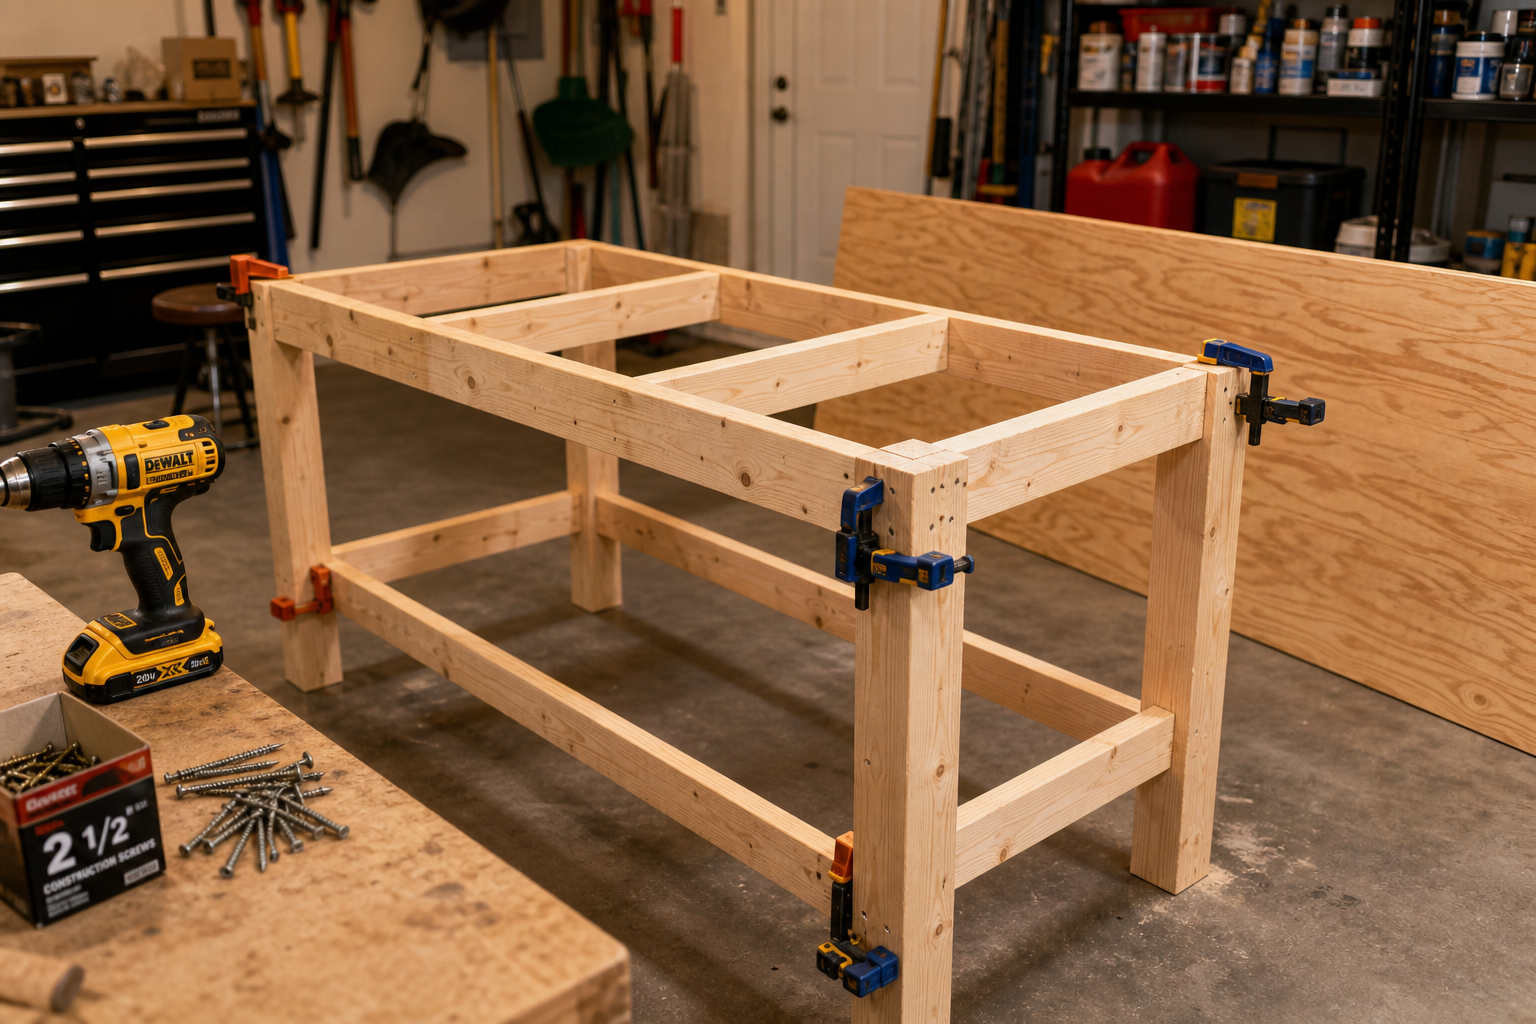
Step 1: Cut all pieces to length
For a 6-foot bench at 34 inches high and 24 inches deep:
- (4) legs: 33 inches (accounting for 3/4-inch top thickness)
- (4) long rails: 72 inches
- (4) short rails: 24 inches
- (4) cross braces: 24 inches
- Top: 24 inches x 72 inches (cut from the plywood sheet)
Cut everything before assembly. Stopping mid-build to cut more pieces breaks your workflow and increases error risk.
Step 2: Build the front and back frames
Each frame consists of two legs connected by top and bottom rails. Lay two legs parallel, 24 inches apart (inside measurement). Position a long rail flush with the top of the legs. Position the bottom rail 6 inches up from the leg bottoms (this creates the lower shelf height).
Pre-drill holes to prevent splitting, then drive two 3-inch screws through each connection point. Apply wood glue before screwing for a stronger joint. Repeat to build the second frame.
Step 3: Connect the frames
Stand both frames upright. Connect them with the short rails at the front and back. You’re creating a rectangle when viewed from above. The short rails attach to the legs just like the long rails did: flush with the top, and 6 inches up for the lower rail.
Check for square by measuring diagonally corner to corner. Both diagonal measurements should match. If they don’t, rack the frame until they do, then secure.
Step 4: Add cross bracing
Install diagonal braces from one corner of the lower frame to the opposite corner. Cut 2x4s to fit the diagonal span. These prevent the bench from racking side to side under load. A workbench without diagonal bracing will wobble within months.
Step 5: Attach the top
Center the plywood on the frame. The plywood should overhang about 1 inch on all sides for clamp clearance. Secure with 2-inch screws every 8 to 10 inches around the perimeter and along the middle support rail. Countersink screws slightly below the surface so you’re not hitting screw heads when you plane or sand on the bench later.
Step 6: Add the lower shelf
Cut 1/2-inch plywood to fit within the lower frame (approximately 22 inches x 70 inches for the dimensions above). This shelf rests on the lower rails and gets secured with 2-inch screws. It holds heavy items like a toolbox, paint cans, or bulk fasteners. Load-bearing capacity of the lower shelf is substantial when supported on all four sides: 200+ pounds if weight is distributed.
Work in small, manageable sections for better quality control. Complete the frames fully before connecting them. Complete the frame assembly before cutting the top. Rushing ahead creates compounding errors that take hours to fix.
Adding a Backsplash and Tool Storage
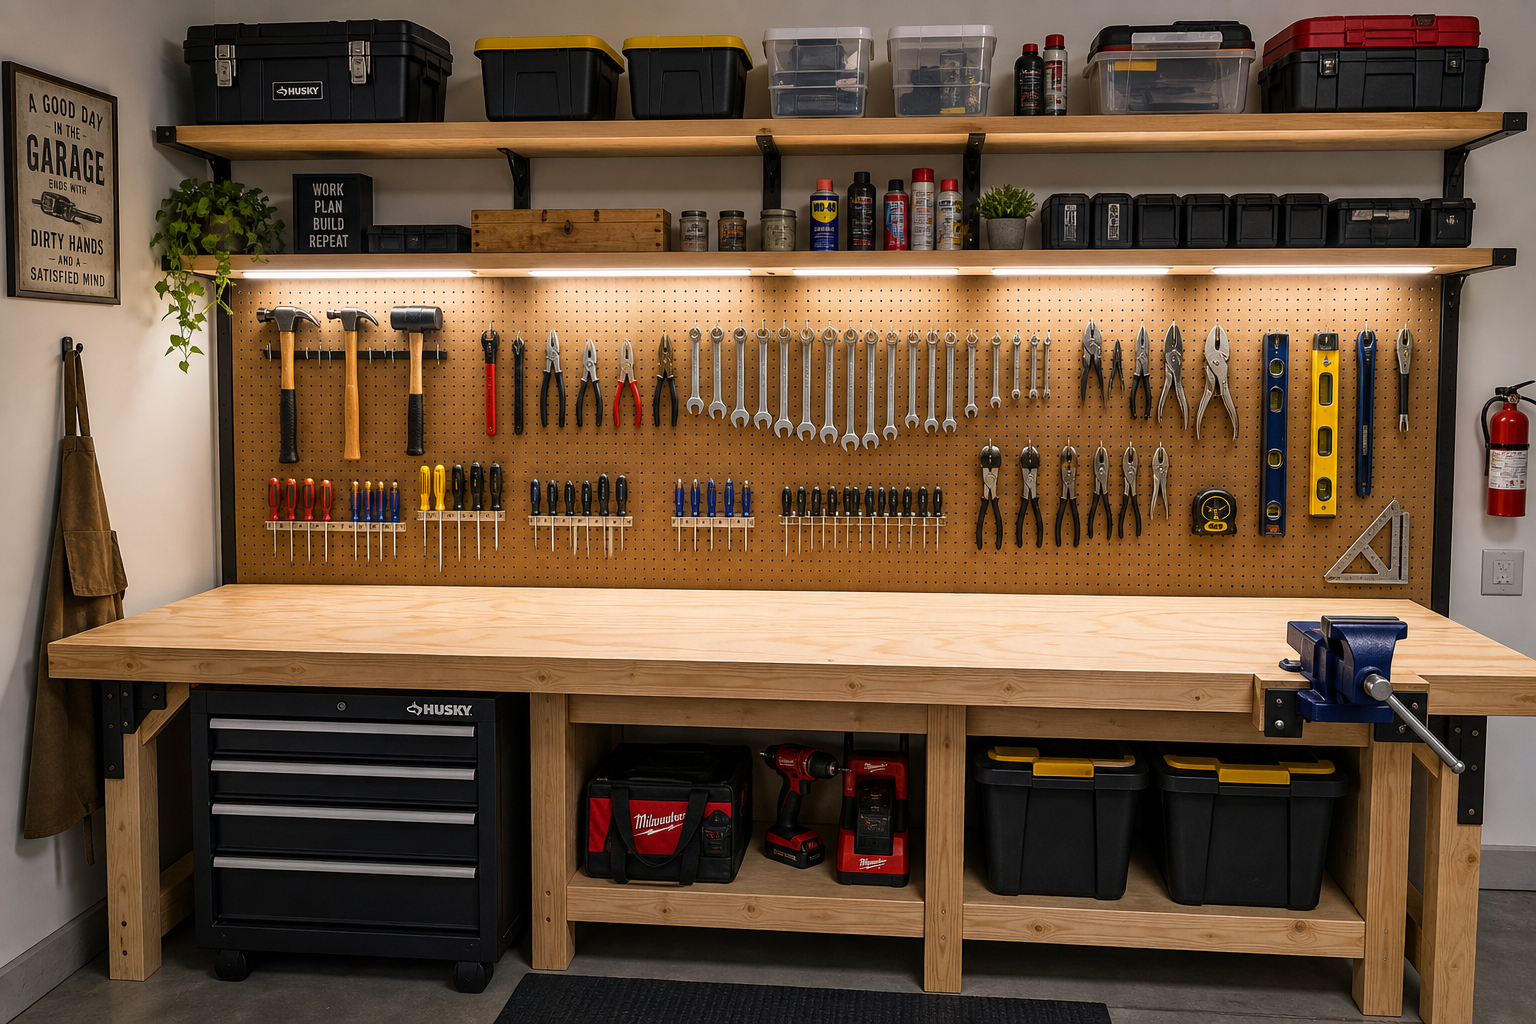
A backsplash keeps tools from sliding off the back edge and creates vertical storage. Cut a piece of 1/2-inch plywood 6 to 12 inches tall and the full length of your bench. Attach it to the back edge of the work surface with screws from underneath or with an L-bracket along the bottom edge.
For tool storage, pegboard is the budget standard. A 4×8 sheet competitively priced to competitively priced and mounts directly to the backsplash or to the wall behind the bench. Space the pegboard 1/2 inch off the wall using washers or wood spacers so hooks have clearance to insert. Pegboard works but it’s not the strongest option for heavy tools. Hooks pull out when overloaded.
If you’re interested in a more robust solution, check out slatwall systems that handle heavier loads and look cleaner. A quality slatwall hook set makes a noticeable difference in results. Check current options and reviews on Amazon to find the right match for your project and budget. The hooks lock into horizontal channels, distributing weight across a larger surface than pegboard. Each hook holds 50 to 75 pounds depending on design. That’s enough for a circular saw, reciprocating saw, or a set of clamps.

Garage Slatwall Storage Systems
Upgrade from pegboard for better weight capacity and cleaner appearance
Magnetic tool strips work for frequently-used hand tools: screwdrivers, pliers, wrenches, chisels. Mount them along the backsplash at eye level. You grab tools without looking, and they stay visible so you know when something is missing.
Finish and Protection
Raw lumber works as-is for a garage bench, but a finish protects the surface and makes cleanup easier. Options at different price points:
Polyurethane
Two coats create a hard, water-resistant surface. Oil-based poly gives a slight amber tone and takes 4 to 6 hours between coats. Water-based dries clear in 2 hours but costs more. Either works. Sand lightly with 220-grit between coats for adhesion.
Linseed oil or tung oil
Soaks into the wood rather than building a film on top. Easy to apply with a rag, and you can reapply anytime the surface looks dry. Not as protective as poly but easier to touch up when the bench gets dinged.
Paint
A coat of porch and floor paint in a dark color hides stains and dings. Gray or brown hides dirt better than lighter colors. Paint makes the bench easier to wipe clean but won’t protect against deep gouges or saw cuts the way poly does.
Skip fancy finishes on the top if you’re doing heavy work that’ll gouge the surface anyway. Finish the frame and legs to prevent splinters, leave the top bare or just hit it with linseed oil. Replace the top in a few years when it’s too chewed up, which is easier and cheaper than refinishing.
Common Mistakes and How to Avoid Them
Undersized legs
2×4 legs work for benches up to 8 feet if properly braced. Beyond that, upgrade to 4×4 posts or double up 2x4s at each corner. Spindly legs cause the whole bench to flex and wobble.
No diagonal bracing
A rectangle made of four 90-degree corners has no resistance to racking forces. Push on one corner and the whole frame skews into a parallelogram. Diagonal bracing triangulates the structure, which is geometrically stable. Don’t skip this.
Forgetting to account for top thickness
If you want a 34-inch finished height and you’re using a 3/4-inch top, cut the legs to 33-1/4 inches. Sounds obvious but it’s an easy detail to miss when you’re cutting a stack of lumber.
Not checking for level during assembly
An out-of-level bench causes parts to roll off one end. Use a 4-foot level on the top frame rails as you assemble. Shim legs if your garage floor slopes.
Overloading a bench without a center support
An 8-foot span of 2×4 rails will sag in the middle when loaded with a heavy vise, an anvil, or a pile of parts. Add a center leg or a vertical support down the middle. It’s easier to add during initial build than to retrofit later.
Lighting Your Work Area
A workbench without good lighting is barely functional. Overhead garage lighting rarely puts enough lumens directly on your work surface. Shadows from your body block the light when you’re leaning over a project.
LED shop lights are the standard: 50,000+ hour lifespan, low electricity consumption, and instant full brightness. Linkable models daisy-chain from one outlet. Most manufacturers limit chains to 4 to 8 fixtures to prevent voltage drop that causes dimming or flickering on distant units.
Mount lights directly above the bench, 6 to 8 feet overhead. A 4-foot fixture over a 4-foot bench, or two 4-foot fixtures over an 8-foot bench. 5000K color temperature (daylight) gives you the most accurate color rendering, which matters when you’re matching paint, stains, or parts. 4000K (neutral white) is slightly warmer if the blue-white tone of 5000K bothers you.
Budget option: linkable LED fixtures at 4000 to 5000 lumens. Two fixtures over an 8-foot bench delivers 8000 to 10,000 lumens, which is plenty for detailed work. For specific recommendations and current pricing, check out our guide to the best garage workbench lighting solutions.
Task lighting helps for close-up work. A swing-arm lamp clamps to the bench edge and positions light exactly where you need it. Look for LED models with adjustable color temperature so you can switch between warm light for general tasks and daylight for precision work.
Storage Integration
The space under your bench is prime real estate. Don’t let it become a junk pile.
Clear plastic bins beat cardboard for garage storage in every way: moisture resistance, pest resistance, visibility, and stackability. Label each bin on the front for easy identification. A label maker and 20 minutes of work saves hours of searching over the coming years. Size bins to fit the lower shelf: 12-inch to 18-inch tall bins typically fit a 6-inch-high shelf with clearance to pull them out.

Clear Garage Storage Bins
Moisture-resistant bins that keep contents visible and organized
Rolling tool chests fit under a 34-inch bench if the chest is under 32 inches tall. This keeps your most-used tools accessible and mobile. You can roll the chest out for big projects or when you need tools across the garage. A 26-inch tool chest fits a 24-inch-deep bench with a couple inches to spare. Our guide to best garage rolling tool carts can help you find the right mobile storage solution.
Drawers built into the bench frame cost more in materials and time but deliver the cleanest look. Use 1/2-inch plywood for drawer boxes, mount them on side-mount slides rated for 75 to 100 pounds. A single wide drawer (18 inches tall, full bench length) holds bulky items like power tools or paint supplies. Multiple smaller drawers organize fasteners, hand tools, and accessories. Factor an extra competitively priced to competitively priced for slides and drawer materials if you go this route.
Extending Your Work Surface
A fold-down wing extends your work surface when you need it and folds away when you don’t. Useful in tight garages where a permanent 30-inch-deep bench would block vehicle access.
Build the main
