

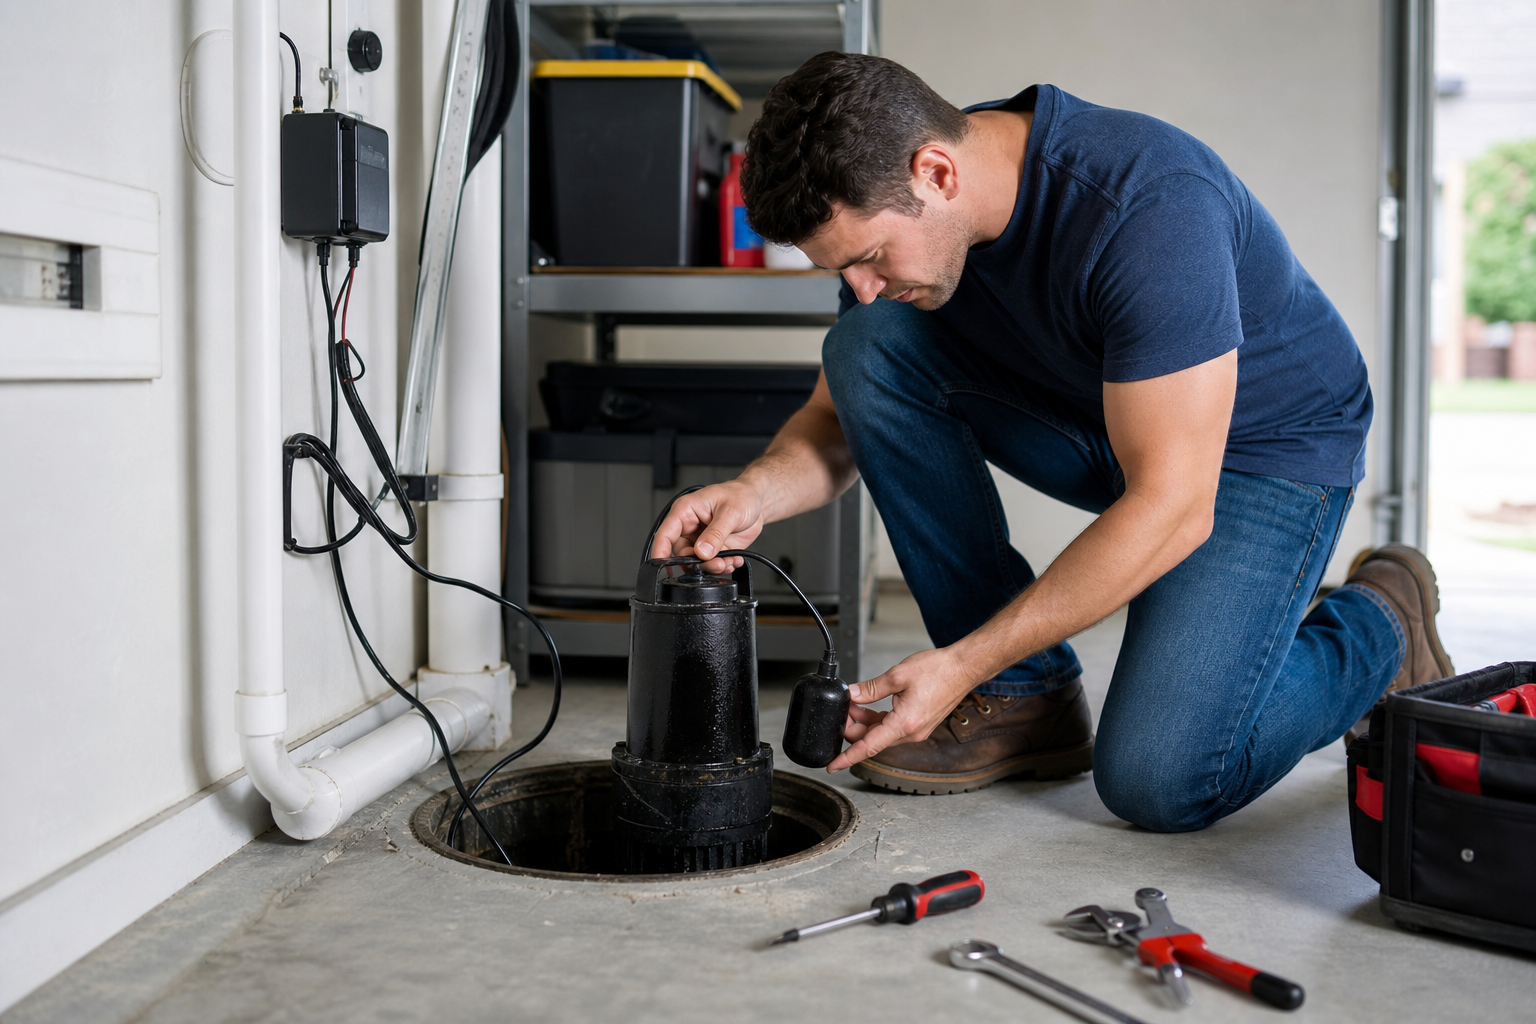
When your garage sump pump stops working, the temptation is to assume the worst. In reality, the cause is usually simpler and cheaper than expected. Most failures trace back to a handful of common issues: stuck float switches, clogged discharge lines, tripped breakers, or worn-out pumps. The key is working through possibilities systematically rather than guessing.
This guide walks through each common cause with specific diagnostic steps and fixes. Grab a flashlight and your basic toolkit, then work through these from easiest to most involved. You’ll save the service call fee and learn how your system works in the process.
Check the Power First
Start with the simplest possibility: no power reaching the pump. Check if the outlet is live by plugging in a lamp or phone charger. If nothing works, head to your breaker panel and look for a tripped breaker. Sump pumps often run on dedicated 15-amp or 20-amp circuits. Reset any tripped breaker and test the pump.
If the breaker trips again immediately, you have a short circuit somewhere in the pump, cord, or outlet. Unplug the pump and reset the breaker. If it holds, the pump itself is shorted and needs replacement. If the breaker trips with the pump unplugged, the outlet or wiring has a problem. That’s an electrician call unless you’re comfortable working inside your panel and running new circuit wire.
GFCI outlets (the ones with test and reset buttons) are required in many garages and can trip without warning. Press the reset button. If it won’t stay reset, the GFCI itself may be faulty or the pump is drawing fault current. Try plugging the pump into a non-GFCI outlet temporarily to isolate the issue.
Check the pump’s power cord for visible damage, especially where it enters the pump housing. Rodents, foot traffic, and moisture all take a toll on cords over the years. A frayed or nicked cord is a safety hazard and a common failure point.
Test the Float Switch
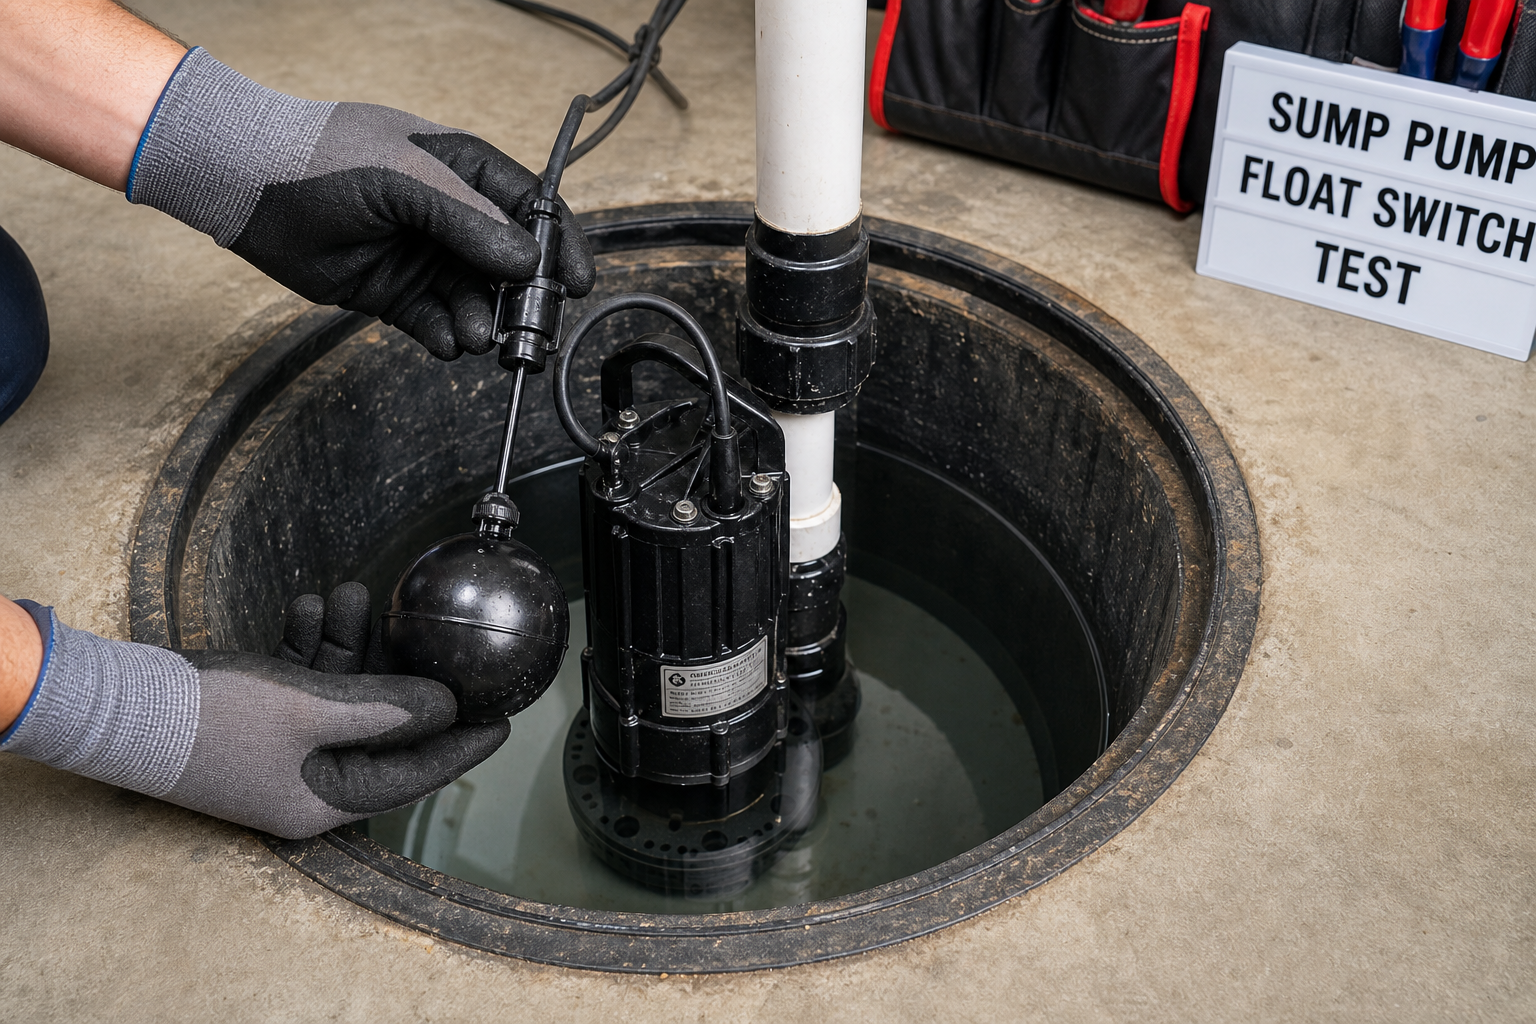
The float switch tells the pump when to turn on and off. It’s a buoyant arm or ball that rises with the water level. When it reaches a certain height, it triggers the pump. When the water drops, the pump shuts off. If the float gets stuck, the pump won’t run even when the pit fills.
Lift the float manually. The pump should kick on. If it doesn’t, and you’ve confirmed power is reaching the outlet, the switch itself is likely bad. Most pumps use one of three float designs: tethered floats (a ball on a cord), vertical floats (a sleeve that slides up and down a rod), or diaphragm switches (internal, not visible). Tethered floats can wrap around the discharge pipe or get wedged against the pit wall. Vertical floats can jam if debris gets between the float and the guide rod.
Remove any obstructions and test again. If the float moves freely but the pump still won’t respond, the switch mechanism inside has failed. On some pumps, you can replace just the switch. On others, it’s integrated into the pump housing and means replacing the whole unit.
Cheap sump pumps use cheap float switches. A budget pump often fails within three to five years because the float switch wears out. A quality pump with a reliable switch runs more upfront but lasts a decade or more. The math favors spending more initially.
Inspect the Discharge Pipe
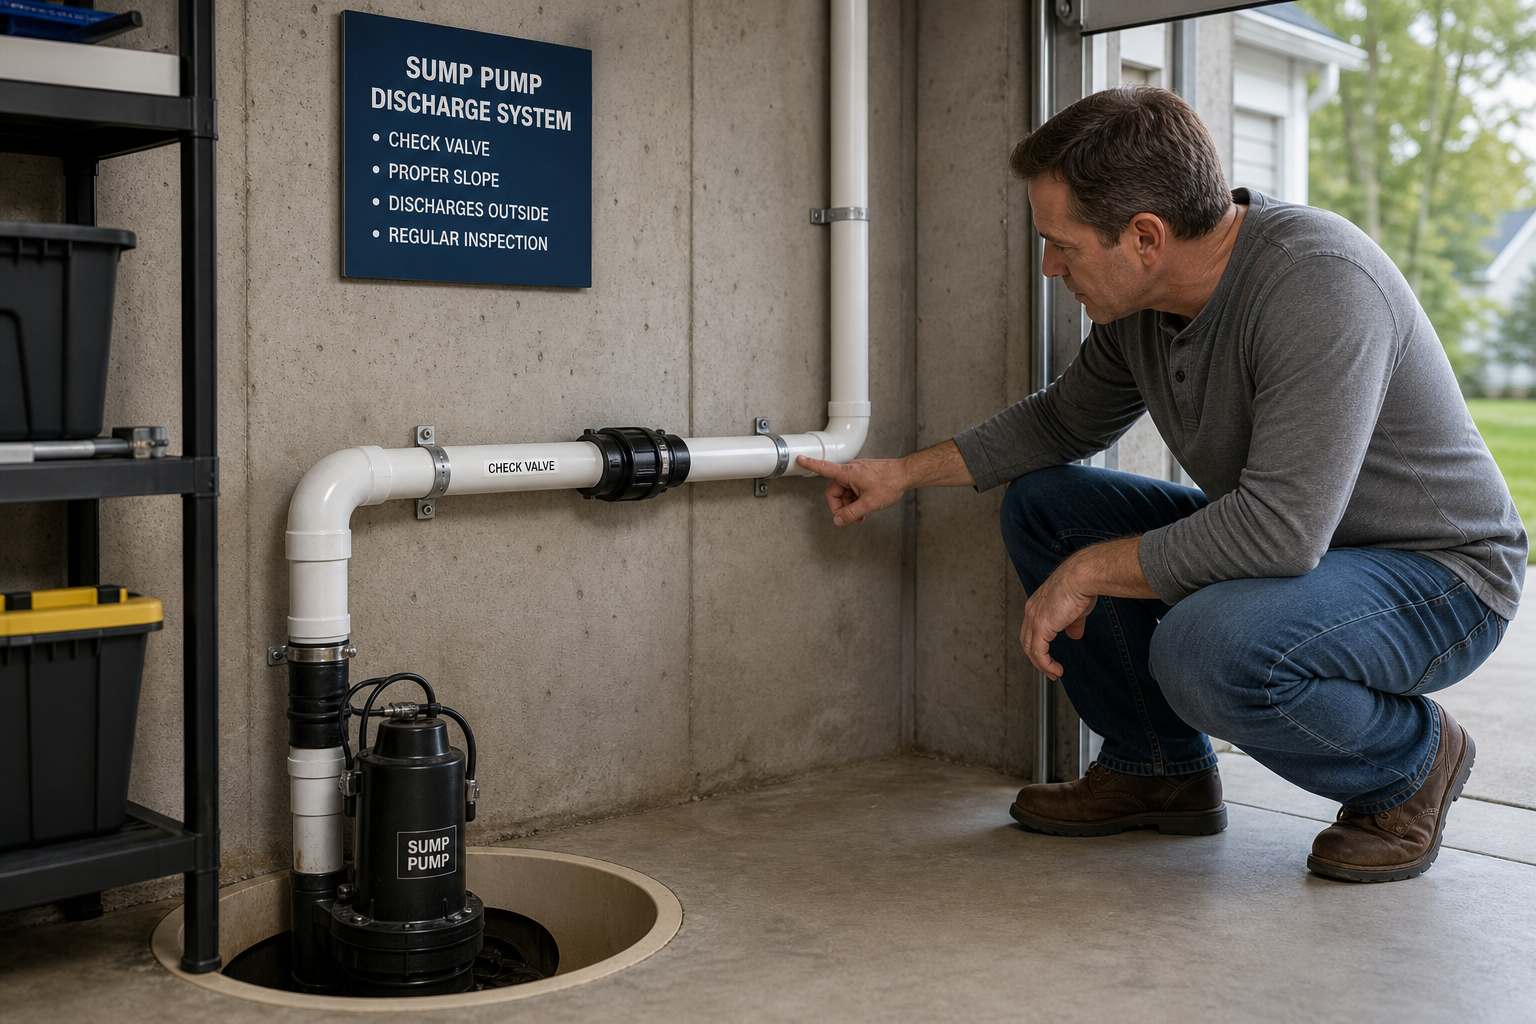
A clogged discharge pipe creates back pressure that can stall the pump or prevent it from moving water effectively. Start at the pump outlet and trace the pipe all the way to where it exits your property. Look for kinks, ice blockages (common in winter), and debris buildup.
In cold climates, discharge pipes that exit above ground can freeze solid. Water backs up into the pump, and the pump runs continuously without clearing the pit. The solution is either burying the discharge line below the frost line or adding a freeze-proof discharge point. Some homeowners install a secondary discharge that routes water into a floor drain or utility sink during winter, though local codes may restrict this.
Check valves prevent pumped water from flowing back into the pit once the pump shuts off. They’re installed on the vertical section of pipe just above the pump. A stuck or failed check valve forces the pump to re-pump the same water over and over. Remove the valve and inspect the flapper inside. If it’s gunked up with sediment or algae, clean it. If it’s cracked or won’t seal, replace it. Check valves are affordable and readily available.
If your discharge pipe runs a long distance or has multiple elbows, friction and head pressure reduce the pump’s effective capacity. A pump rated for 3,000 gallons per hour at a 10-foot head might only move 1,500 gallons per hour at a 15-foot head with two 90-degree turns. If your garage floods during heavy rain, the pump may be undersized for the actual conditions.
Look for a Stuck Impeller
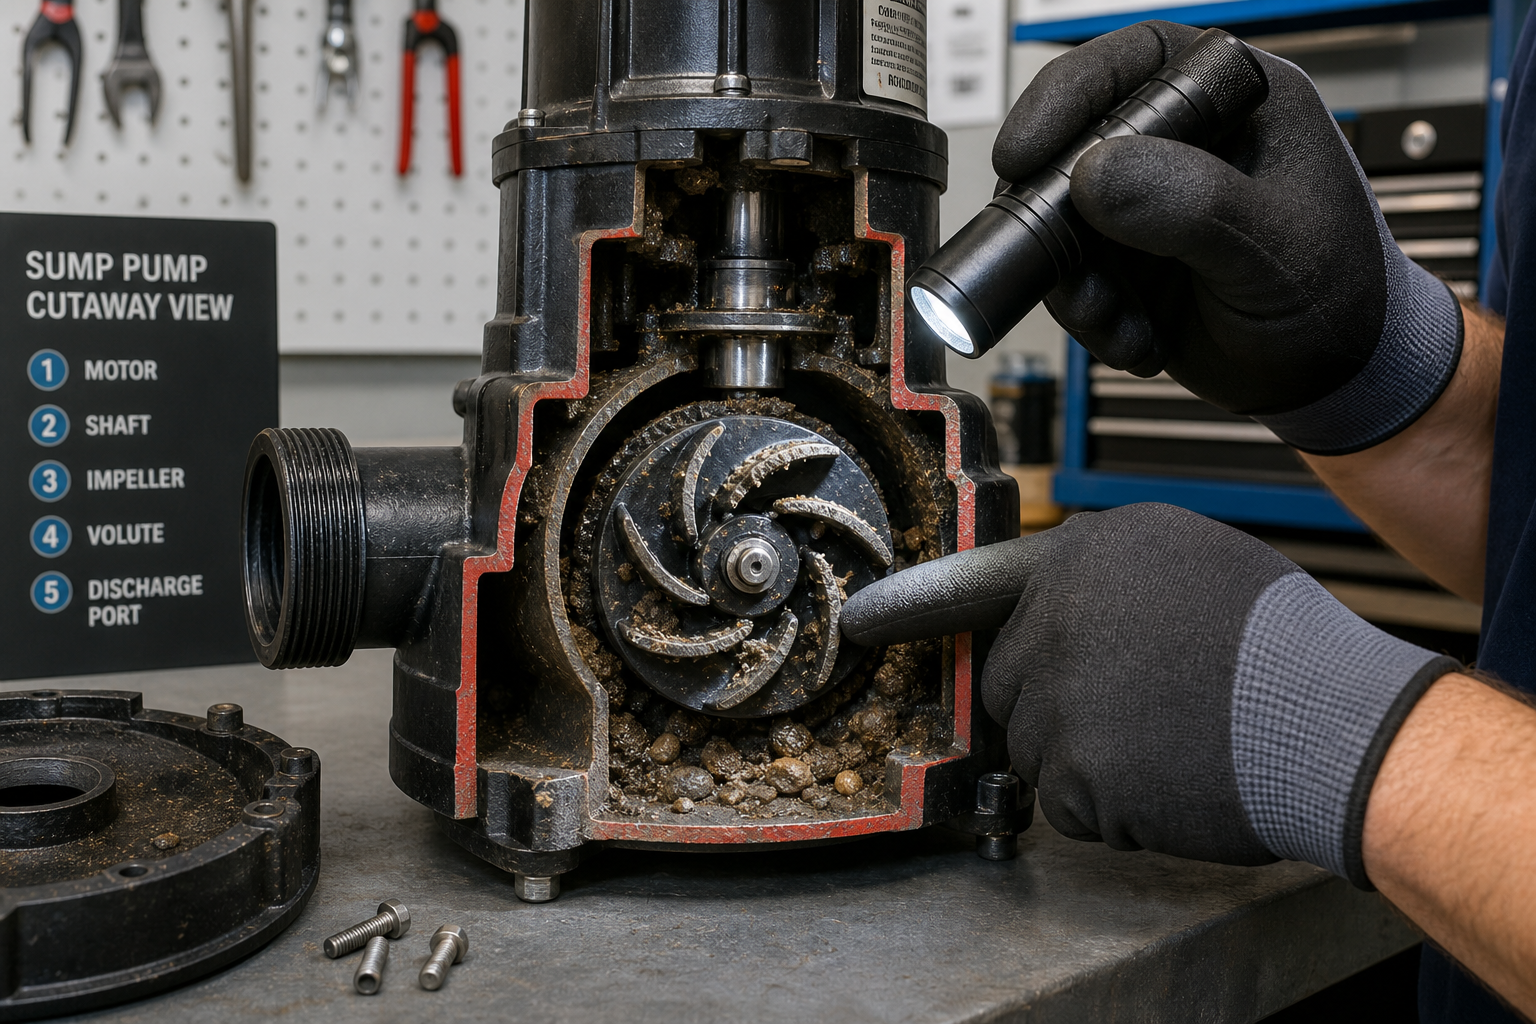
The impeller is the spinning part inside the pump that moves water. It can jam on gravel, sticks, or any debris that makes it past the inlet screen. Unplug the pump, pull it out of the pit, and remove the bottom cover or inlet screen. Spin the impeller by hand. It should rotate smoothly with minimal resistance.
If it’s jammed, clear the obstruction and reassemble. If it spins freely but the pump still doesn’t work, the motor itself may be burned out. Pump motors fail when they run dry (no water in the pit to cool them), when they overheat from continuous use, or when they’re just old and worn. Most homeowner-grade sump pumps use motors rated for intermittent duty, not continuous running.
Replacing a motor on a sump pump is rarely cost-effective. A new motor costs nearly as much as a new pump, and you’re left with old seals, bearings, and housings that are also near end-of-life. Buy a new pump.
Evaluate Pump Age and Usage
Sump pumps don’t last forever. A pump that runs a few times a month might last 10 years. A pump in a high-water-table area that cycles every 15 minutes during wet seasons might burn out in three years. If your pump is more than seven years old and showing any signs of struggle (louder operation, longer run times, visible rust or corrosion), replacement is smarter than repair.
Pedestal pumps (motor mounted above the pit on a shaft) tend to last longer than submersible pumps because the motor stays cooler. Submersibles are quieter and handle debris better, but heat buildup shortens motor life. Both designs work fine for typical garage applications.
Install a Backup System
If your garage floods when the power goes out or when the primary pump can’t keep up, a backup pump prevents damage. Two types dominate the market: battery-powered pumps and water-powered pumps.
Battery backup pumps use a deep-cycle marine battery and a separate pump that kicks in when the primary pump fails or loses power. These systems are moderately priced for installation. The battery needs replacement every three to five years. You’ll also need a battery charger or maintainer to keep the battery topped off. In a typical power outage, a quality battery backup can run for several hours depending on how often it cycles.
Water-powered backup pumps use your home’s municipal water pressure to create suction via a venturi effect. They require no electricity and no battery maintenance. The downside is they use about one gallon of city water for every two gallons of sump water they remove. In areas with expensive water or well systems, this gets pricey. They also require at least 40 psi of water pressure to function, which rules them out for some homes. Water-powered backups work indefinitely as long as you have water pressure.
For a typical garage with seasonal flooding risk, a battery backup makes sense. It’s reliable, self-contained, and doesn’t rack up water bills. Installation is manageable: mount the battery near the sump pit, wire it to the charger, install the backup pump in the pit alongside your primary pump, and run a separate discharge line or use a combo discharge fitting that accepts two pumps.
If you’re in an area with frequent power outages during storms (when sump pumps work hardest), a backup system isn’t optional. The cost of one flooded garage far exceeds the cost of the backup pump.

Maintain Your System Year-Round
Sump pumps need attention beyond just fixing them when they quit. Every three months, dump a bucket of water into the pit to verify the pump cycles on and off correctly. Check that the discharge line is clear. Inspect the power cord and outlet. Look for rust or corrosion on the pump housing.
Once a year, pull the pump out and clean the inlet screen and impeller. Rinse the pit itself. Sediment, algae, and mineral deposits build up over time and reduce pump efficiency. A quick cleanout takes 20 minutes and extends pump life significantly.
Replace the check valve every three to five years even if it seems fine. They’re cheap insurance against a failure that causes the pump to short-cycle and burn out prematurely.
If you have a battery backup, test it monthly by unplugging the primary pump and verifying the backup kicks in. Check the battery water level (if it’s not a sealed battery) and keep the terminals clean. A corroded connection can prevent the backup from working when you need it.
Upgrade to a Higher-Capacity Pump
If your current pump can’t keep up during heavy rain, you need more capacity. Pumps are rated by gallons per hour (GPH) at a specific head height (vertical distance the water must be lifted). A typical 1/3-horsepower pump moves about 2,500 GPH at a 10-foot head. A 1/2-horsepower pump moves closer to 4,000 GPH at the same head.
Measure the vertical distance from the bottom of your sump pit to the highest point in your discharge line. Add a few feet for friction loss through the pipe and fittings. Match that total head to the pump’s performance curve (found in the manual or online specs). Pick a pump that delivers the flow rate you need at your actual head.
Oversizing slightly is fine. Undersizing means you’re back in the same flooded-garage situation during the next storm.
When to Call a Professional
Most sump pump troubleshooting is DIY-friendly. You’re working with low-voltage DC (for battery backups) or standard 120-volt AC, basic plumbing, and mechanical parts you can see and touch. If you can change a light fixture and snake a drain, you can diagnose and fix most sump pump issues.
Call a pro for anything involving your main electrical panel, running new circuits, or modifying structural drainage around your foundation. If your sump pump problem is actually a bigger issue (foundation cracks, a failed French drain, or inadequate grading around the house), a waterproofing specialist or foundation contractor is the right call.
Plumbers handle sump pump installs as part of their normal work, but many handymen and general contractors also do it. Get two quotes, verify licensing and insurance, and ask for recent references. A reputable contractor explains the process clearly, provides a written estimate, and backs the work with a written warranty.
For complex electrical work like adding dedicated circuits or upgrading your panel, you’ll want the same attention to detail that goes into garage EV charging station installation, where proper electrical connections are critical.
Choose the Right Replacement Pump
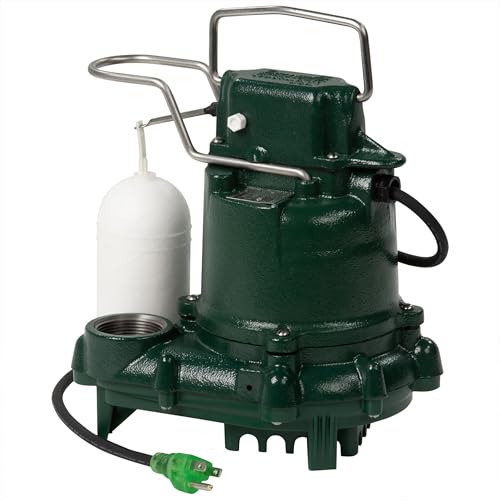
If you’re buying a new pump, stick with known brands: Zoeller, Wayne, Superior Pump, Liberty. These companies make pumps specifically for residential sump applications and stock replacement parts. Big-box-store house brands are hit or miss. Some are rebranded quality pumps. Others are bottom-tier imports that fail early.
Cast-iron pumps outlast plastic pumps but cost more. A cast-iron Zoeller M53 is considered the gold standard for basement and garage sump duty. Plastic Wayne or Superior pumps work fine for lighter-duty applications and cost less initially.
Match the outlet size to your discharge pipe. Most residential systems use 1.5-inch pipe, but some use 2-inch. Using an adapter or reducing the pipe diameter creates unnecessary back pressure.
Check the pump dimensions before buying if your garage pit is shallow or narrow. Some pumps are too tall or wide to fit in tight pits. Measure your pit depth and diameter, then compare to the pump specs.
A quality stud finder makes a noticeable difference in results when mounting backup systems or electrical components. Check current options and reviews to find the right match for your project and budget.
Address the Root Cause
Sump pumps treat the symptom (water in the pit) but not the cause (why water is entering your garage in the first place). If your pump runs constantly or your garage floods despite a working pump, you have a grading, drainage, or foundation issue that needs attention.
Gutters that dump water next to the foundation, poor lot grading, or a high water table all push water into your garage. Extending downspouts, regrading the soil around the foundation, or installing proper drainage systems can reduce or eliminate the water load on your sump pump.
These fixes cost more than replacing a pump, but they prevent ongoing problems. A sump pump that cycles every 10 minutes all spring is working too hard and will fail prematurely. Reducing the inflow extends pump life and lowers the risk of a failure during a storm.
Just like ensuring proper ventilation when you install garage roof vents, addressing water issues at their source prevents bigger problems down the road.
Frequently Asked Questions
Can I handle this as a DIY project?
Most troubleshooting and pump replacement is DIY-accessible with basic tools. You’ll need a screwdriver, adjustable wrench, flashlight, and a bucket. Float switch repairs, impeller cleaning, and discharge line inspections are all manageable tasks. Electrical work beyond resetting a breaker or replacing an outlet should go to a licensed electrician. Battery backup installation is simple if you’re comfortable with basic wiring (connecting a charger to a battery and mounting the pump). Water-powered backup installation requires cutting into your plumbing and is trickier.
How long will a new pump last?
A quality pump with proper maintenance lasts seven to 10 years in typical conditions. High-cycling environments (pump runs frequently) shorten that to three to five years. Cheap pumps fail sooner regardless of conditions. Pedestal pumps generally outlast submersibles because the motor stays cooler. The prep work matters too: a clean pit, a debris-free inlet screen, and an unobstructed discharge line all extend pump life.
How much should I budget?
A replacement sump pump varies widely in price depending on quality and capacity. Battery backup systems require a larger investment when professionally installed. Water-powered backups are more budget-friendly. Professional installation adds labor costs if you’re not doing it yourself. A new check valve is very affordable. Discharge pipe and fittings (if you’re replumbing the system) add modest additional costs. Budget on the higher end if you’re upgrading to a better pump
