
If your garage is a disaster, getting organized can seem overwhelming. A quick way to make progress is to get your tools up off the garage floor – especially your garden tools.
I installed Gladiator GearTrack, one of the more popular garage track systems, but several brands have similar systems.
See the other garage wall organizers I tested here and why I recommended Gladiator.
Gladiator’s installation instructions are easy to understand, but there are a few places where you could run into problems.
In this article, I will walk you through how to install Gladiator GearTrack and
This process will work with most brands, but check with the manufacturer to see if there are any quirks with the system you’re buying.
How to Install Gladiator GearWall & GearTrack On Drywall
Let’s tackle the easy one first.
If you choose to install Gladiator
Never use drywall anchors!
They won’t be able to support the weight of you need to hang everything you want on the wall.
1. Measure where your Gladiator GearTrack will go
Measure twice and cut once.
Good advice. Make sure that the track pieces fit where you want them to go.
I will install Gladiator
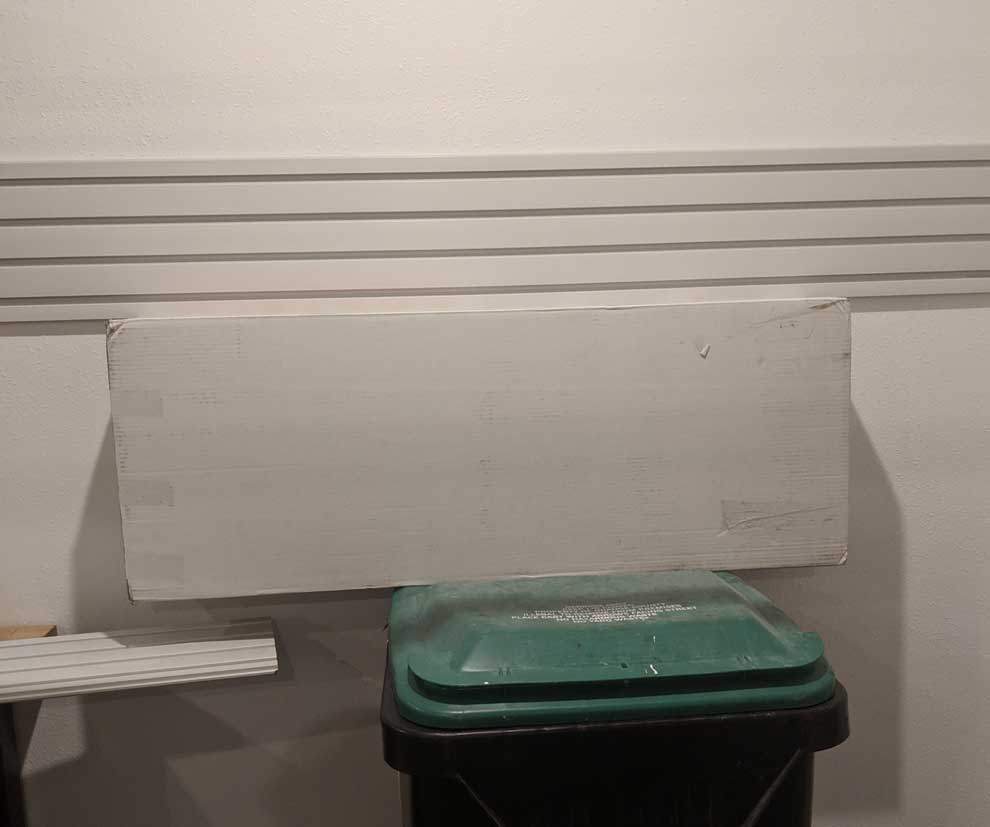
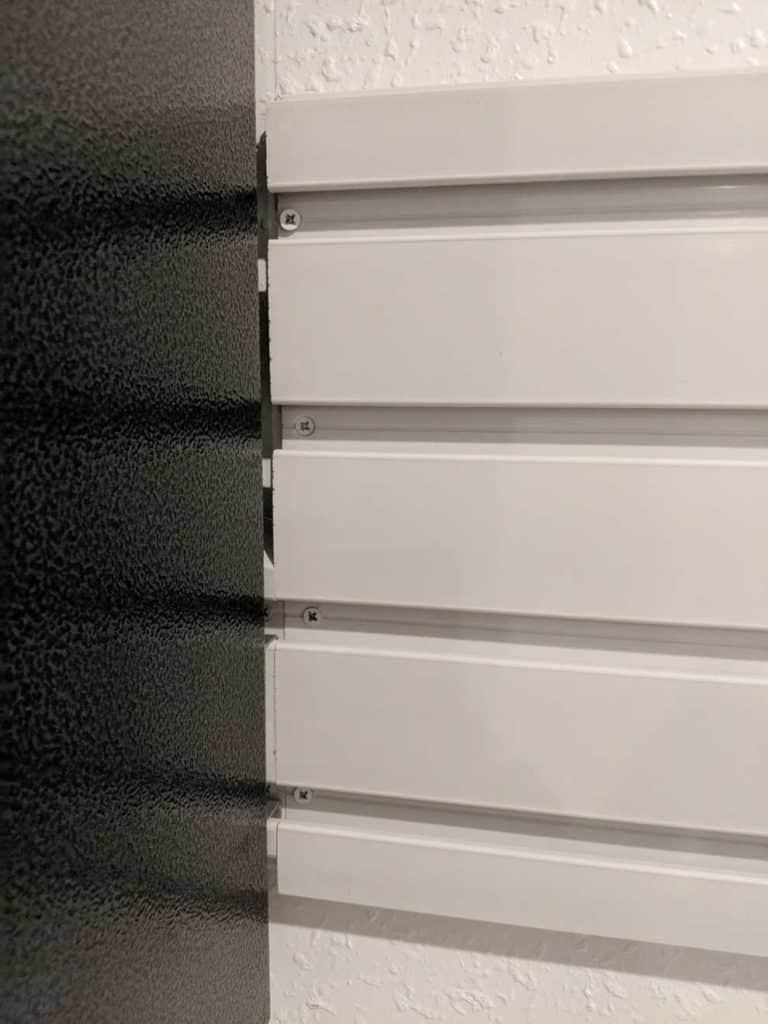
I was about four inches short of being able to use an entire 8′ section of
I recommend shifting things around so you can use an entire section of track wherever possible.
In my case, I could slide my cabinets farther up the wall than I intended, but it still looks good. More importantly, it allowed me to install Gladiator
Since I was doing this myself, I MacGyvered a solution using a box sitting on top of my garbage can to get everything into place.
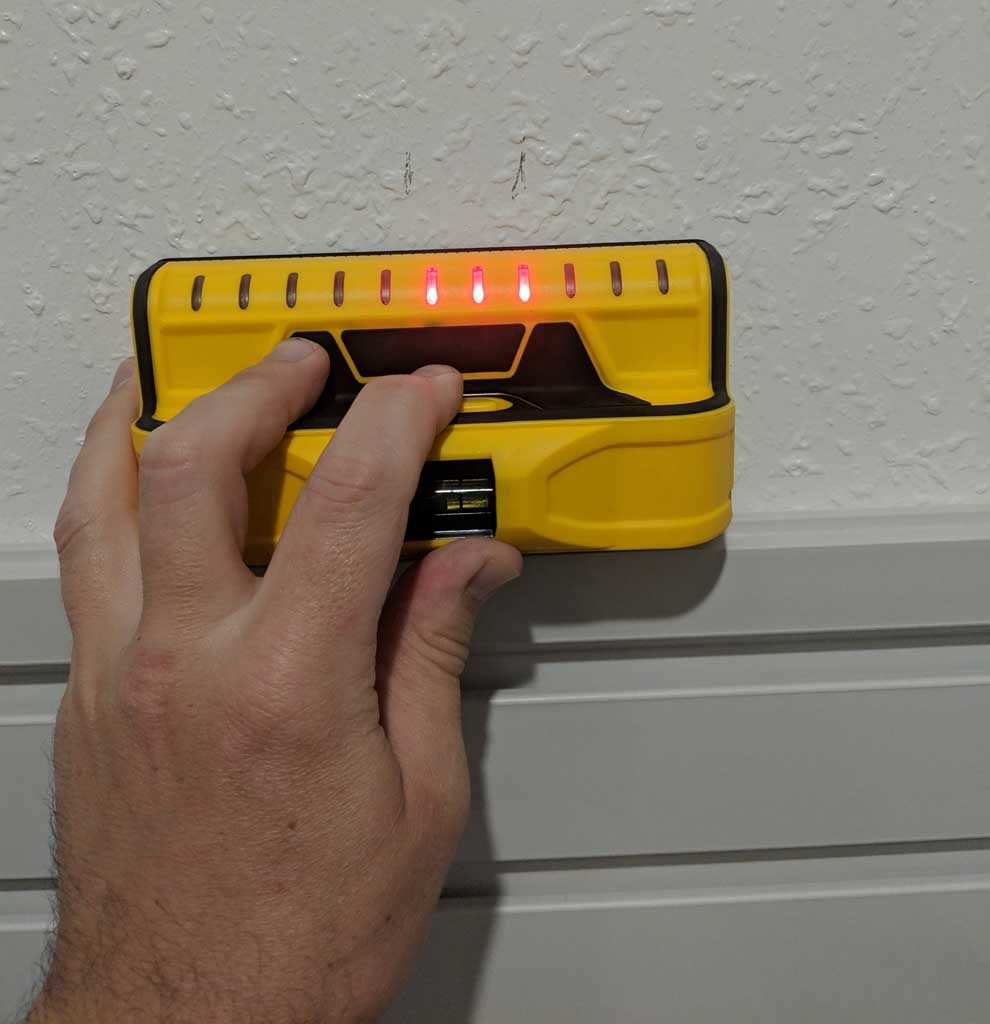
2. Locate Your Wall Studs
Using a stud finder, locate where the studs are in the wall.
Most stud finders will only tell you where the edge is, but the goal is to find the center. You’ll need to come at the studs from both sides (left and right).
- Slowly sweep in from the right-hand side until the stud finder finds the edge of the stud.
- Mark this with a small vertical line.
- Slowly come in from the left-hand side and do the same thing.
- Once you find the edge, make another small vertical line.
- Make a small ‘ X ‘ in the center of the two lines. This is the center of the stud where you’ll want to place the screw.
I found an excellent stud finder with multiple LED lights showing where the stud is as you move along the wall.
It takes a lot of the guesswork out of it. This model is the Franklin 710+, and you can find it at Amazon or your local home improvement store.
It’s a little more money, but it’s worth it.
Oddly enough, the 2×4 boards used for the studs are slightly less than two inches wide. The machining process smooths off a bit of each edge to make a smooth surface.
Note: Be sure to locate any electrical outlets or wires behind the drywall. Drilling or screwing into a live wire can be a shocking experience.
3. Screw in the First GearTrack Panel
Ideally, you’ll position your GearTrack rail to screw it into as many wall studs as possible.
In a perfect world, a 48-inch piece of track will cover four studs if your studs are 12″ apart or three studs if they are 16″ apart.
But it’s never a perfect world, so don’t get too hung up on that. Your goal should be to attach the rail to as many studs as possible (minimum of two).
As a general rule, the more stuff you’re going to hang on the track, the more secure it needs to be.
Place a screw at the bottom of each channel (see image below).
For a Gladiator GearTrack installation, you’ll need two screws per stud and four screws per stud for a Gladiator
You want to have as many screw attachments as possible – ideally three or four per 4′ track.
You should rethink the location if you can’t attach your track system to at least three wall studs.
4. Check to Make Sure Its Level and Repeat
Once you’ve placed the track and the first screw into the wall, you want to ensure it’s level.
I don’t know about you, but I’m that person who can instantly tell when things are crooked.
Picture frames, mirrors, you name it. I can tell from across the room if it’s off by a centimeter, and it bugs the crap out of me.
After putting the first screw in the wall, use your hand level to ensure everything is still level. This is the last opportunity you’ll have to make adjustments.
If you’ve got an annoying friend like me who will point out when things are crooked, you won’t give them a reason to complain.
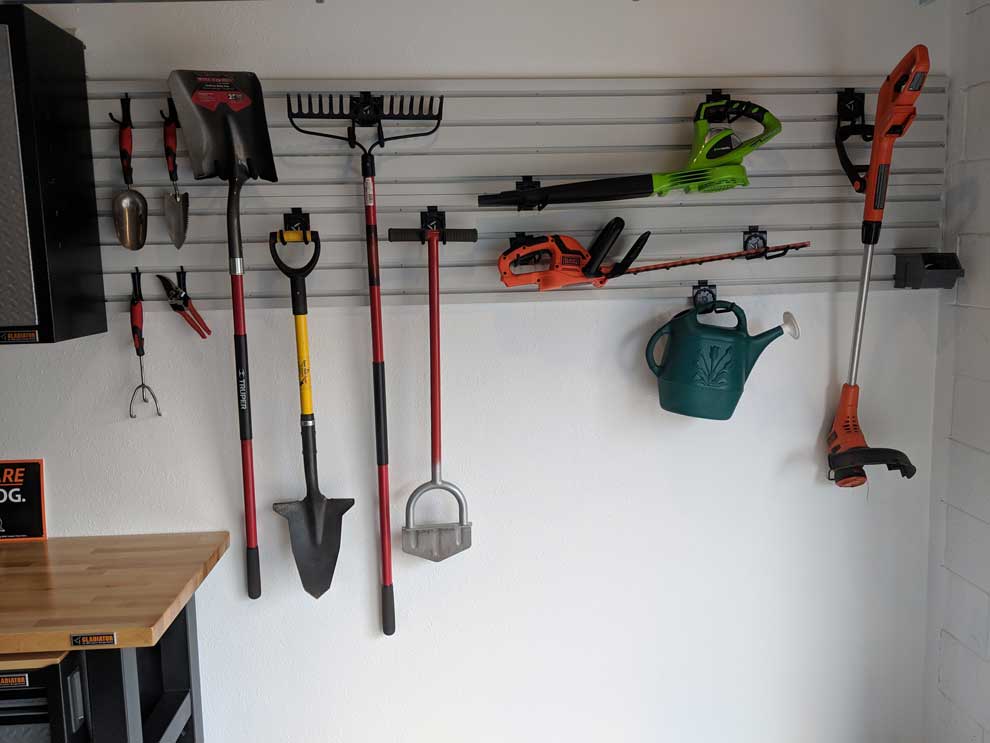
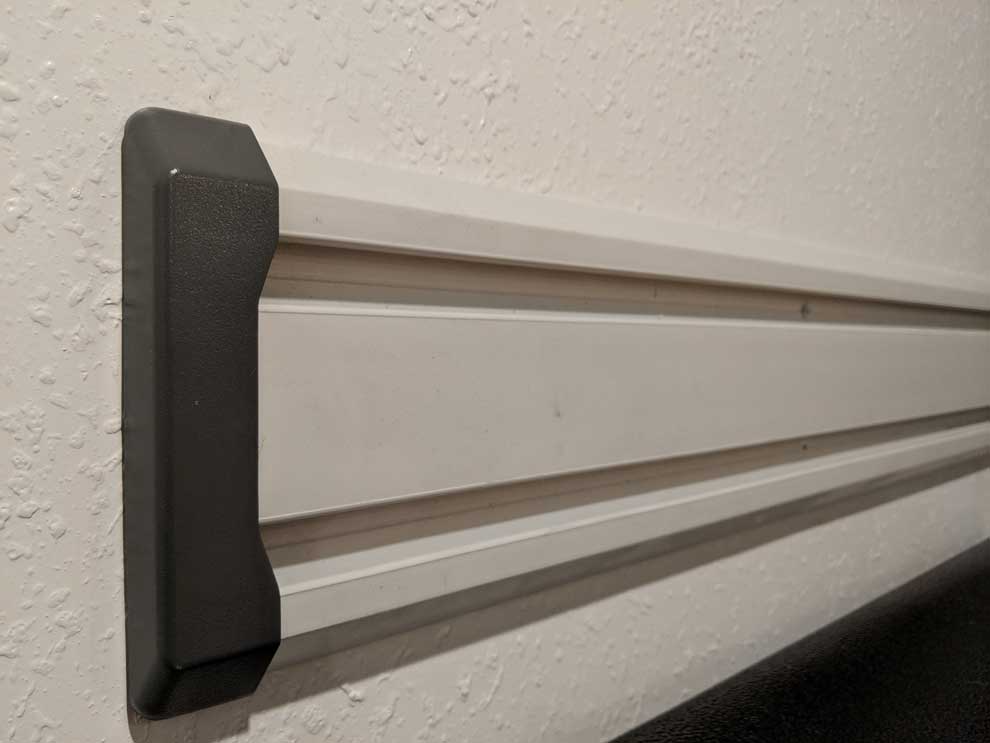
5. Add Endcaps and Accessory Hooks
Finally, fit the endcaps and start adding the accessory hooks.
Take pride in your garage and show your neighbors how cool your Gladiator
How to Install Gladiator GearTrack & GearWall to Concrete Block
It’s more complicated to install Gladiator GearTrack into a concrete block wall.
Of course, I did it the wrong way the first time.
Because the concrete block wall doesn’t have studs to support it, installing Gladiator
Concrete is porous, which means that it absorbs water. Over time any water that seeps into the concrete block can erode the block around the screw, weakening it. Water can even start to corrode the screw itself and eventually cause it to fail.
Gladiator recommends installing vertical wooden studs into the concrete block and mounting the
Rubbermaid goes a step further.
They only recommend mounting the
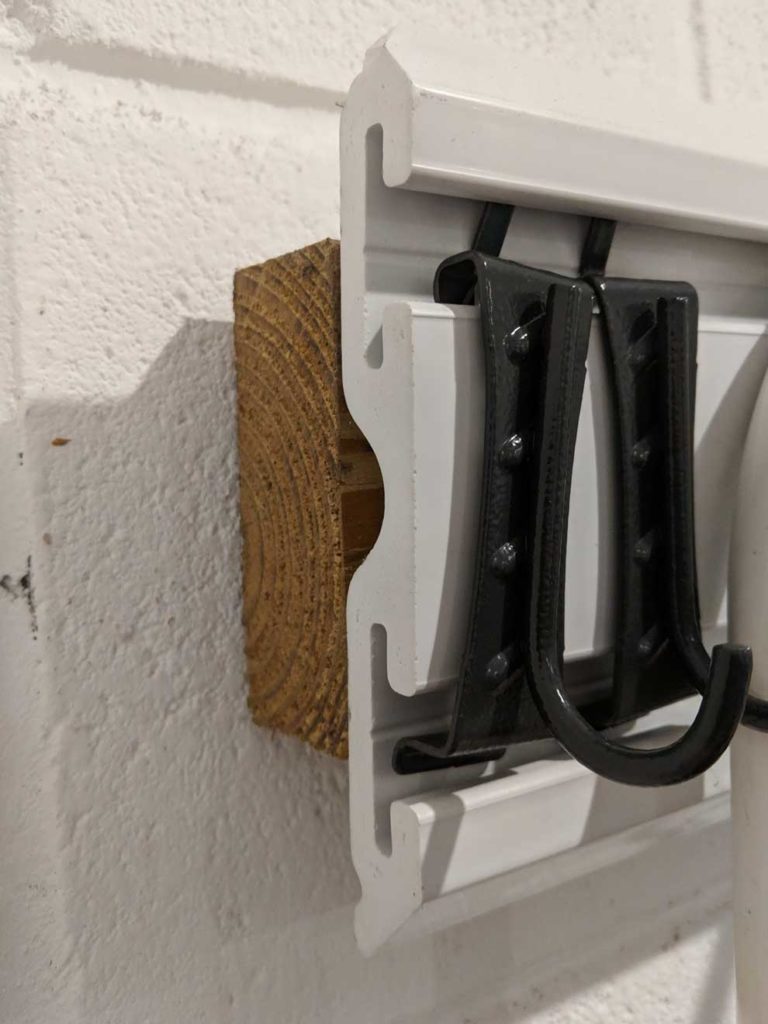
1. Mount the Vertical Wall Studs
The mounting studs must be vertical to get the maximum weight capacity for your Gladiator GearTrack or
That was my mistake.
I mounted a single 8 foot 2×4 horizontally, right underneath my track.
Within a few weeks of putting my garden tools on it, I saw the track bending at an angle underneath the weight. And I wasn’t anywhere near the track’s maximum weight capacity.
The more weight you add to the
Tools, lawn equipment, and ladders are heavy, so you must ensure that the track is adequately supported.
Check out my other article here for other great ideas on storing your ladder in your garage.
Wall studs are simply 2×4 or 2×6 boards cut to whatever length you need.
Ideally, the stud would go from the floor to the ceiling for maximum support. Of course, ideally, the studs would be part of the frame, but then you’d be reading the other section instead.
I recommend at least a 3′ vertical stud to be sure you’re getting the track system’s total weight capacity.
Before you start drilling holes, this is also an excellent time to think about waterproofing your garage walls for some extra protection.
First, pick a location roughly the center of a concrete block and away from any joint lines.
Avoid screwing into the mortar since it’s not as solid as the rest of the block. The connection won’t be as strong.
I use Tapcon concrete screws, placing screws every 12-16 inches along the stud to keep it snug against the wall.
Once the first screw is in place, make sure that the stud is level before going further.
Nothing is worse than having crooked stuff on your walls.
We’re transforming your garage into a neat, organized room you’re proud to show your friends. Take the extra time here and make sure it’s right.
Put additional studs every 12″ or 16″ along the area where you will mount your garage track system.
Exactly how far apart is up to you, but stick with the same distance once you decide.
By spacing the studs every 12″ to 16″ apart, you allow for several connection points along the track rail.
More connection points = a stronger attachment to the wall = higher weight capacity.
2. Mount the GearTrack Directly Over the Wooden Studs
Don’t put that level away yet. You’re still going to need it.
Space out the track rail to overlap as many studs as possible.
I’ll repeat it: the more attachment points you have, the stronger the attachment will be.
Ideally, you’ll want at least three screws in a 48″ track, so plan accordingly.
Gladiator recommends putting screws at the bottom of each channel for the GarageWorks GearTrack.
Never screw into the center of the channel.
Since the two channels connect with the wooden stud, there will be a small gap between the stud and the center of the track. If you put the mounting screw in the center, it won’t have as secure a connection.
3. Check that it’s Level
Before you screw in the second screw, take a few seconds to ensure the garage track is level. Nothing is worse than spending a lot of time permanently attaching something to your house and then realizing it’s crooked.
Trust me. Once you notice it, you can’t unsee it.
Measure twice, cut (or drill) once.
4. Add Endcaps and Accessory Hooks
After mounting the garage tracks, it’s time for the fun part.
Add an endcap to each side to stop any dust, debris, or spiders living in your garage from getting inside. Then, start mounting the accessory hooks, baskets, or anything else.

Wrapping It Up
In this article, I’ve shown you how to install Gladiator GearTrack and
Getting more organized in your garage isn’t hard, and it’s pretty affordable too. You can install Gladiator GearTrack or
I highly recommend the Gladiator wall system (GearTrack &