Next to the floor, the best way to transform your garage is to upgrade the walls.
Garage wall panels can be decorative, functional, or a little bit of both.
Paneling your walls helps declutter your garage, control common garage bugs, and reduce noise while creating additional storage space. To install wall panels, measure your garage’s wall size, select your desired material and resize them to fit. Then, affix the panels to the walls using adhesives or nails. All that is left to do is cover the joints and add baseboards.
Garage wall panels enhance the look and feel of your garage, but there are several different materials to choose from.
This article will discuss each, plus give an overview of how to install them in your garage.
Let’s get started.
Types of Paneling for Garage Walls
Wall panels for your garage can be broken down into two major types: Decorative or Functional.
Decorative wall panels include OSB, plywood, or drywall. They finish your garage and act as a sturdy base layer for any cabinets or decor you want to add later.
Functional wall panels are specifically designed to add storage capacity. Many homeowners will cover a wall, or their entire garage in slatwall or pegboard, allowing them to quickly add wall storage whenever needed.
OSB, Plywood, and Drywall
If your garage is concrete or bare wooden studs, the cheapest way to finish your garage is with OSB, plywood, or drywall wall panels.
OSB is an engineered wood made up of different wood fragments that are compressed and stuck together. It’s typically less expensive than plywood, but its rougher surface makes painting more challenging. For more on the differences between OSB and plywood, check out my article, where I discuss each’s pros and cons.
Drywall is commonly used inside your home, but it can also be used in your garage. In fact, it’s what I did in my own garage after adding insulation. You can see how much it cost me to drywall and insulate my garage here.
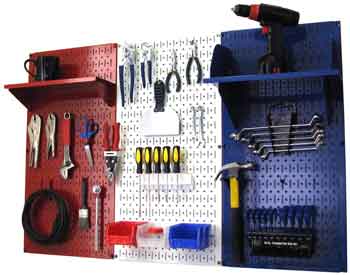
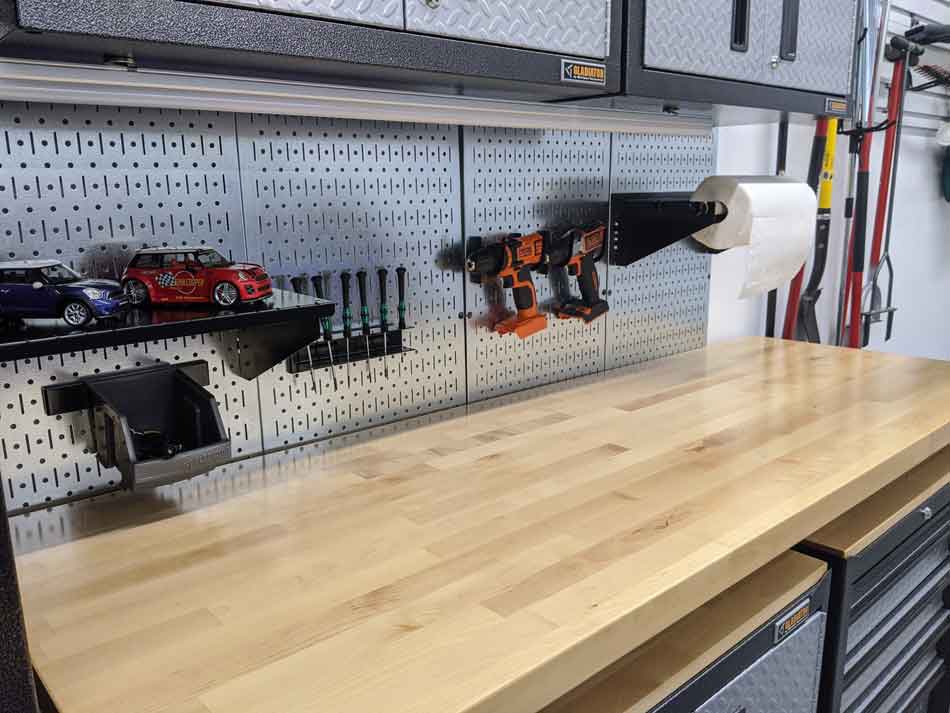
Pegboard
A pegboard is a board with perforations for pegs and hooks for storage. It’s relatively inexpensive but generally only used in small sections of your garage.
Pegboard can be made from materials like Masonite, wood composite, metal, or plastic. Each has its own pros and cons.
I have a small section of Wall Control metal pegboard above my workbench. Although it’s more expensive than plastic or wood, it’s durable, extremely strong, and versatile.
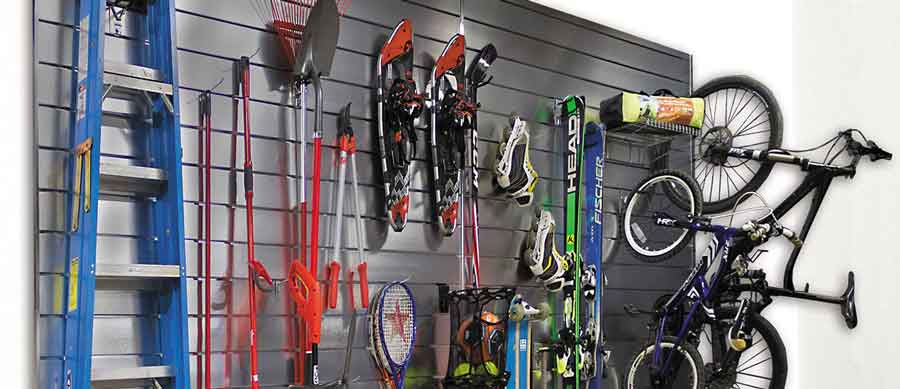
Slatwall Panels
Slatwall panels are a specialized type of wall panel. They come in a flat 4ft. by 8ft. material with horizontal grooves, called slats. These slats are fitted with aluminum or plastic inserts, designed to accept hooks and pegs for storage.
The best slatwall panels are MDF-based or PVC-based plastic. However, you can also find premium slatwall in aluminum and other metals.
I prefer slatwall over pegboard because they have a better variety of hooks and accessories with a higher weight capacity for larger tools.
Factors To Consider When Selecting Garage Walls Panels
Before you run out and buy your garage wall panels, there are some factors to consider first.
How Much Space You Have
Anytime you make changes to your house’s structure, you want to measure twice and cut once. That includes adding paneling to your garage walls.
You want to be aware of exactly how much space you have.
Some options, like Proslat slatwall, are suitable for covering large sections of your walls. On the other hand, some solutions, like pegboard, are better used in smaller sections as an accent piece.
Whatever option you choose, you want to maximize your available garage wall space – and how much storage you can use with it.
What Materials You’re Using
As you figure out how much space you need to cover, the next step is to decide what material you want to use.
Several options are available, including natural wood, drywall, metal, foam, PVC plastic, and medium-density fiberboard (MDF).
Each has unique strengths and shortcomings.
When choosing a material, consider its strength, durability, appearance, how easy it is to install, maintenance needs, and, of course, how much it costs.
Tip: Don’t put too much emphasis on appearance. Sure, we want our garages to look great, but, at the end of the day, we need them to be functional as well. Otherwise, you’ll quickly spend more money on garage cabinets and overhead storage to compensate.
This table summarizes the features of each type of material:
| Material | Quality | Cost | Strength | Durability | Ease of Installation and Maintenance | Aesthetic |
| Natural Wood | Debatable | + | + | – | – | Debatable |
| Metal like steel, aluminum | + | – | + | – | Debatable | Debatable |
| PVC | + | – | – | + | + | + |
| MDF | + | – | + | + | + | + |
| Concrete | + | – | + | + | – | Debatable |
Natural wood planks are readily available in various woods and stains. However, raw wood, unless properly treated, is vulnerable to damage from insects, fire, and moisture.
Concrete delivers maximum protection from the elements, insects, and rodents. Additionally, it also provides excellent sound insulation. Most of our garages probably start out as cinder blocks.
However, they’re not without their downsides. A concrete overlay is costly and challenging to install, so special skills and equipment will be required.
Metal sheets, for example, steel and aluminum, are suitable for garages with plenty of natural light. However, they are not easy to install or drill into. Metal can be noisy and, depending on the type of metal used, could rust over time.
Foam sheets are cost-friendly and easy to put up. Rigid foam panels can also provide a layer of insulation for your garage. However, foam panels aren’t practical for garages with lots of sunlight since they fade when exposed to the sun.
Polyvinyl chloride (PVC) is another excellent paneling option. It is plastic-based and waterproof. This paneling material is easy to install, clean, and maintain. However, it is easily damaged by heat and could warp. It’s not advisable to install plastic-based wall panels in a garage that stays hot for extended periods.
OSB and MDF plywood are the most commonly used materials for paneling walls. They are dense, can support a lot of weight, and are relatively inexpensive to purchase.
MDF sheets are excellent sound insulators but are susceptible to moisture-related damage. However, waterproof MDF sheet panel options are available at a higher cost.

How to Install Garage Wall Panels
Setting up wall paneling in your garage isn’t as tricky as it would seem.
Much like painting or wallpapering, start from one corner and work your way down and across until completed.
Tools You Need to Install Wall Panels in Your Garage
- Panels (Slatwall, pegboard, or any other material of your choice)
- Tape measure
- A notebook and pen to record measurements
- Calculator
- A spirit level
- Adhesive
- Nails/screws
- Hammer
- Screwdriver
- Saw or cutter
- Furring strips
- Caulk & Caulking Gun
- Stain or Paint
- Sandpaper/electric sander
- Pins
- Wood Filler and putty sticks
- Foam Brush
- Pencil
- Drill
- Safety masks, goggles, and any other protective equipment are required.
Step 1: Plan
The first step in paneling your garage walls is to work up a plan.
Decide what material best suits your garage, the layout, and other essential preparations.
Step 2: Measure
After designing your plan, your next step should be to measure the space you’d be paneling.
Pay close attention to detail. It can get expensive if you measure something wrong, so the measurement must be spot-on.
Measure the full height and width of the garage using a tape measure and calculate how many panels you need.
Remember to factor in top and base panels, windows or large openings frames, and other special considerations.
Step 3: Cut
Now, cut your sheets into the desired size based on your calculations.
Tip: Always wear a dust mask when cutting styrofoam, drywall or wood.
Step 4: Pre-Installation
Before mounting anything on the wall, be sure to prep and clean the wall. Check for any holes, bumps, or areas that need to be filled.
Then, sand it down to get it smooth and even.
Tip: This is the perfect time to add insulation to your garage. While the wall panels will provide a little shelter from outside air, insulation will go the extra mile to make your garage more comfortable.
There are several insulation options, the most common being foam board and batt insulation.
Step 5: Paneling the Walls
There are several ways to install the panels on your garage walls, including adhesives, nails, screws, or a combination for extra hold and security.
For additional rigidity, you may also need to add furring strips to wall studs. These studs provide a platform for the panels to hang on.
To start, mark the wall using a pencil. Starting from the bottom, work your way up the walls, fixing the panels one at a time using adhesive and/or nails. The adhesive can be mounted on the wall or the back of the panels, whichever is more convenient.
Using a drywall level, make sure your panels are aligned correctly. Press down firmly, so the panels adhere securely to the wall.
Finally, drive nails or screws into them for additional security.
Step 6: Post-installation
Finally, cover the joints with drywall mud or plaster. If there are any unsightly gaps or holes in your panels, patch them up with caulk, filler, or putty.
Then, proceed to sand back patched areas for a smooth, consistent feel and look.
If you’re painting your garage wall panels, add a coat of primer first. Wood and drywall, especially, are porous, so they need a primer coat to help the paint adhere better.
Finally, add baseboards. This protects the walls against mold, moisture, rodents or insects, spills, and splashes. Commonly available garage baseboards are vinyl, thermoplastic rubber, aluminum, and PVC.
Now, for the fun part. Paint your garage walls whatever color you want. Check out my article here for some ideas on the best color to paint your garage walls.
Tips and Tricks For Installing Garage Wall Panels
- Always be sure to protect yourself. Wear safety goggles, dust masks, and protective clothing while installing wall panels.
- Remember the saying, “measure twice, cut once”? While measuring, always double-check.
- Add a vapor barrier to protect the insulating material and your panels. Foam insulation, for example, contains moisture which may damage your panels if they are MDF-based.
- Condition your paneling material to the garage by allowing it to stay for at least 24 hours. It could be more, depending on the installation grade level.
- Adopt waterproof wood-based panels. This would protect them from moisture-related damage and make them last longer. You can also get moisture-resistant sheets or avoid using wood-based sheets altogether.
- Factor in all wiring and electrical systems. You might need to make cutouts in the panels for switches and outlets.
Wrapping It Up
The garage is one area in a home that gets the least attention in terms of décor and design.
Adding warmth and taste to your garage by paneling the walls will score points for extra storage. Be sure to use any of the following; natural wood, metal like steel or aluminum, MDF sheets, PVC, fiberglass, or even a concrete overlay.
Check out my list of other drywall alternatives for your garage walls here!