We’ve spent a lot of time showing you how to make your garage look great and easier to enjoy your hobbies in. For many people, soundproofing is essential to making your garage more comfortable.
And not just people who use their garage as a workshop or a rehearsal stage for their kid’s band, either.
Soundproofing a garage helps absorb outside noise from lawnmowers and barking dogs while also shielding the inside of your home from your power tools or noisy garage door opener.
Whatever the case, this article will show you how to soundproof a garage door, ceiling, walls, and floor. Usually, adding a little soundproofing material results in significant noise reduction and prevents sound from going where you don’t want it.
But first, you need to understand what problem you’re trying to solve and why you want to add soundproofing.
Soundproofing a Garage: Keeping Sound In vs. Keeping Sound Out?
In general, most people will have one of two goals with soundproofing: to keep the outside noise out of their garage or keep the noise of what they’re doing inside the garage from escaping.
A third case is to improve the sound quality inside the garage. That will only apply to a few people, however.
While most solutions will help achieve both goals, there are some specific things you can change, depending on which is more important to you.
Let’s discuss each in more detail.
Soundproofing Your Garage to Keep Noise Out
If you use your garage as a gym or where you work on your hobby, outside noise can take you out of the zone.
If you can hear any of the following inside your garage, some simple changes can be a huge help:
- The neighbor mowing their lawn
- Dogs barking outside
- Loud music
- Children playing
- Cars and trucks driving by
- Fireworks
Most basic soundproofing solutions will keep outside noise from disturbing you while working in your garage. You’ll want to focus primarily on soundproofing your garage door and any windows you may have.
Soundproofing Your Garage to Keep Noises In
Sometimes, you want to keep noise inside your garage from disturbing anyone in other rooms.
This includes:
- Power tools
- Woodworking
- Band practice in your garage
- Loud garage TVs or stereos
You’ll still start with soundproofing your garage door and windows. You’ll also focus on the walls and ceilings if you have an attached garage. However, creating a completely soundproof garage is less critical than a detached garage away from your house.
You Want to Improve Indoor Sound Quality
In rare cases, you’ll want to improve the sound quality of your garage itself.
This is mainly for people who record video or audio in their garage or use it as a recording studio.
Your soundproofing solution will add elements from both sections above. Additionally, you’ll focus on how the sound waves travel in your garage, adding sound-dampening panels to cut down on echoes and reverberations.
Soundproofing Basics
The basic idea behind soundproofing your garage, or any room, involves closing gaps and adding soundproofing materials to block or absorb sound waves.
That statement has a lot to unpack, so let’s dig into it more.
As you’re probably aware, sound travels in a wave-like pattern. Higher frequencies have shorter wavelengths, while lower frequencies have longer wavelengths.
We perceive higher frequencies as directional, while lower frequencies are omnidirectional. Note: That’s not technically true, just how the human ear perceives it.
Part of this is because it’s easier for high-frequency/short-wavelength waves to be absorbed or reflected.
These waves are reflected differently, depending on the material type and their roughness or absorbency characteristics.
For example, smooth, empty walls reflect sound waves back to the source, causing an echo. However, a carpet or foam panel will absorb more sound waves, and the varying texture will reflect the waves in different directions.
Thus, soundproofing involves placing things that absorb or reflect sound directly in the path of how the waves travel.
Putting panels on every square inch of the walls isn’t necessary, just where the sound is most likely to hit.
That’s why you’ll see strategically placed foam panels on the walls of music recording studios.
We’re going to follow that same logic to soundproof your garage.
Here’s the sequence of steps to follow:
Step 1: How to Soundproof a Garage Door
Without a doubt, the biggest soundproofing challenge you’ll face is dealing with your metal garage door.
The walls of your garage are usually made from either concrete blocks or some paneling over wood or metal studs. In either case, there are several different layers for sound waves to penetrate.
In contrast, aluminum or steel garage doors are designed to be thin and lightweight, which makes it easy for sound waves to penetrate.
Also, most garage doors are incredibly noisy when they open and close.
Despite this, you can do a few things to soundproof your garage door.
Note: These tips focus on the garage vehicle door but apply to the entry door to the house.
Seal the Gaps
As I mentioned, soundproofing involves eliminating gaps and adding material.
Your garage door has gaps running along the bottom, sides, and top of the door. You’ll want to ensure these gaps are covered completely.
One way to find them is to stand inside your garage with the lights off during the day. The outside light will shine through the gaps, showing you exactly what needs attention.
The most common issue is the bottom corners of your garage door, where they meet the floor. Over time, the seal will compress or be eaten by rodents or other common garage pests.
When this happens, replacing the existing garage door seal is usually best.
Next, go outside and look at the rubber seal along the left and right sides of the door. Look for any missing pieces, cracks, or damage. The door seal should fit snugly along the door, not allowing air (or sound) to escape.
Insulate the Door
Most garage doors use a single steel panel with no added insulation.
Not only does this make your garage uncomfortable during extreme temperatures, but it also provides almost no protection against sound waves. Adding a layer of insulation goes a long way to absorbing noise.
The least expensive way to insulate your existing garage door is with foam panels. You can purchase them at your local hardware store, measure the door, and cut the material to fit. Alternatively, you can buy a garage door insulation kit, like the one I have from Matador.
Finally, some people take this a step further and install acoustic foam panels or sound-absorbing acoustic blankets over their garage door. Blankets contain dense material that helps absorb sound waves. They’re a temporary solution, however. You’ll need to pack them away when you want to open or close your garage door.
A word of caution: Acoustic panels attached to your garage door may interfere with its operation. Be sure there’s adequate space for the door to move along the tracks.
Replace the Garage Door
You could upgrade to a new insulated garage door for the ultimate in soundproofing (and insulation).
Over the past decade, there have been several significant advances in garage door construction.
Today’s garage doors are more sturdy, efficient, and quieter than their predecessors.
That said, purchasing a new garage door is a significant investment. I recently priced a new insulated garage door for my home at almost $ 5,000 installed.
Step 2: How to Soundproof Garage Walls & Ceiling
Soundproofing your garage door is a great first step, but sound bounces off your walls and ceiling.
Let’s give them some attention now.
Adding material on top of what’s already there is the key to insulating your garage walls and ceiling.
This isn’t as complicated as it may seem and can be done by adding insulation, wall panels, or (ideally) both.
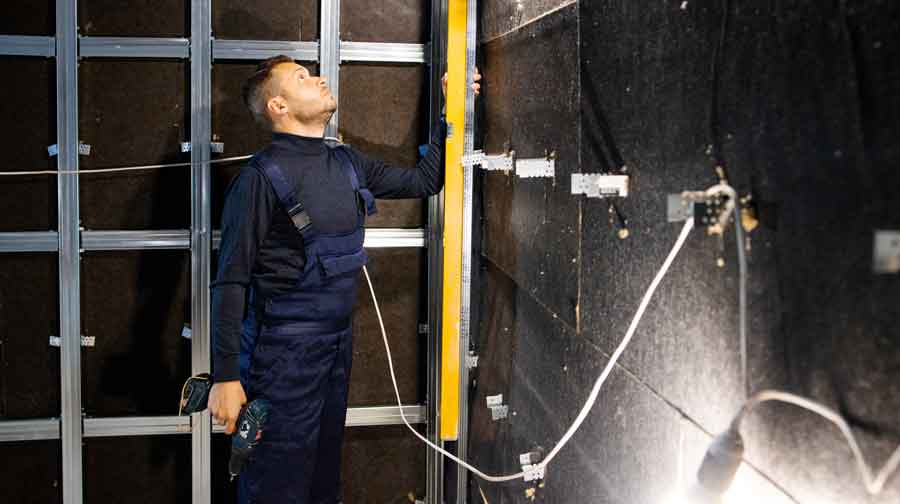
Soundproofing Garage Walls
Most garage walls are constructed from cement blocks or thin paneling over top of wood or metal studs. Many garages don’t even have plywood or OSB paneling and are simply unfinished walls over exposed studs.
No matter where you’re starting, it’s relatively simple (if time-consuming) to add a soundproofing layer to your garage walls. Best of all, you have various options for how to do it.
Bare studs: The best case scenario is if you have an unfinished garage with bare studs and no wall panels. Adding batt, not blown, insulation to your empty wall panels is easy and inexpensive. From there, you can cover it with drywall or plywood.
Concrete blocks: The most common case is for your garage to be constructed from concrete or cinder blocks. While it’s not as easy to cover as bare studs, you can still add drywall or wood paneling. Since concrete is porous, attach thin treated wood studs directly to the concrete, then hang the drywall on the studs. You can also add insulation by framing the wall with regular 2×4 studs.
Finished Garage walls (drywall\plywood\OSB): If your garage already has finished walls, you can still add an additional layer. In this case, opt for a thicker, 5/8″ drywall panel and mount it directly on the wall panel. Stagger the joints to avoid having a panel gap directly on top of another panel gap.
Alternatively, you could remove the wall panels, add new insulation, and put new drywall in the garage.
Soundproofing Garage Ceilings
How much garage ceiling soundproofing you need to add depends on whether you have living space above it.
For example, my house has a bedroom directly over it, so my garage ceiling is well-insulated and finished with drywall panels.
However, adding insulation to an unfinished garage ceiling is well worth the expense. Not only will this add a layer of garage soundproofing, but you’ll also save on your energy bill.
Many solutions for soundproofing your garage walls will also work on your garage ceiling, so review the section above to see what works for your situation.
Take Soundproofing to the Next Level
Regardless of what type of garage wall panels you have, vibrations often occur when the board is attached to the stud.
We can add dampening material between the drywall and the stud to fix this problem.
A resilient channel is a metal channel between the studs and the drywall. This helps to absorb sound waves so they don’t vibrate from your drywall into the studs.
Similarly, Mass Loaded Vinyl (MLV) is a thick, flexible vinyl layer that also goes between wall panels and studs. When secured with a green glue adhesive, it effectively absorbs sound.
Unfortunately, it can be expensive to layer an entire wall in MLV – often costing more than the drywall itself.
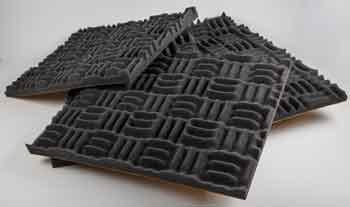
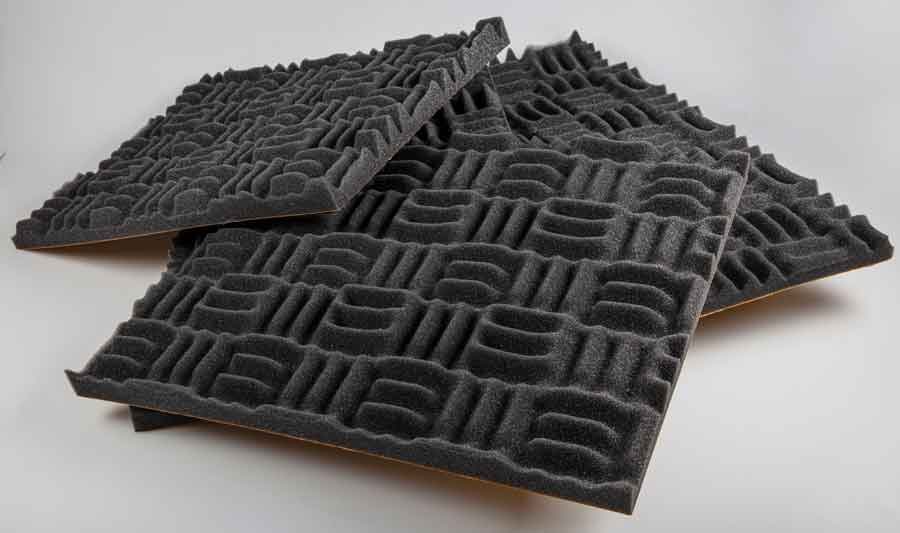
Finally, acoustic foam panels are an excellent way to jazz up and quiet the garage. They provide targeted sound absorption by absorbing sound waves and reducing the noise.
Installing acoustic foam panels on the ceiling is an easy way to reduce the noise from your garage. Sound waves bounce off smooth surfaces, which is what the textured soundproofing ceiling tiles prevent from happening.
This can result in a very dramatic reduction of echoes. Best of all, adding acoustic foam panels doesn’t require professional help. It’s a simple DIY project that may take an afternoon to complete.
Finally, simple foam panels provide exceptional soundproofing properties. They are easy to install, and you can usually find a variety of foam panels that fall within your budget range.
Step 3: Soundproof the Windows (If Applicable)
Although adding windows to your garage is a great way to increase natural light, they provide gaps where noise can escape.
The tradeoff is that garage soundproofing involves covering up the windows, so you must have adequate interior lighting.
There are several options for soundproofing your windows, including:
- Installing a custom acoustic plug from materials such as egg crate panels and untempered hardboard closes gaps between the windows.
- Hang noise-blocking curtains or acoustic blankets in front of the windows.
- Installing soundproofing curtains also helps put your personal touch in the garage.
Step 4: How to Soundproof a Garage Floor
You’ll see the most significant improvements from the previous steps, but soundproofing your garage floor can take you the rest of the way.
Thankfully, this is the easiest and cheapest step.
As we discussed, sound waves continuously bounce from the ceiling, wall, and back to your floor.
Hard, flat surfaces, like concrete or epoxy, only amplify that noise as it echoes through your garage.
Luckily, you can reduce noise transmission with a few simple solutions.

Floor Mats
The simplest and most cost-effective way to soundproof your garage floor is strategically placing mats in open areas. Floor mats are usually inexpensive, starting at around $100.
The soft, cushy material helps absorb sound waves, making your garage floor more comfortable.
In addition to soundproofing, garage floor mats have several significant benefits.
You can find garage floor mats designed to soak up oil and grease, protecting your garage floor. Alternatively, foam mats can help alleviate the stress of standing on hard concrete for extended periods.
A word of caution, however. Although carpeting is a great way to inexpensively soundproof an interior room, we do not recommend carpeting your garage floor.
The carpet will soak up spilled oil, gasoline, and chemicals, causing potential safety risks.
Interlocking Floor Tiles
Although they’re not as comfortable as floor mats, interlocking floor tiles can also help to soundproof your garage floor.
Vented garage floor tiles, like Swisstrax Ribtrax or RaceDeck Free-Flow, are designed to allow liquid to drop through the tile, keeping your garage floor dry.
However, the venting also dissipates sound waves by reflecting them in multiple directions. This helps to reduce echoes in an otherwise empty garage.
Special Use Cases
We’ve above how to soundproof a garage, but some situations need more specific solutions.
Two of the most common are soundproofing a garage workshop for woodworking or metalwork and soundproofing for a garage band practice.
The basics for these special-use cases are still the same as what I’ve detailed above. However, each will have some additional steps that you can take to lower the noise levels even further.\
How to Soundproof a Garage Workshop
If you use power tools for any length of time, it’s critical to take extra steps to soundproof your garage workshop.
A hand drill can hit up to 98 decibels (dB) of noise, while a circular saw tops out at 118 dB. Even Shop-vacs run at 123 dB. (source)
Prolonged exposure to sounds over 85 dB can damage your hearing, while noise above 120 dB can lead to immediate harm.
The best solution is to isolate your loudest power tools from the rest of the garage. Then, the person operating the device can wear ear protection while protecting everyone else in the immediate area.
To do this, you can build a room-within-a-room with dedicated soundproofing insulation and wall panels. This effectively decouples the smaller room from the garage as a whole.
This is often more cost-effective than soundproofing the entire garage. Because the area is much smaller, you can splurge on better sound absorption panels or mass-loaded vinyl barriers.
Soundproofing your garage workshop allows you to work without worrying about affecting others.
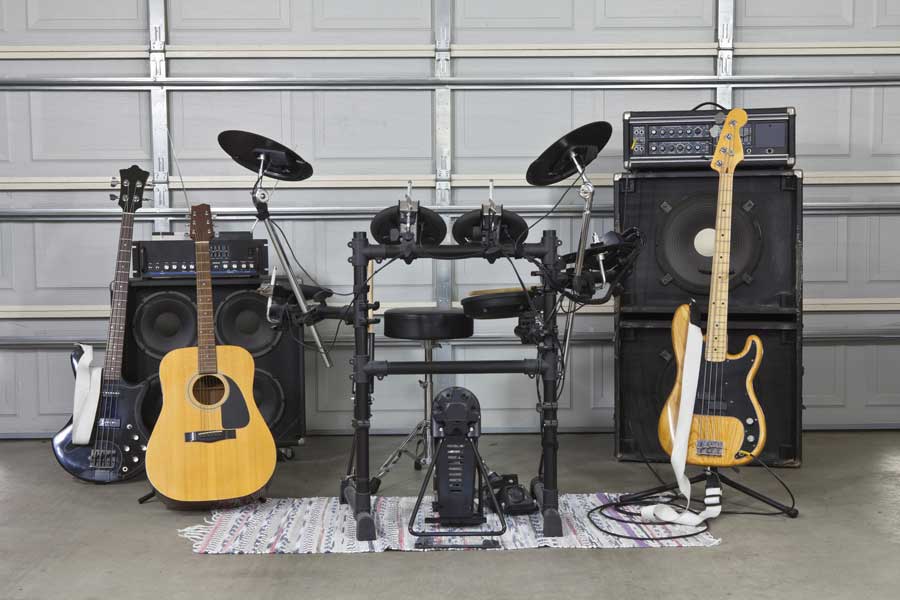
How to Soundproof a Garage For Band Practice (With Drums)
I play guitar in my spare time, so I know how loud musical instruments can be. My 50-watt guitar amp hits 115 dB, and a set of drums ranges between 90 dB and 130 dB.
Soundproofing drums is incredibly challenging because you’re dealing with high-frequencies (cymbals) and low-frequencies (bass drums). Low frequencies have a longer wavelength that penetrates rather than reflects off other objects.
That means you’ll need a combination of acoustic panels and thick floor coverings to effectively soundproof your garage for a band.
Building a room inside a room (decoupling) can help keep low frequencies from drums and bass from traveling outside.
However, you can modify this decoupled room to direct the sound where you want it.
Arrange three small, framed walls with soundproof panels in a ‘U’ shape to direct the sound from the drums towards the other musicians but block the sound from the rest of the house.
Add a thick rubber mat with sound-absorbing properties underneath the drums and guitar amps.
This will absorb any low frequencies that would otherwise resonate throughout the structure during band practice.
Wrapping It Up
Ah, the sweet sound of silence! Whether you’ve been trying to shield your serene garage space from the blaring noises outside or want to keep the inside noises, well, inside – soundproofing a garage can be a game-changer.
Let’s quickly recap what we’ve delved into:
- Soundproofing Goals: Remember, there’s a difference between keeping external sounds out and locking internal sounds in. Tailor your approach based on whether you’re aiming for a peaceful retreat or a vibrant music studio.
- Soundproofing Basics: Start with the rudiments. Address the garage door by sealing gaps, insulating, or even replacing it for maximum soundproofing. Ensure walls and ceilings are adequately soundproofed to enhance indoor sound quality. If you have windows, they’re next on the checklist. And don’t forget about the floor – mats and interlocking tiles can work wonders!
- Special Use Cases: Custom solutions are available if your garage serves a unique purpose, like a workshop or a band practice space. Jamming on drums? There are tailored soundproofing techniques for that, too.
Ultimately, it’s about transforming your garage into a space that suits your lifestyle and needs. Soundproofing a garage can make a significant difference whether you’re just getting started or an expert seeking advanced techniques.
So, roll up those sleeves, revisit any sections of this guide you need, and here’s to a garage that sounds exactly the way you want it to.