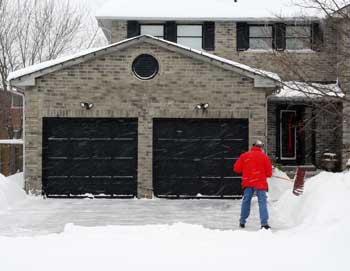
Ahhh….winter. The number one reason why people move to Florida.
This article will look specifically at how to winterize garages so you can be comfortable, even in the coldest weather.
When I was a kid growing up in Pennsylvania, my parents would watch the weather forecast for the first sign of frost. They knew there was a lot of work to do to prepare for winter.
In hindsight, they should have started much sooner.
TLDR: How do you winterize your garage? Preventing cold air from seeping in is one of the most significant factors when getting your garage winter-ready. This includes:
- Insulating the garage door and walls
- Caulking around the garage door
- Install a weather seal
- Waterproof your garage floor
- Set up a heater in the garage
- Lubricating your garage door
We’ll talk about each of those in more detail and, in some cases, link to detailed how-to articles I’ve already written.
Remember, just because you don’t live in a cold climate doesn’t mean you don’t have to worry about winter.
It’s a good idea to get your garage ready for the winter, no matter where you live. The best way to do that is to figure out how to keep the cold air out.
Duh, right?
There are a couple of different steps that you can take to help winterize your garage, such as insulating the door or installing a weather seal under the door. Thankfully, most are easy enough for the average homeowner to do themselves.
How to Winterize Garages to Keep Out the Cold
Properly winterizing your garage is more than just a simple clean-up and reorganization.
It’s about ensuring this integral part of your home’s safety, efficiency, and longevity, especially during the harsh winter months.
This section will describe a detailed, step-by-step process to get your garage winter-ready. These 10 steps will guide you through each stage of the process so you don’t miss a thing.
Step 1: Clean Your Garage
The first step to winterizing your garage is a thorough clean-up. You want to sweep the floor, vacuum corners and cobwebs, and wipe down surfaces with a damp cloth. Pay special attention to the garage floor, walls, and ceiling.
Using a stiff broom, you can eliminate any dirt and debris that accumulated over time. Afterward, a vacuum cleaner helps suck up dust, spider webs, and smaller particles.
Finally, wipe down surfaces with a damp cloth can to clear any leftover dust or grime.
Removing any potential sources of moisture or pests, such as leaves, dirt, and insects, is crucial.
A clean garage looks good and helps prevent mold growth and pest infestations. A clean, dry, and clutter-free space is also less likely to experience freezing issues or structural damage during the colder months.
Step 2: Winterize Your Garage Door (Weatherstripping)
The next three steps all revolve around winterizing a garage door. Each is critical, so be sure to follow along closely.
You’ll first want to inspect and replace the weather stripping under your garage door.
Weatherstripping is used to seal gaps around doors and windows. It helps keep cold air, snow, and rain out while keeping heat in. It also prevents pests from entering.
When the door shuts, the seal helps form a barrier that keeps the heat in the garage instead of letting it seep out from the bottom. It also helps keep water out of your garage when it rains.
Garage door seals and weather stripping are typically made from cheap rubber that deteriorates quickly. In my case, mine needed to be replaced after only a few years.
Look for signs of wear and tear, such as cracks, adhesion loss, or brittleness. These indicate that it’s time to replace the weatherstripping.
You can typically find new seals and weather stripping at your local big box hardware store like Lowe’s or Home Depot and on Amazon.
After that, you can caulk around the garage door, both inside and outside of the garage. Simply caulk up and down all sides of the garage door where the door frame meets your walls to close any little holes where heat can seep out and moisture can seep in.
Replacing your weatherstripping is an easy process that only takes about an hour or so.
Step 3: Winterize Your Garage Door (Lubrication)
The next major step to winterizing your garage door is to lubricate it before the temperature starts to change.
Most of us think our garage doors will work whenever we need them. They still require a bit of maintenance.
Thankfully, you don’t need a garage door technician to do it!
It’s a good idea to lubricate your garage door at least once a year, no matter where you live. This is especially important if you get harsh winters where you live.

You should lubricate the moving parts to help your garage door operate smoothly in cold weather. These include the hinges, rollers, and springs.
Use a white lithium grease spray, and remember to wipe off excess lubricant with a cloth to prevent it from attracting dirt and debris.
Follow my easy guide showing how to lubricate your garage door. It’s a quick, five-minute process that anyone can do.
You should never lubricate your garage door’s tracks, but you should clean them to ensure they’re clear of dirt or grime.
In most cases, all you’ll need is a damp cloth. Try using white vinegar or a household cleaner like Simple Green for stubborn stains.
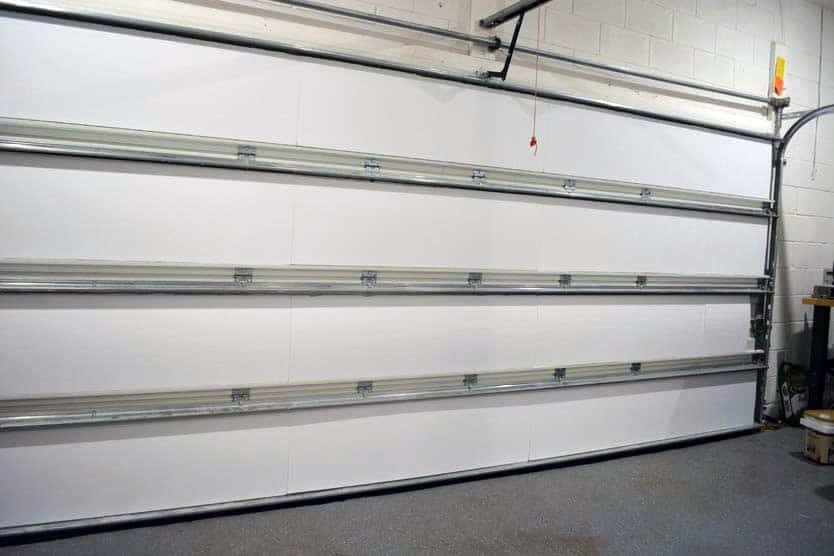
Step 4: Winterize Your Garage Door (Insulation)
With your garage door clean, lubricated, and sealed, let’s look at insulation.
The walls of our home are insulated to help keep it (and us) warm in winter.
The same goes for your garage, except your garage door is the single largest non-insulated surface in most homes.
Without any insulation, your garage could drop down almost to the outdoor temperatures. If it gets below 0 °F and stays there, it can be bad news for anything you’re storing in your garage.
One cheap way to add insulation to your garage is by installing an insulation kit with foam board insulation panels. For a DIY solution, you can buy a giant foam board and cut it to size to fit in between your garage door’s panels.
I installed the Matador garage door insulation kit in my garage, and it definitely had a significant impact. Check out my article for my results and a step-by-step look at the installation process.
Insulation works on a variety of garage door types, such as:
- Wood and panel doors
- Flat doors
- Steel garage doors
Insulation is rated using an R-value metric. This is its capacity to hold in heat. The better their R-value, the less heat they let escape when installed.
Your garage door should have an R-value between R-6 and R-9. Actively cooled or heated garages should have a garage door with an R-value of R-13 or higher.
However, there is a point where you get diminishing returns.
Insulation with an R-value of 6 isn’t twice as good as insulation with an R-value of 3. Nevertheless, try to buy the highest R-value insulation within your price range.
My garage door insulation kit costs around $100 each, so it’s a good bang for your buck.
However, if you have an old garage door, replacing it with a new, insulated garage door will help add value to your home. A new garage door typically costs between $1000 and $3000, but you recoup most of that cost when you go to sell your home.
Step 5: Protect Your Pipes and Water Heater
Your exposed pipes and water heater can freeze in cold weather. To prevent this:
- Insulate them with foam pipe wrap or fiberglass insulation.
- Wrap the insulation around your water heater and pipes, cutting it to fit as needed. You can purchase a water heater blanket for an off-the-shelf solution.
- Secure the insulation with duct tape or cable ties.
Also, drain any water from your pipes or hoses that won’t be used during winter.
This will prevent any leftover water from freezing and causing damage to your plumbing system.
Step 6: Insulating your Garage Walls
One of the best ways to winterize garages is to keep them from freezing in the first place.
Insulating your walls will help keep the heat in from all sides, not just your garage door. While insulating your garage door helps, heat can still escape from the walls.
This isn’t a quick-fix, but garage insulation makes a huge difference!
If you have wood-stud walls, you should buy insulation depending on the width between studs. Most studs are either 16″ or 24″ inches apart, and insulation is sold in those widths.
This was by far the biggest project I did in my garage because I was trying to insulate my concrete block walls.
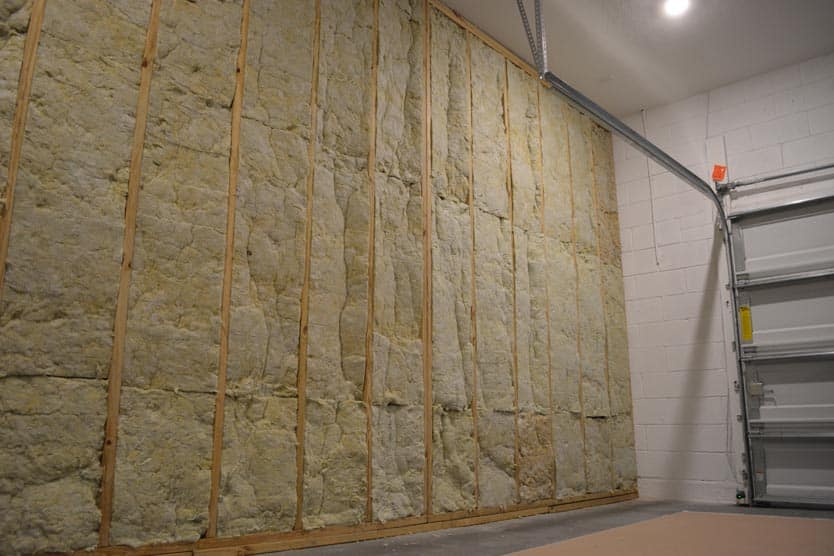
I framed, insulated, and drywalled my concrete block garage walls. It was a big project. However, it made a massive impact on the temperatures inside my garage and its overall look.
There weren’t many people on the Internet doing the same thing to their garage, so I took lots of pictures to help document the process.
Take a look at how I did it in these articles:
- How to insulate a garage step-by-step
- How to drywall your garage
- Should you insulate your garage ceiling?
Step 7: Protect Your Garage Floor
Winter is especially rough on your garage floor.
When we park our cars inside, all that snow, ice, and road salt drips off our car, collects in pools, and starts breaking down our garage floor.
That’s why I recommend a protective epoxy coating on your floor. I’ve written a more detailed article about the pros and cons of epoxy garage floor coatings, so be sure to check it out.
This is another step you want to do earlier rather than later. Once winter weather hits, it will be harder for this to dry and seal.
Step 8: Check Your Liquids (Cleaners, Paint, etc.)
Before the cold snap hits, checking and managing the liquids stored in your garage is essential. Products like paint, weed killer, wood stain, and antifreeze can freeze or deteriorate in low temperatures.
To prevent accidents, leakage, or spoilage, ensure these items are stored in a safe, dry place, out of the reach of children and pets.
Examine the containers for any damage and check the expiration dates. If you find any expired or damaged products, dispose of them appropriately according to local regulations.
For this task, you may need plastic containers for safe storage, funnels for transferring liquids, and gloves to protect your hands.
Step 9: Winterizing Your Garage Refrigerator
Winterizing your garage isn’t just about sealing cracks and insulating walls.
If you’re one of the many homeowners with a refrigerator in the garage, the plummeting temperatures present a unique challenge.
Most household fridges are not designed for the temperature extremes of a winter garage. When the mercury drops, the performance of your garage refrigerator might dip with it.
Why?
Refrigerators operate using a thermostat that senses the ambient temperature.
When the surrounding environment gets too cold, the compressor might not run as frequently, making the freezer section too warm to keep items solidly frozen.
How to Winterize Garage Refrigerators:
- Move Sensitive Items: Items that require a consistent temperature, like certain medications or foods, should be relocated inside during winter.
- Insulate: Consider placing insulation boards or mats beneath and behind the refrigerator. This can help in retaining the internal temperature.
- Use a Garage Refrigerator Kit: Some manufacturers offer garage kits that help the fridge handle extreme temperatures. Check if there’s one compatible with your model.
- Reposition the Fridge: If possible, move your refrigerator to a warmer spot in the garage, away from windows or areas prone to drafts.
- Pre-Winter Maintenance: Ensure the coils are clean and the door seals are tight. A well-maintained refrigerator runs more efficiently, helping counteract the challenges of colder ambient temperatures.
Taking the proper steps now can help ensure your garage refrigerator keeps working properly throughout winter.
Step 10: Invest in a Space-Heater
It’s worth investing in a space heater if your garage gets below freezing..
Sure, it helps make your garage more comfortable, especially if you spend a lot of time working in there. However, it’ll also help keep your tools, electronics, and other machinery in better shape.
Most smartphones and electronics start having issues around 24 °F (-4 °C). Short-term exposure is usually fine, but I would be careful not to store sensitive stuff in extreme temperatures for long periods.
Your tools don’t like the extreme cold temperatures either. Lubricating oils made from mineral oil also start breaking down around 24 °F (-4 °C).
A space heater works best if you’ve insulated your garage door and walls first. Otherwise, that heat will just escape through your garage door and walls.
The kind of heater you buy will depend on the size of your garage and how much money you want to spend on it.
Don’t feel obligated to buy the most expensive. Smaller heaters are usually just as effective in a garage for less money.
For more info on which heater will work for you, check out my buyer’s guide to finding the best garage heater.
If it’s too cold for you, chances are it’s too cold for your stuff.
What Temperature Should I Keep My Garage in Winter?
The best way to winterize garages is by keeping them at a consistent temperature so that it doesn’t freeze from the outside temperature.
The best temperature to keep your garage in winter depends on where you live. Still, a general rule of thumb is between 40°F for inland states and around 65°F for coastal states.
If you’re curious, I go into more depth in my article discussing the garage temperature compared to the outside temperature in winter.
Wrapping It Up
We’ve discussed how to winterize garages for the upcoming cold months. The most significant factor is insulating and keeping the warmth in and the cold weather out.
These garage winter proofing steps can help you get a head start while it’s still warm out. That way, shifting into winter without worrying about your garage will be easy.