This is the biggest home improvement project I’ve ever started. It’s time to build a wall in my garage and drywall it.
In theory, it’s not that difficult.
My only problem is that my garage is unfinished cinder block on three walls. I will have to frame garage walls over concrete, making it more challenging.
Don’t worry. You’ll be there every step of the way.
Before you start, you need to ask yourself why you want to drywall your garage walls in the first place.
You can learn a lot just by asking yourself these questions:
- Are you looking for a more finished look?
- Are you trying to save money and energy?
- Do you want to be able to use your garage year-round – no matter what the weather is outside?
- Or are you going all the way and turning your garage into a spare bedroom or man cave?
Believe it or not, the answer will tell you how far you need to go.
Level 1: This will be the cheapest and easiest method if you want a finished look and don’t care about insulating your garage. You can add some 1″x 3″ (or even 1″ x 2″) studs attached directly to the cinder block and mount the drywall directly to them. Because there’s no insulation in between, you’ll need to waterproof your garage walls before you start.
Level 2: Form and substance. If you want more than the basics, you’ll want some insulation underneath the drywall. This will make your garage more comfortable year-round and help you save money on your monthly energy bill. This is the method that I ended up going with, so you’ll get all the details below.
Level 3: Going all out. This is for you if you spend more than an hour or so daily in your garage. You’ll also want thicker drywall, better insulation, more outlets, and garage lights for mancaves or bedroom conversions. Take some additional time planning at this stage. You (or someone else) will be living in this room, so you need to get it right the first time.
Table of Contents
How to Build A Wall In a Garage: My Plan
I went with level 2: form and a bit of substance.
I wanted something more substantial than just wooden studs holding the drywall up. It’s essential to have something secure to mount my garage track system and Gladiator cabinets.
At the same time, the only thing that would be spending a lot of time in the garage would be my car. I didn’t need to go crazy with extra outlets, lighting, and interior design touches.
My garage needed to look good, but not like every other room in my house.
This definitely saved money overall. I was able to go with thinner drywall and less insulation. I also didn’t have to call an electrician to add a bunch of outlets.
The plan was still to insulate my garage door, but I wanted to see how cool my garage is with the drywall and wall insulation first.
If you want to follow along with the entire process, here’s how I did it:
- Waterproof your garage walls with Drylok
- Insulate garage walls step by step
- How much does it cost to drywall a garage?
- How to drywall your garage
Step 1: Attach the Base Plate
You’ll need a solid base plate attached to the foundation unless you want to attach thin studs to the concrete block.
The garage wall frame that we’re going to build isn’t going to be load-bearing. However, I still want to make sure it’s solid enough to support anything you want to hang on it.
For this section, you’re going to need the following tools:
- Hammer drill. I’m partial to the DeWalt DWD520K
- 1/4 inch concrete drill bit (6″). I chose the DeWalt DW5518
- 1/4 inch wood drill bit. You can usually find these as part of a set
- 1/4 inch x 3-inch split drive concrete anchors. You can use longer anchors if you want, but I recommend at least 3″
- Masonry hammer
- Ear protection
- Safety goggles
- Chalk line
- Construction adhesive
- Level
- Tape measure
- Pressure-treated 2 x 4 boards
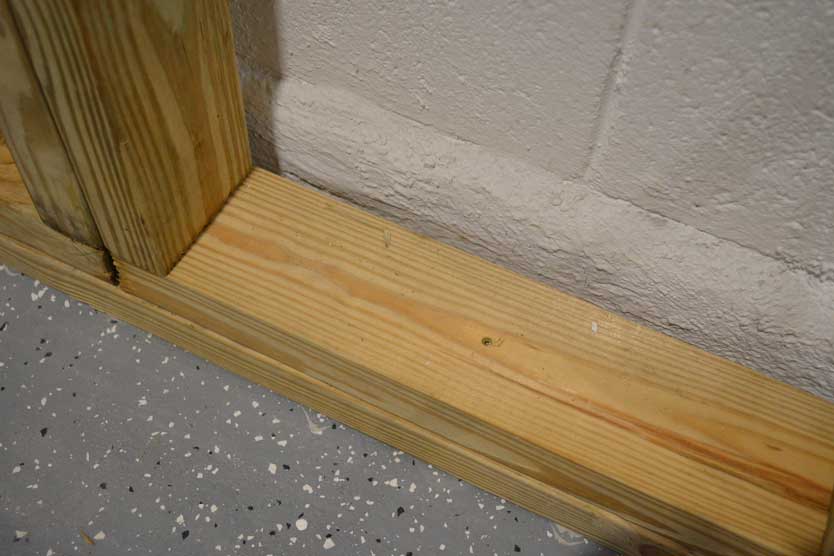
The goal: A base plate running down one side of my garage wall, secured to the slab with concrete anchors and construction adhesive.
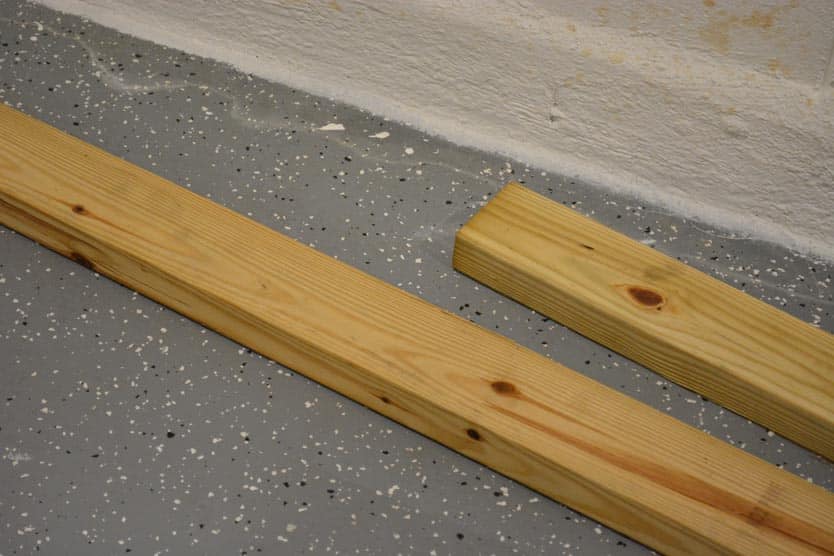
We’ll use 2″ x 4″ pressure-treated lumber for the base plate.
Building codes require pressure-treated lumber for any lumber in contact with concrete below grade (ground level).
This is because pressure-treated lumber holds up better in wet environments and resists rotting than regular lumber.
Remember that concrete is porous, so moisture can freely pass between the concrete and the wood.
If you have doubts, the extra dollar or two spent on pressure-treated lumber is worth your peace of mind.
Start by marking 4 1/2 inches out from the wall at several points down the length of the wall.
Ideally, the marks will be level across the length of the floor, but that will be extremely rare. Your garage walls may bow out depending on your home’s age and how much it has settled over time.
You’ll need a partner for this, so you can snap a chalk line down the length of the wall.
Ensure the line is 4 1/2 inches from the wall at its closest point. We need enough room for the stud while still allowing a little breathing room.
Once the chalk line is down, this will form the boundary for the base plate.
Start by marking off every two feet (24 inches) in the center of the board. This is where you’ll be drilling for the anchors.

Depending on the length of your garage, you may have to adjust this to slightly more or less than two feet, but it’s a good rule of thumb.
The goal is to ensure the boards have enough connection points with the concrete to be secure but not go overboard.
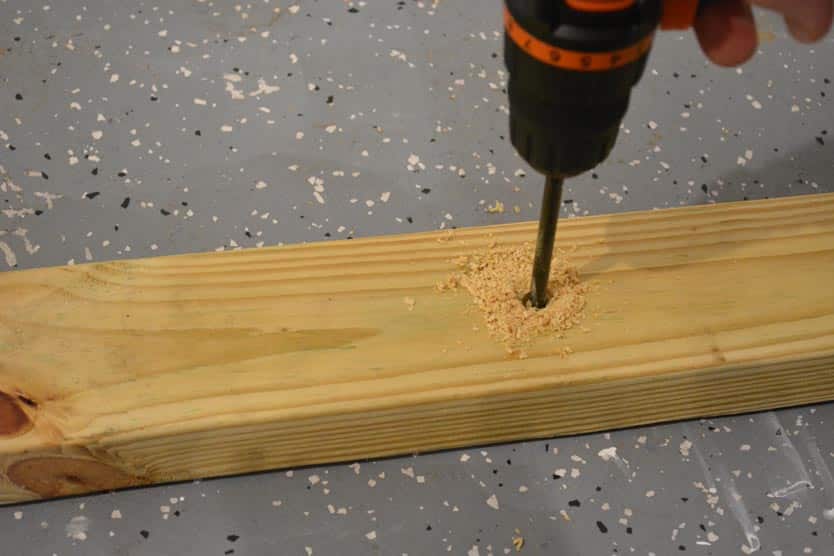
Once you’re satisfied with the number and spacing of the markings, it’s time to pre-drill the holes in the wood using a standard 1/4″ wood drill bit.
Next, you’ll want to add construction adhesive to the floor where the wood will contact the concrete.
If you don’t have bare concrete, you may need to rough up the surface to help the adhestive bond properly. The best coating for garage floors will repel most liquids. That includes adhesives.
We will work on one board at a time, preventing the glue from drying out while you work.
The concrete anchors are VERY secure (trust me on this one). However, it’s always worth going that extra step.
Once you’ve got the adhesive in a neat line on the floor, it’s time to mess it up.
Place the first board on the floor, on top of the adhesive. Put it slightly off-center from your chalk line, closer to the wall.
Then…pick up the board and place it back down. This time, put it right up against the chalk line.
We’re trying to spread the adhesive, allowing it to contact more of the board.

Now for the final step: the concrete anchors.
Concrete anchors look like heavy-duty nails, with a little ridge near the tip.
When you hammer the anchor into the concrete, that notch will spread out and anchor itself.

We’ll need to drill into the concrete slab a little farther than the length of the anchor itself – right around half an inch farther.
In my case, I’m using 3″ anchors and a 2″ board, which requires at least a 6″ concrete drill bit.
If you don’t own a hammer drill, I recommend renting one. This next part will be faster and easier than using a standard drill.
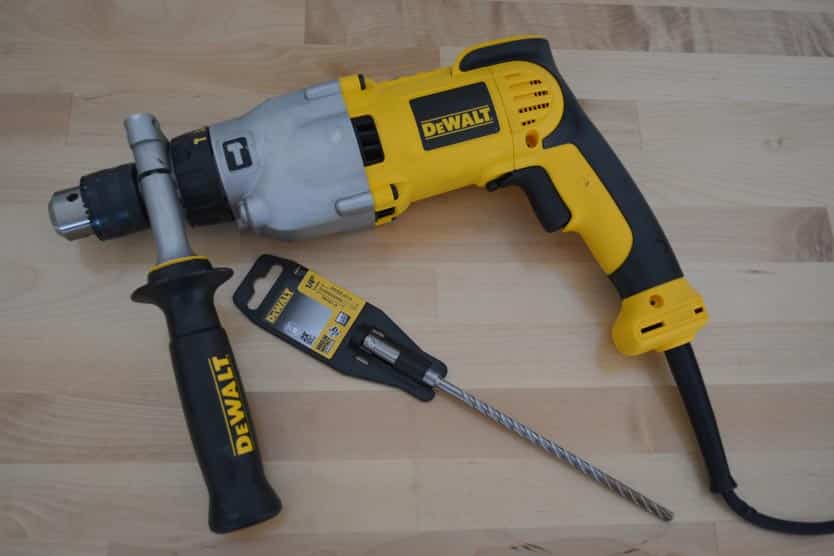
Hammer drills differ from regular drills by adding a hammering motion (hence the name) while rotating the drill bit.
It literally hammers the drill bit into the concrete while it’s drilling.
In short, it will save you a ton of time and effort. This is not to say it’ll be easy, and my shoulders were definitely sore after hammer-drilling holes in concrete for twenty feet.

- 10 amp motor generates 50% more power with increased overload protection for added durability
- Dual Mode: hammerdrill / drill for versatility
- 2-Speed range for high-speed drilling or high-torque applications
- Soft grip handle and two-finger trigger for increased comfort and greater control
In this step, we will go through the mounting holes one at a time. We’ve already pre-drilled the pilot holes earlier, but it’s crucial not to drill more than one hole into the concrete at a time.
Why?
Imagine how much it would suck if you drilled all the holes in your concrete slab but later found out the wood shifted somewhere along the way.
So we’re going to tackle this one anchor at a time.
Break out the hammer drill with your six-inch masonry bit, and let’s drill the first hole.
Note: Always wear ear and eye protection! Hammer drills are extremely loud, so protect those eardrums.
Drill the first hole. It should be approximately 1/2″ to 1″ deeper than the length of your anchor.
As I said earlier, my anchor is three inches long, and my base plate board is 2 inches deep, so I used a six-inch masonry drill bit. If you have an extended drill bit, you can use tape to mark where to stop drilling.
Set the drill aside once the first hole is drilled. Next, grab your framing hammer (or any heavy-duty hammer) and a concrete anchor.
Keep your eye protection on and take extra care during this step.
Press the anchor as deep into the board as it will go before you start hammering.
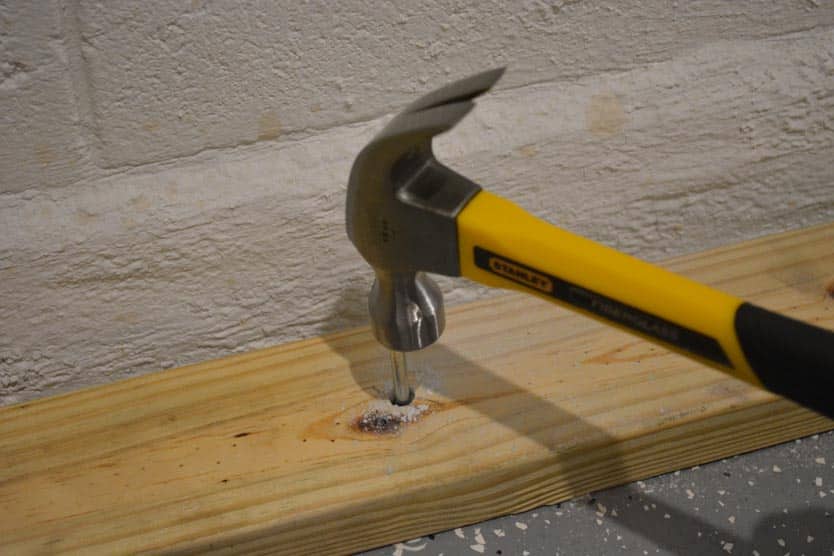
Once the anchor is aligned with the hole you drilled into your concrete floor, you can be more aggressive with the hammer.
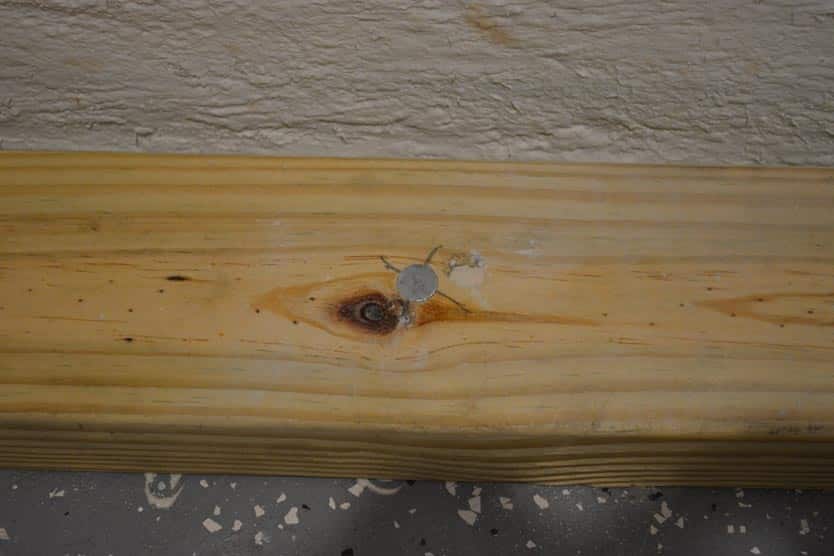
Congratulations! The first anchor is in place.
Double-check that the board is still aligned to your chalk line and continue down the wall.
Once you’re finished, you should have a secure base plate to mount the wall frame we will build in the next step.
Step 2: Build the Wall Frame
With the base plate secure to the concrete floor, You have a solid base to attach your wall frame.
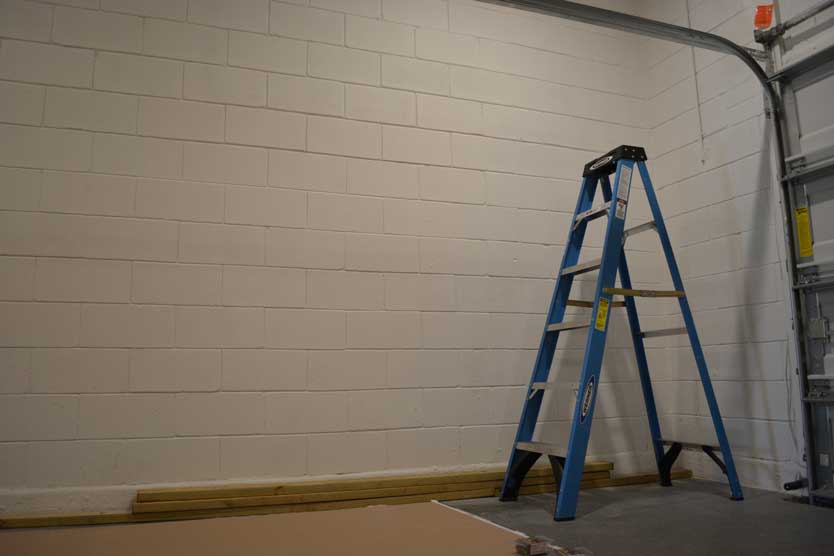
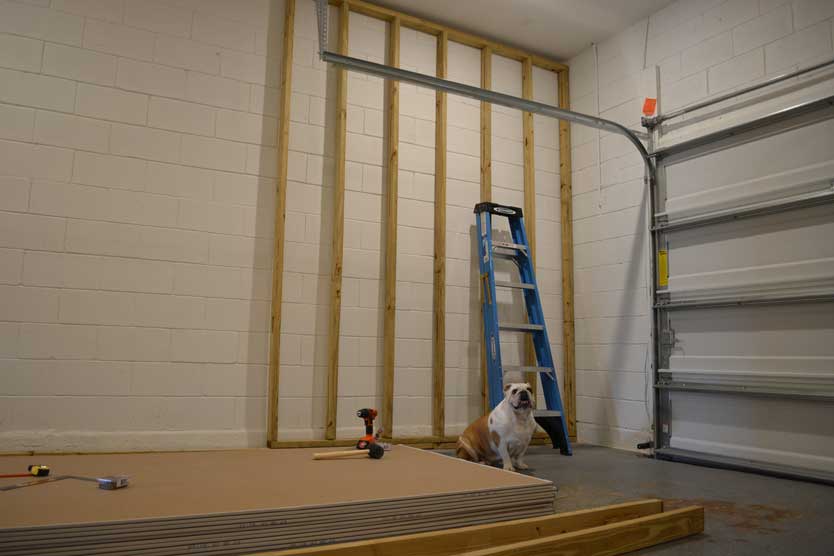
In preparation, I’ve cleared some space on my garage floor to build the frame on the ground and lift it into place.
This is much easier than building the wall frame vertically against the wall. If you’ve got the option or can move things around to make it work, I recommend building garage walls on the floor.
For this section, you’re going to need the following tools:
- Pressure-treated lumber (2 x 4) long enough to reach your garage ceiling at the highest point
- Table saw, or miter saw
- Either 3″ framing nails or screws
- (optional) cordless drill with screwdriver bit
- Tape measure
- Eye protection
If you don’t have a table or miter-saw handy, you can usually find a local store to cut the wood for you.
The goal: By the end of this section, you’ll have the wall vertically in place against your concrete wall and secured to the base plate.
We’ll level it out and connect it to the ceiling and side walls in step 3.
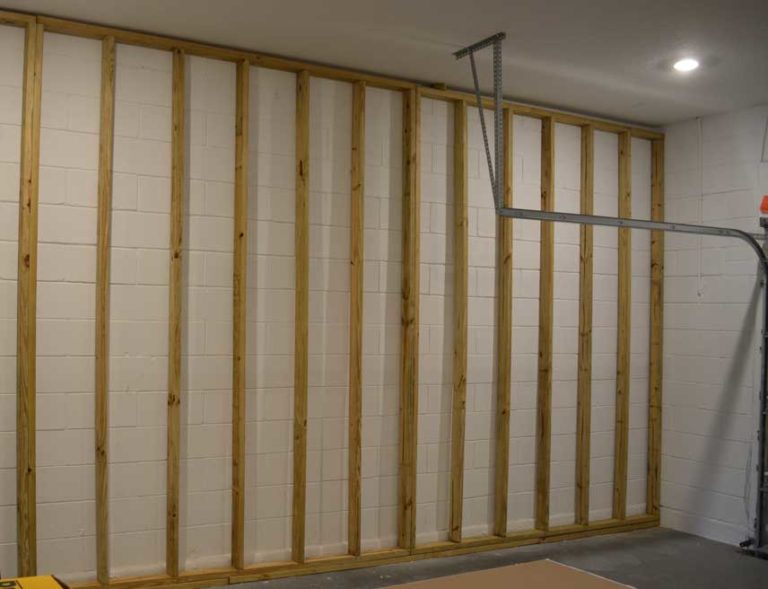
Important note: You’ll see in these pictures that I’m building my garage wall in three distinct sections. I’m doing this project on my own, and the wall frame is pretty damn heavy. No matter how strong you think you are, you’ll probably underestimate how heavy the wall frame is when you get it assembled.
Be safe and chunk the project into more manageable sections.
We’ve already built the base plate to secure the wall frame to the concrete floor, and that lays the foundation that we’ll build on in this step.
Now, we will build the wall frame with its own top and bottom pieces.
Measuring and cutting the studs
Start by stacking two 2 x 4 pressure-treated boards on your base plate next to one corner of the wall.
We want to measure how long our vertical studs need to be at various points along the wall.
The distance from the three boards (base plate, bottom frame, and top frame) to the ceiling will be the same as the distance from the top and bottom frames.
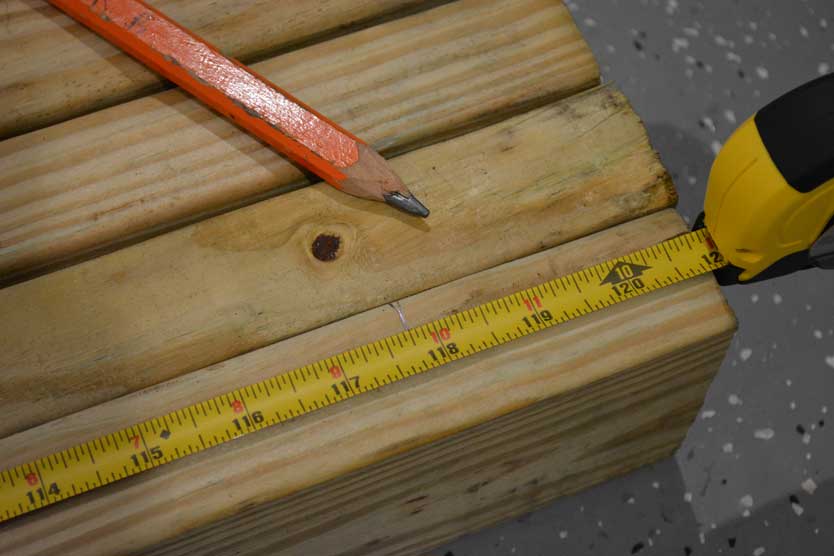
Using your tape measure, measure the distance from the boards to the ceiling. Do this at several points along the wall and keep track of the lowest number.
My garage slopes downward from the left side of this picture (house side) to the right (garage door side). So, my lowest point was next to the door going into my house.
Take that lowest measurement and subtract one inch from it. That’s the length of your vertical studs.
Why subtract an inch?
When we build the frame on the ground, we’ll need to slide it vertically into place. We also need some breathing room to make it fit.
Don’t worry about the gap. We’ll take care of that in step 3.
Studs are placed every 16″ or 24″ along the wall, so you’ll need enough 2 x 4 boards to cover it. In my case, I went with sixteen inches between the studs.
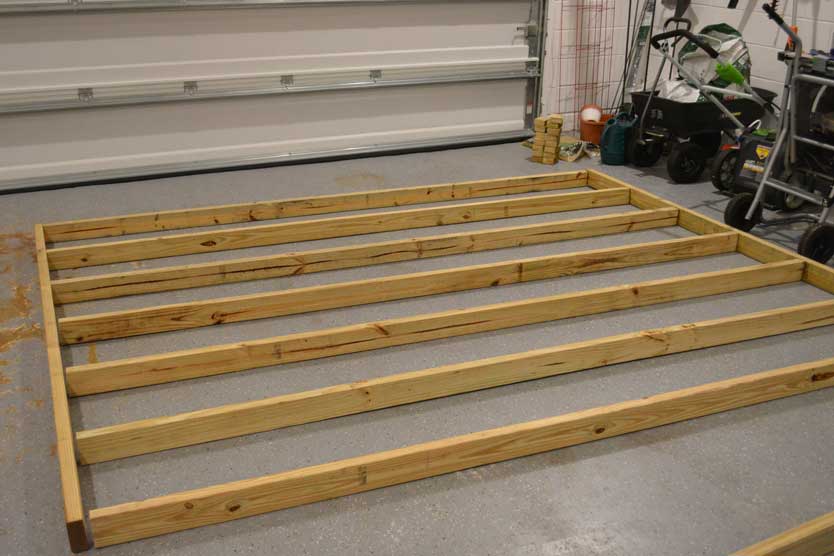
Next, you’ll want to line up your studs together to get an idea of the shape and curve of each board.
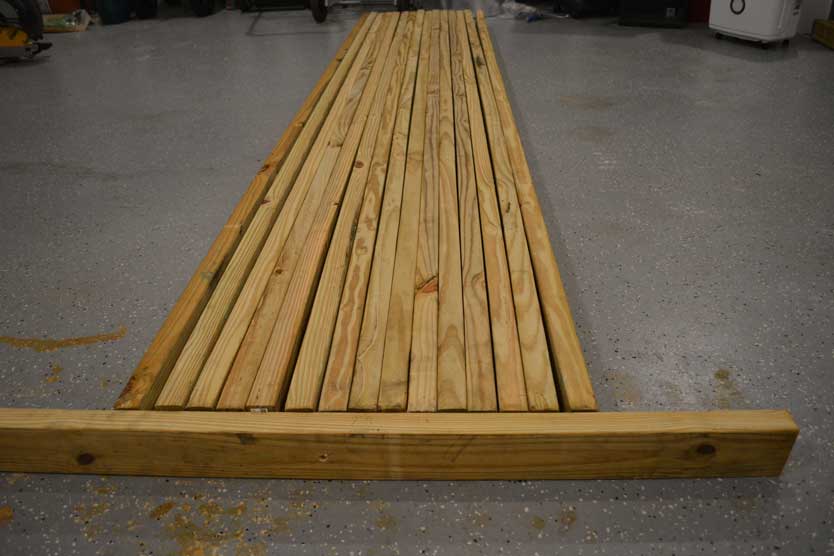
When you line them up, pay special attention to the boards. In this picture, you can see a couple of boards bowed out in one direction or another.
Swap these out for different boards if you’ve got extra boards (you did buy extra, didn’t you?). It’ll make mounting the drywall easier.
This is the perfect time to look at your lumber and decide if there are minor curves or if the wood is so warped that your frame will suffer.
Once you’re sure the studs will be straight, it’s time to start cutting them.
We want to take the lowest point between the three boards (base plate, bottom frame, and top edge) and the ceiling and subtract one inch to move the frame into place later.
Measure off that distance for each board and mark a line.
Once you have all the studs measured, measure them one more time…just to be sure.
Measure twice and cut once.
If you’re convinced they will all turn out the same length, make your cuts using your table or miter saw.
Assemble the Frame
For this project, I’m building garage walls in three distinct sections.
Two sections are simple 8″ frames, and the third section will be 4″ to cover the rest of the distance but also has a section of pipe that I’ll need to account for.
For the two larger sections, I’m using two eight-foot 2″ x 4″ pressure-treated boards – one for the top and one for the bottom.
Studs are placed every sixteen inches on center. Next, we’re going to mark where the studs go.
Important note: Did you catch that part about the studs being 16″ on center? You can’t simply measure every 16″ from the end and expect that to work well. The drywall is designed in lengths so that it’s going to fit over the studs. But if your measurements are off, you’ll constantly cut drywall and create more work for yourself later.
The easy way to fix that is to account for the stud’s width when mounting them to the wall frame.
Studs are usually an inch and a half thick. So, we need to back out 3/4″ from our measurement each time.
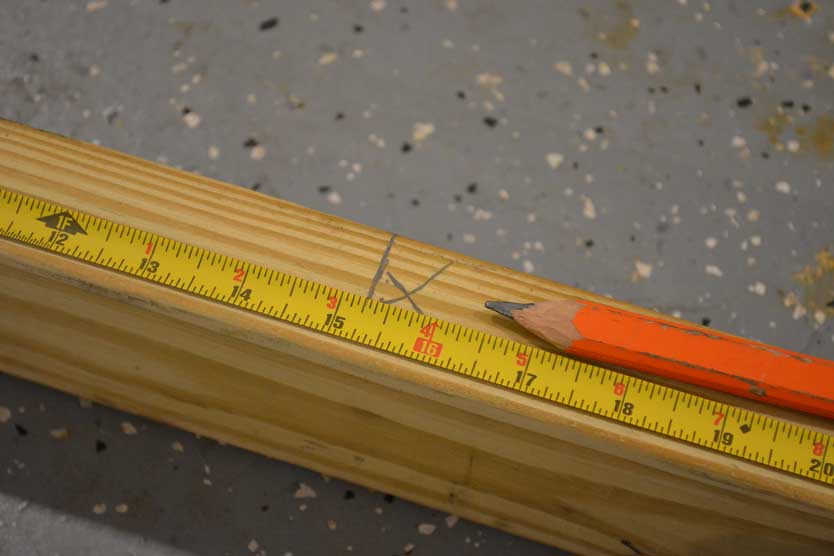
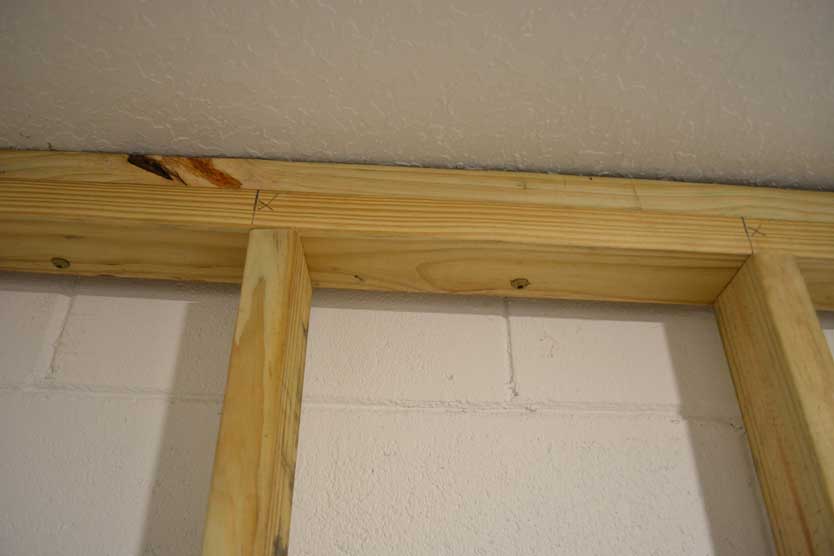
As you can see in the picture, I’ve measured 16″ from the beginning of my bottom plate and then subtracted 3/4″.
I then marked where the edge of the stud would be.
I’ve also made an ‘X’ to remind myself which side of the line to put the stud to ensure the center point will be right over that 16″ line.
Continue until you reach the end of the line, then repeat for the top frame.
Once everything is marked out, it’s time to lay them out on the floor.
Give yourself plenty of floor space near the top and bottom. That way, you can drive the framing nails (or screws) into the top and bottom of the frame.
You’ve got the option of using either framing nails or screws for this part. Framing nails are stronger, so opt for those if you can.
In my case, I’m using 3″ exterior deck screws to secure my boards. They don’t have as high a shear strength as the nails, but they’re easier to drive with your standard cordless drill.
From now on, I’ll say ‘screws’ instead of “nails or screws,” but understand that the two are interchangeable for this section.
We’ll be using two screws per stud to lock them into place.
I recommend starting at one end of the top frame and working your way along the line.
Line up your first stud so that the edge of the stud aligns with the line you made earlier and the bulk of the stud is over the ‘X.’
See the image below if you can’t visualize this.

Safety tip: It will be tempting to hold the stud close to the top frame to get leverage, but don’t. The boards can move and cause injury when driving the screws.
Keep your hands out of the way!
Your goal is to have a nice 90-degree angle between the two boards so anything that joins those pieces (other sections of frame or drywall) will fit flush.
We will use two screws per stud, about half an inch from each side, to get a solid attachment point.
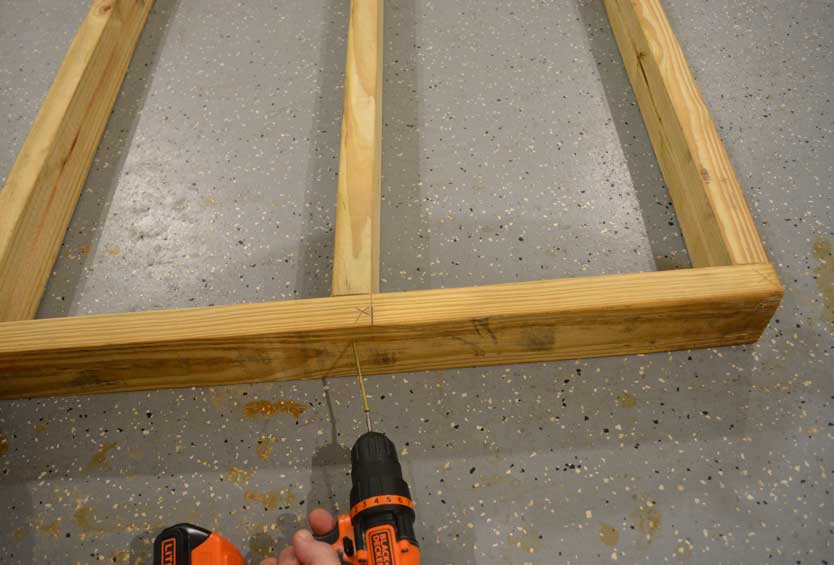
Next, drive in the screws flush with the top of the board.
One down…a whole lot more to go. Repeat the process for the rest of the studs on the top and bottom frames.
Once you’re finished assembling the frame, check to ensure it’s secure and strong.
Now, it’s time to lift it into place. This is where I wish I’d had a second pair of hands.
If you’re doing this by yourself, do yourself a favor and break the wall into no more than eight-foot sections.
I had a helper, but she wasn’t used to lifting the wall into place. :)
Once you’ve finished the first section, lather, rinse, and repeat for the remaining sections.
Again…break the project down into manageable chunks.
If this was a load-bearing wall, the steps would be different. Framing garage walls against a concrete wall isn’t as complicated as it seems since the concrete is already bearing the load of your house.
Important note: If you built your wall in sections like I did, you’d need to secure the sections to each other.
The goal is to have one secure frame for the entire length of your wall. I used 3″ screws to secure the studs to the top and bottom of the frame.

Step 3: Secure the Frame to the Wall
We’re almost there.
With the frame in place against the concrete wall, the only thing left now is securing it so it’s strong enough to hang our tools and garage storage cabinets.
This should go without saying, but the frame must be secured against all four sides of the wall. Don’t even think about cutting corners here – safety first!
For this section, the supplies you need will depend on your situation.
In my case, I secured the bottom of the frame to the base plate, one side of the frame directly to the concrete block, and the other side and the top to the existing wall frame using spacers.
The goal: Your frame will be secure against the concrete wall and ready for insulation and drywall by the end of this section.
Let’s start with the easy part first.
Secure the frame to the base plate
Back at the beginning of this process, you ensured that the base plate was straight and level along the length of your wall.
That work will make this section really easy because all you have to do is line up the bottom of your frame to the base plate.
Use one 3″ framing nail or screw for every gap between your studs.
It’s helpful to have a friend in this section to ensure the frame doesn’t move while you’re busy screwing in the support anchors, but it’s not necessary.
Secure the frame to the ceiling
Whether or not your garage ceiling already has drywall covering it, this section could be really easy or challenging.
You’re looking for solid connection points above the top of the wall frame – either a major ceiling beam or a smaller joist.
Think of a beam as a large piece of sturdy wood with a high load-bearing capacity instead of joists, which are smaller with less weight capacity.
I was lucky enough to have a solid beam running up the length of my wall that was wide enough to secure my frame to it. That allowed me to screw my supports at any point I chose.
If that isn’t the case for your wall, you’ll have two other options.
You can screw the frame into the cross beams running perpendicular to your wall across the width of your garage. This option is preferred if your garage ceiling is drywalled already since it’ll be less messy.
Alternatively, you can add a small joist between the beams for a secure attachment point if you have access.
Important note: Most garages are sloped away from the house to help with drainage. Usually, there’s a narrow gap at the rear and a wider gap next to your garage door.
It is common to need different widths of wood as spacers between the top of the frame and the ceiling.
For example, I could secure the frame directly to the joist above at the back of my garage.
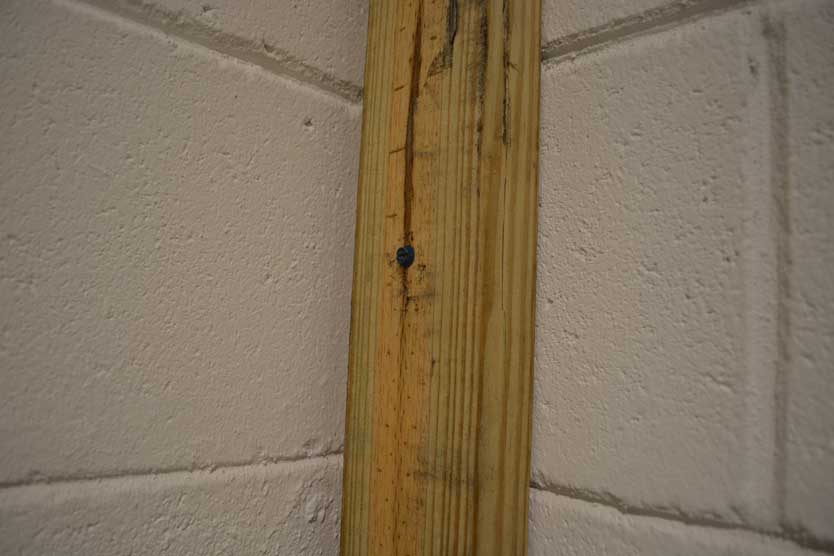
However, midway down the wall, I was using a 1″ x 4″ board (as you can see below).
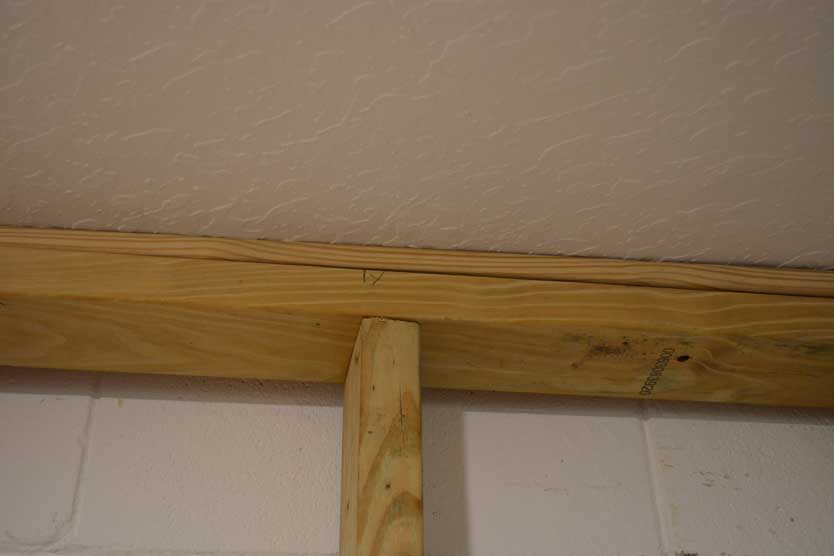
But, closer to the garage door, I was using a 2″ x 4″ spacer.
You can see in the picture below that the anchor is already in place. Don’t worry. We’ll get to that in a minute.
You don’t need to have the entire length of the wall fit snugly to the top of the frame. That’s the ideal, but it won’t often be the case.
You need enough secure attachment points so the wall will securely hold anything you put on it.
I recommend securing the frame to the ceiling every 2-3 feet along the length of the wall. So, if your garage is twenty feet long, you’ll want between 7 and 10 anchors attaching the frame to the ceiling.
Once you have your attachment points marked out and your spacers in place, you’ll want to ensure your frame is plumb (i.e., straight up and down).
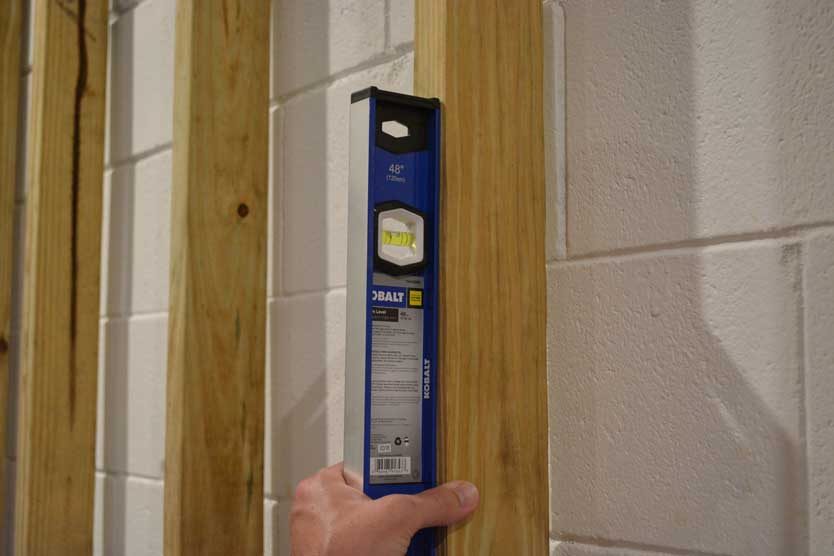
Grab your large wall level and check various points along the wall to ensure the wall frame is straight.
If you’ve done the previous step correctly, the frame should be pretty snug against the wooden spacers. You may need to use a rubber mallet to make minor adjustments.
Check as many points as you need to feel comfortable that the wall is plumb.
In my case, that was every other stud because I wanted to ensure the wall was straight.
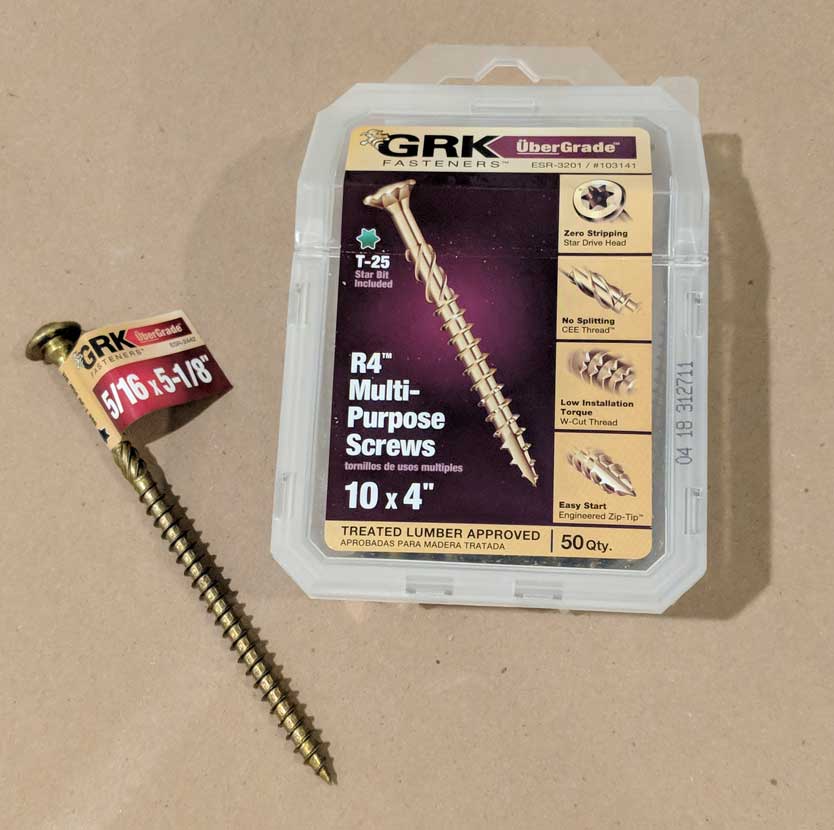
To secure the walls, I used various lengths of GRK fasteners, depending on the size of the spacer wood I’d used.
At the narrow points, the 4″ screws gave me enough length to get through the top of the frame and the one-inch spacer.
When the gap was large enough to accommodate the 2″ x 4″ spacer board, I switched to the 5 1/8″ screws.
I went for the upper end of my recommendations and had ten anchor points to the ceiling.
Secure the frame to the concrete block
Once both the top and bottom are secured, the sides are connected based on whatever material is on the wall next to it.
Usually, one of those walls (usually the one with the garage door itself) will be made of cinder blocks.
Fortunately, if you’ve measured everything correctly up to this point, the edge of the frame should be snug up against the wall, which should be a piece of cake.
I used five Tapcon concrete anchors that were 1/4″ x 2 3/4″, spaced about 16 inches apart from floor to ceiling.
It’s important to drill into the cinder block, not the softer concrete between the blocks.
Wrapping It Up
This wall was pretty straightforward, so I started with this side of the garage.
There was only one small pipe in the upper left corner that I needed to work around. There were no additional electrical outlets that I wanted to put on the wall or any that needed to be moved.
In short…this is as easy as it can get. And even this non-handyman felt perfectly comfortable doing it.
There’s more to come, obviously. I’ve secured the basic wall frame, but I’ll need to insulate it and attach the drywall before painting it.
Keep following along with how I insulated my garage walls here.